Are you switching from a physical external hard drive to QNAP NAS (Network-Attached Storage)? How can you backup files to QNAP NAS in Windows? For that, this guide from MiniTool Solution will show you some free tools.
Overview of QNAP NAS
QNAP’s Network-Attached Storage (NAS) is a device used to store digital files such as photos, videos, music, and documents. As its name suggests, a NAS allows you to access files via Wi-Fi or wired network depending on your usage scenario.
Therefore, comparing with the real physical external hard drive, QNAP NAS showcases some obvious advantages when choosing it as a backup drive. Most of all, rather than taking it everywhere, it is placed at home and always accessible at anytime and anywhere.
In general, NAS users place multiple hard drives in a NAS to create a RAID (Redundant Array of Independent Disks). RAID is a technology that combines multiple hard drives into a large storage space called a volume.
4 Major Benefits:
- Protect your data from drive failure
- Access data remotely, like using cloud storage
- Work fast like local drive
- Fun features to manage files
How to Back up Files from PC to NAS in Windows
To create an image backup for your Windows data to QNAP NAS, there are some free tools on your computer and a professional alternative. Read the following paragraphs and get more information.
Use MiniTool ShadowMaker to Backup Windows data to NAS Drive
First of all, I would like to introduce to you the easiest way to back up files – MiniTool ShadowMaker. As a professional PC backup software, it is available in almost all storage devices that can be recognized by Windows including USB external drives, HDD, SSD, NAS, Hardware RAID, and so forth.
It can satisfy the needs of file backup, partition backup, system backup, and disk backup. Apart from data backup, MiniTool ShadowMaker also supports performing a disk cloning. With this feature, you can clone HDD to SSD or clone SSD to larger SSD.
Now, let me show you how to backup files to QNAP NAS via this amazing tool. By the way, this backup software offers a Trial Edition that allows a 30-day free trial for most of backup features.
Step 1. Download, install, and launch MiniTool ShadowMaker. Click on Keep Trial to enter the Home page.
MiniTool ShadowMaker TrialClick to Download100%Clean & Safe
Step 2. Under Backup, click SOURCE > Folders and Files to choose the files you want to protect.
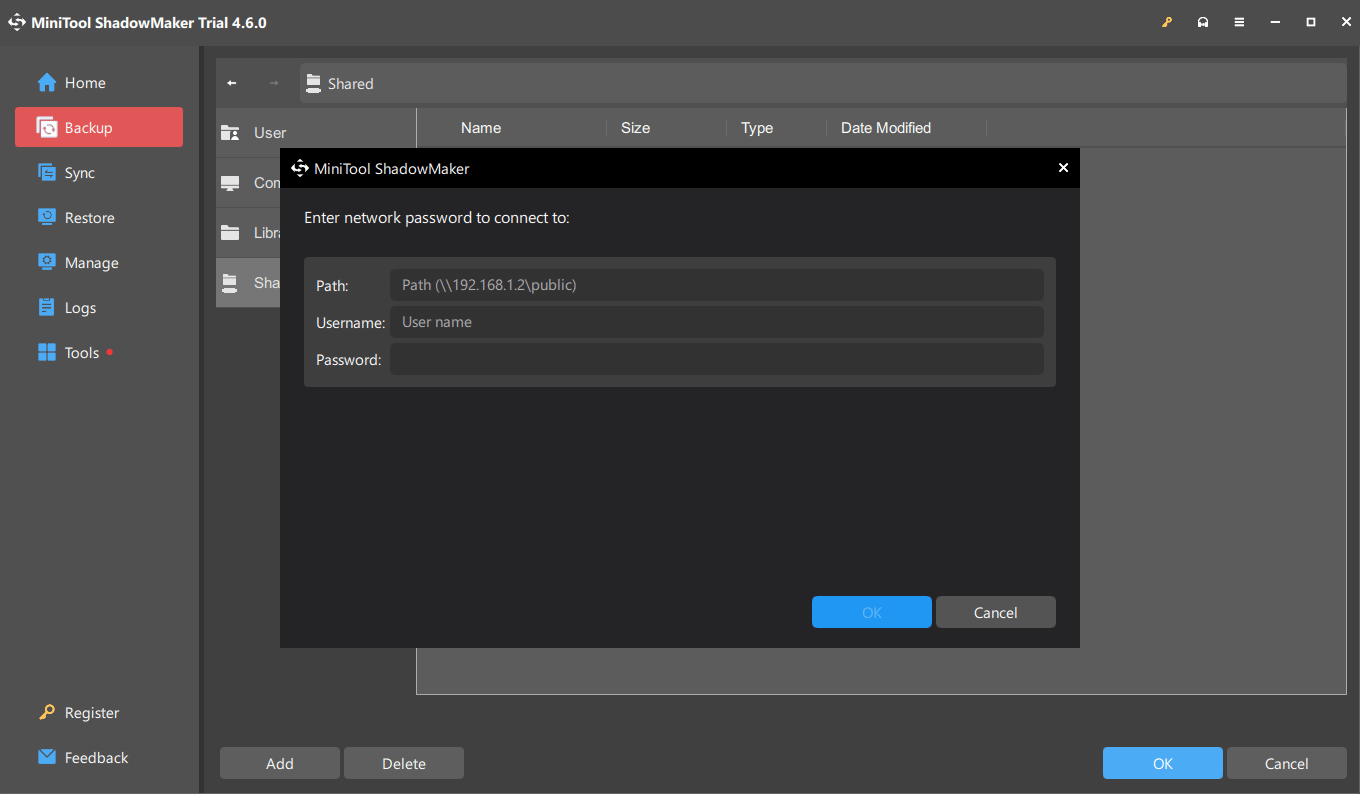
Step 3. Turn to DESTINATION > choose Shared > click Add in the left bottom > type the path, username, and password to connect your QNAP NAS drive. Then your NAS drive should appear in the Shared tab.

Step 4. Choose the NAS drive as the destination path and click on Back Up Now.
Related article: What Is a NAS Drive and How to Do a NAS Backup on Windows 10?
Backup Files to QNAP NAS Using File History
File History is a snap-in backup application that backs up all files in the Library. You can use it to save backups of local files to a QNAP NAS drive.
Step 1. Press Win + I at the same time to launch Settings and then go to Update & Security > choose Files backup from the left pane > click the More options link.
Step 2. Scroll down to select See advanced settings to open Control Panel > choose Select drive > find Add network location.
Step 3. Then choose the NAS you connected.
Step 4. Choose it and click Select Folder. Then the network path should show up in Available drives. Click OK to bring back the File History interface.
Step 5. Make sure File History is turning on and then you can configure how you want to backup files in Advanced settings.
Backup Files to QNAP NAS with Windows Backup and Restore
Backup and Restore (Windows 7) is a backup software that comes with Windows 7, inherited by Windows 10/11. You can also backup Windows data to NAS drive with it. Comparing with File History, it offers more flexibility. Let me show you how to work with it.
Related article: File History vs Backup and Restore: What’s the Difference?
Step 1. Type control panel in Windows Search and choose the best match.
Step 2. Look for Backup and Restore (Windows 7) > click on Set up backup on the right of the panel > click Save on a network.
Step 3. Click Browse to add the network location of the NAS device and enter its credentials. Click OK to continue.
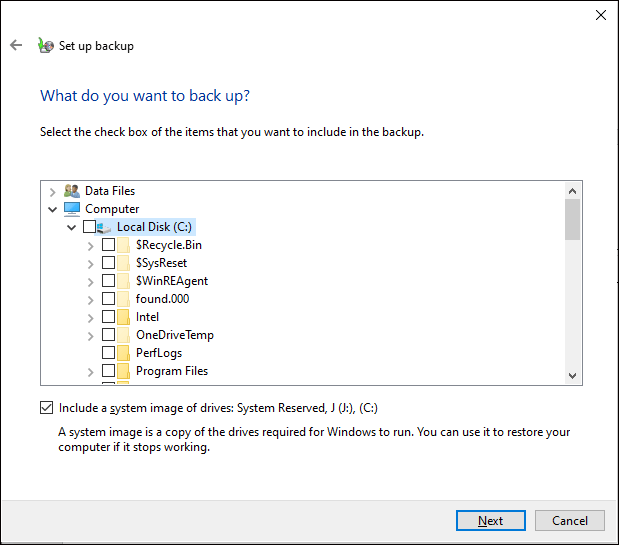
Step 4. Click Next > select Let me choose to choose the items you want to back up. The Change schedule option allows you to set up automatic backup to network drive.

Step 5. Click on Save settings and run the backup to begin.
Final Thoughts
In this guide, we demonstrate 3 free and handy backup software to you. If you’re not tech-savvy, to backup files to QNAP NAS, MiniTool ShadowMaker is an ideal choice since it can streamline the backup process for you.
Please contact our product team via [email protected] if there are any problems or suggestions when using MiniTool ShadowMaker.


User Comments :