What can you do when your computer is currently unbootable? Things will be much better if you have an emergency recovery disk. With it, you will be able to boot your computer and troubleshoot it. In this guide from MiniTool Solution, we will walk you through on how to create an emergency recovery disk step by step.
What Is an Emergency Recovery Disk?
When your computer fails to boot or has some serious problems, you can enter Safe Mode and Windows Recovery Mode (also called Windows Recovery Environment or WinRE) to troubleshoot problems in your operating system. What if the 2 diagnostic modes stop working? In this case, you can consider booting your Windows machine via an Emergency Recovery Disk (ERD).
What is an Emergency Recovery Disk? As the name suggests, this disk can save you from emergency conditions especially when your computer fails to boot from the normal mode, Safe Mode, as well as Windows Recovery Environment. With the help of Emergency Recovery Disk, you can access system recovery options from it and then repair your system.
In the following paragraphs, we will show you how to create an Emergency Recovery Disk via both Windows inbuilt utilities and third-party software.
How to Create an Emergency Recovery Disk on Windows 10/11?
Option 1: via MiniTool ShadowMaker
To create an emergency bootable disk, some third-party software like MiniTool ShadowMaker is worth trying. This free Windows backup software is dedicated to providing data protection and disaster recovery solutions for PCs, servers, or workstations.
On the one hand, it is able to backup files, the Windows system, selected partitions, and even the whole disk. On the other hand, in addition to data backup, it also supports creating a bootable ISO file, USB flash drive, USB hard drive, or CD. Now, let’s see how to create an emergency disk with this tool:
Step 1. Launch MiniTool ShadowMaker Trial Edition on a working computer and hit Keep Trial.
MiniTool ShadowMaker TrialClick to Download100%Clean & Safe
Step 2. Navigate to the Tools page and select Media Builder.
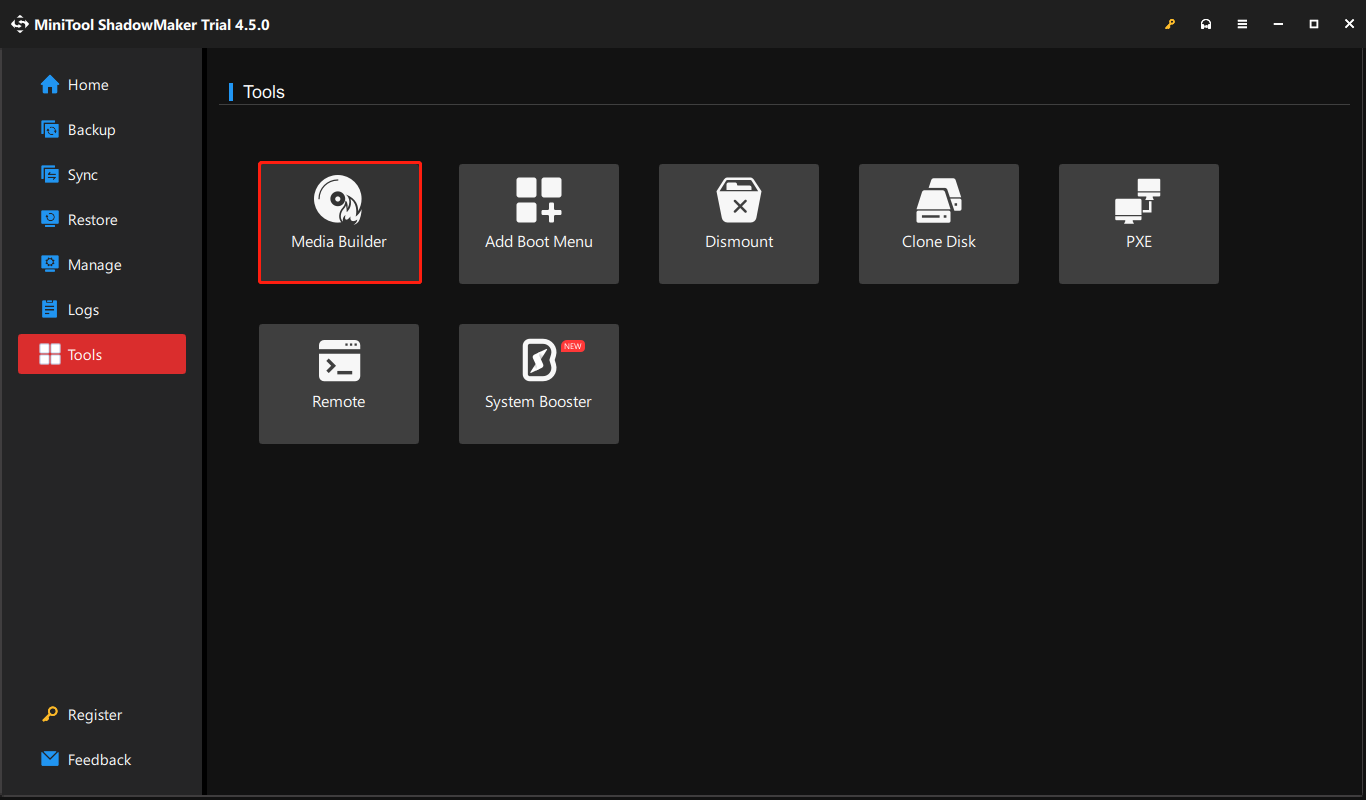
Step 3. Click on WinPE-based media with MiniTool plug-in.

Step 4. Choose a medium destination according to your needs:
- ISO File – You can use it on a virtual machine without burning it.
- USB Flash Disk – It is usually used on a physical machine.
- USB Hard Disk – It refers to the hard drives with USB ports.
- CD/DVD Writer – This of media can only be used on some old computers because now most computers don’t have an optical drive.
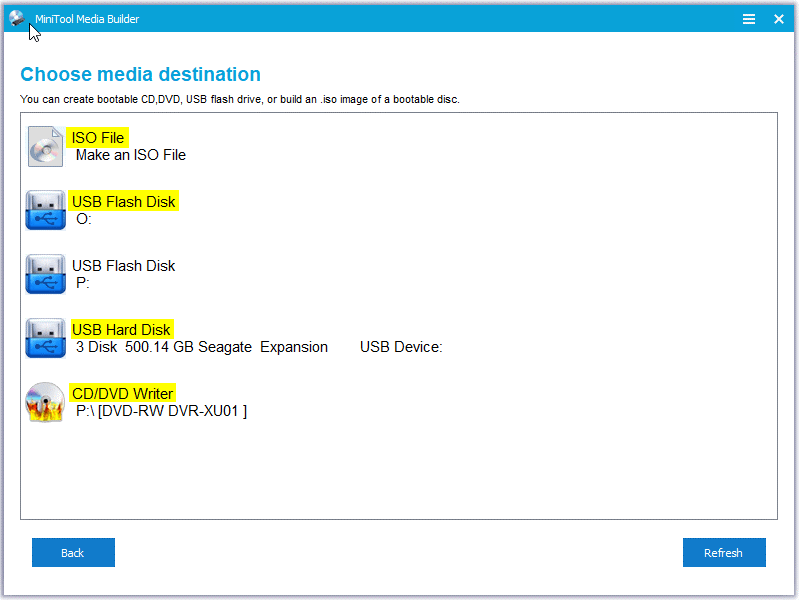
Step 5. Then, a warning message will appear to inform you that all the data on the drive you choose will be destroyed. Click on Yes to confirm this action and wait for the process to complete.
Now, it’s time to repair the problematic or unbootable Windows device. Here’s how to do it:
- Insert the Emergency Recovery Disk into the unbootable computer.
- Head to the BIOS menu.
- Go to the Boot or Boot Options tab to select the Emergency Recovery Disk you create as the default boot device.
- Save the changes and exit.
- Reboot your computer.
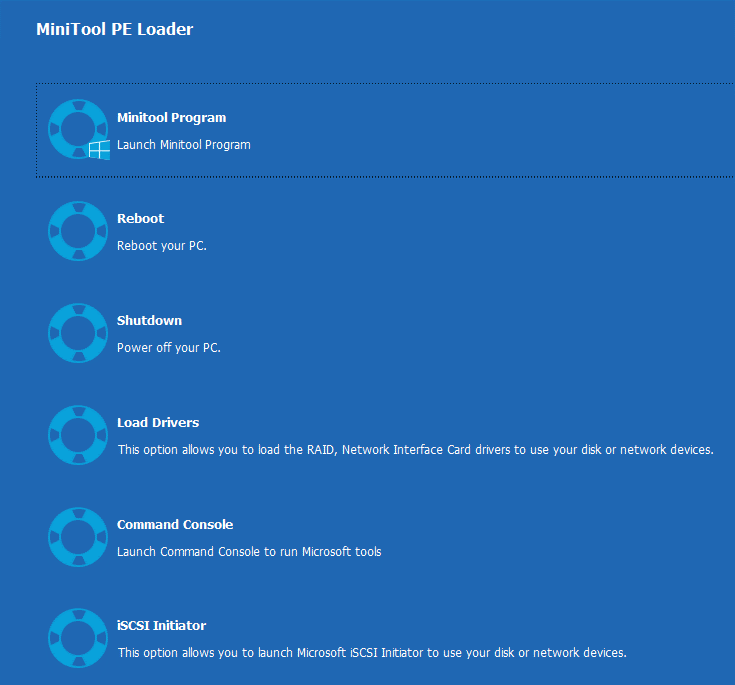
Then, the problematic computer will enter the MiniTool PE Loader screen and there is a list of programs that you can utilize. For example, you can launch MiniTool ShadowMaker to back up important items on this device or run some Microsoft tools or command lines via Command Console to repair your computer.
Option 2: via Windows Recovery
Windows allows you to create a recovery drive to perform a system recovery. When your Windows device can’t start or access the desktop, you can use this drive to reset it or troubleshoot problems. Also, you can choose to back up system files to this drive and then you can use it to reinstall Windows. Here’s how to create an emergency disk via it:
Step 1. Insert a USB flash drive into a computer that can work normally.
Step 2. Open Control Panel > Recovery > Create a recovery drive.
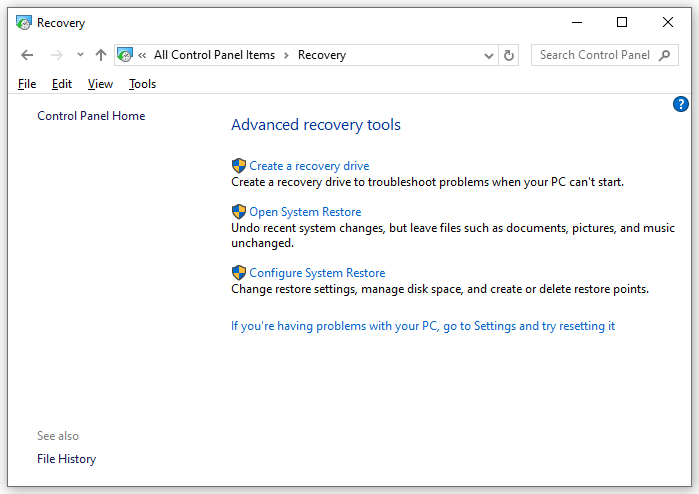
Step 3. Check Back up system files to the recovery drive and hit Next.
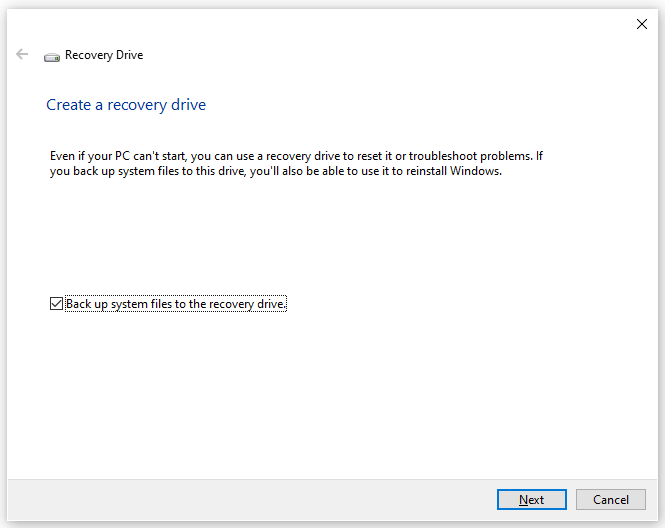
Step 4. Select your USB flash drive and hit Create to start the process.
To repair the crashed system, you need to: boot your computer from this emergency recovery drive > go to Troubleshoot > Recover from a drive > select Just remove my files or Fully clean the drive > hit Recover.
Option 3: via Backup and Restore (Windows 7)
Microsoft Windows comes with an inbuilt utility called Backup and Restore (Windows 7) that enables you to create a system image, create an emergency system recovery disk, set up a selected backup as well as restore specific files.
A system repair disc it creates contains Windows system recovery tools that can help you recover your system from a severe error and restore your computer from a system image. Follow these steps:
Step 1. Open Control Panel.
Step 2. Click on System and Security > Backup and Restore (Windows 7) > Create a system repair disc.
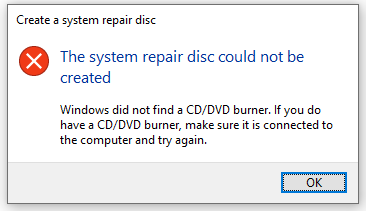
Step 3. Select a CD/DVD drive and hit Create disc.
We Need Your Voice
In summary, an Emergency Recovery Disk (ERD) provides another option when neither Safe Mode nor WinRE starts the system. This guide helps you to get to the bottom of how to create an Emergency Recovery Disk in 3 ways. When you are suffering from a boot failure or system crashes, you can start your system with this drive you create and perform system recovery.
Do you have any suggestions about our product? Welcome to share your ideas via [email protected]. We are always looking forwards to receiving your feedback!

User Comments :