The Lenovo laptop running slow issue may result from overloaded memory, insufficient disk space, outdated drivers or Windows, or malware. MiniTool offers some methods to fix it, including managing startup items, checking for malware, and upgrading hardware.
Quick Answer
If your Lenovo laptop is running slowly, try these proven fixes:
| Fix | What it does |
| Disable startup programs | Reduces boot time and improves responsiveness |
| Free up disk space | Prevents lag caused by low storage space |
| Upgrade from HDD to SSD | Dramatically improves loading and startup speed |
| Close background apps | Reduces CPU and RAM usage |
| Update Windows and drivers | Fixes performance bugs and compatibility issues |
| Upgrade RAM | Boosts the computer’s speed and multitasking capability |
Why Is My Lenovo Laptop So Slow
A Lenovo laptop may run slowly for several common reasons, involving hardware limitations, software issues, or system settings.
| Common symptom | Possible cause |
| Slow startup | Too many startup programs |
| Frequent freezing | Low RAM |
| Long app loading times | Using an HDD |
| High disk usage | Insufficient storage space or an aging drive |
| Slow performance after updates | Driver or Windows conflicts |
| Lag during multitasking | Insufficient RAM |
| Loud fan | Overheating |
| Browser being unresponsive | Low RAM or too many tabs |

How to Make Lenovo Laptop Faster
To speed up a Lenovo laptop, begin with quick fixes such as closing unused applications and disabling unnecessary startup programs.
Next, perform routine maintenance and optimization, including running Disk Cleanup, scanning for malware, and adjusting power settings.
If performance is still poor, consider upgrading the RAM or replacing an HDD with an SSD if possible.
Here’s the detailed breakdown.
Immediate Fixes
To fix Lenovo laptop running slow, try these methods immediately:
- Restart the device
- Close intensive programs
- Disable startup apps
- Check for Windows updates
# 1. Restart the Laptop
The easiest way to make a Lenovo laptop run faster is to restart it. It can instantly clear temporary files, free up RAM, and stop background processes causing slow performance. If this method doesn’t work, continue to try other methods.
# 2. Close Intensive Apps
Some intensive programs may overload the memory and slow down the running speed.
To solve Lenovo laptop running slow, close unnecessary apps:
Step 1. Press Ctrl + Shift + Esc simultaneously to open Task Manager.
Step 2. In the Processes tab, see what is using high CPU or RAM.
Step 3. Right-click one program and select End task.
Step 4. Repeat the steps to end all the resource-hungry processes.
# 3. Manage Startup Items
Startup apps are programs that launch automatically during startup. Too many startup apps can slow down your PC, hog RAM, and increase boot times.
To disable unnecessary startup programs:
Step 1. Open Task Manager.
Step 2. Go to the Startup apps tab and click Startup impact to order the startup items.
Step 3. Right-click the app that has a high startup impact and choose Disable.
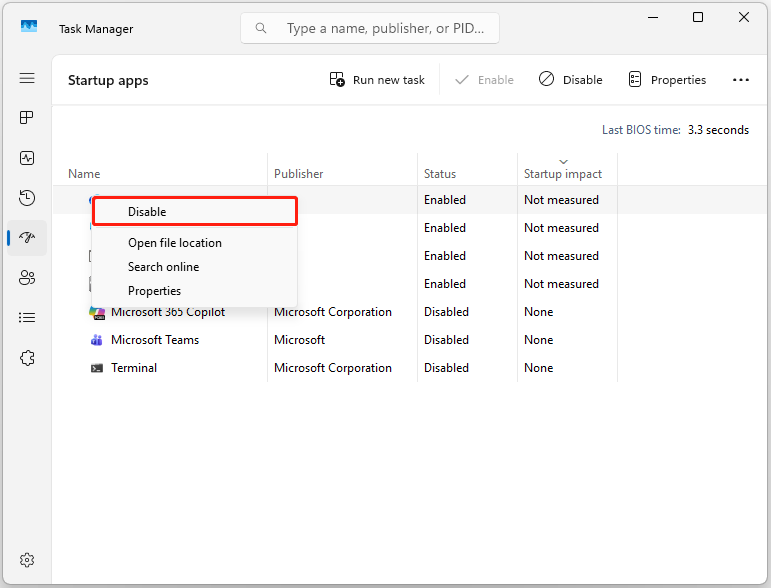
Step 4. Repeat the steps to disable all the unnecessary startup items.
# 4. Check for Windows Updates
Running an older operating system can create compatibility issues with modern applications, resulting in Lenovo laptops running slowly. To solve the issue, check for updates in Windows Update and install the available updates.
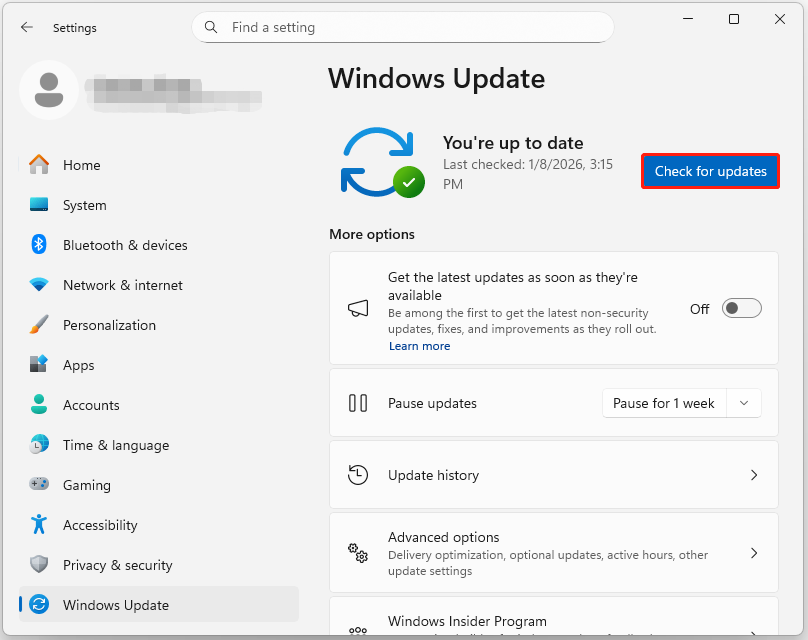
Step 1. Press Win + I to open Settings.
Step 2. Select Windows Update.
Step 3. Click Check for updates. If there are available updates, update them.
Maintenance & Optimization
To fix the Lenovo laptop running slow issue, try these methods:
- Uninstall unnecessary apps
- Run Disk Cleanup
- Run a virus scan
- Update drivers
- Adjust power settings
- Reconfigure visual effects
# 1. Uninstall Unnecessary Apps
Uninstalling unneeded apps and removing pre-installed bloatware is a very effective method to speed up a slow Lenovo laptop. It helps free storage space and diminishes background processes.
Step 1. Press Win + S to open Search.
Step 2. Type control panel and press Enter.
Step 3. Set View by to Large icons and select Programs and Features.
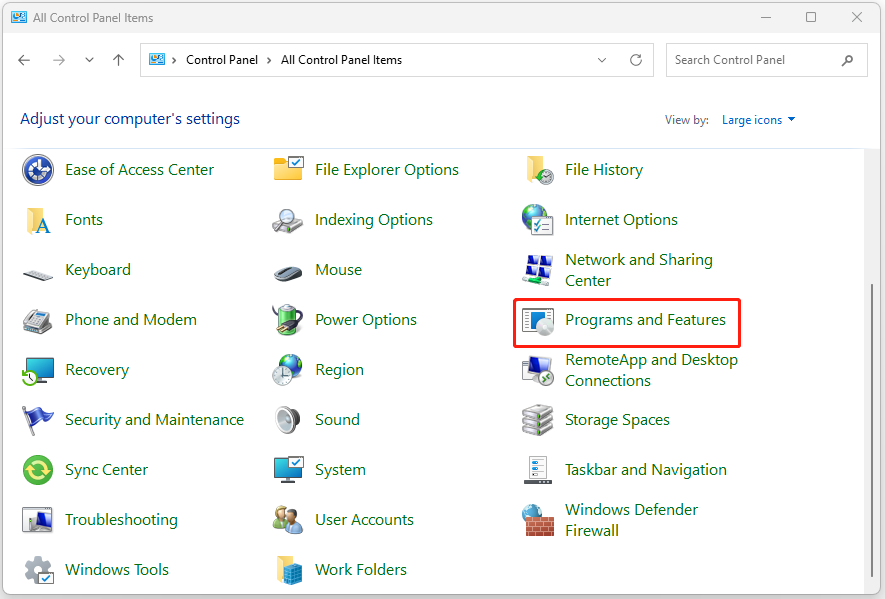
Step 4. Choose the unnecessary app from the list, right-click it, and select Uninstall.
Step 5. Follow the on-screen instructions to complete the process. Then, repeat the above steps to uninstall all other unnecessary apps.
# 2. Run Disk Cleanup
Disk Cleanup is a built-in tool on Windows that can remove temporary files, system caches, and other unnecessary data. Thus, run it to fix slowness caused by a full drive.
Step 1. Open Search, type disk cleanup, and press Enter.
Step 2. Select the system drive and click OK.
Step 3. Choose the file types that you want to delete and click OK. Then, click Delete Files in the prompted window.
Step 4. If you want to get a deep clean, click Clean up system files in the Disk Cleanup dialog.

Step 4. Select the system drive again and click OK.
Step 5. Choose the boxes for the file types you want to delete and click OK.
Step 6. Click Delete Files to confirm.
# 2. Check for Malware
Malicious programs often run in the background, leading to sluggish performance, freezing, and long boot times. Therefore, run a full virus scan to check for viruses and malware on your PC to fix the issue.
Step 1. Open Search, type windows security, and press Enter.
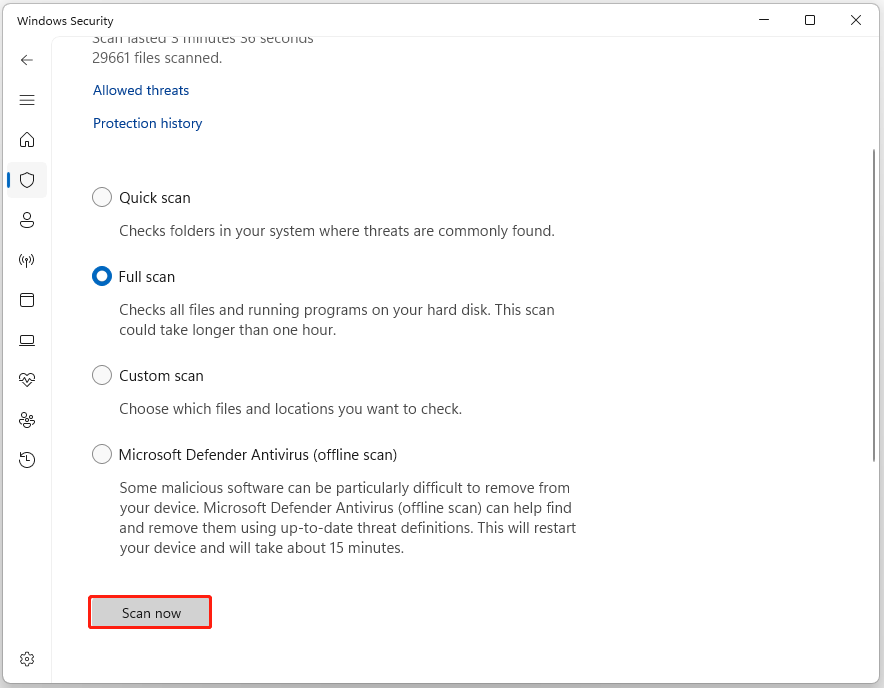
Step 2. Click Virus & threat protection in the prompted window.
Step 3. Click Scan options, choose a scan method as you prefer, and then click Scan now.
Step 4. Once the scanning is completed, enter the Protection history page.
Step 5. Locate the quarantined item and select Remove to permanently delete it.

# 3. Update Drivers
Outdated, corrupt, or missing drivers often cause system lag, stuttering, and poor performance.
To fix the Lenovo laptop lagging, update drivers:
Step 1. Press Win + X to open Quick Link and select Device Manager from the menu.
Step 2. In Device Manager, expand the categories to find the device you want to update.
Step 3. Right-click the device name and select Update driver.
Step 4. Choose Search automatically for drivers. Then, Windows will scan your computer for the latest driver and install it.
Repeat the above steps to update all outdated drivers. Once complete, restart your computer if required. Now, the laptop should run smoothly.
# 4. Adjust Power Settings
Best Performance maximizes speed by allowing for aggressive CPU boosting. This is ideal for gaming or heavy workloads while the power cable is plugged in.
To resolve Lenovo performance issues, change to this power option:
Step 1. Go to Settings > System > Power & battery.
Step 2. Locate Power mode and select Best performance for higher speed.
Further reading: what are the differences among the three Power modes?
- Best Performance: Minimizes power-saving features and keeps the CPU running at high speed for maximum responsiveness. This is best used when the power cable is plugged in.
- Balanced: Automatically adjusts CPU performance based on your workload. This is the best option for most users.
- Best Power Efficiency: Lowers CPU speed, reduces brightness, and limits background tasks to extend battery life when away from a charger.

# 5. Adjust Visual Effects
Visual effects in Windows, such as animations, window shadows, and transparency, consume significant system resources, specifically targeting the GPU (graphics processing unit) and CPU (central processing unit).
Here’s how to adjust visual effects to improve laptop running speed:
Step 1. Press Win + R to open Run, type sysdm.cpl, and hit Enter.
Step 2. Go to the Advanced tab and click Settings under Performance.
Step 4. Select Adjust for best performance to proceed.
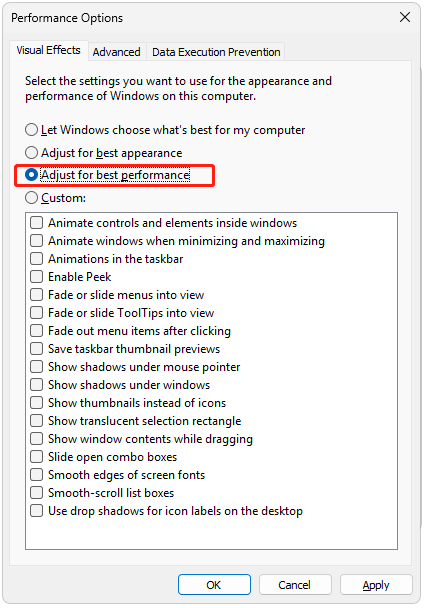
Step 5. Click Apply, then OK to save changes.

Hardware Upgrade
Additionally, consider upgrading hardware to fix the issue of Lenovo laptops running slowly.
# 1. Upgrade RAM
Laptops with only 4 GB or 8 GB of RAM often run slowly during multitasking. If the RAM is not soldered to the motherboard, consider installing more RAM or replacing the RAM.
| RAM size | Recommended usage |
| 4GB | Basic tasks |
| 8GB | Daily use |
| 16GB or above | Gaming, video editing, or other intensive tasks |
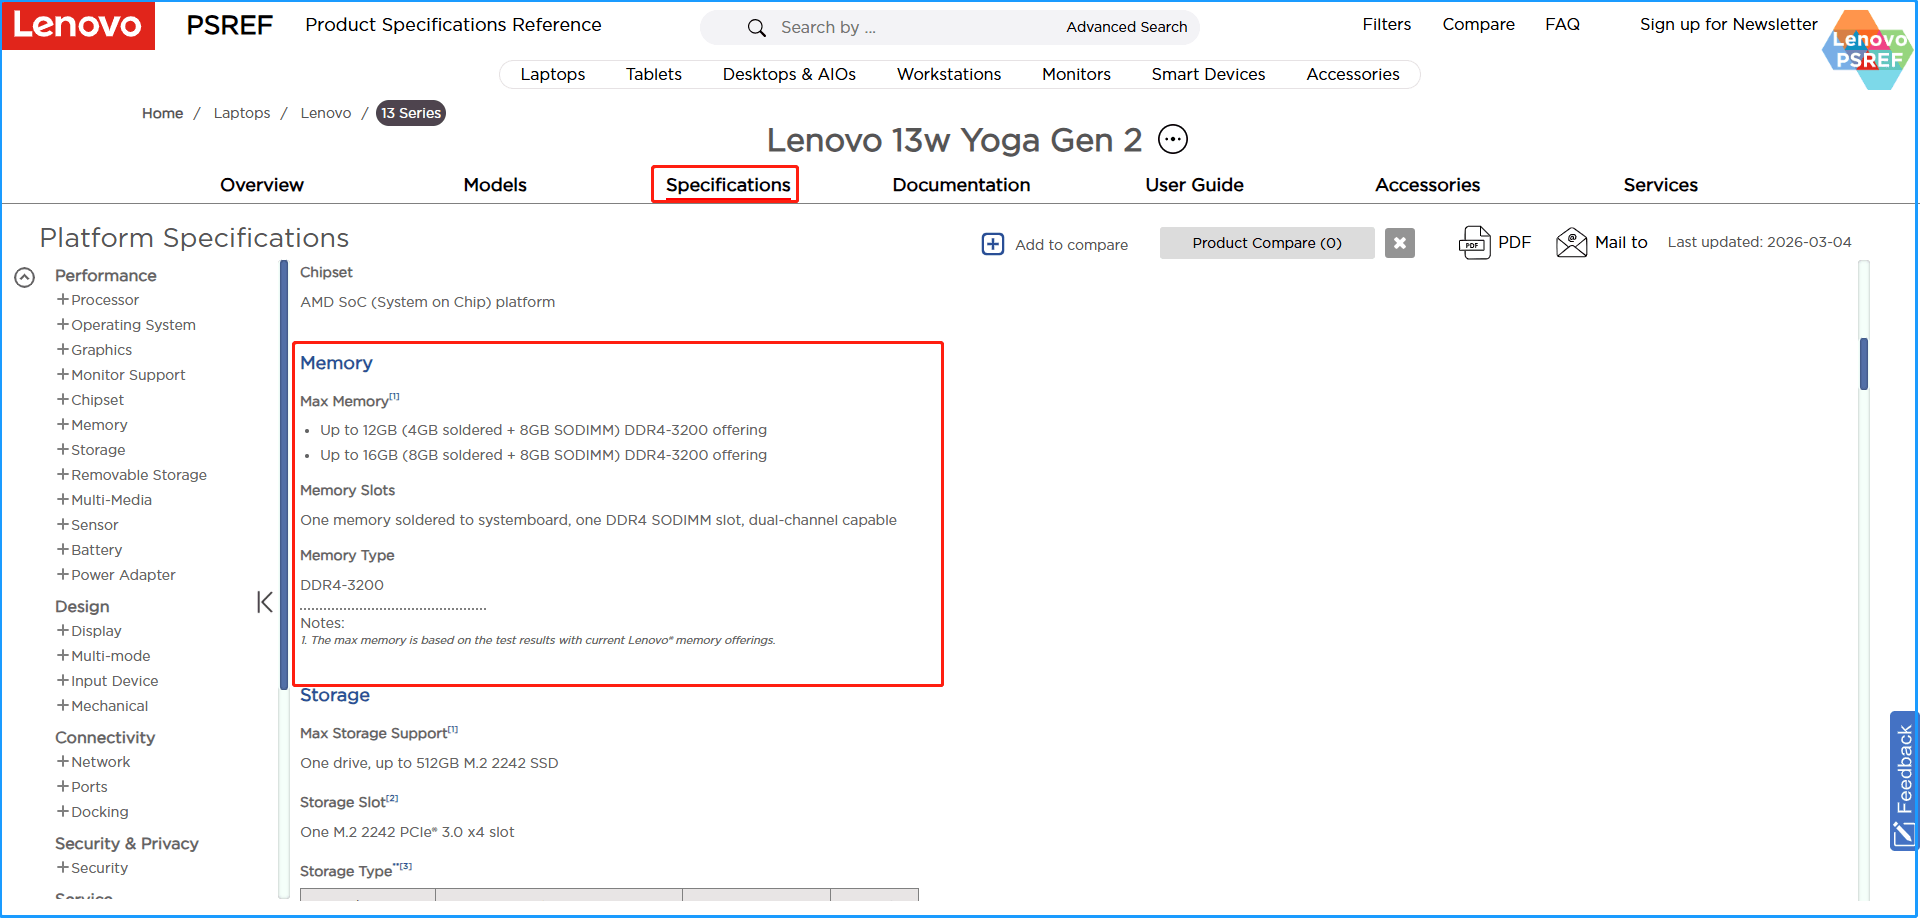
To check the RAM specifications, do the following steps:
- Visit the Lenovo Product Specifications Reference (PSREF) website.
- Search for your model.
- Go to its Specifications tab.
- Review the Memory section to check for memory information, including the memory size, slots, and type.
Here’s how to upgrade RAM on a laptop:
Step 1. Turn off the laptop completely and drain its residual power.
- Shut down the laptop.
- Unplug the power adapter.
- Remove the battery if possible.
- Hold the power button for 5 seconds to drain residual power.
Step 2. Remove the bottom panel of the laptop using a small-headed screwdriver.
Step 3. Locate the RAM slots, pull back the metal clips on both sides, and the RAM stick should pop up at an angle.
Step 4. Align the notch on the new RAM module with the notch in the slot.
Step 5. Insert the RAM at a 30 to 45-degree angle, then press down firmly until the side clips click into place.
Step 6. Reassemble the back panel, reinsert the battery, and power on the laptop.
The system should automatically recognize the new RAM; check this in your operating system’s System Information or Task Manager.

# 2. Upgrade an HDD to an SSD
Upgrading a Lenovo laptop’s HDD to an SSD significantly reduces boot times, speeds up app loading, and boosts overall performance.
If none of the above ways can help you fix the Lenovo laptop running slow issue, upgrade the HDD to SSD with the following steps:
Phase 1: Preparation and Cloning
- Purchase a 2.5-inch SATA SSD or M.2 SSD, depending on your laptop’s compatibility.
- Buy a USB-to-SATA adapter or enclosure to connect the new SSD to your laptop externally.
Now, use software to copy your entire HDD to the new SSD. To do that, it is highly recommended to use MiniTool ShadowMaker. This all-in-one PC backup software not only can help you perform computer backup, but also is good at cloning HDD to SSD.
Here’s how to use it to clone system from HDD to SSD:
Step 1. Download and install MiniTool ShadowMaker on your computer. Then, launch this software to its main interface.
MiniTool ShadowMaker TrialClick to Download100%Clean & Safe
Step 2. Select Tools and click Clone Disk.
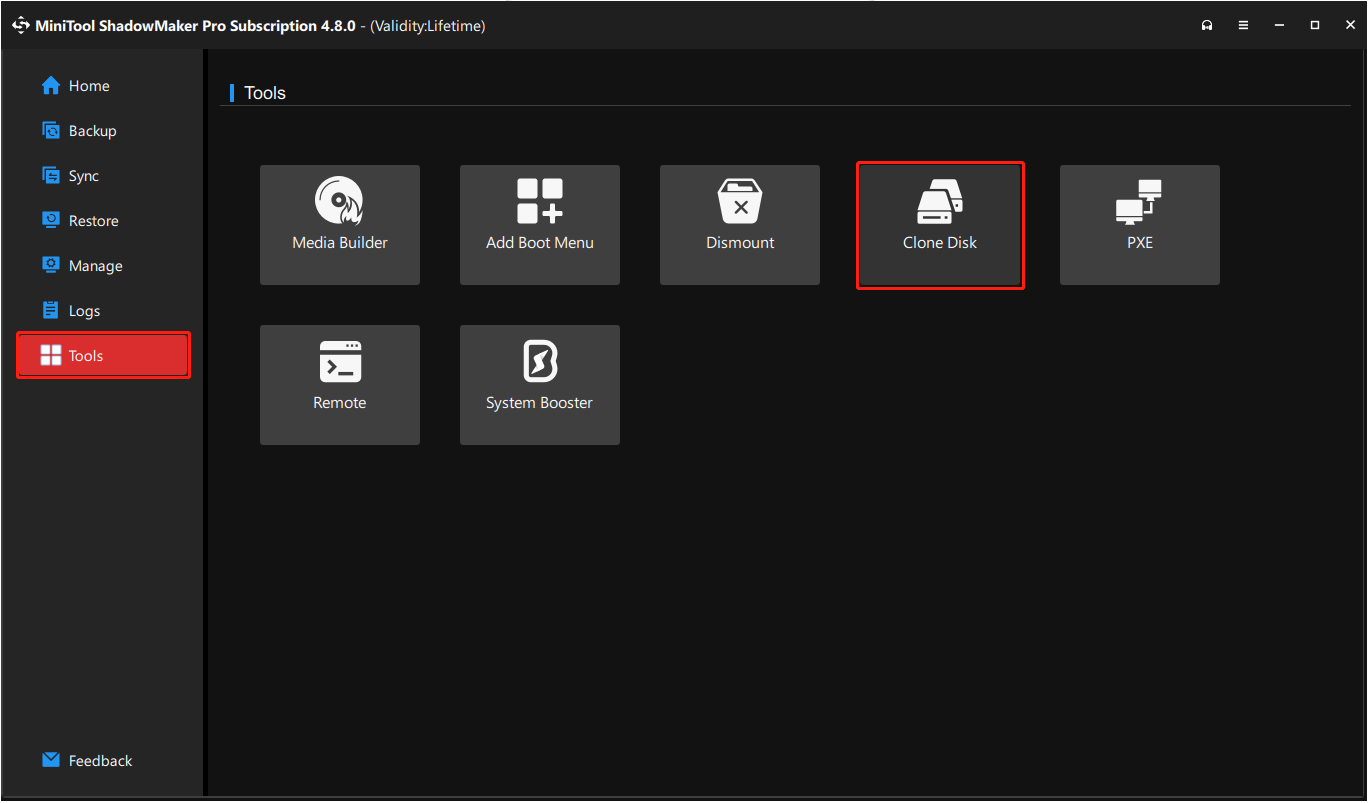
Step 3. Choose your HDD, and click Next.
Step 4. Select the new SSD and click Start. In the prompted Warning window, click OK to proceed.
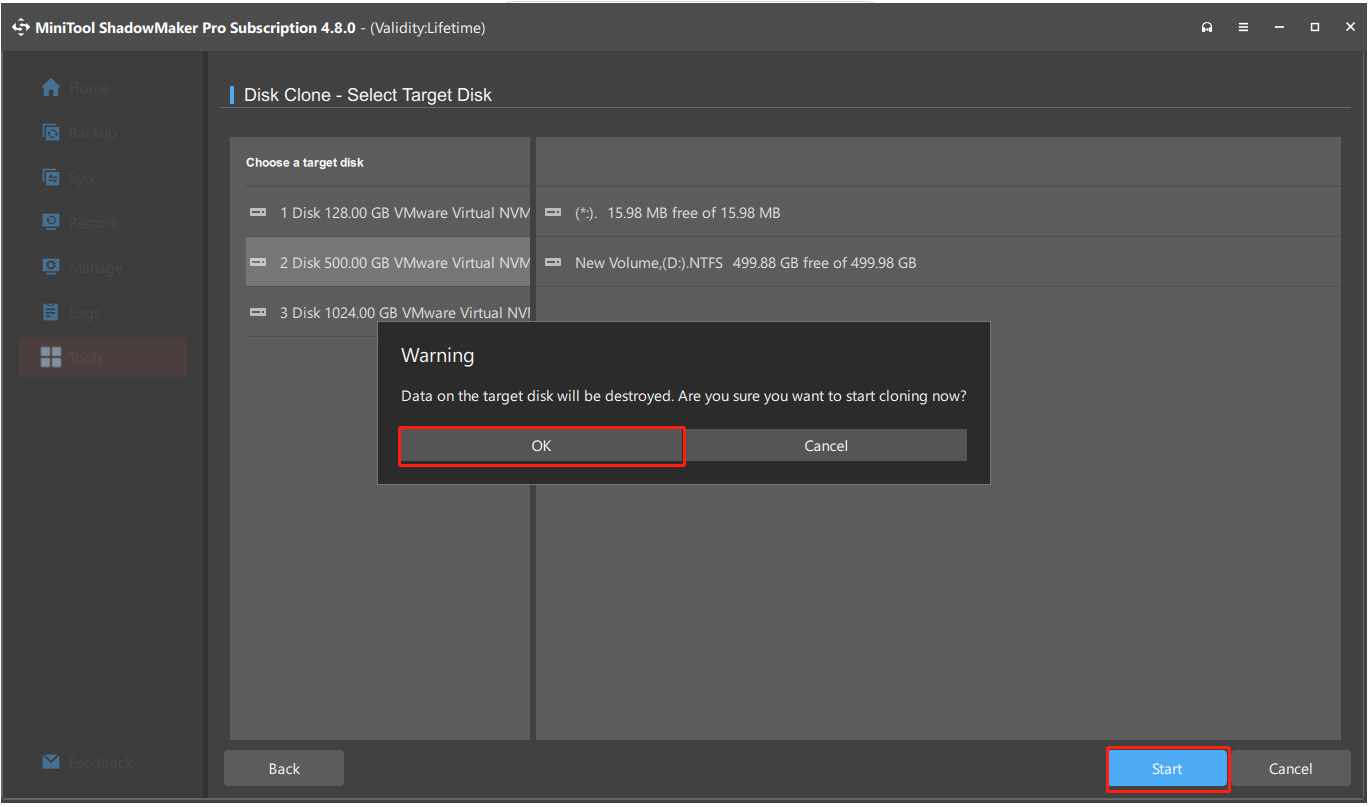
Step 5. Now, the cloning process will start. Once the process is complete, click Finish to confirm.
Phase 2: Physical Installation
Once you have cloned all your data from the HDD to the new SSD, replace the old HDD with the new SSD. Here are the steps:
Step 1. Turn off your laptop and unplug it.
Step 2. Remove the bottom casing with a Phillips screwdriver to remove the screws.
Step 3. Unplug the internal battery connector.
Step 4. Unscrew and gently remove the old HDD from its bay, noting its orientation.
Step 5. Slide the SSD into the bay and ensure it connects firmly to the SATA connector.
Step 6. Reconnect the battery, close the case, and secure it with screws.
Phase 3: Post-Installation
After installing the new SSD in your Lenovo laptop, do the following tips to check and complete the upgrade process.
- Verify Speed and Data: If cloning was successful, your laptop should boot faster. Additionally, all of your data should be available.
- Use Old HDD: Place the old HDD into an external enclosure to use as external storage.
Conclusion
Overloaded memory, insufficient disk space, and many other reasons can lead to the Lenovo laptop running slow issue. This post has listed several methods, from immediate fixes, maintenance & optimization, and hardware upgrade, to troubleshoot the issue.
Furthermore, if you encounter issues while using this MiniTool ShadowMaker to clone your disk, feel free to contact us via [email protected].
Lenovo Laptop Running Slow FAQ
The business-grade models often exceed this range due to their higher quality and durability, while consumer-oriented models may have a slightly shorter lifespan.
Quality control issues: Budget Lenovo models often have an inconsistent build quality issue.
Design & aesthetics: The higher-end and durable Lenovo laptop (like ThinkPad) doesn't have a good look.
Thermal management: Models like Legion have been reported to experience overheating issues.
Software bloatware: Some models come with excessive preinstalled software, which can affect performance.
Additionally, many users report on different forums that the ThinkPad line from Lenovo is often rated slightly higher for physical durability.
About The Author

Position: Columnist
Vera has been working at the MiniTool Team for over 10 years as a technical editor and content writer. She mainly focuses on disk and partition management, data recovery, Windows backup and restore, and PC troubleshooting. Through in-depth software testing and hands-on experience, she has helped users solve a wide range of computer problems and better protect their data on Windows devices.
User Comments :