Windows Security is a built-in, free antivirus tool in Windows, constantly working to protect PCs from malware.
However, it may be too strict for third-party software or file downloads from the internet sometimes. For instance, it may suddenly flag them as infected, while you run/open normally before.
What Causes the “Operation Did Not Complete Successfully” Error Message
The error may pop up in your PC for the following reasons:
- Malware detection: The file genuinely contains a virus, Trojan, therefore, your security software is stopping it.
- False positives: A safe and legitimate file is mistakenly identified as harmful by the antivirus, triggering the block.
- Security software conflict: When opening a file or installing software, antivirus software may interfere with the operation, resulting in the error.
- Corrupted download: Downloaded files that are incomplete or damaged may be flagged as suspicious by antivirus software, but this does not mean they are inherently malicious.
- System file corruption: If there are corrupted system files on your PC, Windows can’t properly execute operations and trigger security warnings.
- Accumulated browsing data: Accumulated browsing data can slow down PC’s performance and trigger false positives.
- Unverified or high-risk third-party content: It is easy to trigger errors when you try to install cracked software (even if harmless), unsigned installers, tools from unknown developers, custom scripts & mods on your PC.
Back Up Data to Avoid Data Loss
A virus on a computer may cause data loss easily. To avoid it, it is highly recommended to use a backup tool to back up your data. To achieve that, MiniTool ShadowMaker is a good choice.
It offers the Backup feature to perform a computer backup effectively. Here’s how to perform that:
Step 1. Click the following button to get the MiniTool ShadowMaker installation package. Then, install and launch it on your PC.
MiniTool ShadowMaker TrialClick to Download100%Clean & Safe
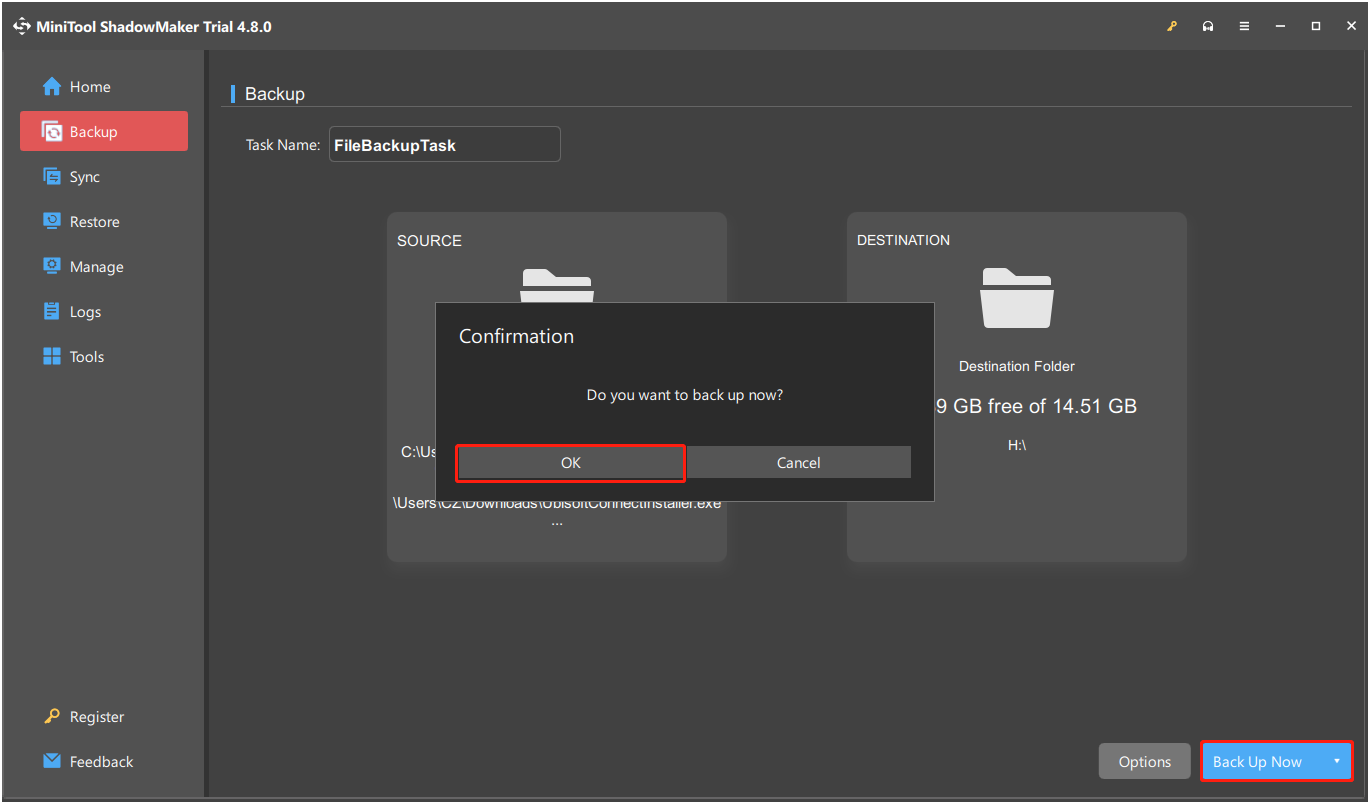
Step 2. Select Backup from the left panel. Then, go to SOURCE, and click Folders and Files.
Step 3. Tick the boxes of the files that you want to back up and click OK.
Step 4. Go to DESTINATION, choose a location to save the backup files, and click OK.
Step 5. Click Back Up Now and OK sequentially to proceed.
How to Fix “Operation Did Not Complete Successfully”
To fix the “operation did not complete virus” error in Windows 10/11, try running an antivirus scan, disabling antivirus software temporarily, adding the file or folder to the Exclusions list, and so on.
Method 1. Verify if You Downloaded the File from a Reputable Source
When you encounter the error on your PC, the first thing you should do is to ensure that you downloaded the file from a reputable source.
If you obtained the program via an unsolicited link, an email, or a web search, the issue can happen. Therefore, go to the official website of the software and download it.
Method 2. Redownload and Rerun the File Again
If you download the file from an official website but still encounter the error, try downloading it again. Then, run the downloaded file and check if the error persists. If it runs normally, the error may be a false positive.
Method 3. Temporarily Disable Antivirus Software
If there aren’t any viruses or malware on your computer, try temporarily disabling antivirus software to fix the error. Here’s how to disable Windows Security:
Step 1. Press Win + S to open the Search window.
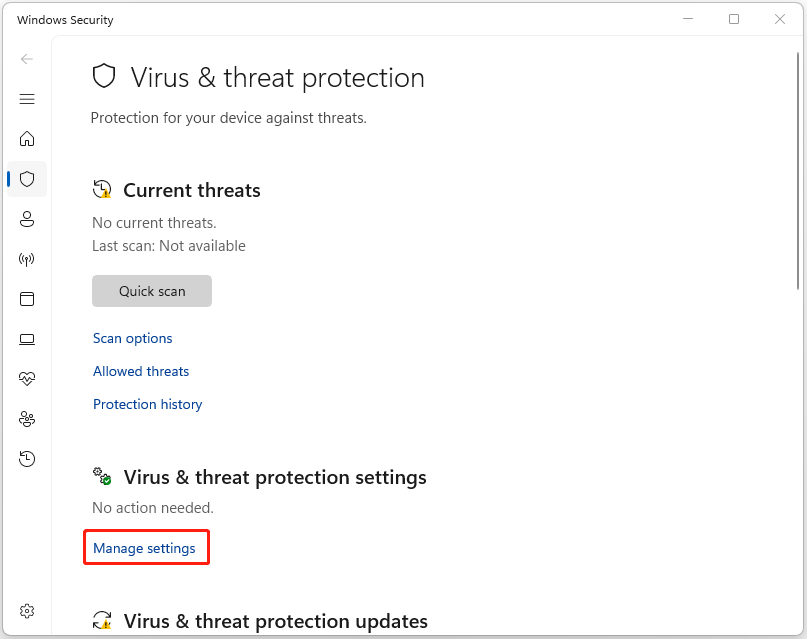
Step 2. Type virus & threat protection in the search box, and select the most matched one from the search results.
Step 3. In the prompted window, click Manage settings under the Virus & threat protection settings section.
Step 4. Toggle off these switches to disable Microsoft Defender temporarily:
- Real-time protection
- Dev Drive protection
- Cloud-delivered protection
- Automatic sample submission
- Tamper Protection
Step 5. Once done, run the file again and check if the error has been resolved.
![[Solution] How to Disable Windows Defender Antivirus on Win 10](https://images.minitool.com/minitool.com/images/uploads/2019/04/disable-windows-defender-win10-thumbnail.jpg)
Method 4. Add the File or Folder to the Exclusions List
Adding the file or folder to the Exclusions list in Windows Security tells the antivirus to skip scanning that item. Therefore, if temporarily disabling antivirus software does not help you fix the “operation did not complete virus Windows 10/11” error, try this method.
Here are the detailed steps:
Step 1. Open the Virus & threat protection settings page.
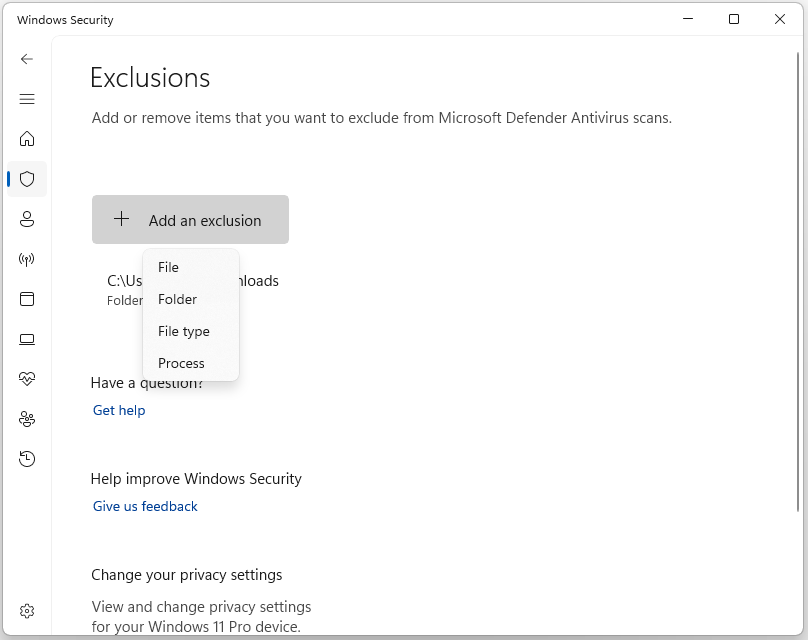
Step 2. Scroll down to find Exclusions, click Add or remove exclusions under this section, and then click Yes in the pop-up UAC window to continue.
Step 3. Click Add an exclusion and select one option from its drop-down menu.
- File: Select a specific file.
- Folder: Select a folder.
- File type: Enter the file extension, such as .exe, .tmp, or other extensions.
- Process: Enter a running process by its name, such as myprogram.exe.
Step 4. After that, the item will appear in your exclusion list and won’t be scanned. Now, try opening the file again and check if the error has been resolved.
Method 5. Run an Antivirus Scan
Viruses and malware infection is one of the main reasons for the “operation did not complete successfully” error in Windows 11/10. In this circumstance, try running an antivirus scan with the following steps to fix the error:
Step 1. Open the Search window, type windows security, and press Enter.
Step 2. Select Virus & threat protection in the pop-up window.
Step 3. Click Scan options, choose one scan option, and click Scan Now.
- Quick scan: Scan common malware locations.
- Full scan: Check everything on your drive.
- Custom scan: Scan the specific files and folders.
- Microsoft Defender Offline scan: Restart the PC to scan deep system files.
Step 4. Once the virus scanning process is complete, access the Protection history page, and select a proper action option for the found virus or malware.
Method 6. Repair the File Explorer
The “operation did not complete successfully” error in Windows 11/10 can also be triggered by the File Explorer window. In this situation, try the following steps to repair File Explorer.
Step 1. Press Win + R to open Run.
Step 2. Type cmd and press Ctrl + Shift + Enter to run Command Prompt as administrator.
Step 3. Input the following command and press Enter after each command.
- sfc /SCANFILE=c:\windows\explorer.exe
- sfc /SCANFILE=C:\Windows\SysWow64\explorer.exe
Step 4. Restart your computer and check if the error has been resolved.
Method 7. Clear Browsing Data
Browsers store temporary data to improve performance, but unmanaged files can slow down your PC. This buildup may also trigger false positives with the error message “operation did not complete successfully because the file contains a virus”.
In this case, clear accumulated browsing data with the following steps:
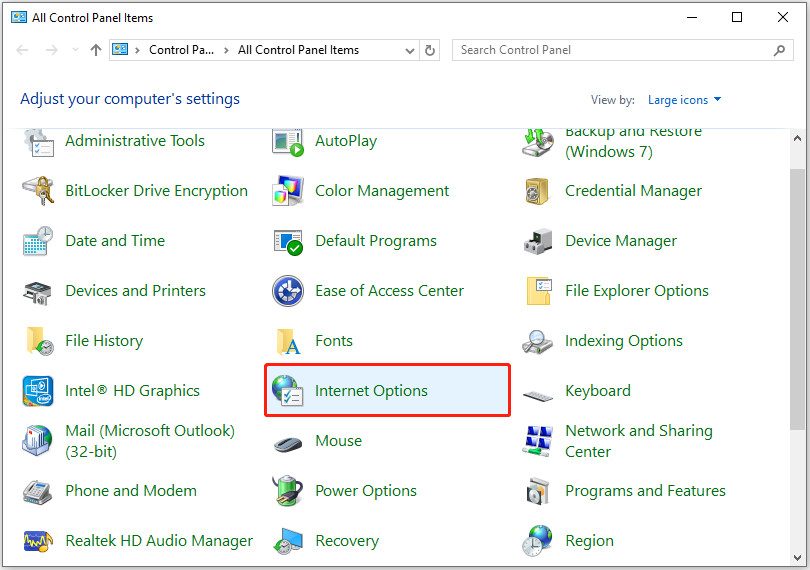
Step 1. Press Win + R to open Run, type control panel, and press Enter.
Step 2. Set View by to Large icons and select Internet Options from the feature list.
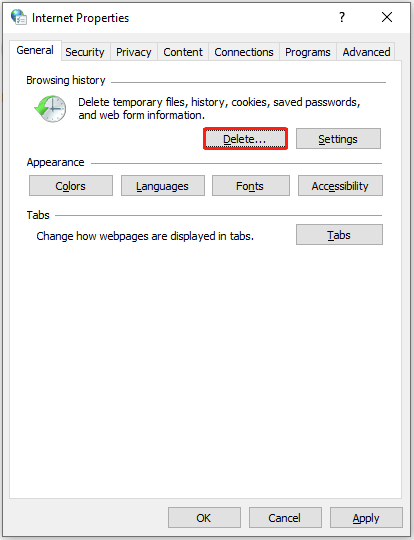
Step 3. In the Internet Options window, go to the General tab and click the Delete button.
Step 4. Uncheck the Preserve Favorites website data option. Then, check the boxes of the following options:
- Temporary Internet files
- Cookies
- History
- Download History
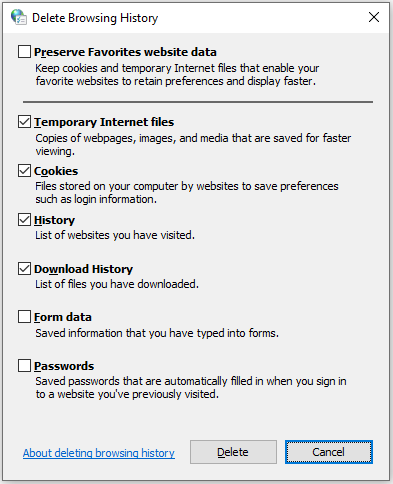
Step 5. Click the Delete button to remove the selected files. Then, restart your PC and check if the error is fixed.
Method 8. Run the Disk Cleanup Utility
Accumulating temporary data on Windows 10/11 can cause performance drops and misleading errors. In this case, use the Disk Cleanup tool to delete these files and reclaim space. Here’s how to do that:
Step 1. Open the Search window, type disk cleanup, and press Enter.
Step 2. In the Disk Cleanup: Drive Selection window, select your system drive and click OK.
Step 3. Select the files that you want to delete and click OK.
Step 4. Click Delete Files in the prompted window.
Method 9. Run SFC and DISM
Corrupted system files can cause the “operation did not complete successfully” error in Windows 10/11 as well.
SFC (System File Checker) and DISM (Deployment Image Servicing and Management) are built-in command-line tools in Windows that scan for and repair corrupted or missing critical system files, addressing issues like application crashes, freezes, and boot failures.
Follow the instructions to run DISM and SFC to fix the error:
Step 1. Run Command Prompt as administrator.
Step 2. Execute the following commands one by one to perform the DISM scan:
- DISM.exe /Online /Cleanup-Image /ScanHealth
- DISM.exe /Online /Cleanup-Image /CheckHealth
- DISM.exe /Online /Cleanup-Image /RestoreHealth
Step 3. After DISM scanning is complete, type sfc/ scannow and press Enter.
Step 4. Once done, restart your PC and check if the error persists.
Method 10. Perform a Clean Boot
A clean boot isolates third-party software conflicts by starting Windows with only the most basic drivers and programs. If you suspect the “operation did not complete successfully” error is caused by third-party software, but are unable to find out which it is, perform a clean boot.
Here’s the guide:
Step 1. Open Run, type msconfig in the box, and press Enter.
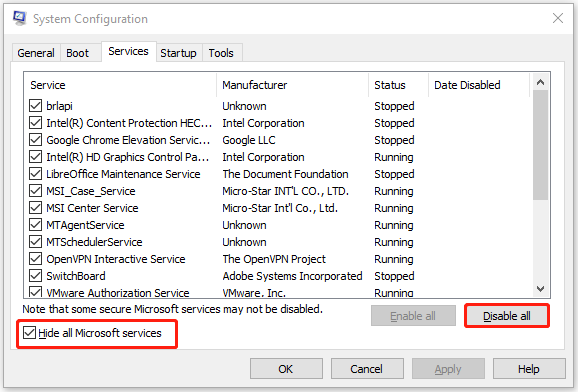
Step 2. In the System Configuration window, select the Services tab, and check the Hide all Microsoft services option. Next, click Disable all then Apply.
Step 3. Go to the Startup tab and click Open Task Manager.
Step 4. Right-click the applications you suspect and select Disable.
Step 5. Exit Task Manager and click OK under the Startup tab.
Then, your computer will restart into a clean boot environment. Now, run the file again and check if the issue has been resolved.
Step 6. If yes, it means that the culprit is third-party programs. Then, try to find out the culprit and boot into normal Windows.
Bottom Line
It is not hard to get rid of the “operation did not complete successfully” error in Windows 10/11. This post provides some effective solutions. To resolve it, follow the instructions in this complete guide.
What’s more, to avoid data loss, run MiniTool ShadowMaker for data backup. It plays an important role in PC backup.
If you encounter any issues with this software, please contact us via [email protected].
Operation Did Not Complete Successfully FAQ
Additionally, checking for write protection, trying another computer, or assigning a new drive letter may work for this error.
Step 1. Close the warning via Task Manager.
Step 2. Run a full virus scan.
Step 3. Update Windows, drivers, and software to the latest version.
Step 4. Go to the browser's notification settings to remove any unknown or suspicious websites from the Allow list.
NTFS for Windows
Ext4/Btrfs/XFS for Linux
APFS for Macs
FAT32/exFAT for cross-platform USB drives
About The Author

Position: Columnist
Charlotte is a technology columnist with a strong focus on the Windows operating system, specializing in disk management, backup, and data recovery. She is passionate about analyzing computer errors, identifying root causes, and delivering practical solutions. In her free time, she stays updated on the latest developments in computer systems and hardware while continuously learning new technologies to broaden her expertise. Her writing style is clear and easy to understand, making complex technical topics accessible even to users with limited computer knowledge.
User Comments :