When it comes to backing up and restoring data, two key concepts are often discussed: system state backup and bare-metal backup. Knowing how these approaches differ is vital for creating a strong data recovery strategy. The following part gives information about system state vs bare-metal backup.
Overview of System State and Bare-metal Backup
System State Backup
A system state backup captures critical operating system files, enabling system recovery in cases where startup fails due to corrupted or missing system files and registry data. You can use system state backup when an operating system error causes system settings corrupted. You can use it to restore system settings to a stable state to reduce errors on another healthy computer.
Bare-metal backup
A bare-metal backup captures the operating system files and essential volume data (excluding user files), offering complete recovery when a system becomes unbootable. Importantly, this type of backup automatically incorporates a system state backup as part of its process. You can use bare-metal backups to restore system state settings.
System State Backup vs Bare-Metal Backup
Then, let’s see bare-metal backup vs system state backup in different aspects.
Key Components
System State Backup
The specific components included in this backup vary based on the system’s function.
1. All Windows systems:
- Registry
- Boot files
- COM+ Class Registration database
- System files under Windows File Protection
2. Domain Controllers:
- Active Directory (NTDS database)
- SYSVOL (Group Policy and logon scripts)
3. Servers with other roles:
- Cluster service metadata (for failover clusters)
- Certificate Services database (if installed)
Bare-metal backup
It backs up all critical components as follows:
- Entire operating system
- Installed applications
- System configurations
- Boot sectors & partitions
- System State (included automatically)
- Drivers & firmware settings
- User data
When to Use
As for system state backup vs bare-metal backup, they are suitable for different situations.
System State Backup
- Recover from system crashes
- Restore Active Directory
- Rebuild system configurations
- Recover from registry corruption
Bare Metal Backup
- Full server/workstation disaster recovery
- Hardware migration (e.g., replacing a failed server)
- Prepare for catastrophic failure scenarios
- Meet compliance requirements for business continuity
Backup and Recovery Duration
How about system state backup vs bare-metal backup in backup and recovery duration? The execution time for system state and bare metal recovery varies significantly due to differences in backup size.
System state recovery is faster, as it captures only a snapshot of critical operating system components. Bare-metal recovery requires more time due to its comprehensive nature. It fully restores the operating system and, when configured, can also include user data across multiple disk partitions.
This difference in scope directly impacts the speed of each recovery process.
Pros and Cons of Recovery
Now, let’s move on to the next aspect of system state recovery vs bare-metal recovery – the pros and cons.
System State Backup
Pros
- Requires minimal resources, enabling frequent backups.
- Safeguards operating system components without touching user files.
- Optimized for rapid backup/restore cycles.
Cons
- You can use it only on the computer where you created the system state backup. Therefore, you need to create a backup for each server in the cluster.
- The system state can be restored only if the server is functioning normally.
- System state recovery does not cover user data. It means that you need an additional backup and recovery solution.
Bare-Metal Backup
Pros
- Bare-metal backup lets you restore only specific parts of a system from a full backup – you don’t have to recover everything.
- Hackers can infect backups with malware, but bare metal backups are locked with encryption. Only users with the right key can open them.
- Bare-metal recovery works in a single step – no extra setup is needed. Just start the process, and it handles the rest.
- Bare-metal recovery always includes system settings and critical files by default, so your operating system will work correctly after recovery.
- Bare-metal backups can save and restore personal files, but this is usually turned off. You’ll need to enable it yourself if needed.
Cons
You must restore the backup to identical hardware – the recovery system needs to match the original computer’s specifications exactly.
Which One to Choose
After getting the details of bare-metal backup vs system state backup, here is a quick summary for you that can help you make the decision quickly.
1. What Gets Backed Up
- System state backups save only the most important system files and settings.
- Bare metal backups save everything – like taking a full picture of your entire computer.
2. Speed & Effort
- Bare-metal backups take longer and need more computer power.
- System state backups are faster and lighter on your system.
3. When to Use
- Use bare metal backups when you might need to rebuild your whole system (like after a crash or hardware failure).
- System state backups are better when you just need to fix or restore specific system parts.
4. Restoring Options
- System state backups let you pick and choose what to restore.
- Bare-metal backups restore everything at once.
5. Storage Space Needed
Bare metal backups take up much more storage space – plan accordingly if you need to keep many backups.
6. Rules & Regulations
Check if your industry has any special backup rules. Some might require full system backups, while others only need key parts saved.
How to Perform System State Backup and Bare-Metal Backup
This part is about how to perform the system state backup and bare-metal backup.
Step 1: Open Server Manager and click Add roles and features. Then, click Next.
Step 2: Now, choose the installation type section. You need to choose the Role-based or Feature-based installations option and click Next.
Step 3: Select a server from the server pool or select a virtual hard disk. Then, click Next.
Step 4: Under Select server roles, click Next.
Step 5: Under the Features section, check the Windows Server Backup feature and click Next.
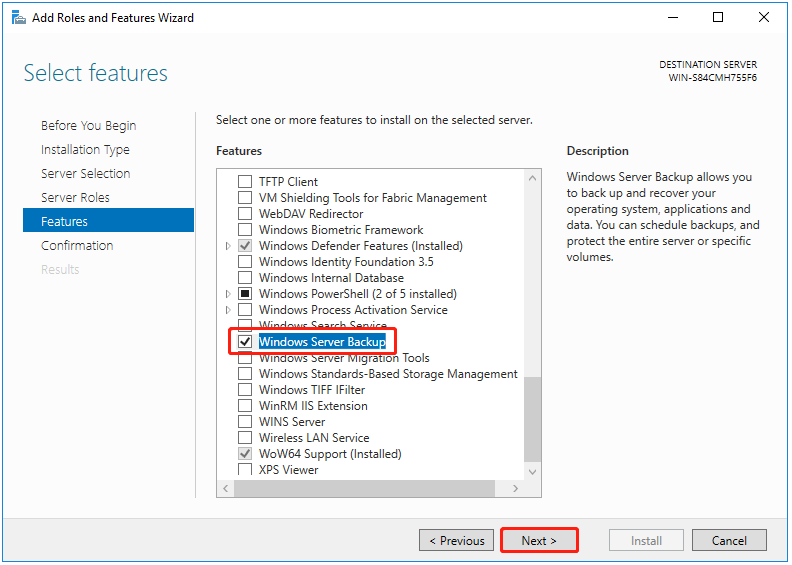
Step 6: It will ask you to confirm the operation and you need to click Install. Now the Windows Server Backup feature installation will begin. Wait for it to be completed.
Step 7: Type Windows Server Backup in the Search box and open it.
Step 8: Right-click Local Backup and then select Backup Once….
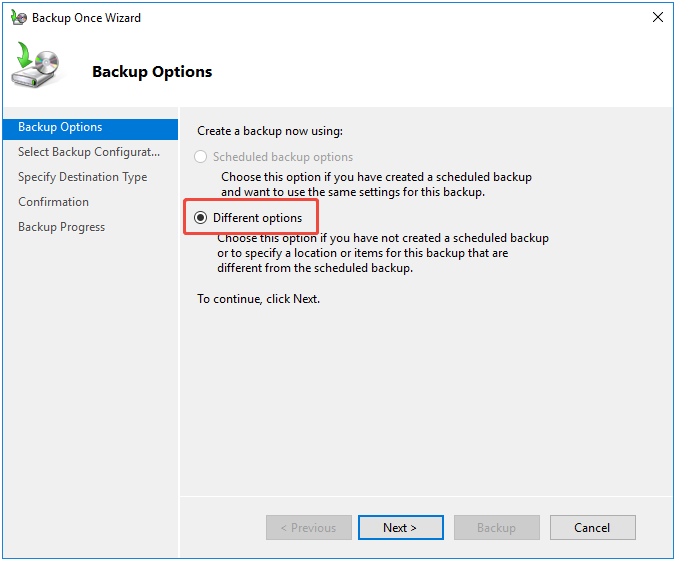
Step 9: Under Backup Options, select Different options, and click Next. Choose this option if you have not created a scheduled backup or want to specify a location or items for this backup that are different from the scheduled backup.
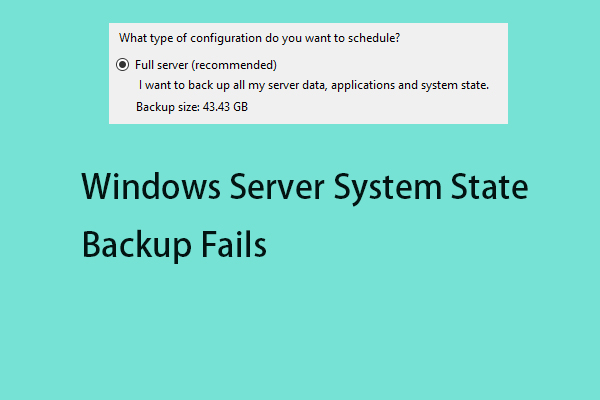
Step 10: Select Full server (recommended) or Custom.
- The full server backup will back up all your server data, applications, and system state.
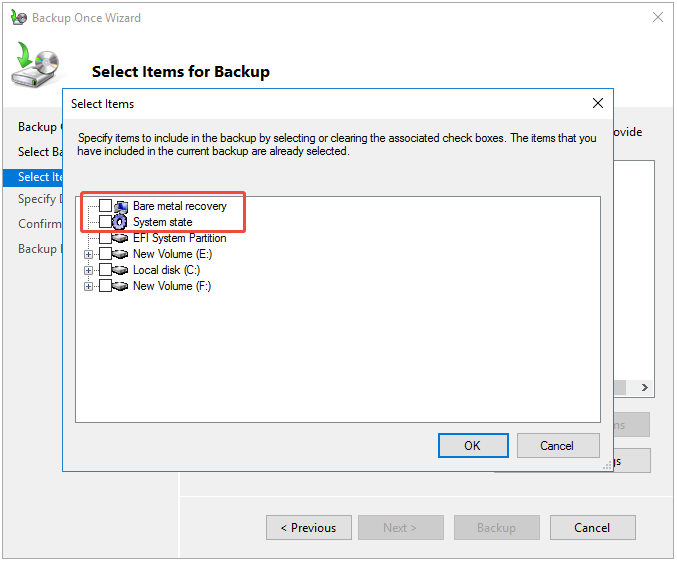
- To create the system state backup or bare-metal backup, you can choose the Custom option and click Next. Then, you can choose Add Items and select Bare metal recovery or System state based on your needs. Click Next to continue.
Step 11: Under Specify Destination Type, choose Local drives or Remote shared folders, and click Next. Here, you need to choose the first option.
Step 12: Then, you need to click the drop-down menu to choose the external hard drive as the backup destination. Click Next.
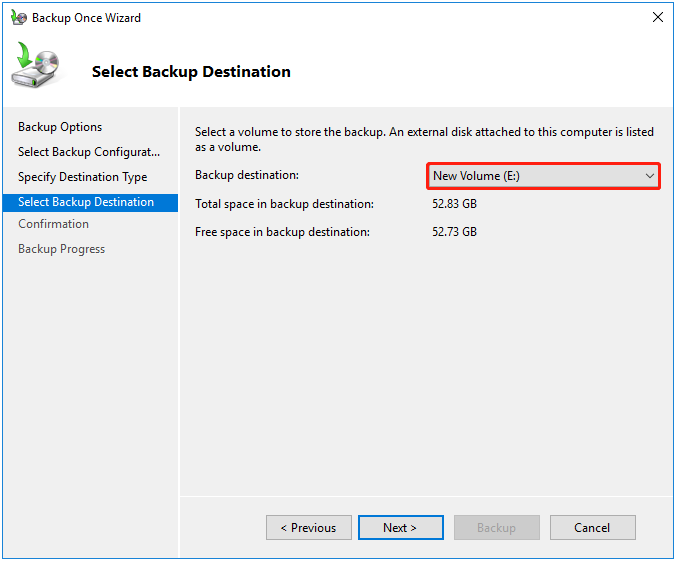
Step 13: Now, you can click Backup to start the backup task. Once the backup is done, you will see the status message: Successful.
An Easier Way to Make System Backup and Recovery
There is an easier way to make system backup and recovery. It is highly recommended to use MiniTool ShadowMaker – a piece of the Server backup software – to help you do that. MiniTool ShadowMaker is supported to back up files and folders, disks and partitions, and also the operating system. You can also use it to clone SSD to larger SSD.
Besides, you may encounter different errors when using Windows Server Backup such as Windows Server Backup Stuck at “Reading Data; Please Wait…”, Windows Server backup service missing, etc. Thus, MiniTool ShadowMaker is more suitable for you.
MiniTool ShadowMaker TrialClick to Download100%Clean & Safe
The first thing that needs you to do is backing up the system on your computer. Then you need to restore it to the bare-metal computer. If you have created the system image, you can directly navigate to the restore part.
Part 1: Perform the System Backup
Now, I will show you how to create a system image with MiniTool ShadowMaker.
Step 1: Install and launch it. Then click Keep Trial to enter its main interface.
Step 2: Go to the Backup page. MiniTool ShadowMaker chooses the operating system as the backup source by default. If you want to back up files, click SOURCE > Folders and Files. Check the files you want to back up.
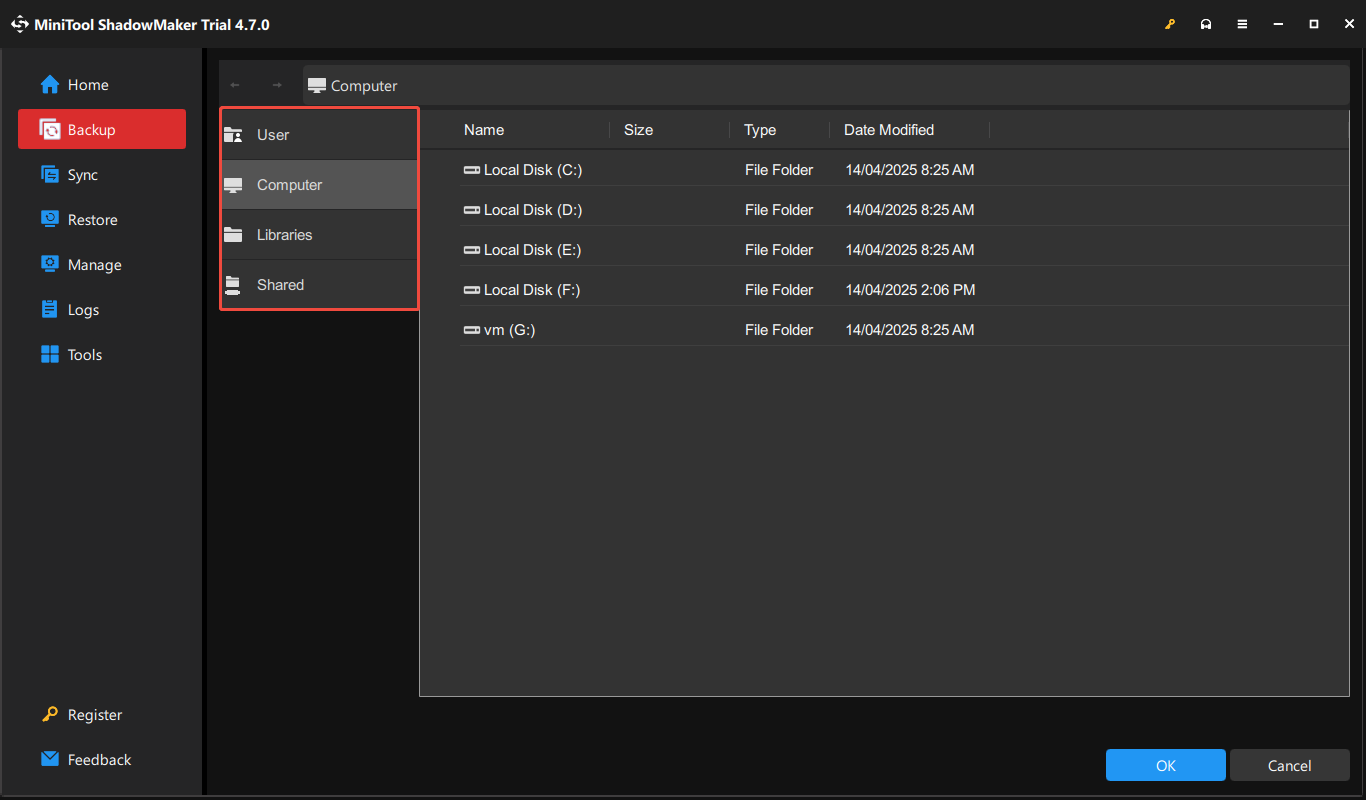
Step 3: Then click DESTINATION to choose a target disk to save the backup image. There are 4 paths available – User, Computer, Libraries, and Shared.
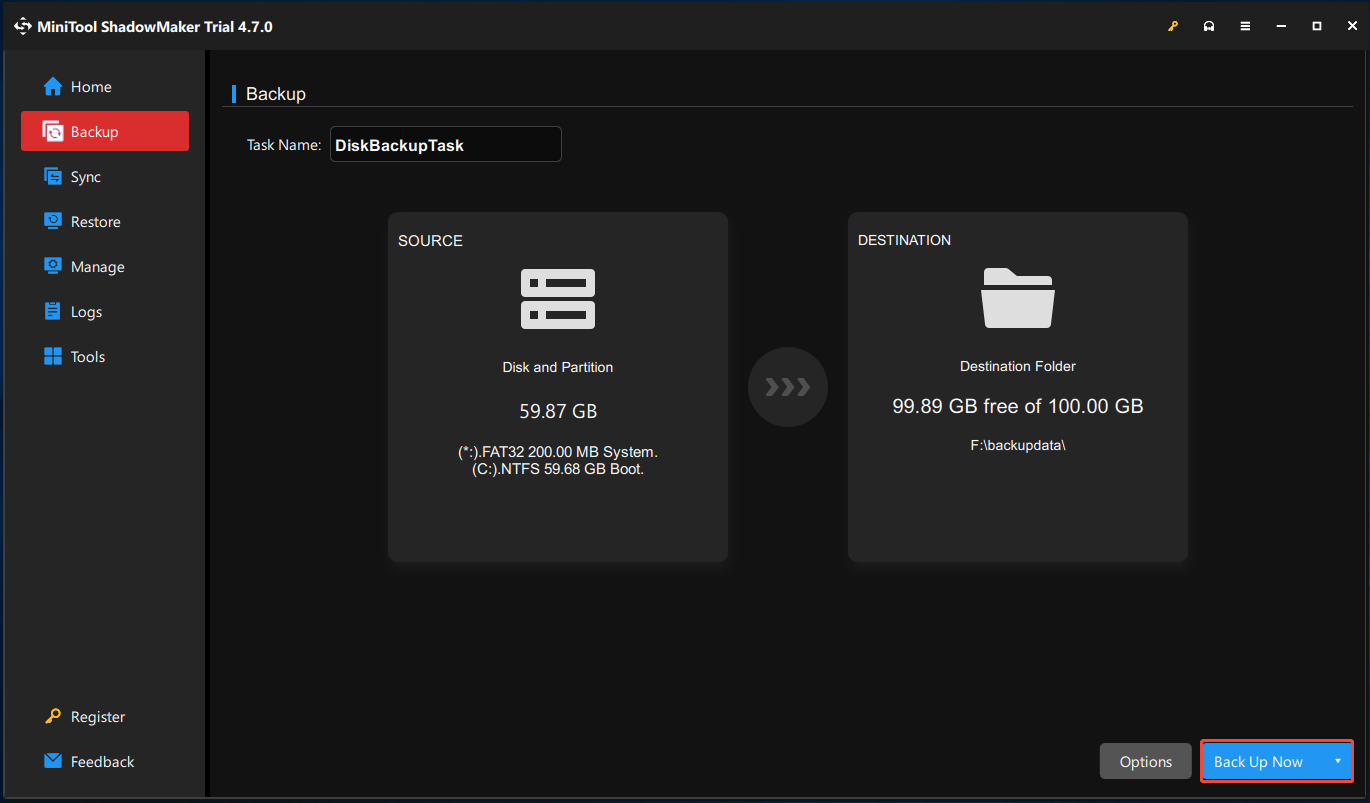
Step 4: After selecting the backup source and destination, you can perform the backup task immediately by clicking the Back Up Now button.
When the backup process is finished, the system image is successfully created.
Part 2: Perform the Restore
Step 1: Prepare a USB drive (at least 8GB) and connect it to the device.
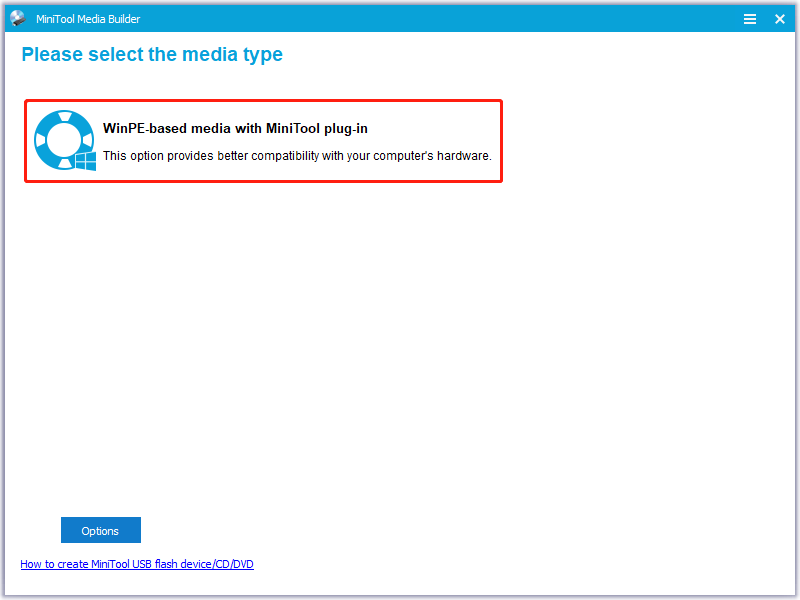
Step 2: Go to Media Builder in the Tools tab and select WinPE-based media with MiniTool plug-in.
Step 3: Choose USB Flash Drive and choose the right one to burn the boot flash drive.
Step 4: Wait for a while and click Finish when the burning succeeds.
Step 5: Then connect the created bootable USB drive to your PC before starting the computer and enter BIOS by pressing dedicated keys.
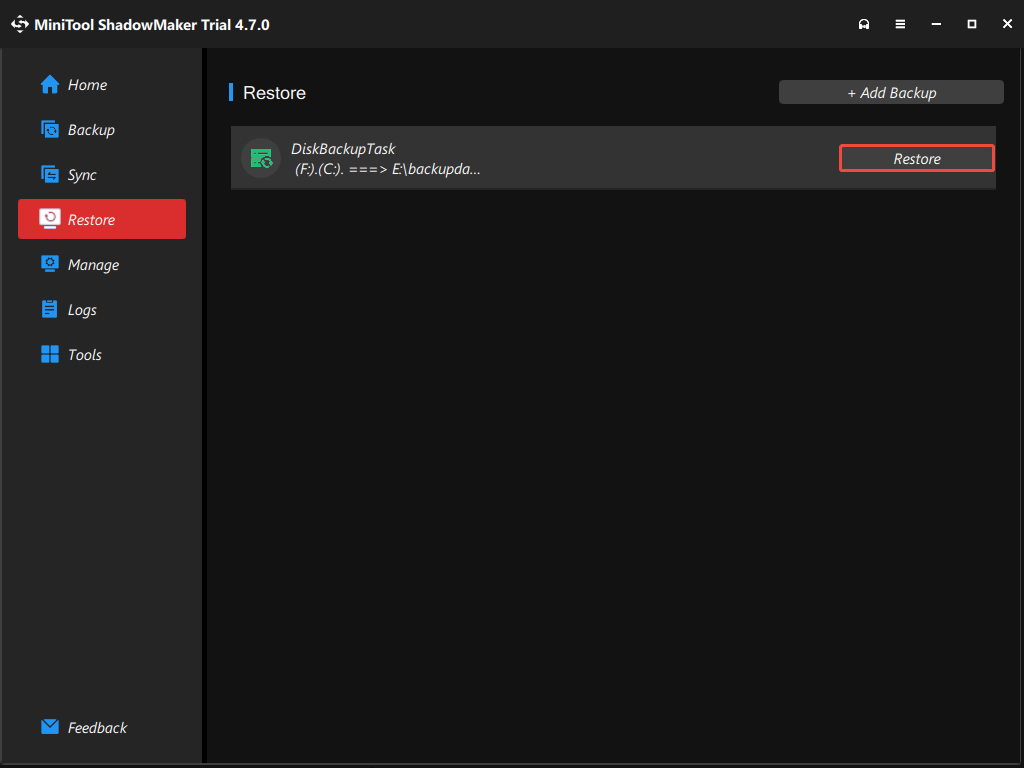
Step 6: MiniTool ShadowMaker will run by itself in WinPE. Go to the Restore page, you can find the system image you have created and click Restore.
Step 7: Then you need to select the backup version and click the Next button to continue.
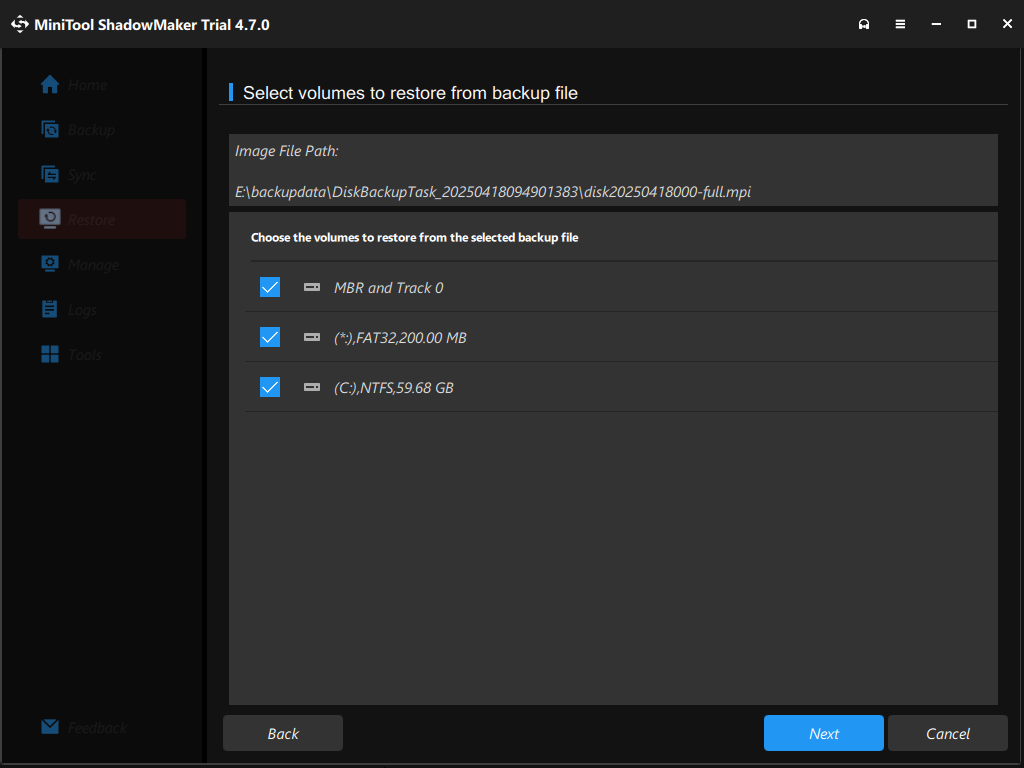
Step 8: Select volumes to restore from the backup file. You need to check all system drives as well as MBR and Track 0.
Step 9: Now, you should choose a target disk that you want to restore the system image to. Choose the hard drive of the target computer as the destination disk.
Step 10: You need to wait patiently for the restoration process to finish.
Bottom Line
After learning some information about system state backup vs bare-metal backup, you may already know which one to choose. If you need any help when using MiniTool software, you may contact us via [email protected].
User Comments :