Why Do Something Before Installing Windows 11
Windows 11, the current latest release of the Microsoft Windows Operating System, brings a fresh design including Start Menu, Settings, Taskbar, etc., and improved features. In system requirements, the hardware is higher. If you are interested in this new OS, you can free upgrade to or install Windows 11.
Compared to Windows 10, it is a massive overhaul. This means that you should get your computer ready before installing Windows 11 to make sure everything goes smoothly.
Since Windows 11 is brand-new and not reliable at present, there is a good chance that you run into update problems. Preparing the system before Windows 11 installation can reduce the possibility of problems. Although errors appear after the installation, you have a way to recover the system quickly.
What to do before installing Windows 11 or upgrading to this OS? Let’s look at multiple tips from the following part.
If you are using Windows 7 or Windows 8 and plan to install Windows 10, you should also do some things before you do, and here is a related post for you - What to Do Before Upgrade to Windows 10? Answer Is Here.
What to Do Before Windows 11 Upgrade/Installation
If you plan to install Windows 11, consider some things before you do including compatibility, security, usability, etc. Follow the guide to know the things you should notice.
Make Sure Windows 11 Is Compatible with PC
For laptops or desktops, updating to Windows 11 from Windows 10 is a complete reinstallation of the operating system. So, you should make sure your computer hardware is compatible with the new system. If the PC cannot meet demands, Windows 11 cannot be installed with an error. Or although it is installed successfully, many update issues always appear.
Microsoft offers higher system requirements of Windows 11 and let’s see the minimum requirements:
- CPU: 1 gigahertz (GHz) or faster with 2 or more cores on a compatible 64-bit processor or System on a Chip (SoC)
- GPU: DirectX 12 compatible graphics / WDDM 2.x
- RAM: 4 GB or higher
- Storage: 64 GB or larger
- TPM: Trusted Platform Module (TPM) version 2.0
- System firmware: UEFI, Secure Boot capable
- Display: greater than 9″ with HD Resolution (720p)
To check your PC’s specifications, press Win + R to open Run, enter msinfo32 and click OK. To check your DirectX version, execute the dxdiag command in Run.
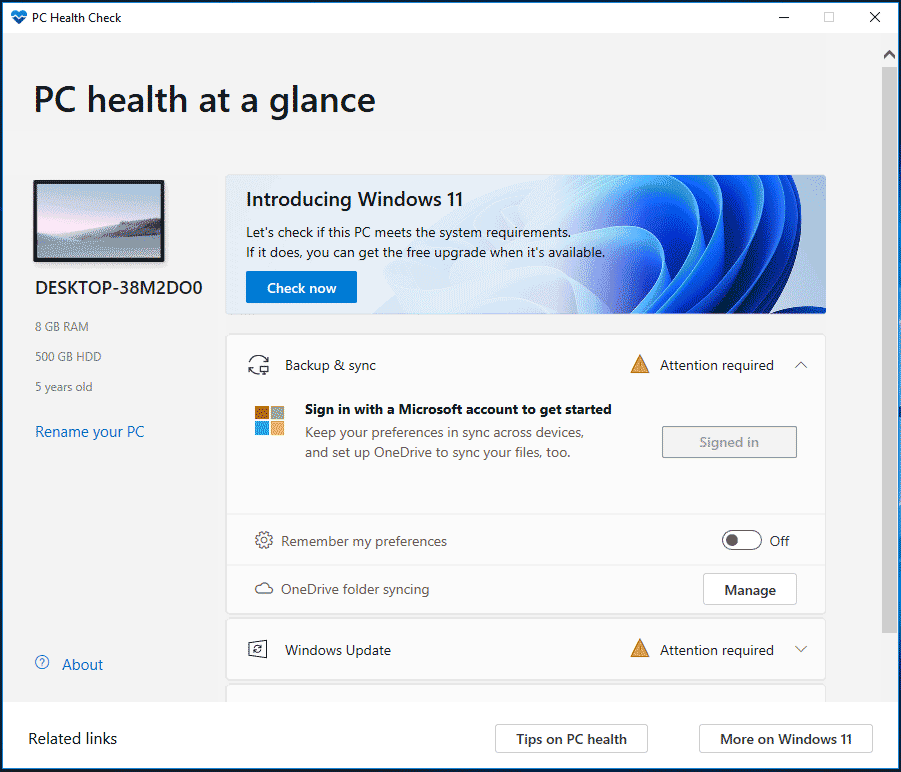
To quickly check the compatibility, you can use a professional tool called PC Health Check. It will tell you whether your PC is compatible or not along with a specific reason. PC Health Check is available to free download for compatibility check and see how to run it.
Microsoft offers an update called KB5005463 that installs this app on Windows 10, version 20H2 and later. If your PC has this pre-installed app, run it.
Step 1: Download PC Health Check via its official website.
Step 2: Open the WindowsPCHealthCheckSetup.msi file with a double-click.
Step 3: Accept the terms in the License Agreement and click Install.
Step 4: Check the box of Open Windows PC Health Check and click Finish.
Step 5: In the main interface, click Check now to start a compatibility check. After a while, this app will tell you if your PC meets Windows 11 system minimums. If not, the related results will be listed.
If your hardware meets demands, continue reading what to do before installing Windows 11.
Enable TPM 2.0
Trusted Platform Module (TPM) version 2.0 is required to provide better security in Windows 11. To upgrade to or install Windows 11, make sure your device has the chip and the feature is enabled.
To check if your computer has a TPM chip, press Win + R, type tpm.msc and click OK. If TPM is ready for use, enable it via the steps below:
Step 1: Open Windows 10 Settings by pressing Win + I.
Step 2: Go to Update & Security > Recovery.
Step 3: In the Advanced startup section and click Restart now.
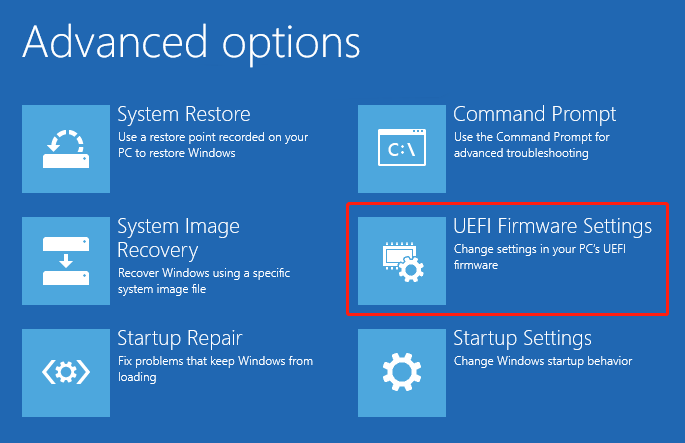
Step 4: Choose Troubleshoot > Advanced options > UEFI Firmware Settings.
Step 5: Click Restart to continue.
Step 6: Click on the advanced, security, or boot settings page depending on your motherboard and choose Trusted Platform Module (TPM), then enable it. Note that the option to enable the TPM chip may be different based on your device and you can visit Microsoft’s official website to know details.
To know more information about TPM check and how to enable TPM, refer to our previous post - How to Check if Your PC Has TPM for Windows 11? How to Enable It.
Enable Secure Boot
Similar to TPM 2.0, Secure Boot is another feature that is required by Windows 11 installation and it makes sure that your computer boots only using trusted software. Most devices having UEFI firmware include Secure Boot.
To enable Secure Boot:
Step 1: Navigate to Settings > Update & Security > Recovery.
Step 2: Click Restart now and go to Troubleshoot > Advanced options > UEFI Firmware Settings > Restart.
Step 3: Click the advanced, security, or boot settings page and locate the Secure Boot option, then enable it.
If your PC uses the legacy BIOS, you need to convert the MBR disk to GPT and switch to UEFI mode to enable Secure Boot. Or else, the machine cannot boot after you enable the new firmware.
Backup Before Upgrading to Windows 11
What to do before installing Windows 11? Another thing is PC backup.
Before proceeding with Windows 11 update or installation, you had better make sure you have created a backup for your important data and create a system image. This is because Windows 11 may contain many bugs and errors that hinder your daily workflow and put you at risk of losing important data.
Once something goes wrong or data is lost, you can use the backup to restore your PC or lost data. A backup is the best precaution and the best recovery strategy.
Well then, how to make a backup before upgrading to Windows 11 or installing this new operating system? In Windows 10, there is a built-in backup tool called Backup and Restore (Windows 7) that enables you to create a system image and back up your files.
In addition, you can use third-party backup software to easily back up your PC and MiniTool ShadowMaker is recommended here. It is more flexible and supports more features compared to Backup and Restore (Windows 7).
File, folder, disk, operating system and partition backup & recovery, disk cloning, and file sync are supported. Scheduled backups and differential & incremental backups can be created via MiniTool ShadowMaker. Importantly, it allows you to create a bootable drive to back up your PC or run recovery in case of system crashes. Just get this free backup software on your Windows 10 computer for backup before upgrading to Windows 11.
MiniTool ShadowMaker TrialClick to Download100%Clean & Safe
Step 1: After installing MiniTool ShadowMaker, open it and click Keep Trial to enter its main interface.
Step 2: To create a system image, go to Backup and you can find system partitions for Windows to boot are selected as the backup source and a storage path is also selected. You can directly click Backup Up Now to execute the system backup.
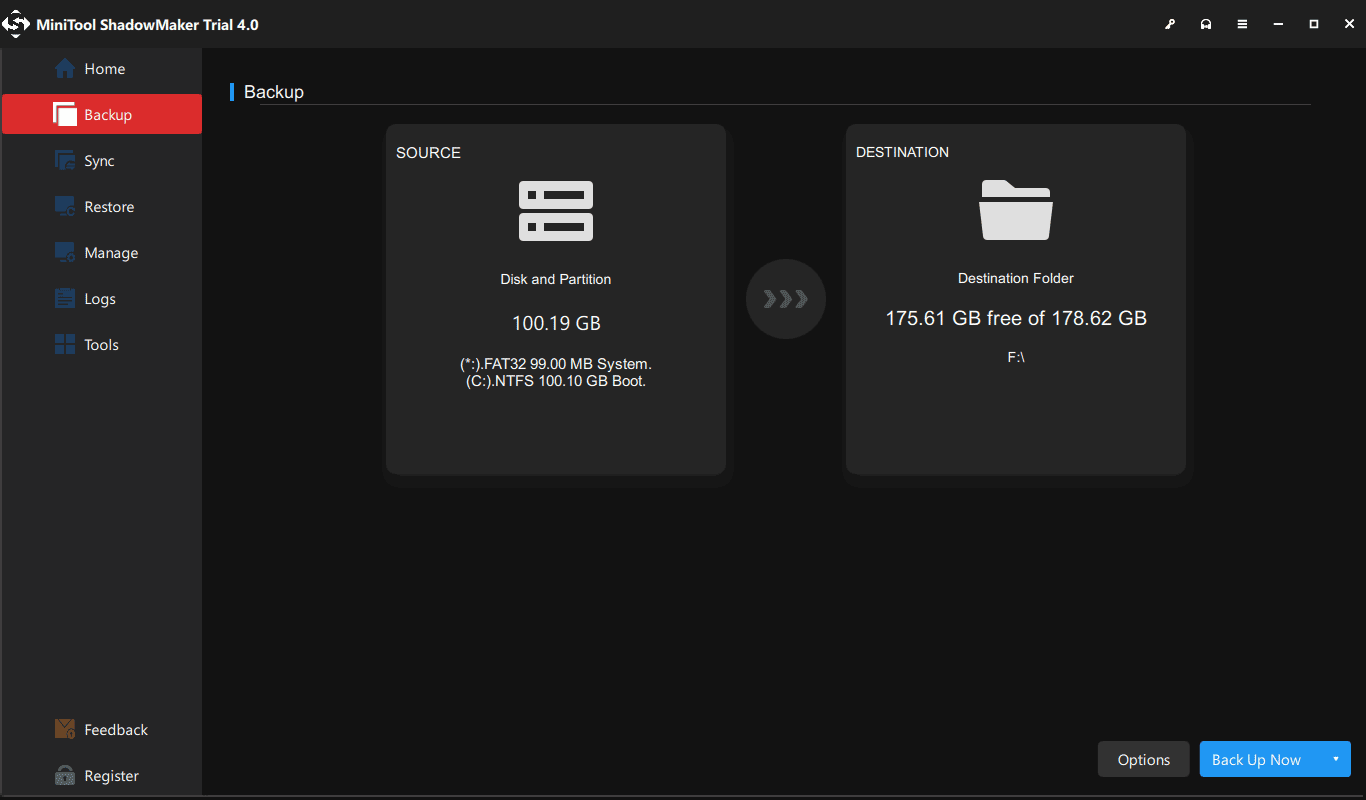
You had better choose another destination and back up Windows to an external hard drive or a big USB flash drive. To back up data, click SOURCE > Folders and Files, check the items that you need and click OK. Next, start the backup task.
After backup, go to Tools and click Media Builder to create a bootable USB flash drive or external hard drive for recovery in case of system breakdown.
Clear up Disk Space
According to Microsoft, Windows 11 requires at least 64GB storage space for upgrade and you need to make space for the new OS. Otherwise, insufficient disk space can lead to a failed installation.
To free up some disk space, you can run Disk Cleanup to delete some temporary files and non-essential files. Or use the Storage feature in Windows 10 to remove temporary files. In addition, there are some other ways to help clear up disk space, and just go to this related post – 10 Ways to Free up Disk Space in Windows 10/11.
To get more disk space, you can choose to use a big hard drive. Just prepare a large SSD/HDD, use MiniTool ShadowMaker to clone the system disk to the new disk, and then boot the PC from the new one. Follow the guide for this task - How to Clone a Hard Drive to SSD in Windows 11/10/8/7.
Uninstall Conflicting and Non-Essential Apps
There is a chance that some third-party apps can interfere with the installation process of Windows 11 due to a conflict and cause many errors. Especially when you have antivirus software on your PC, this case often appears. Similarly, some non-essential or poorly designed apps can lead to issues that prevent the Windows 11 update/installation.
Thus, go to uninstall these problematic programs:
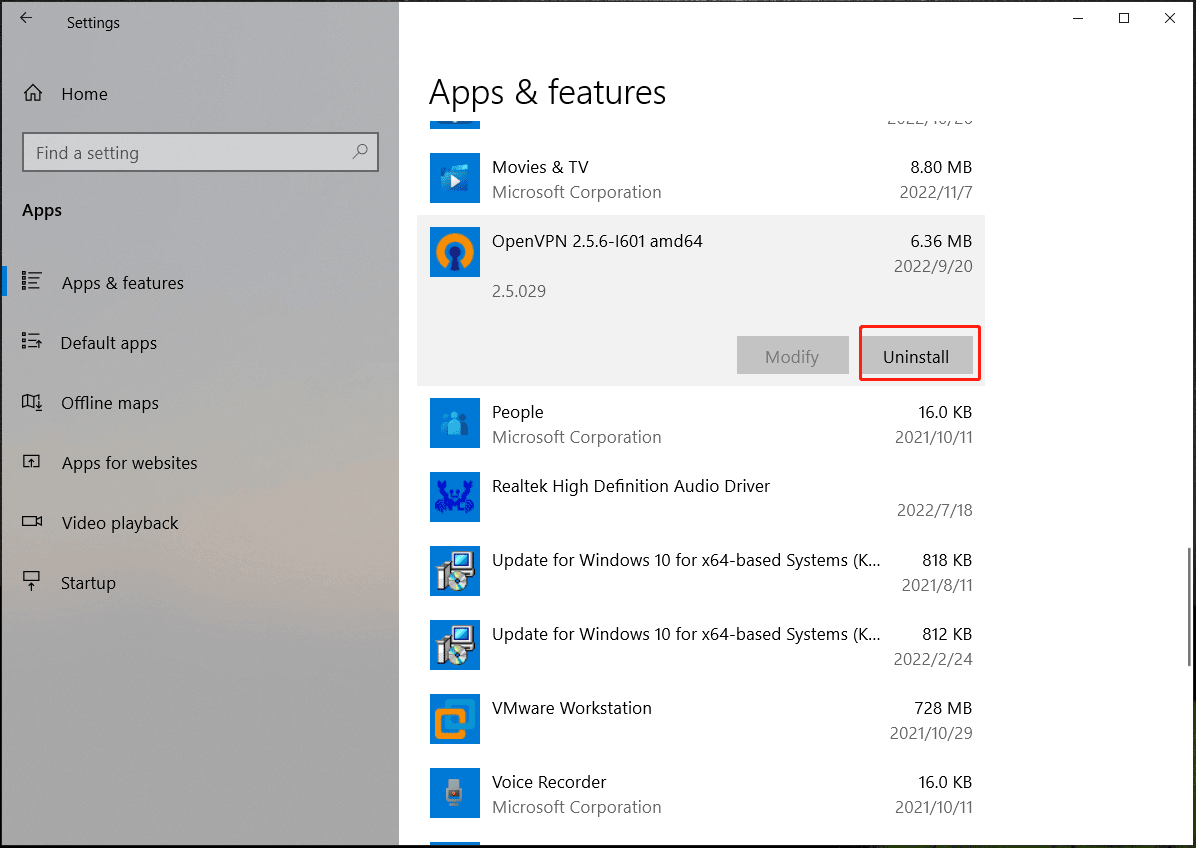
Step 1: Open Settings in Windows 10.
Step 2: Click Apps > Apps & features.
Step 3: Choose the app you want to uninstall and click Uninstall.
Remember Your Microsoft Account
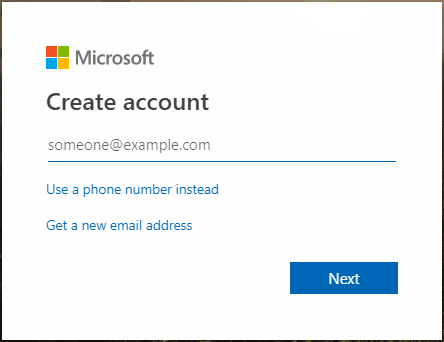
In addition to the above things, what to do before installing Windows 11? Another one is the Microsoft account. Windows 11 update requires you to log in to your Microsoft account which may be created when you set up your Windows 10. Make sure you still remember the username and password. If you forget the login information, reset it. Or if you don’t have such one, create an account via the official website.
Check and Repair System Errors
In some cases, damaged system files may cause some errors and block you from upgrading to the latest version of Windows 11. Thus, before the in-place upgrade, you can use System File Checker (SFC) and Deployment Imaging and Servicing Management (DISM) to check the entire operating system for corrupt system files and repair them.
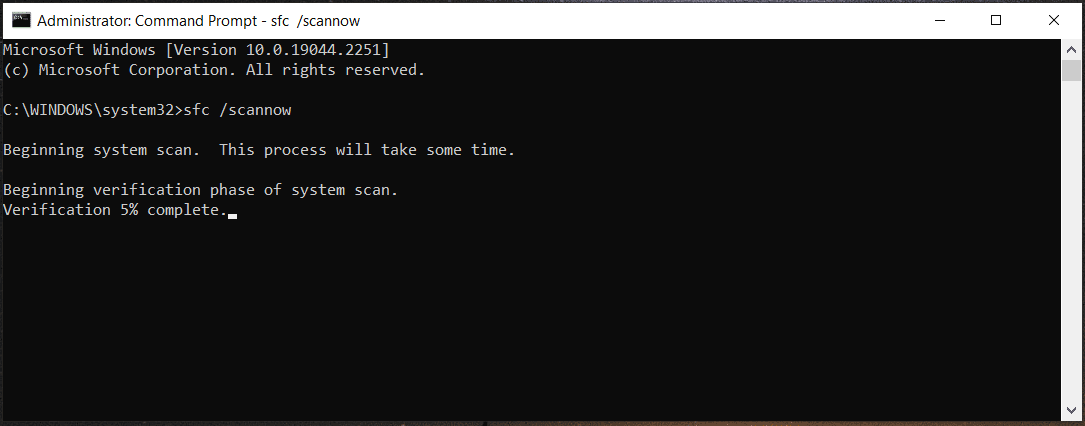
Step 1: Run Command Prompt as administrator by typing cmd into the search box and right-clicking on it to choose the option.
Step 2: Type sfc /scannow and press Enter.
Make Sure Internet Connection Is Stable
The main reason for a failed Windows 11 upgrade is an unstable Internet connection. Since Windows 11 is a software update from Microsoft’s servers, make sure the network is connected and reliable. Avoid using hotspots and public connections.
Disconnect Non-Essential Peripherals
During the upgrade process, hardware conflicts may happen and stop from installing Windows 11. Thus, you had better disconnect the non-essential peripherals including printers, scanners, USB drives, external drives, etc. Besides, Bluetooth devices may also cause errors and you should also disconnect the connection.
Also, make sure your laptop is charged before installing Windows 11 or the upgrade.
Bottom Line
What to do before installing Windows 11 or what to do before Windows 11 upgrade? After reading this post, you know much information. Before you do, it is necessary to check the compatibility issue, enable TPM 2.0 & Secure Boot, free up space, etc. Besides, backup before upgrading to Windows 11 is quite important to avoid system issues or data loss.
If you find other useful things to do before installing Windows 11/update, leave your idea in the comment section.
About The Author

Position: Columnist
Vera has been working at the MiniTool Team for over 10 years as a technical editor and content writer. She mainly focuses on disk and partition management, data recovery, Windows backup and restore, and PC troubleshooting. Through in-depth software testing and hands-on experience, she has helped users solve a wide range of computer problems and better protect their data on Windows devices.
User Comments :