File sync is a good way to protect your data and the Windows inbuilt sync program – Sync Center comes in handy. However, it is inevitable that there will be kinds of Windows 10 Sync Center problems. In this guide, MiniTool summarizes several common issues and corresponding solutions for you.
Overview of Sync Center on Windows 10
Sync Center is a feature introduced in Windows Vista and supports all modern versions of Windows. It is mainly used to synchronize network files and folders between the local computer and network servers and ensures that you can still access these files offline on your computer when the server is running slowly, disconnected, or unavailable. In other words, you can check all data created offline at any time.
This function also enables you to keep information accessible when syncing your system and files within network servers or cloud drives. When your server or PC is not connected to the network, you can obtain these files, so they are also called offline files.
However, it does not allow you to synchronize information between your PC and other supported devices. By default, if the computer is not connected to a network drive, the online network folder is empty.
To be frank, it’s hard to avoid experiencing various issues when working with a Windows PC. In this guide, we are going to introduce several common problems in Sync Center and help you get rid of them.
Related article: How to Enable/Disable/Configure Offline Files Windows 10/11?
How to Fix Windows 10 Sync Center Problems
Case 1. Work Offline or Work Online Option Disappear
After switching between online and offline modes, the Work Offline or Work Online option in Windows Explorer might disappear, and the Client Side Cache (CSC) will remain in offline mode until the computer restarts next time.
You might have noticed that Windows 10 usually changes to offline mode. Also, Windows 10 will not turn back to online mode automatically after the network becomes available.
Cause: This potential problem is caused by the way Windows Vista and Windows 10 handle remote file operations.
Solution: To solve this issue with offline file synchronization, you should make sure that all parts of a UNC path, share level (SMB) permissions, and NTFS permissions for the folder and subfolders are accessible and enabled.
Case 2. Offline Files Access Is Denied
One of the Windows 10 Sync Center problems is receiving offline file access denied prompts. Although Offline Files allows you to access the files you created even though there is a connectivity problem on your computer, you might be prompted by the following messages when trying to open them.
# Offline file access denied contact your administrator.
# Folder redirection offline files – access denied.
# Offline files cannot synchronize access is denied.
# Sync failed access denied.
# Offline files cannot be disabled access is denied.
Cause: Windows 10 offline files not syncing can arise from file encryption, permissions issues, and so forth.
Solution 1. Grant the Permissions
When setting up file synchronization, the offline folder will check the user’s permissions on the root share. Therefore, if you place the user’s subfolder under a root share folder and set \\server_name\root_folder\user_name as the mapped drive path, you are very likely to receive a prompt saying offline file access is denied.
In this way, you need to check your syncing settings, grant the permissions, and try entering your offline files again.
Solution 2. Unencrypt Offline Files
If file encryption is enabled, you are also not permitted to access offline files. It’s noted that offline file encryption will enable automatically when your device connects to a new network. Follow the steps to unencrypt the offline files:
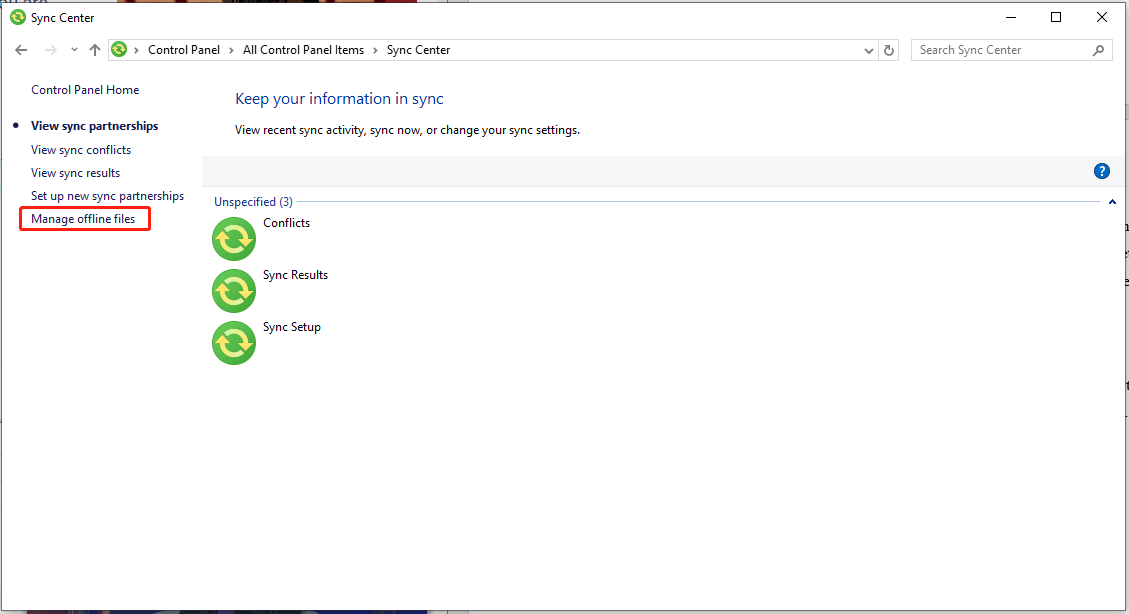
Step 1. Press Win + S to evoke Windows Search and type Control Panel to launch it.
Step 2. In Control Panel, navigate to Sync Center and select it.
Step 3. In the Sync Center interface, click on Manage offline files > go to the Encryption tab > hit Unencrypt.
Solutionn 3. Reset Offline File Caches
Another solution to fix Sync Center problems in Windows 10 is to reset offline file caches. To do that:
Step 1. Press Win + R to bring up the Run dialog.
Step 2. Type regedit and click on OK to launch Registry Editor.
Step 3. Navigate to the following path: HKEY_LOCAL_MACHINE\SYSTEM\CurrentControlSet\Services\Csc\Parameters
Step 4. Right-click on Parameters on the left pane > select New > right-click on DWORD (32-bit) Value > rename it as FormatDatabase.
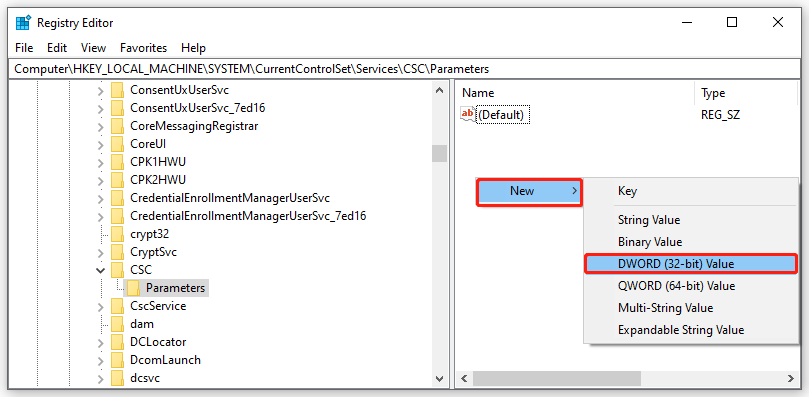
Step 5. Then right-click on FormatDatabase > select Modify from the context menu > set the value data to 1 and hit OK.
When making all changes, restart your computer to make them take effect.
Case 3. Offline Files Showing Disconnected
There is a phenomenon that is Offline Files showing disconnected. One possible reason for the emergence of this problem might be the network connection issue, you could try to turn off the auto disconnect feature on the client. Here’s how to disable it:
Step 1. Type Command Prompt in the search bar and hit Enter to open it.
Step 2. Copy & paste net config server /autodisconnect:-1 in the command window and press Enter.
Another possible factor could be slow link detection. It can be modified via GPO. The client runs more sort of tests to determine the quality of the link to the server hosting the share. If it determines that its running speed is slow, it will set Offline Files to offline mode and only display the contents cached through OFC.
You can usually get it back online by opening File Explorer and expanding the Easy access menu.
Related article: How to Transfer Files from PC to PC Without Internet on Windows?
Case 4. Always Available Offline Files Is Greyed Out
When you see Offline Files are enabled but not yet active, you can try to restart this computer to activate Offline Files and check if the tool returns to normal. If not, go on with the next operation:
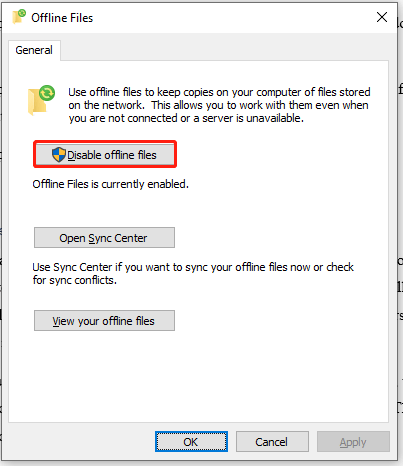
Step1. Go to Control Panel and open Sync Center.
Step 2. In Sync Center, click on Manage offline files > Disable offline files > tap on OK. It will tell you Offline Files is disabled but active and ask you to restart your PC to deactivate it.
Step 3. Next up, go to the CSC folder (C:/Windows/CSC, also called Windows offline files location) and delete all the files in it.
Step 4. Then return to the Offline Files window, click on Enable offline files and reboot your computer.
Case 5. Sync Center Conflicts
What are Microsoft Sync Center conflicts? If only you enable Sync Center, its icon will show up in the system tray. When there are some sync conflicts, you can see a yellow triangle with an exclamation in front of the Sync Center icon. Typically, a sync conflict refers to a modified Team Share file not syncing as expected to the server.
There are 2 types of file sync conflicts when working in Team Share:
# Collision – When one file is modified in two different locations at the same time, collision will occur. Only one of the versions can sync to the server, and the other will be marked as a collision.
# Locked file version – This sync conflict will happen when a user attempts to modify a file that has been previously locked by another user.
Solution 1. Through Control Panel
Step 1. Type Control Panel in the search box and hit Enter to open it.
Step 2. Click on the down icon beside View by and choose Large icons from the dropdown menu.
Step 3. Find and access Sync Center by clicking it.
Step 4. Select View sync conflicts from the left side menu.
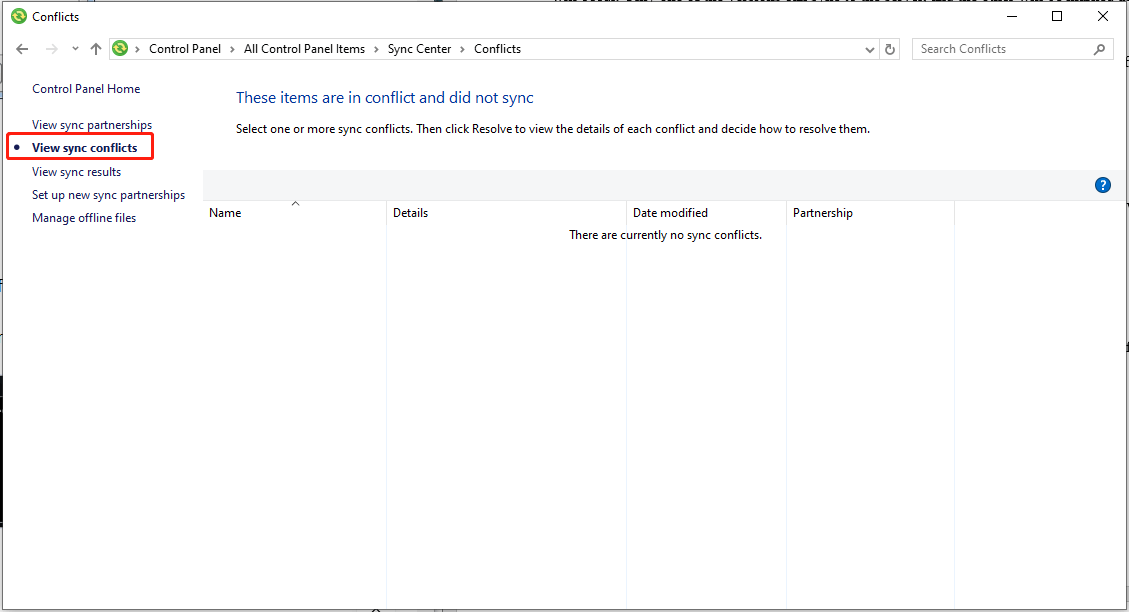
Step 5. Click on the conflicts from the list > tap on Resolve > check the details of each conflict and decide how to fix them.
Solution 2. Delete the Conflicted Files
Step 1. Press Win + E to fire up File Explorer and then open the Sync folder.
Step 2. Type -conflict in the top address bar and hit Enter to locate the conflicted files.
Step 3. Click on the Home tab > hit Select all on the far right > right-click on the selected files > choose Delete in the context menu.
Case 6. Cannot Open Files Offline
In the following scenarios, attempting to open a file while working offline will fail. And the error message displayed will vary depending on the application.
# Special folders are redirected to a file share.
# User data in the redirected folders is cached locally through the offline files feature.
# You’re using an application that’s managed by Windows Information Protection.
For example, Word and Excel fail with the error: Sorry, we couldn’t open ‘\\severname\fileshare\filename’.
Cause: This Sync Center not working issue occurs because the Offline Files feature doesn’t support Windows Information Protection.
Solution: To work around this issue, try to open the file by using an application that’s not managed by Windows Information Protection.
Best Alternative: MiniTool ShadowMaker
Some of you may perceive that Sync Center is less user-friendly and time-consuming. Besides, to prevent kinds of Windows 10 Sync Center problems, there is another excellent alternative – MiniTool ShadowMaker. It is a piece of PC backup software that allows you to sync your folders and files on Windows PCs.
This freeware also boasts many powerful features such as file backup, partition backup, system backup, disk backup, and disk clone. No matter you want to protect your data or move Windows to another drive, this program can satisfy all your needs.
With it, you can create a scheduled sync, saving your time to sync the files manually. Beyond that, you can also exclude some unnecessary files to make the sync process faster.
Let me introduce how to set an automatic file sync with MiniTool ShadowMaker for you.
Step 1. Click on the button below to download and install this 30-day free trial.
MiniTool ShadowMaker TrialClick to Download100%Clean & Safe
Step 2. Click on Keep Trial to enter its main interface.
Step 3. Go to the Sync page and click on SOURCE to select the files you need to sync. Then, head to DESTINATION to choose a storage path for the sync task.
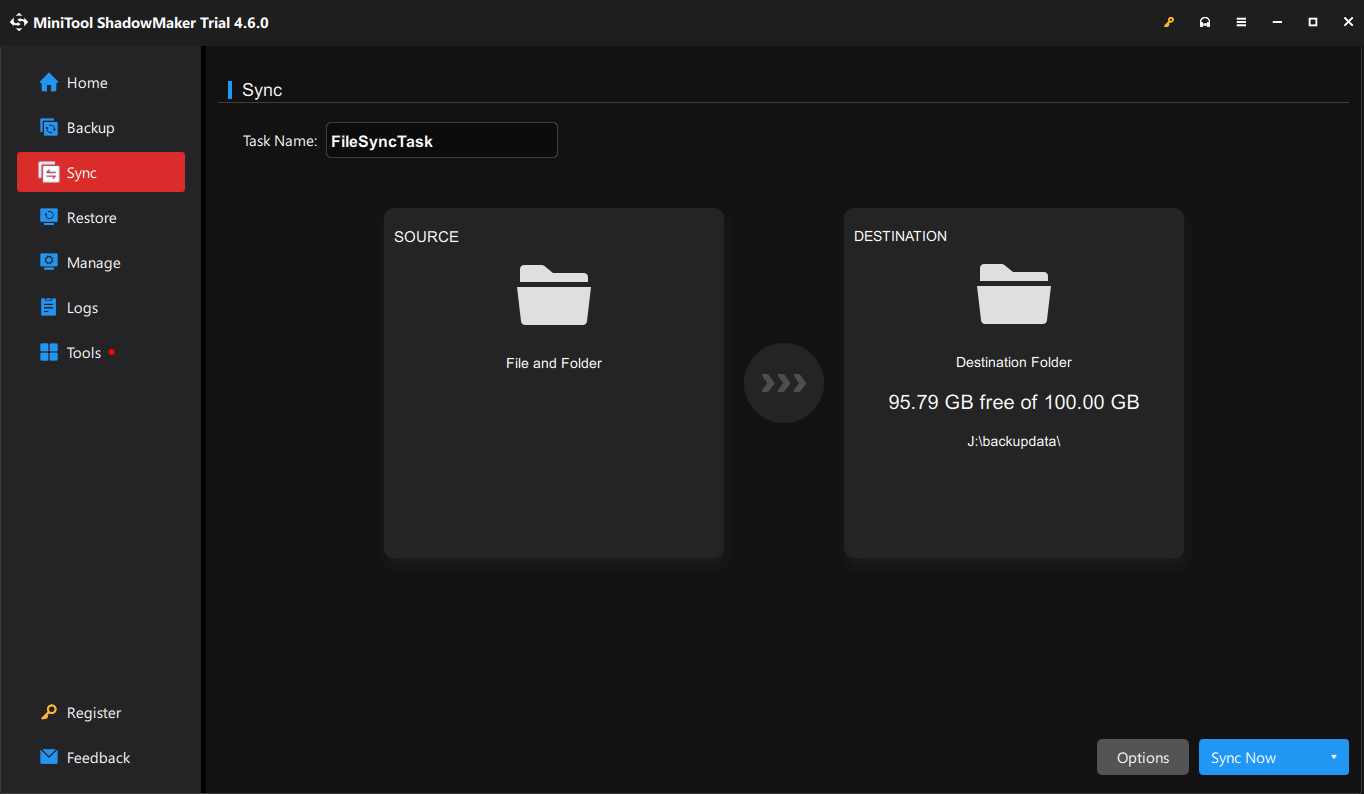
Step 4. Go to Options in the lower right corner > toggle on Schedule Settings > set up the sync interval > hit OK.
Step 5. Tap on Sync Now to start the process at once or select Sync Later to delay the sync task.
However, MiniTool ShadowMaker also has some limitations. For instance, it only supports one-way sync and cloud sync is not supported.
Other Useful Services in MiniTool ShadowMaker:
- Back up folders, files, systems, partitions, and disks.
- Remote computer backup.
- Encrypt backup image.
- Customize different backup types.
- Set image compression levels to manage disk space.
- Restore backups to original or other devices.
- Create a bootable USB flash drive, USB hard drive, CD, DVD, or ISO file.
- Clone disks.
Wrapping Things Up
In this guide, we collect a series of common Windows 10 Sync Center problems and targeted workarounds for them respectively. Beyond that, it’s highly recommended you try a Sync Center alternative – MiniTool ShdowMaker, which can set you free from various sync or backup issues interrupting your workflow. Appreciate your support.
Do you have any worries or problems related to MiniTool ShdowMaker? If yes, please don’t hesitate to contact our support team via [email protected].
User Comments :