Windows Server Backup is a free feature that allows you to perform basic backup and recovery tasks for servers. Do you know how to make full use of this feature? Is there any alternative to it? Refer to this guide from MiniTool and then you will have the answer.
Why Do You Need a Windows Backup Server?
Windows Server Backup is an inbuilt feature in Windows Server that you can use to protect your data. You might store crucial data or system settings on your Windows Server. However, no one can guarantee that the data on your computer will be intact forever. Moreover, data loss might occur at any time and from any place.
Typical factors that might trigger unexpected data loss include:
- System Crashes
- Hard Drive Failures
- Power Outage
- Virus Infection
- Accidental Human Deletion
If you’ve ever experienced data loss, you might know the importance of Windows Server Backup: it can prevent that from happening. With the backup, you can easily retrieve lost files, folders, or even save an unbootable device without much time and cost.
What is Windows Server Backup? How to properly perform server backup with it? In the following paragraphs, we will show you how to back up your Windows Server with Windows Server Backup.
Overview of Windows Server Backup
Windows Server Backup is a free and installable feature that can back up data for the Windows Server operating system. To protect the Server’s data, understanding how to use such backup software is of vital importance.
Windows Server Backup comes with multiple tools and features to ensure your Server backups are performed correctly and are customizable. Here are the core functions of Windows Server Backup:
- Backup Type – Windows Server Backup supports full server backup and incremental backup. It can back up a wide range of data, including the operating system, system state, applications, and data. Or, it also allows you to back up only changes since the last backup are saved after the first backup, reducing backup time and storage use.
- Custom Backup – It supports custom backup sources, which means you can select the specific files, folders, or other data for the backup as per your actual needs.
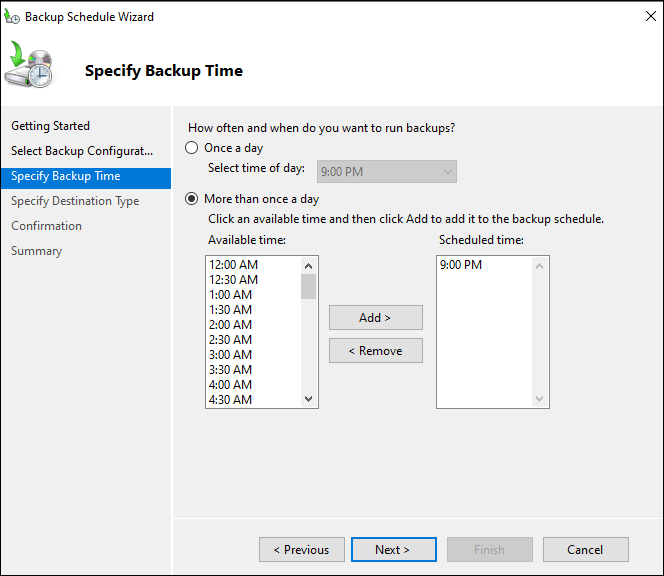
- Scheduled Backup – This service enables you to decide how often and when to perform the backup tasks, but the scheduling feature is limited.
- Item-level Recovery – You can restore individual files, folders, or applications without conducting a system restore.
- Bare Metal Recovery – This tool can create a backup of your entire Server, ensuring that all the data on the Server is covered. In the event of hardware failures, system crashes or other catastrophic events, the backups can be used for bare metal recovery.
- Local or Remote Backups – Windows Server Backup supports backing up to not only local drive but also a remote shared folder.
- Virtual Machines – Windows Server Backup can be used within a virtual machine environment in the same manner that it is used on a physical server to provide backup and recovery services.
By now, you should have a rough understanding of Windows Server Backup. Next comes the part that you are most concerned about – how to use it. In the following section, we will show you how to set up and use Windows Server Backup.
How to Work with Windows Server Backup?
Move 1: Install Windows Server Backup on Your Windows Server
Windows Server Backup is not installed by default in Windows Server. You have to add it as a feature before using it. The installation is a straightforward process. Follow the steps to install this backup software:
Step 1. Launch Server Manager and click on Manage at the top right screen.
Step 2. Select Add Roles and Features from the context menu and hit Next after reading the introduction.
Step 3. Then click Next three times for Installation Type, Server Selection, and Server Roles respectively.
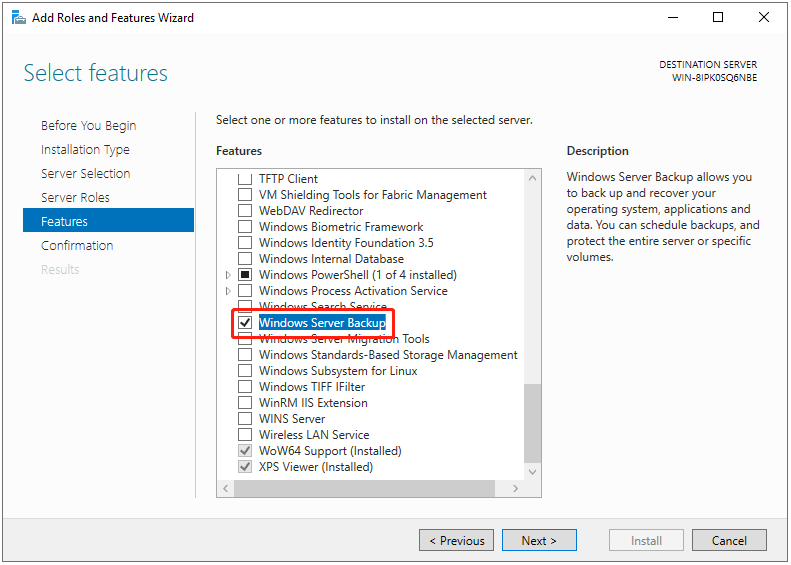
Step 4. In the Features tab, scroll down to find the Windows Server Backup feature > check the box beside it > click on Next to continue.
Step 5. On the Confirmation section, tick Restart the destination server automatically if required > tap on Install to execute the installation.
Wait for the installation to complete. Once done, head over to Move 2 to see how to back up Server with the Windows Server Backup service.
Move 2: Perform Server Backup with Windows Server Backup
Now, it’s time to run a manual backup using Windows Server Backup. Check the following stepwise guide:
Step 1. Open your Windows Server Backup software and click the Local Backup option from the left side.
Step 2. Choose Backup Once at the far right of the page.
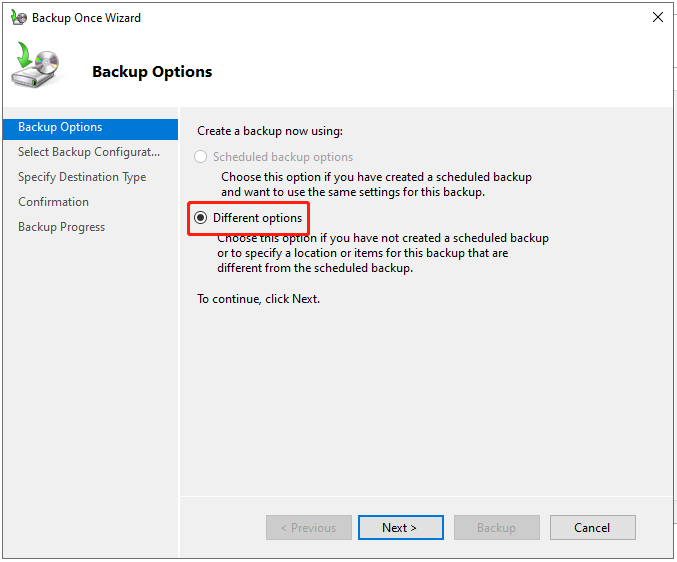
Step 3. In Backup Once Wizard, select Different options under Backup Options and hit Next.
Step 4. Under Select Backup Configuration, choose Full server (recommended) or Custom. For this demonstration, we pick Custom and then click on Next.
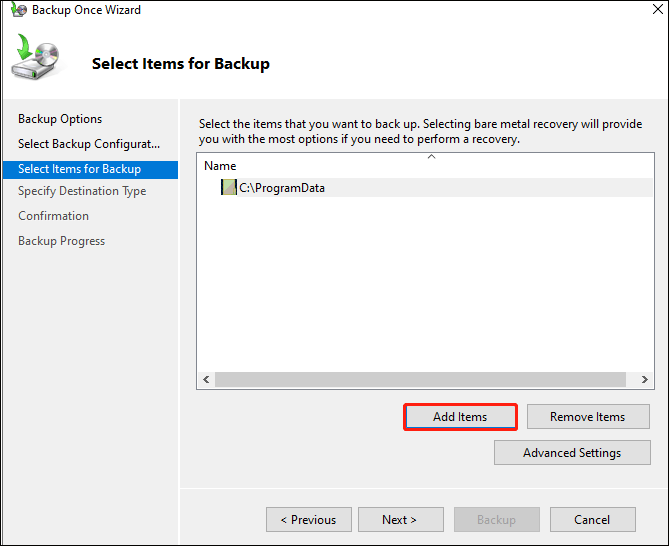
Step 5. In Select Items for Backup, click on Add Items and choose the content you want to back up.
Step 6. Then specify where you want to store the backups in Specify Destination Type and Select Backup Destination, and then hit Next to continue.
Step 7. Review the backup settings and then hit Backup to perform a Windows Server backup.
When the process is finished, you have successfully backed up your Windows Server.

Move 3: Restore from Server Backups
After backing up, you should also learn how to restore the Server backups. It is an essential step where your backups come into play. Understanding the restoration process enables you to take measures immediately when problems like fatal system errors, ransomware attacks, or hardware failures occur.
Let’s see how to restore your backups with Windows Server Backup:
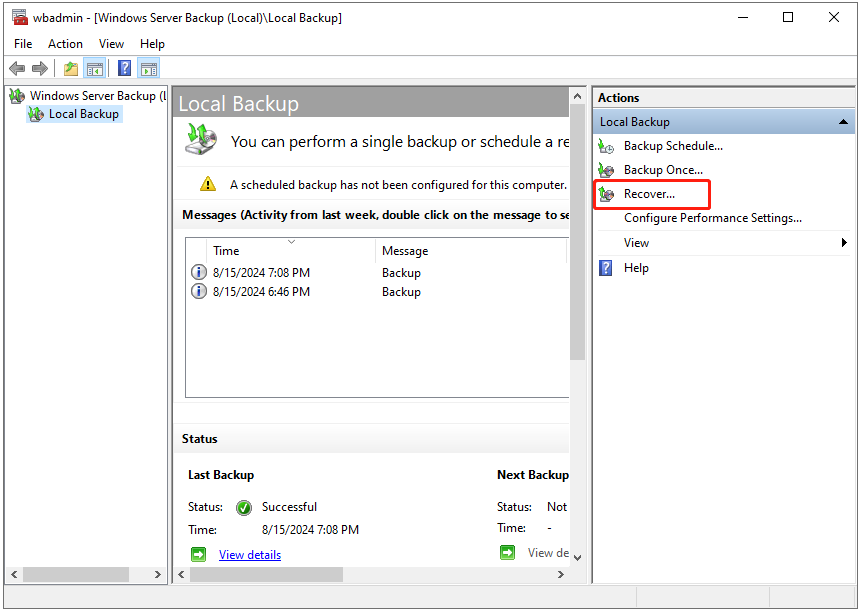
Step 1. Fire up Windows Server Backup and go to Local Backup > Recover to open the Recovery Wizard.
Step 2. Configure details for the recovery.
- Getting Started – choose the source backup location that you want to use for the recovery and click Next.
- Specify Location Type – select Local drives or Remote shared folder and hit Next.
- Select Backup Date – select the date and time of the required backup and hit Next.
- Select Recovery Type – choose Files and folders (as an example) and click Next.
- Select Items to Recover – browse to find the files or folders that you want to recover and hit Next.
- Specify Recovery Options – choose the destination location and click Next.
Step 3. In the Confirmation page, see all the settings and then tap on Recover.
When this process is finished, you have successfully restored the files and folders.
Further Reading: Windows Server Backup Alternative – MiniTool ShadowMaker
Here is a video guide:
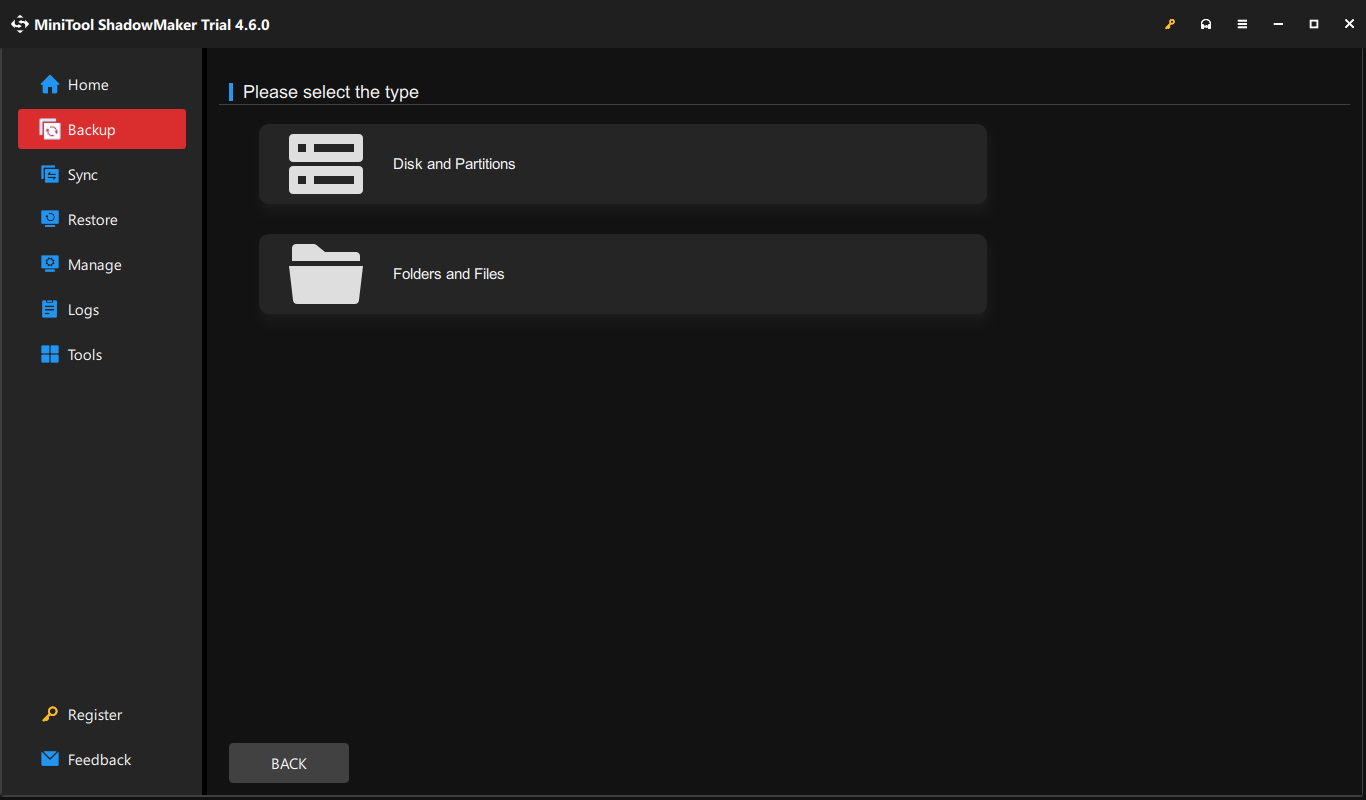
Apart from Windows Server Backup software, we also would like to introduce to you its best alternative – MiniTool ShadowMaker. Available in Windows 11/10/8.1/8/7 and Windows Server OS, this is a piece of Server backup software that supports backing up various items on your computer including personal files, the operating system, selected partitions, or even the whole disk.
This software offers a 30-day free trial and paid versions. Moreover, it is lightweight and user-friendly. Even if you are not computer literate, you can master this program and back up data with ease.
Here’s how to back up data on Windows Server with it:
Step 1. Download and install MiniTool ShadowMaker Trial Edition. After installation, launch this freeware to enter its main interface.
MiniTool ShadowMaker TrialClick to Download100%Clean & Safe
Step 2. Go to the Backup page. As you can see, the system-related partitions are selected as the default backup source, so you only need to select a storage path for the backup image in DESTINATION.
Also, you can alter the default backup source in the SOURCE section if you want to back up other items like files, folders, partitions, or the whole disk.
Step 3. Click on Back Up Now to start the process at once.
Recover Server Backup
How can you bring your backed-up items back to life? Here goes:
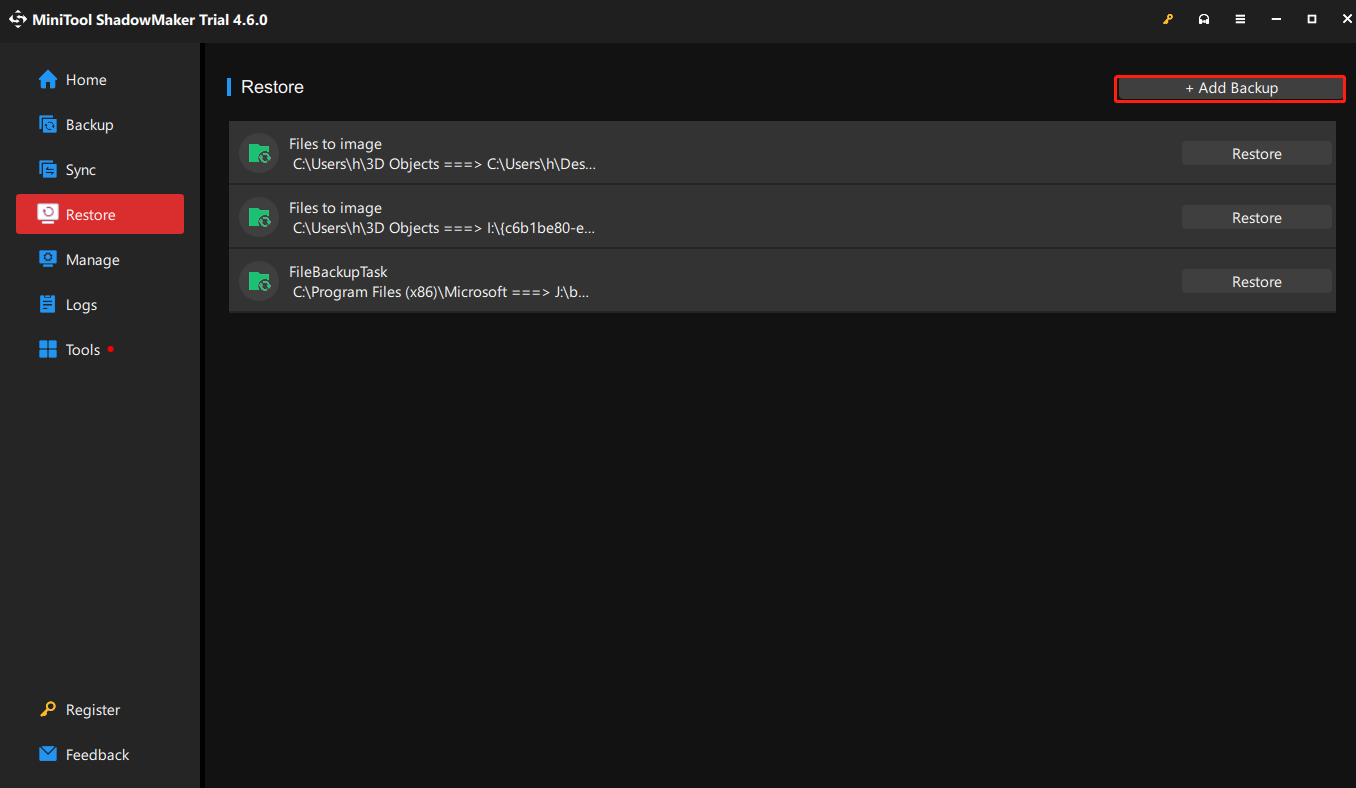
Step 1. In MiniTool ShadowMaker, go to the Restore tab.
Step 2. Look for the image of your backups and then click on Restore next to it. If there is no backup task, click on Add Backup to browse and add it to the list.
Step 3. In the pop-up window, select the file restore version and click Next.
Step 4. Then choose the files/folders to restore and click Next.
Step 5. Hit Browse to pick a destination location to save the restored files > click Start to initiate the operation.
Windows Server Backup vs MiniTool ShadowMaker
Windows Server Backup and MiniTool ShadowMaker are both backup software. You may wonder what the differences between the two of them are. Here we make a comparison of their key aspects:
| Windows Server Backup | MiniTool ShadowMaker | |
| Price | Built-in and free | Free with limited features; Paid version for more advanced features |
| Ease of use | Basic GUI | Easy and user-friendly interface |
| Backup source | Files & folder; Full server; System state; Bare metal backup | Files & folder; Partitions; System; disks |
| Backup destinations | Local drive; Remote shared folders | Local drive; External hard drive; USB flash drive; NAS |
| Supported OS | Windows Server OS only | Windows 11/10/8.1/8/7 Windows Server 2008/2012/2016/2019/2022/2025 |
| Scheduling | Limited | Flexible |
| Encryption | Not support | Support |
Wrapping Things Up
This guide elaborates on what Windows Server Backup is and how to perform Server backup with it. In addition, we introduce a powerful PC backup software for you – MiniTool ShadowMaker. Which one do you prefer? Personally speaking, the last option is more favored because it offers greater flexibility, a more customizable backup solution, more robust features, and better disaster recovery capability.
MiniTool ShadowMaker TrialClick to Download100%Clean & Safe
If you have any problem about our MiniTool backup software, please don’t hesitate to share your ideas with us via [email protected]. We are looking forward to receiving your feedback! Appreciate your time and support!
Windows Server Backup FAQ
2. Choose Backup Once at the far right of the page.
3. In Backup Once Wizard, select Different options under Backup Options and hit Next.
4. In the Select Backup Configuration page, choose Full server (recommended) and then click on Next.
5. Specify where you want to store the backups and then hit Next to continue.
6. Check the backup settings and click Backup to start a Windows Server backup.
2. Type wbadmin.msc and hit Enter.
Then you will access Windows Server Backup.
User Comments :