Although computer technology is getting more and more sophisticated, files suddenly disappeared from a PC is still a common problem. This problem can be caused by various reasons. Sometimes files are hidden or moved, while sometimes they are lost actually. To help you resolve this problem, this post on MiniTool provides solutions and explains the main causes of this problem for you.
Are you encountering the same situation where files suddenly disappeared from the PC as the user below:
“There’s this single folder where I keep about 130 GB worth of VERY important things. Work, hobbies, personal projects. This very morning, I saved a text in there. Then, after work, I came home, and it just disappeared, the whole thing! What do I do? Can anyone help me? I cannot afford to lose this stuff.”reddit.com
In fact, files missing from PC can happen in two situations:
- The files still exist, but have been hidden or are in a different location. In this case, you may not see your files that have been hidden or in the original storage location.
- The files are actually lost or deleted. Under this circumstance, a professional data recovery tool or local/cloud backups may be what you need.
Why does this happen? Continue reading.
Why Did Files Suddenly Disappear From Windows 10/11 PC
In addition to hidden files or folders, they may disappear for several other reasons. The most common causes are listed below.
1. Accidental deletion.
You might have unintentionally deleted a file. Files deleted by Shift + Delete will be permanently removed without being sent to the Recycle Bin.
2. Files could be saved or moved to an incorrect location.
You might overlook the file path when saving files, accidentally placing them in the system’s default folder, or dragging them into unrelated directories.
3. Files may disappear due to changes in account or sync settings.
If you logged into a different Windows account, the Users folder and cloud syncing (like OneDrive) have been changed, causing local files to disappear.
4. Windows update.
A Windows reinstallation or update might relocate data into an “Old User” directory.

5. System or disk errors can lead to file access issues.
Corrupted partition tables, bad sectors, or hard drive failures can block access to files. System crashes, corrupted files, and hardware issues may also lead to data loss.
6. Cleanup tools might have accidentally deleted your files.
Sometimes, antivirus software can mistakenly delete your files during cleanup. In addition, disk cleanup or optimization tools often delete your files that they consider “unnecessary”.
7. Windows may have loaded a temporary user profile.
If Windows detects issues with your main profile, it may sometimes load a temporary one.
How can you recover missing files from your computer? Read on to get more details.
Immediate Steps to Take When Files Disappear From PC
Most of the time, files that seem to be missing are just hidden, relocated, or stored in a different account, rather than being permanently deleted.
Therefore, try the following six methods to restore them.
Method 1. Restart the PC
Sometimes, all it takes to restore your user profile and get your disappeared files back is a simple restart.
This quick action can clear temporary glitches and refresh system resources, making it an effective first step.
Step 1: Click the Windows and Power buttons.
Step 2: Select the Restart option from the menu.
If it doesn’t work, continue with the next solution.
Method 2. Check the User Account
For the “file suddenly disappeared” issue due to the user profile, there are two cases you may meet:
- Situation 1. If your computer has several user accounts, each one maintains its individual data. Ensure that you are signed into the correct account.
- Situation 2. After a Windows update or password reset, the system may create a new user profile, causing files to appear missing. If you have admin rights, try logging into the original account to locate your files.
#1. Sign Out from Temporary/Incorrect User Profile
Here’s how to check if you are signing in to the correct account:
- Press Win + I to open Settings, and go to Accounts.
- Click Your info. Check the email address and the account name. Ensure that it corresponds to the account that should hold your files.
If you find you’re in a different account, to switch your profile, click Start > Profile icon > Sign out, then log in again.
#2. Check the Old Administrator Account
If you have recently updated Windows 10 to Windows 11 and set up a new Microsoft account, your files may be stored in the disabled administrator account.
To restore the missing files, you must activate the disabled account. Here’s how to do it:
Step 1. Press Win + S to open the Windows search bar, type Computer Management, and press Enter.
Step 2. In the left pane, click Local Users and Groups, then double-click Users.
Step 3. Look for the Administrator user profile, which shows a downward arrow icon. It means the account is disabled. To enable the disabled account, double-click it to open its Properties.
Step 4. Uncheck the Account is disabled box, then click Apply and OK.
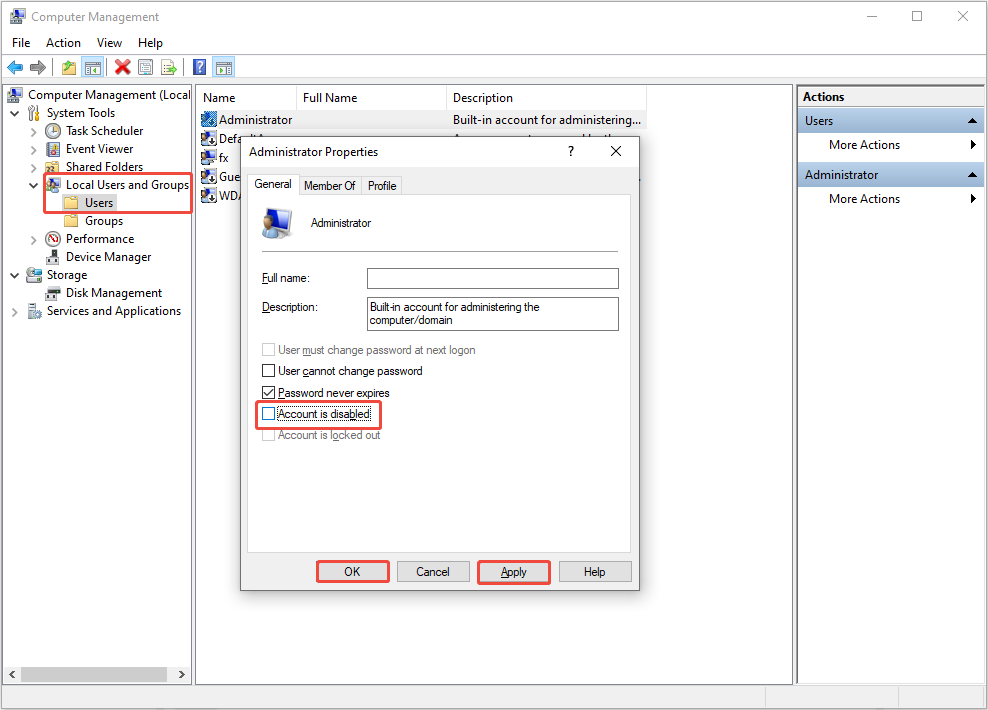
Step 5. Restart your computer and log in using the administrator account.
Method 3. Search for Files Throughout the System
If you forget where the file is stored or if its location has been changed, try searching for it in Windows File Explorer.
To search for files in File Explorer, type the exact file name or specify the file type in the File Explorer search bar.
To look for files by type, use the asterisk (*) symbol followed by the file extension (e.g., *png) and press Enter.
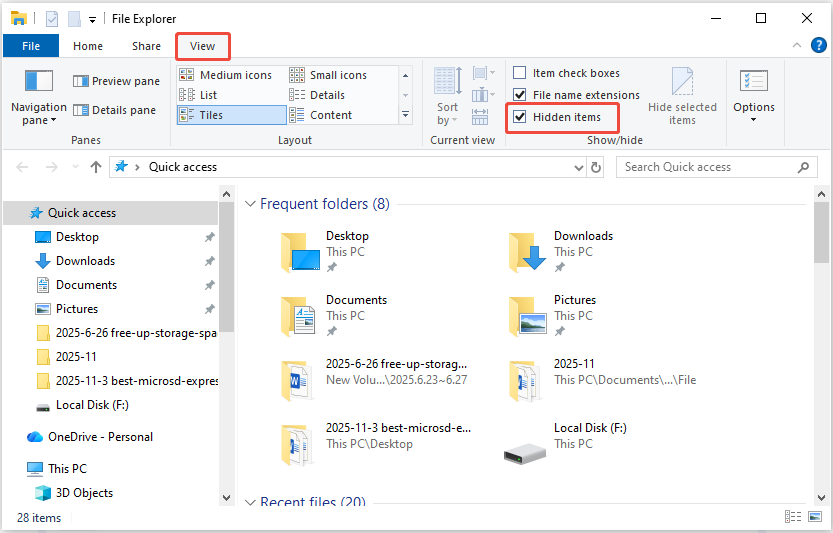
Method 4. Show Hidden Files
As mentioned above, if the files are hidden, they won’t appear on your computer. In this case, you need to enable the option to show hidden files to make them visible.
Follow these steps to unhide them:
Step 1. Press Win + E to open File Explorer.
Step 2. Go to the View tab.
Step 3. Ensure the Hidden items box is checked. Then the hidden files should appear.
If you prefer a quick video guide to show hidden files, watch this short video:
Proceed to the following solution if you are still unable to see missing files on Windows.
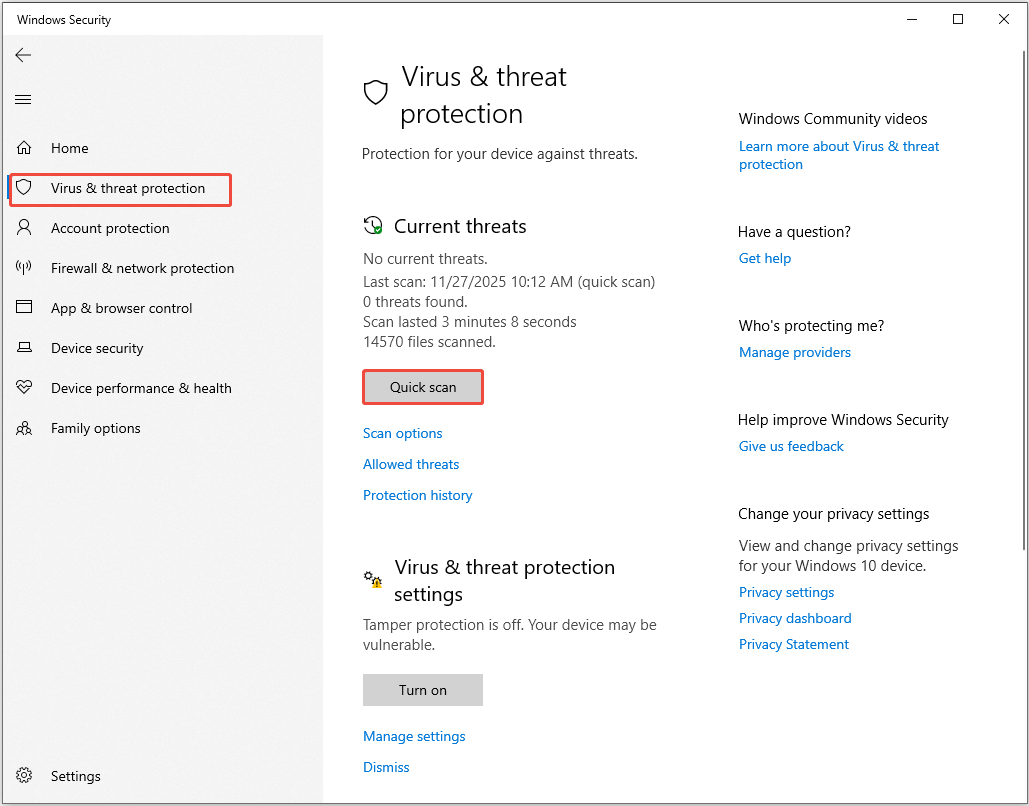
Method 5. Scan for Malware
Malware or viruses can delete or hide files. In this case, consider scanning for malware on your PC.
Follow the steps to scan for malware in Microsoft Defender:
Step 1. Press Win + S to open the Windows search bar, type Windows Security into the box, and press Enter.
Step 2. In the pop-up window, go to the Virus & threat protection tab.
Step 3. In the Current threats section, click the Quick scan button to scan for malware.
Method 6. Restore Quarantined Files in Microsoft Defender
Quarantined files in Microsoft Defender are those detected as suspicious or malicious and moved to a secure location to prevent harm.
Windows allows you to review them, either restoring false positives or permanently deleting them.
Step 1. Open Windows Security.
Step 2. Click on Virus & threat protection.
Step 3. Select Protection history under the Current threats section.
Step 4. From the Filter dropdown menu, select Quarantined Items.
Step 5. Select the file you want to restore and click the Actions button.
Step 6. Choose Restore from the dropdown menu.
Now, you may see your missing files back. If not, proceed with more advanced recovery solutions.
Advanced Methods to Recover Missing/Deleted/Lost Files on Windows 10/11
Once you’ve done the basic steps above, but the files are still missing, here are more detailed methods to carry out a missing file recovery.
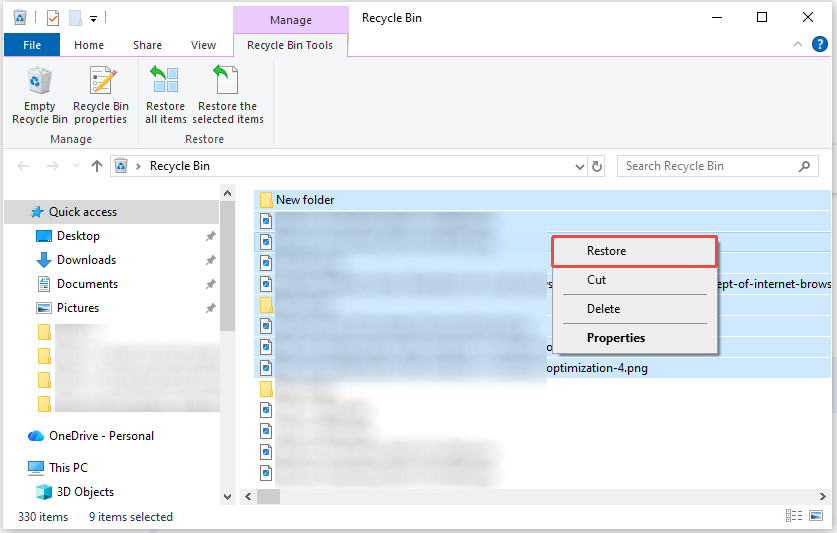
Solution 1. Check the Recycle Bin
If the files are deleted by mistake on Windows, they will remain in the Recycle Bin instead of being permanently deleted.
Therefore, the first step to recover deleted or lost files is checking the Recycle Bin:
Step 1. Open the Recycle Bin. Then, browse the list to locate the target files.
Step 2. After finding them, select multiple files by pressing the Shift or Ctrl button, right-click the area, and choose Restore.
Solution 2. Check the Backup
Creating backups of your files is crucial for safeguarding against unexpected data loss. It allows for a quick file restoration, regardless of the backup method you selected.
If you use third-party backup software, launch the application and adhere to its restoration procedure.
If your files are saved in the cloud, access your account and retrieve the files to your computer.
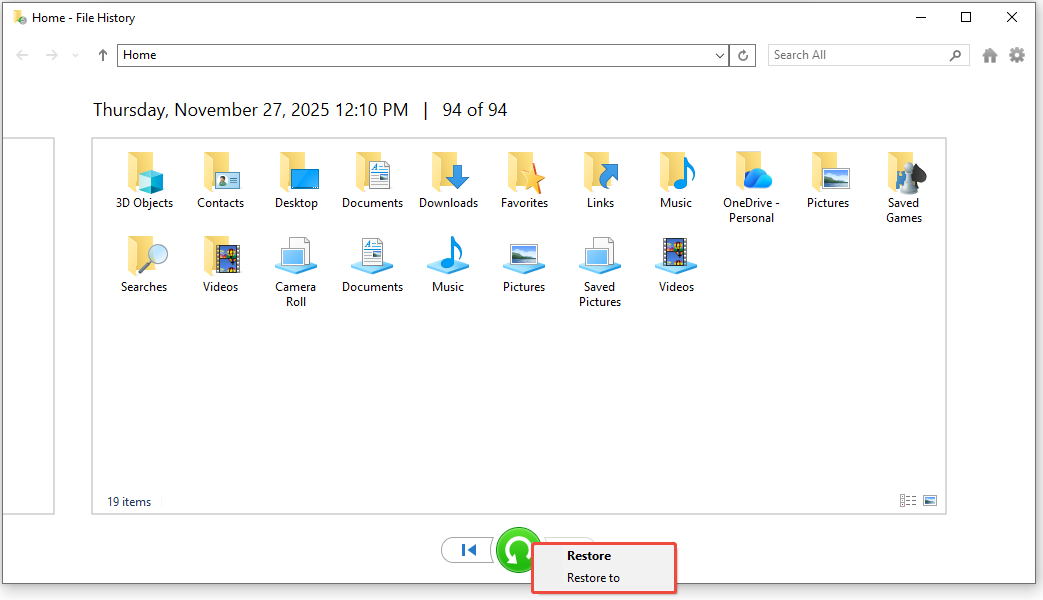
File History is a useful backup feature in Windows that automatically saves your files to an external hard drive or a network location. If you had enabled File History before your files were deleted, follow these steps to retrieve your data:
Step 1. Type Control Panel in the Windows search bar and press Enter to access it.
Step 2. Select System and Security > File History > Restore personal files.
Step 3. Look through the listed files and select the ones you wish to recover. Then, right-click the green Restore button and decide whether to restore them to their original location or to a different one.
If your files were permanently deleted without a backup, you will need data recovery software to retrieve them.
Solution 3. Use MiniTool Power Data Recovery
To recover permanently deleted /lost/missing files, MiniTool Power Data Recovery is the best choice.
This data recovery tool supports various file types, such as photos, documents, audio files, videos, databases, and more.
It can recover files from different devices, including USB flash drives, SD cards, hard drives, etc. And it is compatible with Windows 11/10/8.1/8.
Moreover, this free file recovery software allows you to restore 1 GB of files for free.
Now, download and install it on your computer to get ready.
MiniTool Power Data Recovery FreeClick to Download100%Clean & Safe
Here’s the breakdown of missing file recovery using MiniTool Power Data Recovery:
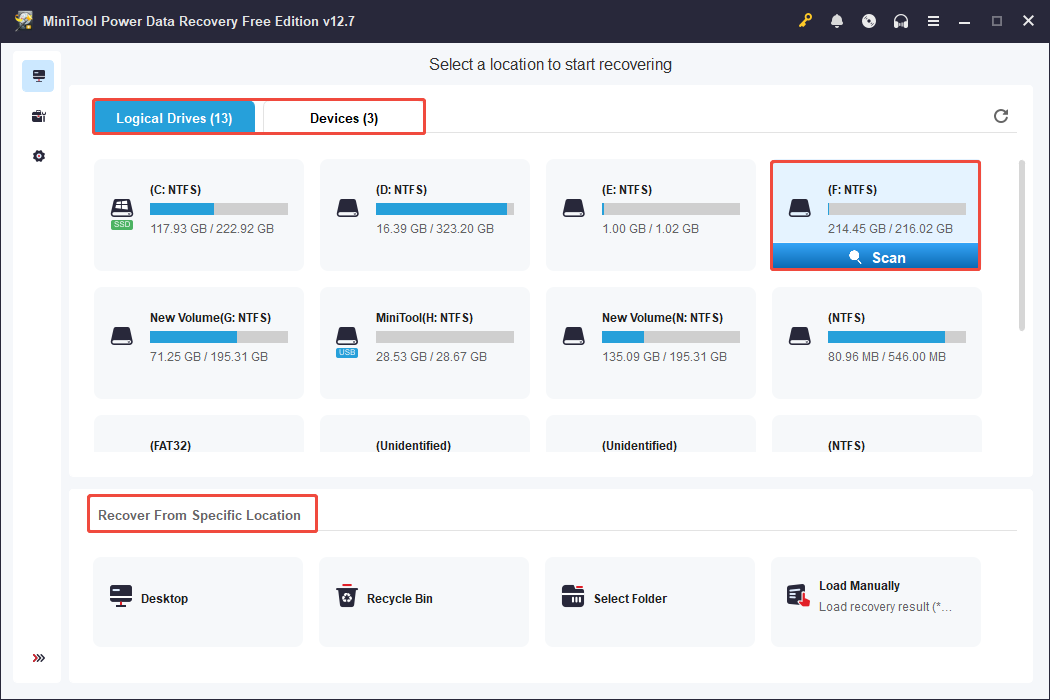
Step 1. Launch MiniTool Power Data Recovery. In the main interface, there are three sections: Logical Drives, Devices, and Recover From Specific Location.
- Logical Drives: This part includes all partitions detected by your PC, including existing partitions, deleted partitions, and unallocated spaces.
- Devices: This section lists all the disks connected to your computer.
- Recover From Specific Locations: It allows for scanning in the specific location, such as the Desktop, Recycle Bin, and a Specific Folder.
Locate the target partition, location, or drive, place your cursor over the section, and click Scan.
Step 2. Once the scanning process is finished, files are listed by their paths under the Path tab. This tool also provides other filter criteria features.
- Type: This feature helps you find files by their types, like documents, pictures, audio, and videos.
- Filter: This function allows you to set filtering criteria to narrow down the scope, such as file type, modified date, size, and category.
- Search: This feature supports searching for file names to locate files. Type a full name or a partial name in the box and press Enter.
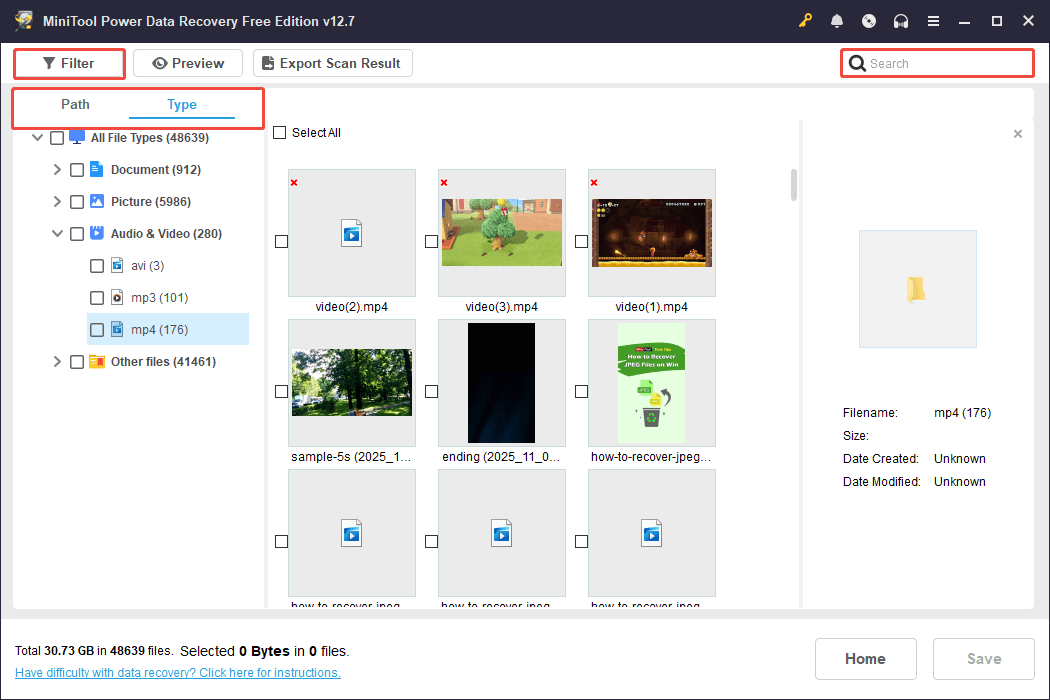
To determine if a file is needed or not, double-click to preview it.
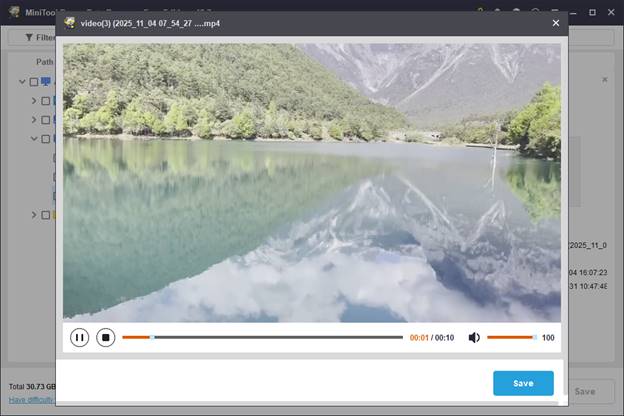
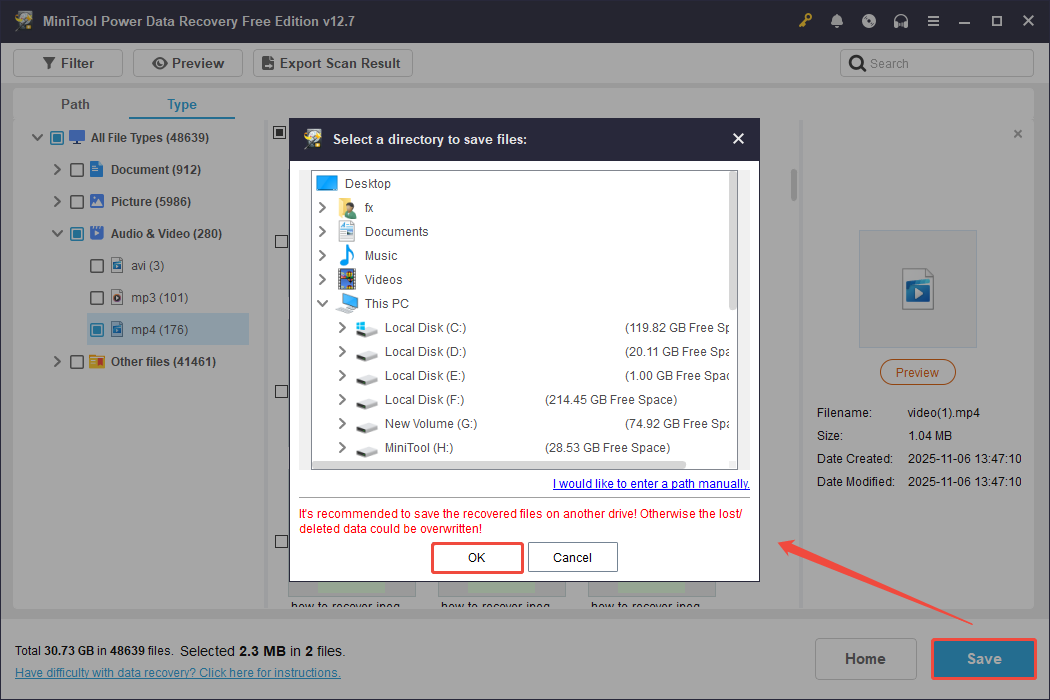
Step 3. Check all the desired files and click the Save button. In the pop-up window, choose a new and safe destination for the recovered files, and then click OK.
Bottom Line
When your files suddenly disappeared from your PC, try some basic checks, such as restarting the PC, checking the profile, unhiding files, and restoring quarantined files.
If the missing files are permanently deleted or lost, you need to check the Recycle Bin and backups first. If these places don’t contain your files, data recovery software can help you to recover them.
If you encounter any issues or have any questions while using MiniTool Power Data Recovery, contact the support team at [email protected].
About The Author

Position: Columnist
Sandy became an English editor after graduation. She is devoted to finding effective solutions for diverse IT problems and provides articles on data recovery, data backup, and computer partitions and drives. In her spare time, she likes listening to music and playing games.
User Comments :