Read this MiniTool post to learn how to fix the “Please insert a disk into USB drive” error. First, reconnect the drive and verify if the error disappears. If not, recover data from the drive. Then, fix the error by updating the driver, running hardware and devices troubleshooter, creating a new volume, or formatting the disk.
Quick Answer:
The “Please insert a disk into USB drive” error occurs when Windows cannot detect usable storage on your USB device. To fix it:
- Recover your data using MiniTool Power Data Recovery Free.
- Create a new volume if the disk shows unallocated.
- Update the USB driver if the driver is corrupted or outdated.
- Run the Hardware and Devices troubleshooter to repair hardware issues.
- Clean and format the USB drive if none of the methods above work.
After these steps, your USB drive should be accessible without showing the error.
_____________________________________________________________________________________
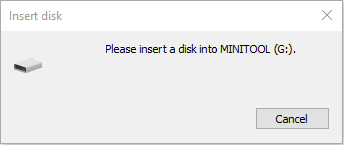
“Please insert a disk into USB drive” is a common error message in Windows systems. It means that your computer has detected no usable storage media in your USB device.
Why does this error occur? Check the following section to learn the causes.
Part 1. Common Causes of “Please Insert a Disk into Removable Disk”
Here are some possible reasons for this error.
- USB interface or connection issues: Loose ports, poor contact, or insufficient power.
- Partition loss: Missing disk partitions trigger the error.
- Driver errors or incorrect installation: Outdated or corrupted USB drivers prevent proper recognition.
- USB device damage or flash memory chip failure: Internal memory chip issues can render the drive unreadable.
- Partition table or file system corruption: Corrupt partitions make the system consider the device as empty.
To fix this error, keep reading.
Part 2. Recover Data from the USB Drive
Before dealing with the “Please insert a disk into USB drive” error through the advanced methods, recover your data first.
This is because subsequent repair operations may corrupt existing data, potentially resulting in permanent file loss.
Tool Required:
- MiniTool Power Data Recovery, which supports recovering all types of files from USB drives, SD cards, and other file storage media.
- The free edition allows recovery of up to 1 GB of data.
- Recover files even if the file system has been damaged or the disk partition has been lost.
- Recover data using the read-only mode, preventing secondary damage to the original USB drive data.
MiniTool Power Data Recovery FreeClick to Download100%Clean & Safe
Steps to Recover Data From the Inaccessible USB Drive:
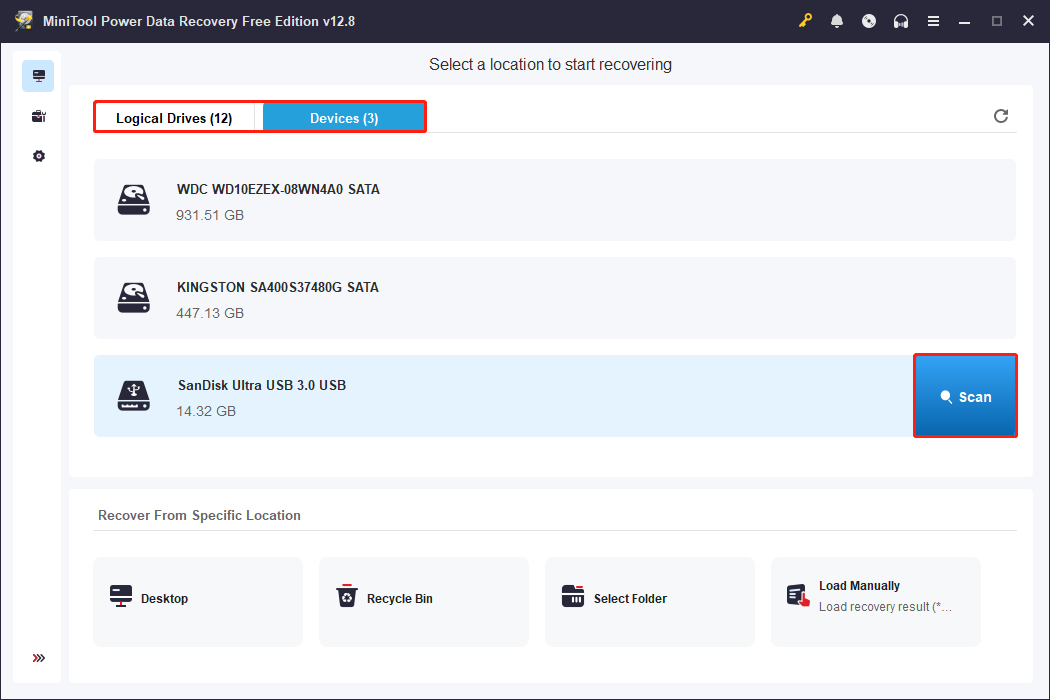
Step 1: Open the software and scan the USB drive
Launch MiniTool Power Data Recovery. In the Logical Drives section, select your USB drive, which may appear as Lost Partition, and click Scan.
If you have difficulty locating the target USB partition, switch to the Devices tab and scan the entire USB drive directly.
Step 2: Find the target files in the scan results
Wait for the process to complete. When it ends, locate the target files using Path, Type, Filter, and Search.
- Path: Displays scan results according to the file structure.
- Type: Categorizes found files based on file type (such as document, picture, video, and more).
- Filter: Filters results by criteria such as file type, modification date, file size, and file category.
- Search: Searches for a specific file by entering the full or partial filename directly.
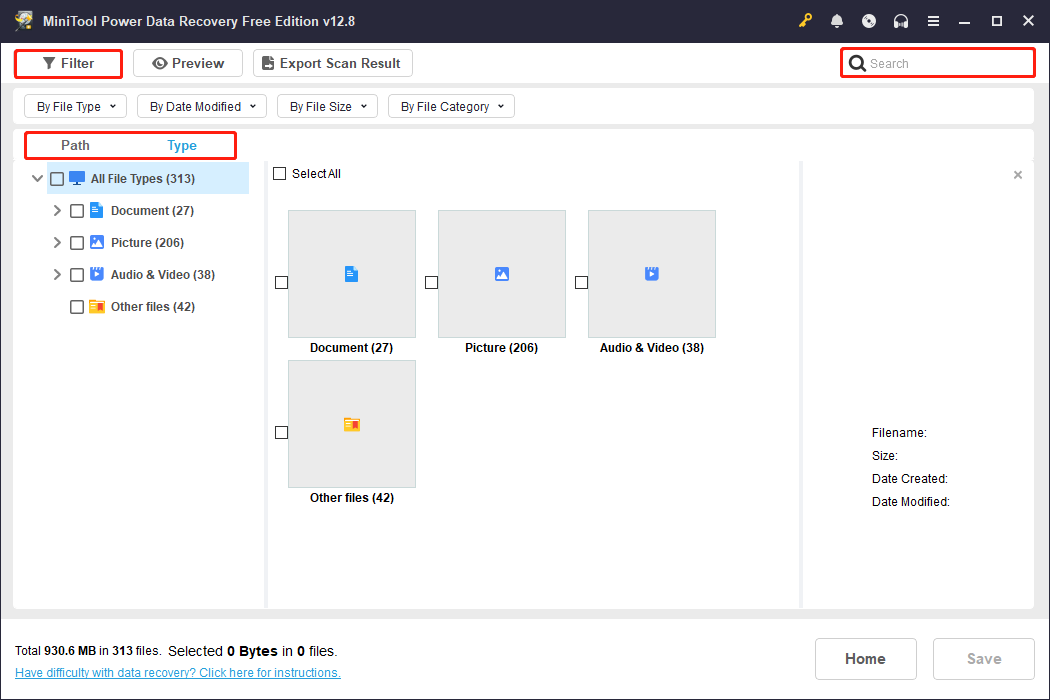
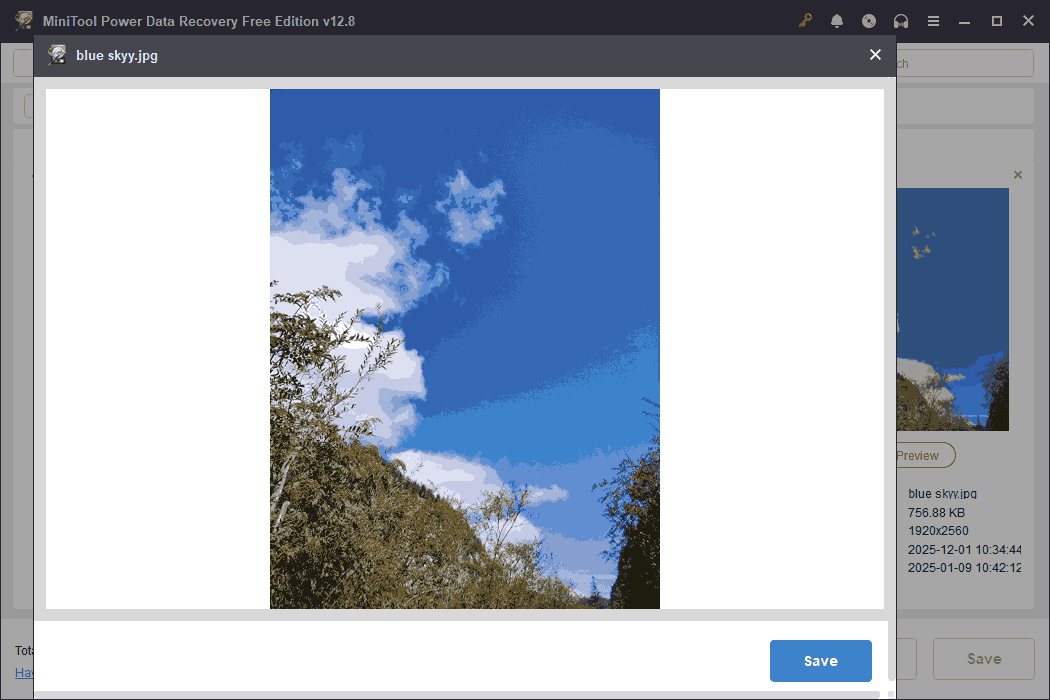
After finding the files, double-click them to preview. This confirms whether it is the desired file, preventing the accidental restoration of useless files.
Step 3: Recover the required files to a safe place
When the files are confirmed, select them and click the Save button. In the new pop-up window, choose a new path and click OK.
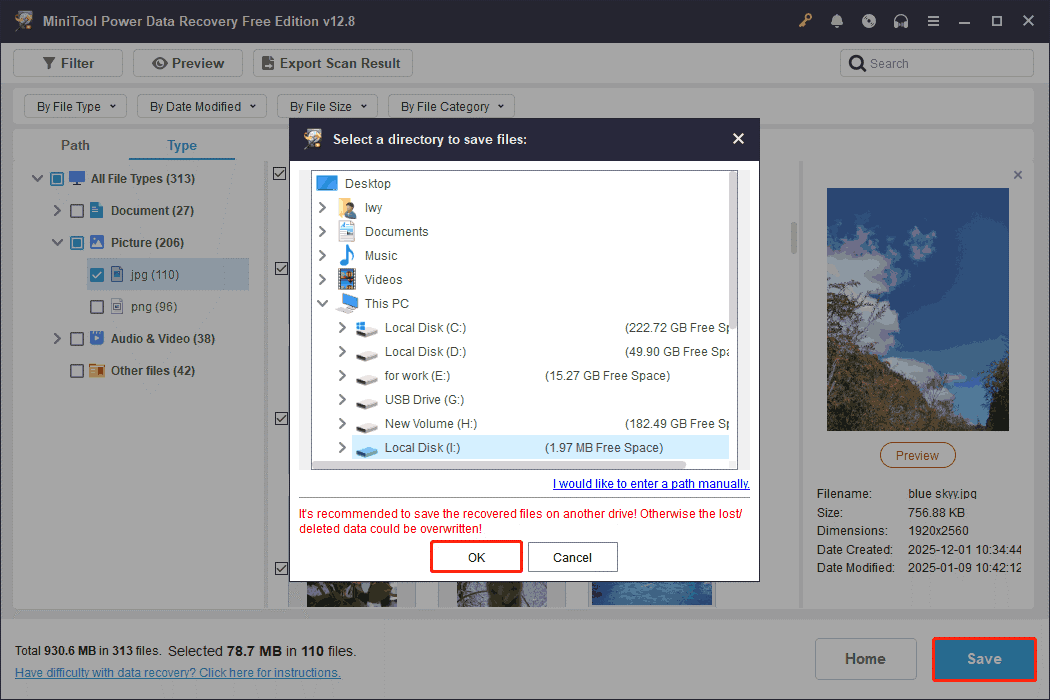
When the Recovery Completed window shows, click the View Recovered button to check the files.
After data recovery, proceed to fix the USB drive.
Part 3. Fix Please Insert a Disk into USB Drive Error
If you prefer video tutorials, watch this short video:
Method 1: Update the USB Driver
Old or corrupted USB drivers may cause the system to fail to recognize the USB drive, resulting in this “insert disk into USB drive” error.
Updating the driver can resolve compatibility issues and improve communication between the operating system and the USB controller.
Step 1: Right-click the Windows button and choose Device Manager.
Step 2: Click the small arrow in front of Disk drives to expand it.
Step 3: Right-click the target disk and select Update driver.

Step 4: In the new window, select Search automatically for drivers.
When the new driver is detected, follow the on-screen wizards to complete the process.
If there is no driver found, try reinstalling the device:
In Device Manager, right-click the disk under Disk drives and select Uninstall device. Then restart your computer, and Windows will install the driver automatically.
If this method doesn’t work, try the next one.
Method 2: Run Hardware and Devices Troubleshooter
Running hardware and devices troubleshooter can help your system automatically detect and repair common issues with USB ports or drivers.
Step 1: Press Win + R to open the Run dialog.
Step 2: Type msdt.exe -id DeviceDiagnostic and press Enter.
Step 3: In the pop-up window, click Next to detect the problems.
Step 4: When the testing process ends, click Next to restart your computer.
If the issue persists, continue with the following method.
Method 3: Create a New Volume
A corrupted partition table or the absence of valid partitions may cause a USB drive to display the error message.
In such cases, the USB drive often appears as Unallocated in Disk Management. To make the drive usable again, creating a new simple volume is typically required.
Here are two options to create a new volume.
Option 1: With Disk Management
Disk Management is a built-in tool in Windows systems. It can be used to create new volumes and rebuild a valid partition structure for unallocated USB drives.
Step 1: Press Win + X and choose Disk Management.
Step 2: Right-click the unallocated space and select New Simple Volume.
Step 3: Click Next until the Assign Drive Letter or Path page shows.
Step 4: Choose a letter for the drive and click Next.
Step 5: In the Format Partition page, choose a file system and type a volume label.
Step 6: Finally, click Next > Finish to make the change take effect.
Option 2: Via MiniTool Partition Wizard
MiniTool Partition Wizard is a comprehensive disk partitioning management tool. It is more flexible than the tools that come with Windows and supports the rapid creation of new volumes.
Step 1: Download and install the software, and then launch it.
MiniTool Partition Wizard FreeClick to Download100%Clean & Safe
Step 2: Select the target disk and click Create Partition under Partition Management.
Step 3: Type a partition label, set a drive letter, choose a file system, and click OK.
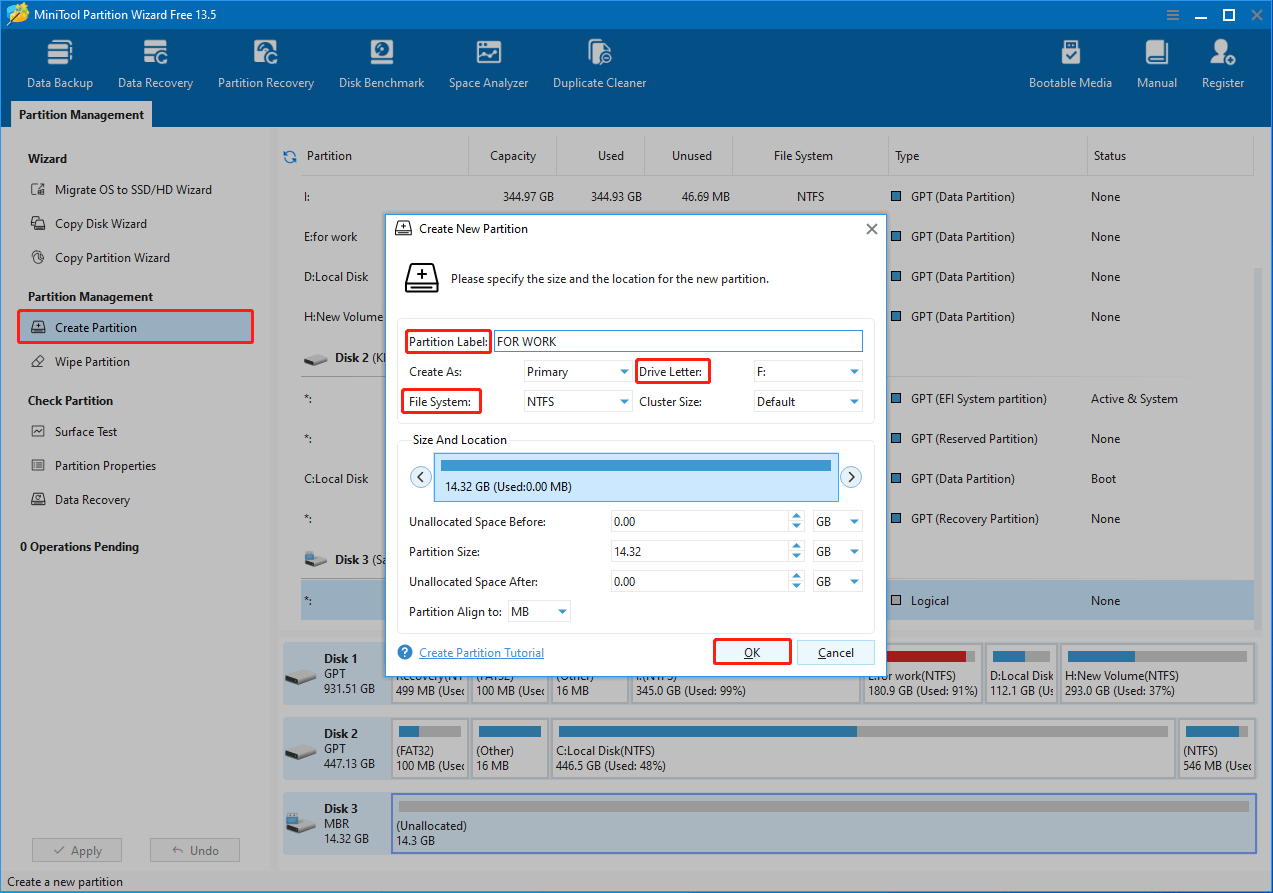
Step 4: Click Apply in the bottom left corner to confirm the change.
If this approach fails to resolve the error, proceed to the last option.
Read Also: Solved – New Simple Volume Greyed out in Disk Management
Method 4: Format the Drive to Normal by DiskPart
If the above methods fail, the last resort is to clean up and reformat the hard drive using the DiskPart command.
DiskPart can completely remove the old configuration and create a new volume. It allows the operating system to re-recognize the storage device, thus resolving the error message.
Step 1: Type Command Prompt in the Windows search box, right-click the best match, and choose Run as administrator.
Step 2: Type diskpart to launch this tool. Then continue typing the following commands one by one and press Enter after each:
- list disk
- select disk # (# should be replaced by your actual disk number.)
- clean
- create partition primary
- select partition 1
- format fs=fat32 quick (fat32 can be replaced by ntfs or exfat.)
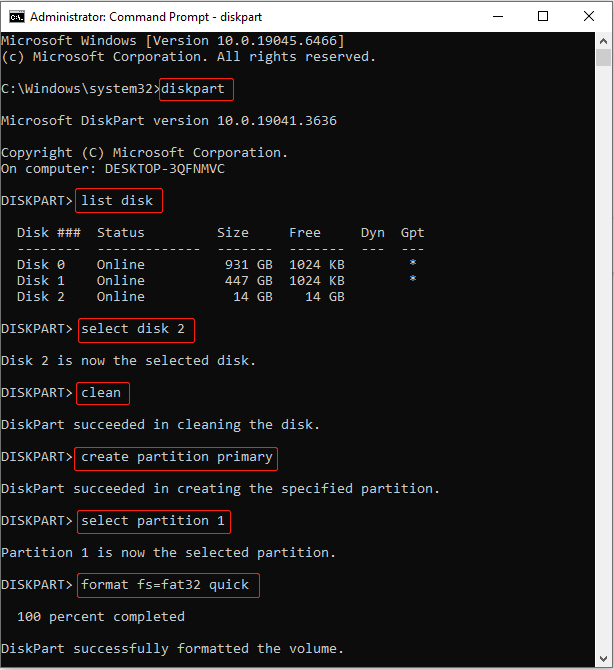
It might take a while to format the disk. Wait patiently for it to complete.
Part 4. Final Thoughts
Now you know how to fix “Please insert a disk into USB drive”. It involves two steps.
- Recover data from your problematic USB drive using MiniTool Power Data Recovery.
- Fix the error by updating the disk driver, running the troubleshooter, creating a new volume, and formatting the drive.
For further assistance, do not hesitate to consult us through [email protected].
Part 5. Insert a Disk into USB Drive FAQ
This usually means the computer cannot read the data on the USB drive due to a missing partition table, lost partitions, or corrupted USB drivers.
If it shows unallocated, right-click the unallocated space and choose New Simple Volume. Then set up the volume size, file system, and format the drive.
About The Author

Position: Columnist
Shirley holds a bachelor’s degree in English and has been an editor at the MiniTool Team for many years. She specializes in IT-related content, with a focus on data recovery, file backup, disk management, and other technical topics. She is committed to delivering clear, accurate, and practical solutions to help users resolve common computer issues.
User Comments :