What Is the Steam Deck?
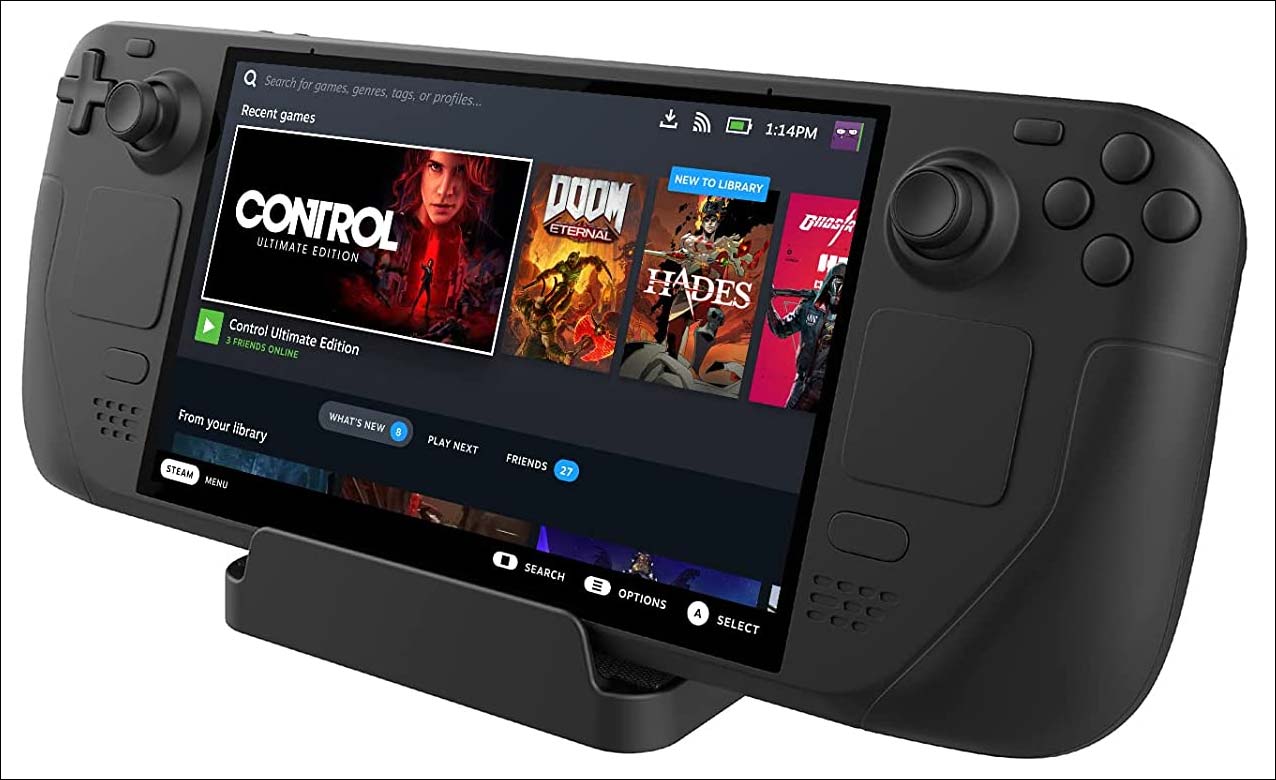
The Stem Deck is a newly released handheld gaming computer which was initially released on February 25, 2022. It is developed by Valve. Like the Nintendo Switch, you can use the Steam Deck as a handheld device or connect it to a monitor and then use it to play games.
Which OS Is the Steam Deck Running?
The Steam Deck is an x86-64-v3 device with integrated gaming inputs. It is designed to play the full Steam library. By default, the Steam Deck is running SteamOS out of the box, which is based on Arch Linux.
However, Steam Deck is also mentioned as a PC. This means that you can install another operating system like Windows 10/11 on your Steam deck. To run Windows on the Steam Deck and get the best experience, you need to install some additional drivers.
In the next part, we will introduce how the Steam Deck runs Windows, including how to install Windows on the Steam Deck and some other useful information.
How to Install Windows on the Steam Deck?
Windows and SteamOS dual-boot are not yet available. If you want to install Windows 10 or Windows 11 on your Steam Deck, you need to firstly wipe the device.
After that, you can boot your Steam Deck from the Windows 10/11 bootable USB drive and install Windows on your Steam Deck.
Just in case you don’t know what to do, we write this article to show a complete tutorial.
Step 1: Wipe Steam Deck
As mentioned above, you can only install one operating system on Steam Deck. If SteamOS has been pre-installed on your device and you want to install Windows on it, you will need to factory reset Steam Deck.
It is very easy to do this: you can just factory reset Steam Deck from itself:
- Go to Settings > System.
- Tap the Factory Reset button on the screen.
- Tap the Factory Reset button on the pop-up interface to confirm the operation.

You should wait patiently until the factory reset process ends. Then, power off your Steam Deck.
Step 2: Create a Windows 10/11 Bootable USB Drive
Like install Windows 10/11 on a computer via USB, you need to create a Windows 10/11 bootable USB drive, then use it to install Windows on the Steam Deck. To do this, you need to prepare a USB drive that with at least 8GB. You’d better do this job on your Windows computer.
Additionally, if you want to install Windows 11, you need to make sure that you have the latest OS update (in order to get the latest BIOS with fTPM support) before the installation.
Here is how to create a Windows 10/11 bootable USB drive:
1. Go to the Windows 10 software download page if you want to create a Windows 10 bootable USB drive.
Go to the Windows 11 software download page if you want to create a Windows 11 bootable USB drive.
2. Click the Download now button under the Create Windows 10 installation media section or click the Download now button under the Create Windows 11 Installation Media section to download the Windows 10/11 media creation tool.
3. Plug the USB drive to your computer via the USB port.
4. Open the Windows 10/11 media creation tool you have downloaded to run it.
5. Click the Accept button when you see the Windows 10/11 setup interface.
6. The setup begins to work on getting a few things ready. You should wait patiently until the whole process end.
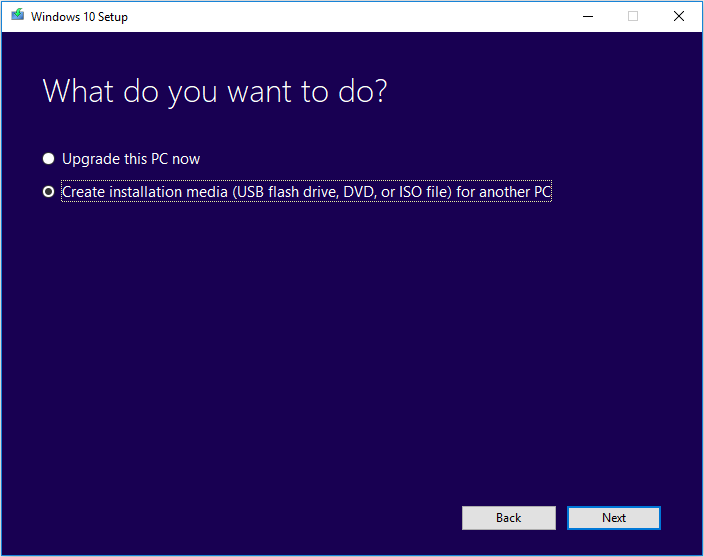
7. When you see the What do you want to do page, select Create installation media (USB flash drive, DVD, or ISO file) for another PC, then click Next to continue.
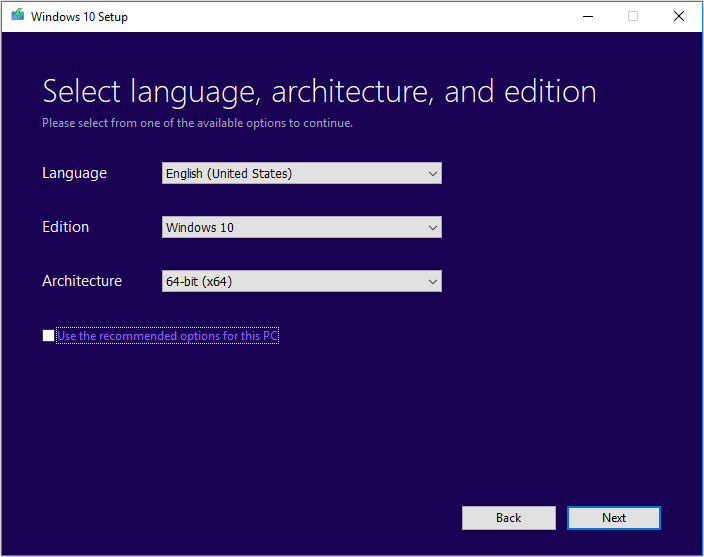
8. Uncheck Use the recommended options for this PC. Then select the language, edition, and architecture as per your situation. Next, click the Next button to continue.
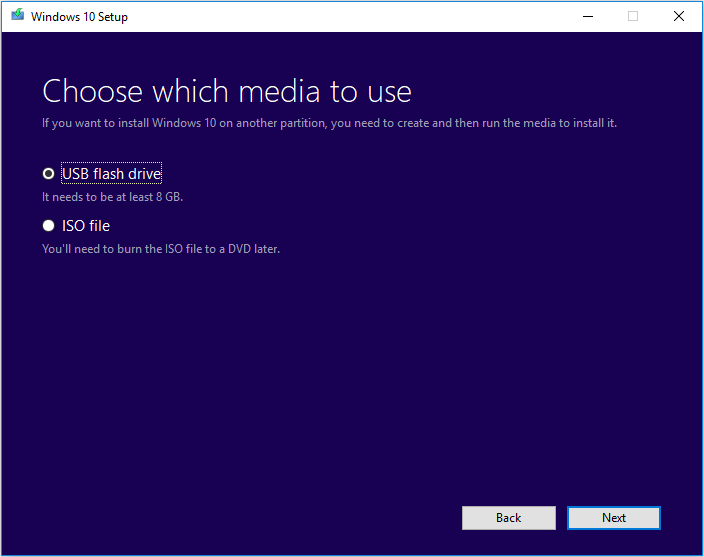
9. On the next page, select the media you want to use. In this case, we need to create a Windows 10/11 bootable USB drive. So, you need to make sure USB flash drive is selected. Then, click the Next button to continue.
10. You will see all the removable drives that can be detected on the next page. Select the target one and click the Next button to continue.
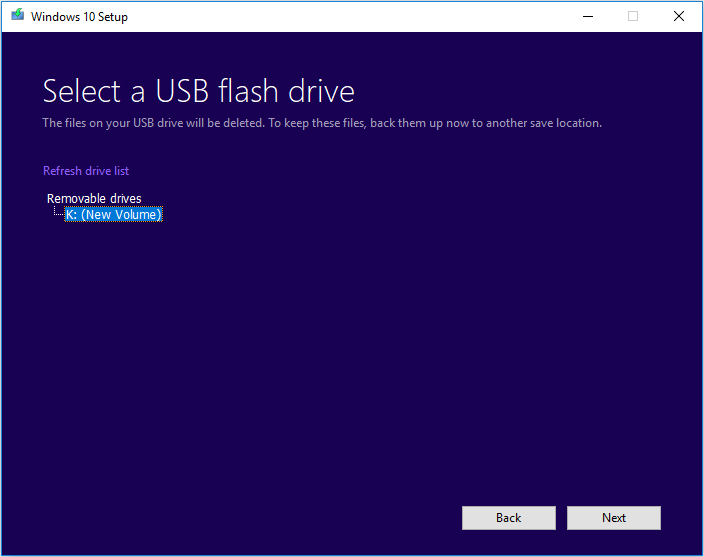
11. The Windows 10/11 setup will begin to download Windows 10/11 and create a Windows 10/11 bootable USB medium. This process will last for a while. But you can keep using your computer during the process.
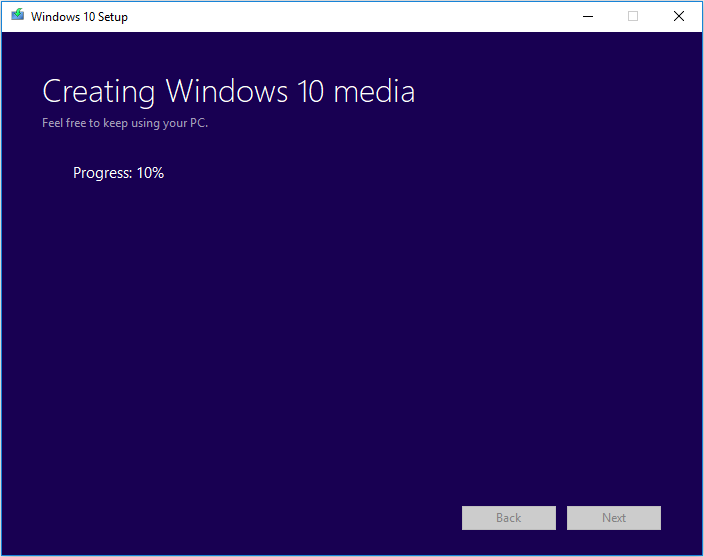
12. When the process ends, you need to click the Finish button to quit this interface.
Now, a Windows 10/11 bootable USB drive is prepared. You need to unplug it from your computer and continue with the next step.
Step 3: Install Windows 10/11 on the Steam Deck
It is not difficult to install Windows 10/11 on your Steam Deck as long as you have a Windows 10/11 bootable USB drive.
Here is how to install Windows on the Steam Deck:
1. Make sure your Steam Deck is powered off. Then, connect the bootable USB drive to your Steam Deck with a USB hub. A USB hub also allow you to control the installation with a mouse and keyboard. So, it is a good choice to use a USB hub.
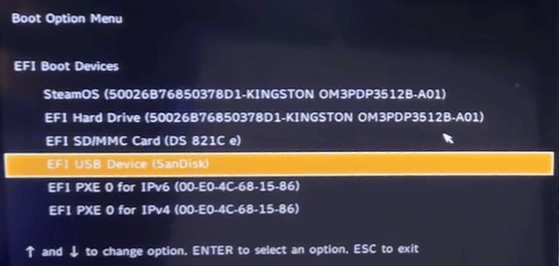
2. Press the Power button and hold the Volume down button at the same time. This can help you enter the boot manager.
3. Select your connected Windows 10 bootable USB drive or Windows 11 bootable USB drive to continue.
4. When you first see the Windows Setup interface, you need to select the language you want to install, time and currency format, and keyboard or input method according to your needs. If the default selections can satisfy you, you can just click the Next button to continue.
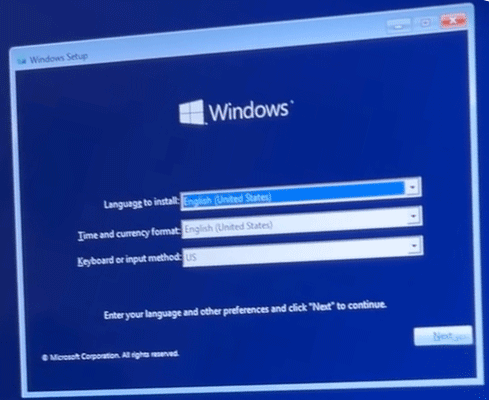
5. On the next page, click the Install now button to continue. Then, the setup process will begin.
You will see the Activate Windows interface. If you have a product key, you can enter it into the box on the page. If you don’t have one or want to activate Windows 10/11 later, you can click the I don’t have a product key link to continue.
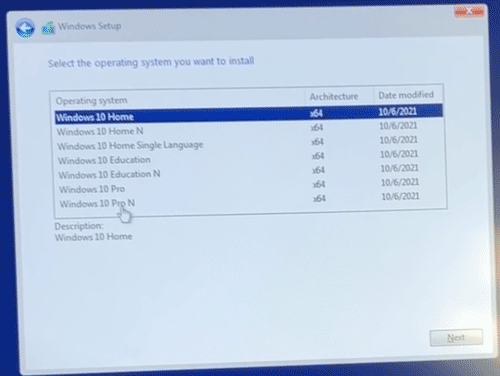
6. When you see the next page, select the operating system you want to install and click the Next button to continue.
7. On the next page, check I accept the license terms and click the Next button.
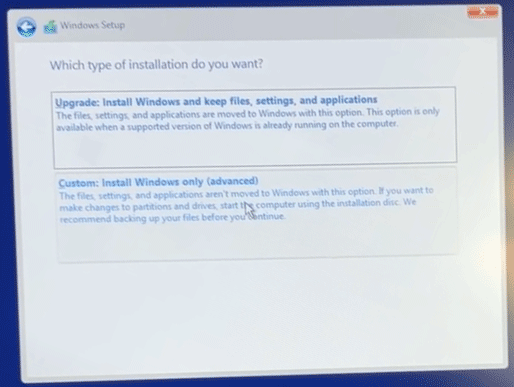
8. Select Custom: Install Windows only (advanced).
9. On the next page, you need to select the partition where you want to install Windows and delete it.
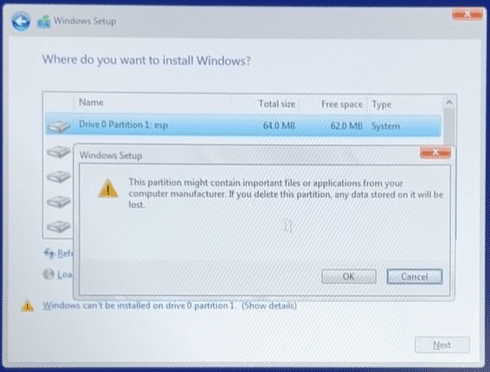
10. Select the partition you have deleted. This partition should show up as Unallocated space. Then, click the Next button to continue.
11. Windows Setup will begin to install Windows 10/11 on that drive. You should wait until the process completes.
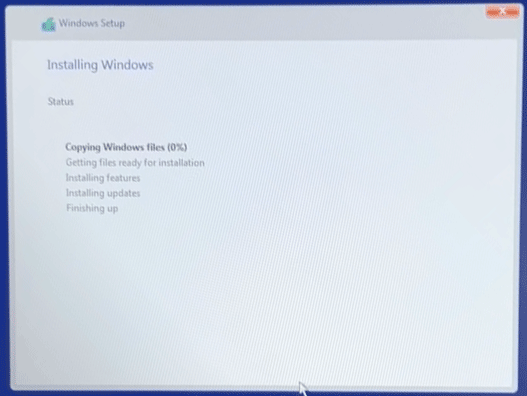
12. Continue with the Windows 10/11 Out-of-Box Experience like doing it on a Windows computer.
Until now, the Windows 10/11 installation on the Steam Deck is finished. However, to get the best performance, you should install Steam Deck Windows drivers on your device. Valve has officially released Windows drivers for the Steam Deck. You can go to the official site to download and install all needed Steam Deck Windows drivers.
Steam Deck Windows Drivers Download and Install
These drivers are available to download now:
- APU driver: you can click here to download it, then run the setup.exe file to install it on your Steam Deck.
- Wi-Fi driver: you can click here to download it, then run the install.bat file to install it on your Steam Deck.
- Bluetooth driver: you can click here to download it, then run the installdriver.cmd file to install it on your device.
- SD Card reader driver: you can click here to download it, then run the setup.exe file to install it on your Steam Deck.
- Audio drivers: you can click here to download driver 1/2, then right click inf and select Install to install this driver on your device. Or, download driver 2/2, right click NAU88L21.inf and select Install. On Windows 11, you need to right-click the file and select Show more options to use the Install option. Besides, you should get the updated APU driver mentioned above for audio support.
Now, you can experience Windows 10/11 on the Steam Deck and check if it is suitable for you. If you are not satisfied with it, you can reinstall Steam Deck on your device.
Recover Your Lost and Deleted Files on Windows 10/11
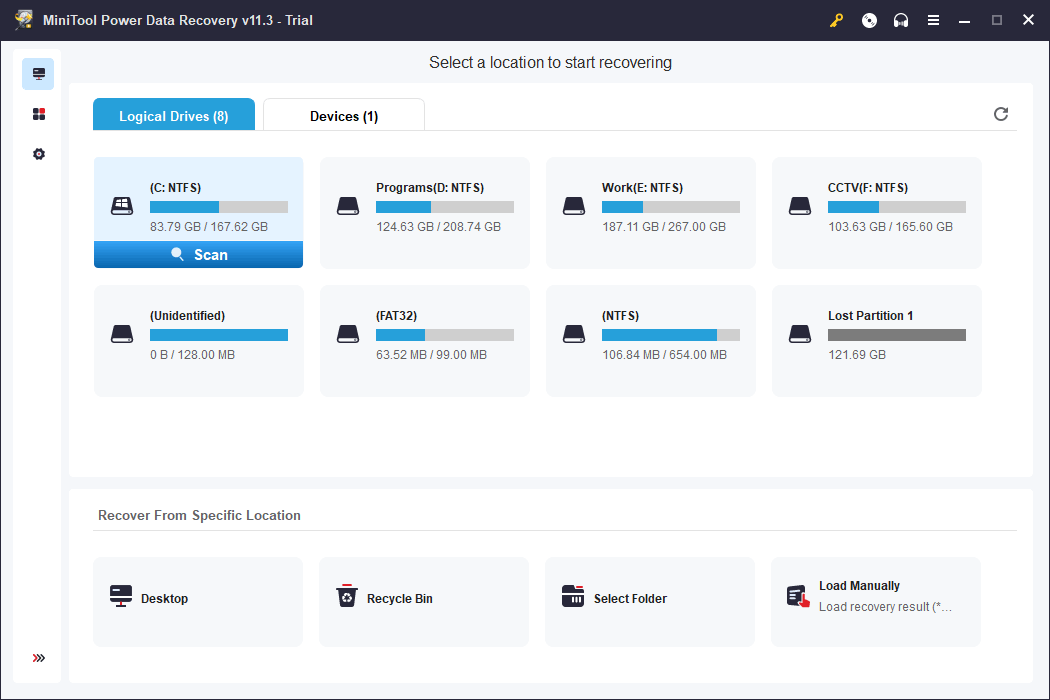
If some of your files get lost or deleted on your Windows device, you can try a free file recovery tool like MiniTool Power Data Recovery to get them back.
This data recovery software is designed to work on all versions of Windows. With it, you can recover many kinds of files like images, videos, music files, documents, and more from your computer internal hard drives, external hard drives, SSDs, memory cards, USB flash drives, pen drives, and more.
This software can work on various situations. For example:
- If you delete some important files by mistake and you have empty Recycle Bin, you can use this software to scan the original drive and recover your data.
- If your storage drive is inaccessible, you can use this software to scan that drive, find your needed files, and recover them.
- If your Windows device is unbootable, you can create a MiniTool Power Data Recovery bootable drive, boot your computer from the drive, then scan, find, and recover your files.
However, you may be not sure if this tool can help you find your files. Here, we recommend you first use the trial edition to scan the target drive and check the scan results.
MiniTool Power Data Recovery TrialClick to Download100%Clean & Safe
After downloading and installing this software on your device, you can open it and select the target drive to scan. After scanning, you can check if you can find your needed files from the scan results. To recover all your needed files, you need to use a full edition.
Make the Steam Deck Run Windows 10/11
Want to run Windows on the Steam Deck? It is not so difficult to do this. You can find a full guide on how to install Windows 10/11 on the Steam Deck. Hope you have a good experience.
Should you have other related issues, you can let us know in the comments. You can also contact us via [email protected].


User Comments :