Free Space on Drive C Become Less after a Windows Update
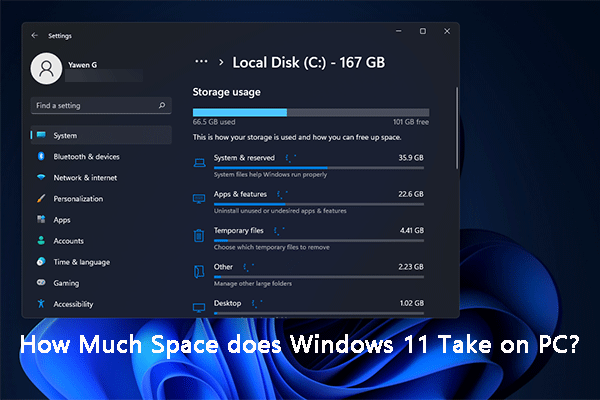
Microsoft continues to release major updates for Windows systems that are still in support, such as Windows 10 and Windows 11. After updating/upgrading to a new Windows version, you may find that there is less free space on drive C. Even worse, your C drive is full after Windows updates and your computer runs slowly.
Maybe you know the free disk space will be less, but you don’t know why and how to free up disk space after Windows updates. In this post, we will explain these issues separately.
- Windows 11 22H2 Release Date: Everything You Should Know
- Windows 10 22H2 Release Date: Everything You Should Know
Why Is Disk Space Low Space or Full after Windows 10/11 Updates?
During the Windows 10/11 update process, the system installation will make a backup of your previous setup. This gives you the chance to go back to the previous version of Windows 10/11 in case the new Windows version is not compatible with your PC or the update causes issues/errors.
After the successful installation of the update, the backup will be saved to Windows.old folder in C drive.
The size of Windows.old folder is not small. In a best case scenario, it could be about 12 GB of disk space. But the occupied disk space could easily reach 20 GB or more, depending on the size of your previous Windows installation.
If your C drive had a large amount of free space before the Windows update, your computer may not be affected. Additionally, Windows.old folder will be automatically deleted 28 days later. In a situation like this, you can keep Windows.old folder (for 28 days).
But if the free space in the C drive is not so large before the update, your C drive may be full after a Windows update. This will significantly slow down your computer or even cause other serious issues like computer freezing, and computer shutting down unexpectedly.
To avoid affecting your computer performance, you should free up disk space on drive C after a Windows update. In the following part, we will show you 4 ways to free up disk space after updating to the latest Windows version.
How to Reclaim Space after Windows Updates?
In this part, we will introduce these 4 things you can try to reclaim disk space after Windows updates.
How to Free up Disk Space after Windows 10/11 Update?
- Delete Windows.old folder in the C Drive after Windows Updates.
- Run Storage Sense to free up disk space after Windows Updates.
- Delete the temporary files in the Settings app after Windows Updates.
- Run Disk Cleanup to reclaim more disk space after Windows Updates.
Way 1: Delete Windows.old Folder to Release More Space for Drive C
As we have mentioned in the above part, the Windows.old folder is created to save the installation files of your previous Windows version and the total size of these files is very large. This is for your system recovery needs. If the new Windows version works well on your device and your C drive is full after Windows updates, you can consider deleting Windows.old folder.
- Free Download Rufus 3.19 for Windows 11/10 and Introduction
- Use Rufus to Install Windows 11 22H2 without a Microsoft Account
This will not damage your computer, but you only lose the chance to go back to your previous Windows version.
How to Delete Windows.old folder on Windows 10/11?
You can just find Windows.old folder in C drive and then select it to delete.
Step 1: Press Windows + E to open File Explorer.
Step 2: Open drive C.
Step 3: Scroll down to find Windows.old folder. Then, right-click it and select Delete.
Step 4: On the pop-up window, you can see the folder deletion needs the administrator’s permission. You need to click the Continue button to delete Windows.old folder from the C drive.
Step 5: Go back to the desktop. Then, right-click Recycle Bin and select Empty Recycle Bin. This can permanently remove Windows.old folder from your computer and free up several gigabytes for the C drive.

After these steps, you can go to File Explorer and move your mouse cursor to C drive, and see if it has more free space.
However, not all Windows 10/11 updates will create a Windows.old folder. For example, after you install a feature update or perform an in-place update, a Windows.old folder will be created; if you just install an optional update or a cumulative update, there will be no new Windows.old folder. Then, you can use these methods to reclaim disk space (especially C drive) after Windows updates.
Way 2: Run Storage Sense to Free up Disk Space after Windows Updates
Storage Sense is a Windows built-in storage management tool that can help you free up disk space, delete temporary files, and manage locally available cloud content.
But this tool is not turned on by default. You need to manually turn it on and run it to clean up your computer. You can also set it to automatically run as per your settings.
Here we go:
Step 1: Press Windows + I to open the Setting app.
Step 2: Go to System > Storage.
Step 3: Click Storage Sense under Storage management to continue.

Step 4: Usually, the Keep Windows running smoothly by automatically cleaning up temporary system and app files option is selected by default. You’d better keep this setting. Then, turn on the button under Automatic User content cleanup.
Step 5: The Run Storage Sense now button will be available immediately. You can click this button to run Storage Sense to clean up files.

Tip: Set Automatic User Content Cleanup via Storage Sense
You are allowed to set Storage Sense to automatically run and clean up files on your Windows 10/11 computer. Under Configure cleanup schedules, you can find these 3 options:
Run Storage Sense:
- Every day
- Every week
- Every month
- During low free disk space (default)
Delete files in my recycle bin if they have been there for over:
- Never
- 1 day
- 14 days
- 30 days (default)
- 60 days.
Delete files in my Downloads folder if they haven’t been opened for:
- Never (default)
- 1 day
- 14 days
- 30 days
- 60 days.
You can select your needed options. The changed settings can be automatically saved. After that, Storage Sense will automatically run as per your settings.
Way 3: Deleted the Unnecessary Temporary Files via Storage in the Settings App
Temporary files on Windows 10/11 include Windows update files, Windows upgrade log files, thumbnails, Delivery Optimization Files, Windows error reports and feedback diagnostics, and more. These files are saved in the C drive and take up much disk space.
Here are the steps to delete temporary files on your PC.
Step 1: Open the Settings app on your device.
Step 2: Go to System > Storage.
Step 3: Click Temporary files. It will take a while to calculate the data in it. You should wait patiently.

Step 4: On the next page, you can see which kinds of files are temporary files on Windows. The default selected files are safe to delete. You can also select other kinds of files to delete.
Step 5: Click the Remove files button to delete the selected temporary files from your PC.

Way 4: Run Disk Cleanup to Reclaim More Disk Space after Windows Updates
Disk Cleanup is also a Windows built-in tool to help you remove useless files like the precious Windows setup files from your computer.
Here is how to run Disk Cleanup to free up space on the C drive:
Step 1: Click the search icon from the taskbar and search for disk cleanup.
Step 2: Click Disk Cleanup from the search results to open this tool.
Step 3: C drive is selected by default. Then, click the OK button to continue.

Step 4: On the page, you can select the files you don’t use anymore and click the OK button to continue.
Step 5: A small interface will pop up with a message saying Are you sure you want to permanently delete these files? Click the Delete Files button to confirm the deletion if you are sure.

These are the 4 ways to free up disk space after Windows Updates. When your C drive is full after Windows updates, you can use these methods to delete the unnecessary files to free up more space.
Recover Your Lost and Deleted Files on Windows 10/11?
Although it is relatively safe to delete the Windows setup files using the above methods, some of your important files may get deleted by mistake in rare cases. For example, you mistakenly selected some files that should not be deleted. As long as these files are not overwritten by new data, you can use MiniTool Power Data Recovery (a free file recovery tool) to get them back.
This MiniTool data recovery software is specially designed to recover data from all kinds of data storage devices. It can work on Windows versions, including Windows 11, Windows 10, Windows 8, and Windows 7.
You can use this program to recover files in different situations. For example, when you can’t access a drive to use files in it, you can use this software to recover your needed files to an accessible location. Even if your Windows computer can’t boot normally, you can use this software to create a bootable medium, boot your PC from the bootable medium, and then select your desired files to recover.
This software has a trial edition. You can first use it to scan the drive you want to recover data from and see if it can find the deleted and lost files you care about.
MiniTool Power Data Recovery TrialClick to Download100%Clean & Safe
Step 1: Download and install this software on your computer. To prevent your deleted or lost files from being overwritten, you should not install this software to the original location of the lost/deleted files.
Step 2: Open the software to enter its main interface. This software will show all the drives it can detect under Logical Drives. You can select the target drive and click the Scan button to scan that drive. However, if you are not sure which one is the target drive, you can switch to the Devices tab and select the whole drive to scan.

Step 3: After scanning, you can see the scan results. Then, you can check if you can find the files you want to recover.

Step 4: If you want to use this software to recover files, you need to use a full edition. After getting the license key, you can just enter it in the scan results interface by clicking the key icon from the top menu. Next, you can select files at once and click the Save button to choose a suitable location to save them.
The End
Want to know how to free up space after Windows 10/11 updates? This article shows you some methods you can try. These methods are proved to be effective. You can feel free to try.
Should you have other issues related to Windows updates, you can let us know in the comments. You can also contact us via [email protected].


User Comments :