Unexpected shutdown or restart is not a rare situation on different devices including computers. Many reasons should be responsible for your computer keeps shutting down randomly. Though it's very annoying to face this situation, you can find practical solutions from this MiniTool post.
Problem: The Computer Keeps Shutting Down Without Warning
Have you encountered an unexpected computer shutdown similar to the user below? At one moment, your computer is operating smoothly, and in the next moment, it suddenly powers down without prior notification.
“This is new behavior in the past month, though I'm uncertain when exactly, as I use this computer as a server host, so a "video game" is usually running. What is going on? Why is my computer shutting down when it should never shut down without user input?”learn.microsoft.com
It is evident that you did not start the shutdown process, which indicates that an external factor is causing Windows to shut down unexpectedly.

Sometimes, the vexing issue is straightforward, such as a misaligned or incorrectly connected cable in the power supply.
However, there are also cases where the computer continuously powers off and on due to internal software problems.
We have listed some common causes below:
- Overheating CPU/GPU.
- Hardware-related issues.
- Driver issues.
- Quick startup settings.
- Enabled sleep mode.
- Operating system errors.
- Malware and virus issues.
- Battery, charger, or power problems.
- Etc.
For various reasons, your computer may shut down randomly or automatically. This can disrupt your work or gaming and lead to data loss, which can be perplexing.
You may wonder: What are the signs of the computer shutting down randomly?
Common Symptoms Before a Shutdown
Here are some common symptoms before a shutdown:
- Alerts for overheating or excessive fan noise.
- Blue Screen of Death (BSOD) occurs before shutdown.
- Freezing or delayed response before powering off.
- Abrupt black screen without any prior notice.
- Rapid battery depletion in laptops.
- Etc.
A sudden shutdown may cause data loss, hardware damage, and interrupted work. Therefore, troubleshooting the issue of random shutdowns in Windows is essential without delay.
Initial Step: Enter the Safe Mode
When your Windows 11/10 PC unexpectedly powers off, it’s advisable to access Windows Recovery Mode. After entering the Windows Recovery environment, select Troubleshoot > Advanced Options > Startup Settings > F4 > Restart to initiate Safe Mode.
Before diving into the specific methods to fix the PC’s sudden shutdown issue, you may find that your important data is lost once you restart your PC.
If you are facing a data loss situation, let’s first check how to recover lost files on Windows.
How to Recover Lost Data After a Sudden Shutdown
To recover files that have been lost after an unexpected shutdown, you can utilize MiniTool Power Data Recovery.
This free file recovery software is safe and trustworthy, specifically created for users of Windows. It is particularly effective at recovering various types of files, such as documents, images, videos, audio recordings, emails, archives, and more.
MiniTool Power Data Recovery FreeClick to Download100%Clean & Safe
The free version of this powerful hard drive recovery tool enables you to recover up to 1 GB of files for free.
Step 1. Launch the software and choose a partition to scan under the Logical Drives tab. Besides, you can switch to the Devices tab and choose to scan the entire disk.
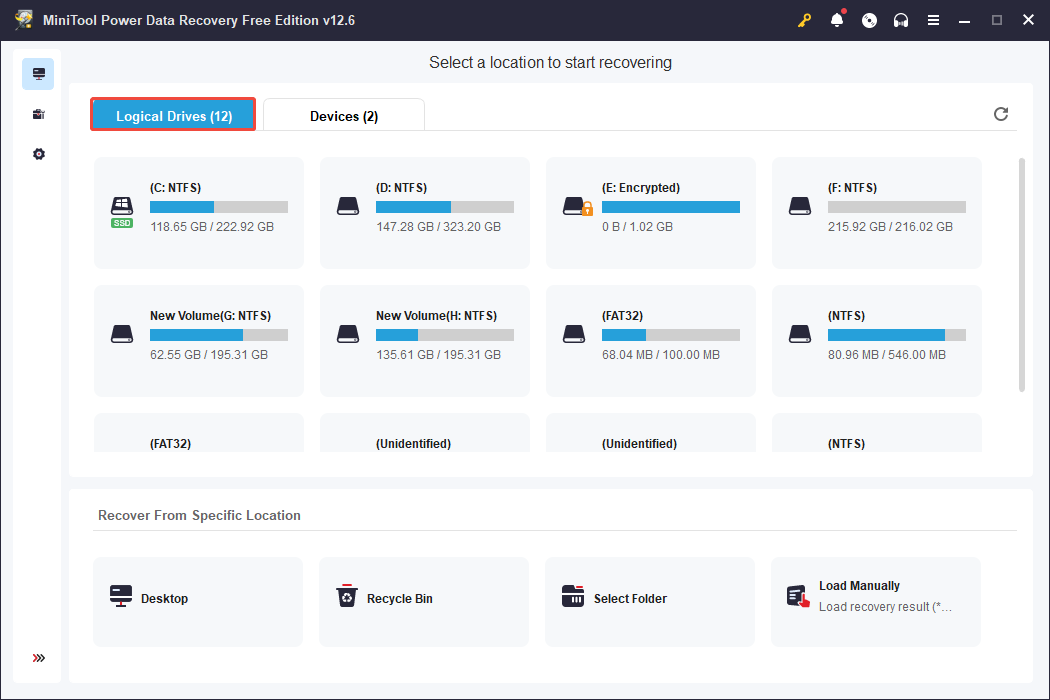
Be patient until the scanning process has completed. To achieve the best recovery results, it is advised not to interrupt the scanning procedure.
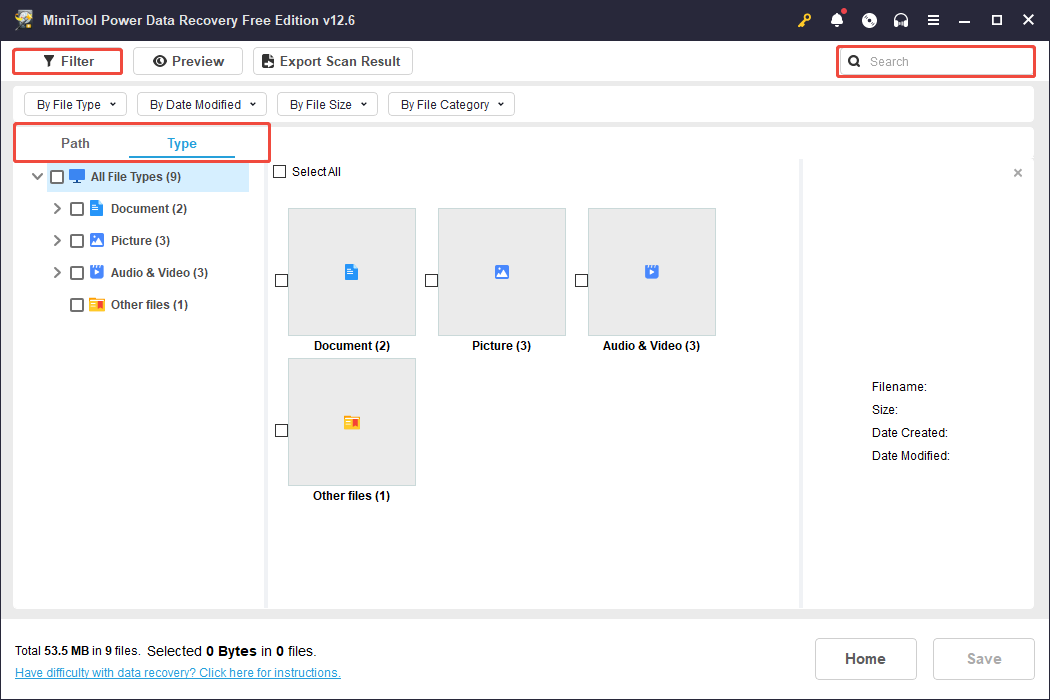
Step 2. Afterward, you will see files for both lost and deleted. There are various helpful features available to assist you in quickly finding your desired files.
- Path: You can expand folders to see your files based on the original folder structure.
- Filter: You can narrow down files by adjusting parameters such as file size, file type, file category, and the date modified.
- Type: This allows you to select specific kinds of files, like archives, photos, documents, audio files, etc.
- Search: You can locate files by entering their names.
- Preview: This enables you to check if the selected file is the one you need.
Step 3: Select the files you wish to recover and press the Save button.
Step 4: Specify an appropriate storage location for your files and click OK. Please avoid saving your files to the original drive, as this may lead to failure in recovery due to overwriting.

Let’s check the more detailed breakdown of potential causes and solutions in the following part.
How to Fix Overheating
Many of the computers available today are built to shut down suddenly without warning when their internal components overheat, which is called thermal protection.
Causes for Overheating CPU/GPU
In general, the causes of the CPU/GPU overheating issue can be as follows:
- There is too much dust on the CPU fans.
- The CPU cooler is not installed correctly. For instance, the radiator cable is not plugged in.
- The thermal paste is not enough or too much.
- The computer case itself is of poor quality. For example, the inside design is terrible.
- The PC fan direction is not good.
- Etc.
In this situation, follow the solutions below to fix the overheating CPU/GPU issue.
Method 1. Clean the PC Dust
If you’ve been using your computer for many years, dust and dirt can obstruct fans and heat sinks, hindering effective cooling. Utilize compressed air to clean fans, ventilation openings, and the CPU heatsink.
Method 2. Stop CPU Overclocking
Have you ever used software or BIOS to overclock your CPU? If you have, please refrain from doing so, as overclocking the CPU can lead to a rapid increase in temperature.
Method 3. Check If the CPU Radiator/Fans Is Installed Correctly
Ensure that your fans are connected to the correct headers. Confirm that the pump’s SATA cable is connected to the PSU. Verify that all fans (CPU, GPU, and case fans) are operating as they should.
Method 4. Replace the Thermal Paste
A PC cannot operate properly without thermal paste. It’s important to verify whether the thermal paste has dried out. If it has, you might need to apply a new layer.
Moreover, an excessive amount of thermal paste can harm the motherboard. It’s essential to understand how much thermal paste is required for a PC.
Method 5. Replace the Cooling System or Undervolt the CPU
Sometimes, the PC’s cooling system may not be functioning well. In that case, replacing the cooling system could help resolve the problem.
If you don’t want to do that, you may need to undervolt the CPU. Meanwhile, utilize monitoring software to observe the temperatures of components while they are under load to determine if overheating is the problem.
Method 6. Contact the PC Vendor
If your computer is still covered by warranty, you can reach out to the vendor for complimentary repairs, no matter what problems the PC has.
How to Fix Power Supply Issues
A faulty power supply unit, battery, or charger could make your computer not work properly and even turn off. Besides, you’ll discover that the computer keeps turning off if the charger voltage is insufficient.
Here are some basic steps to check:
- Check the Power Cable & Outlet.
- Try to use a different wall outlet or power strip.
- Replace the power cable if it is faulty.
- Check the PSU switch.
- Confirm that the GPU, SATA, and other cables are securely connected.
Method 1. Run the Power Troubleshooter
Fortunately, you can simply run the Windows built-in Power Troubleshooter to fix issues with the power plan. Here’s how to do that.
Step 1. Press Win + I to open Settings.
Step 2. Click the Update & Security tab and then scroll down and click Troubleshoot on the right side of the window.
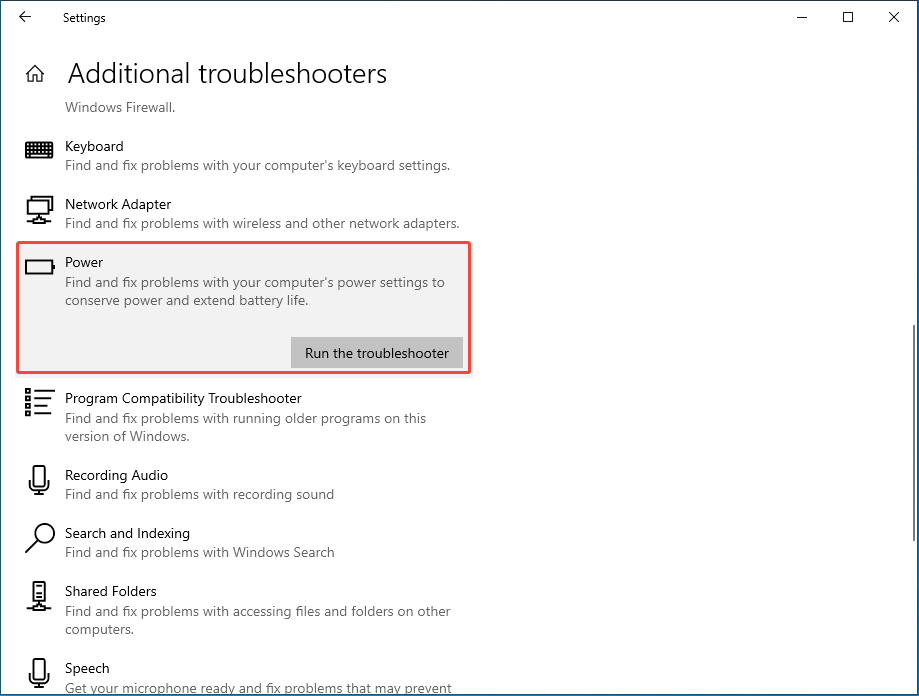
Step 3. Then click Additional troubleshooters.
Step 4. Click the Power option and click the Run the troubleshooter button.
Step 5. Wait for the finish of the process and follow the on-screen instructions to apply the fixes.
Step 6. Restart your computer to see if your PC shuts down unexpectedly again.
Method 2. Change Advanced Power Settings
The advanced power settings enable you to tailor power options for various system components such as USB settings, hard drives, wireless adapters, and more.
Consider adjusting these settings to address the issue of your PC shutting down unexpectedly.
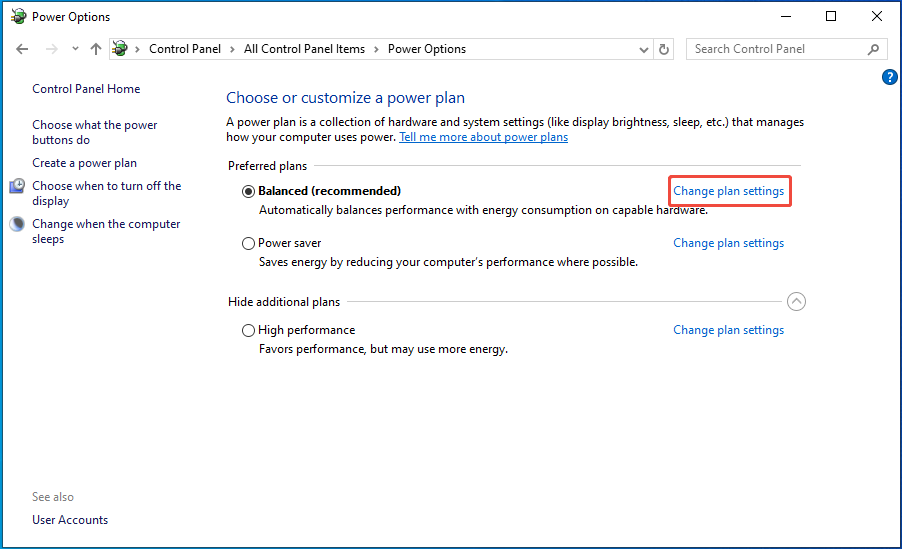
Step 1. Launch the Control Panel.
Step 2. Next, switch to Large icons next to the View by option. Then, select Power Options > Change plan settings (next to your current power plan) > Change advanced power settings.
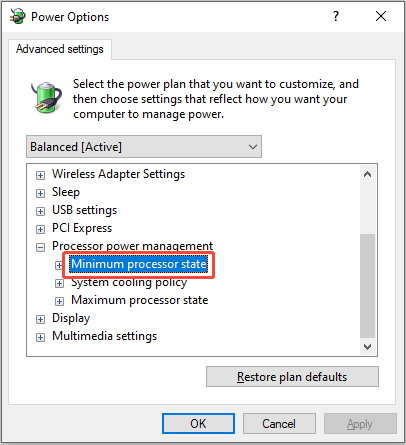
Step 3. In the resulting window, locate and double-click Processor power management. Then, double-click Minimum processor state within this section and adjust its settings. Change the value from 100 to 0.
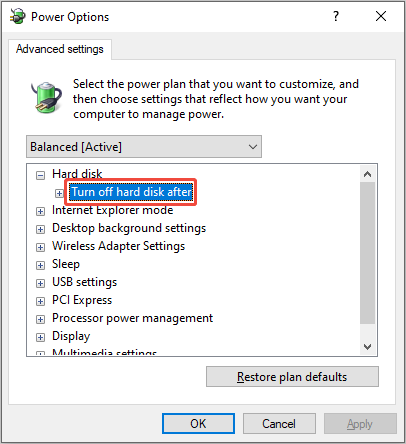
Step 4. Double-click Hard disk > Turn off hard disk after, and set the value to Never.
Step 5. Finally, click Apply > OK to complete the changes.
Method 3. Check PSU Wattage
It’s crucial to check what your PSU is and whether it is capable of supplying sufficient power to satisfy the overall energy requirements of your entire system.
This involves assessing not only the total wattage but also understanding the power demands of each component, such as the CPU, GPU, and any additional peripherals.
How to Fix Operating System Errors
In some cases, a corrupted operating system or incorrect system settings can lead to unexpected shutdowns of the computer.
Here are some common operating system errors that may cause the issue. Follow the solutions to fix it.
Method 1. Disable Fast Startup
The Fast Startup feature was created to reduce the boot time of the computer after it has been shut down.
However, it can cause an unstable system; for instance, your computer may shut down unexpectedly.
In such cases, it is advisable to disable this feature.
Step 1. Press Win + S to open the Windows search bar. Type Control Panel in the box and press Enter.
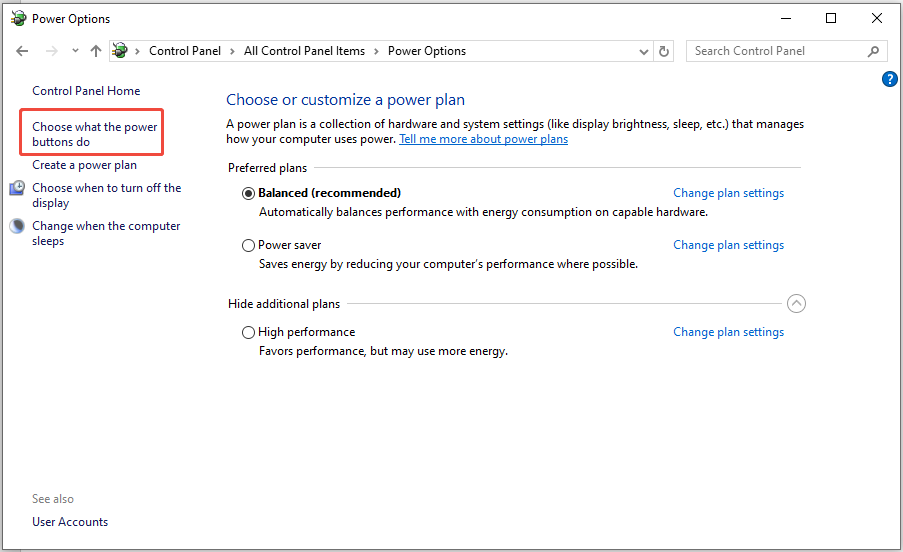
Step 2. In the Control Panel window, locate and click Power Options.
Step 3. In the left sidebar of the next window, click on Choose what the power buttons do.
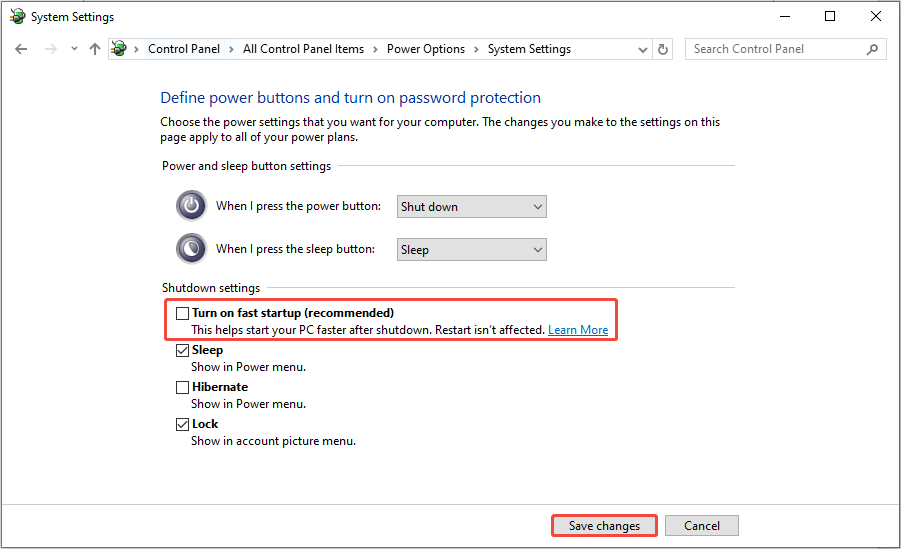
Step 4. Click on the link that says Change settings that are currently unavailable.

Step 5. Deselect the Turn on fast startup (recommended) checkbox and click Save changes to apply the modification.
Method 2. Turn off Sleep Mode
Although sleep mode helps save energy when you’re not using your device, there have been occasions where the PC unexpectedly or automatically shuts down instead of entering sleep mode.
Step 1. Press Win + I to open Windows Settings.
Step 2. Go to System and shift to the Power & sleep tab on the left sidebar.
Step 3. Choose Never in both the Screen and Sleep sections.

Method 3. Update Windows
Updating Windows with the latest patches can help resolve various confusing problems. You can also attempt to update Windows to address the issue of random shutdowns.
Step 1. Launch the Settings on your device.
Step 2. Select Update & Security.
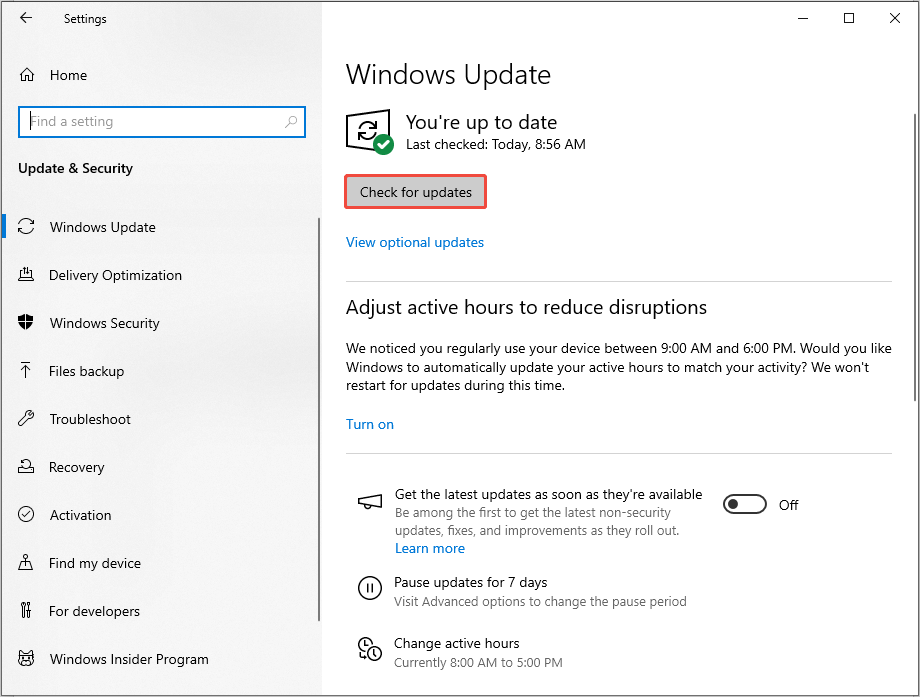
Step 3. In the Windows Update tab, click on the Check for updates option located on the right side of the window. If updates are available, they will be displayed, and then click the Download and Install button to proceed with the installation.
Method 4. Disable Automatic Restart
Automatic restart is a function that compels your computer to reboot after its next crash. However, in certain situations, it may enter a restart loop, causing your PC to shut down unpredictably and then continually restart.
Here’s how to turn off the automatic restart feature on Windows 10 and 11:
Step 1. Press Win + R to open the Run dialog box.
Step 2. Type sysdm.cpl and press Enter.
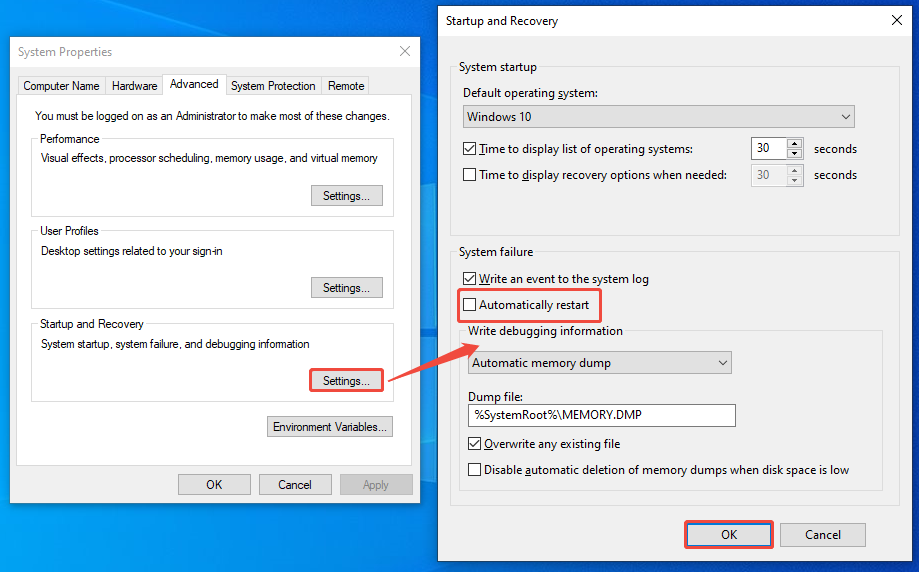
Step 3. Go to the Advanced tab. Under the Startup and Recovery section, click the Settings button.
Step 4. Deselect Automatically restart under System failure.
Step 5. Click OK to save the change.
Method 5. Restore the System
If you set up a system restore point before your computer experiences shutdown issues, you can restore your system to a former state to help resolve this problem.
Step 1. Press Win + S, type Control Panel in the search bar, and then press Enter to launch the window.
Step 2. Select Recovery > Configure System Restore.
Step 3. In the System Protection tab, click the System Restore button.
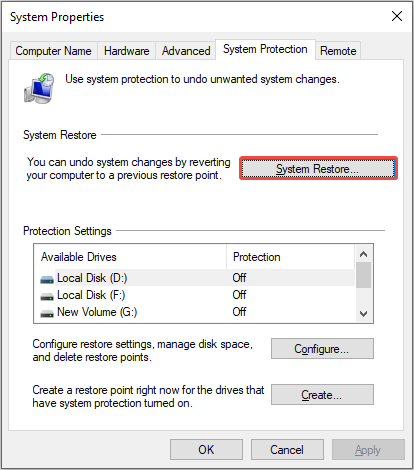
Step 4. Follow the prompts in the wizard to restore Windows to a previous system restore point.
Method 6. Reset the Computer
Resetting your computer to its factory state can fix most issues. This process will delete your existing configurations and installed applications.
You have the option to either retain or delete your data. However, for the sake of data security, I advise backing up your files to an external device if you opt for this approach.
MiniTool ShadowMaker TrialClick to Download100%Clean & Safe
Step 1. Press Win + I to access Settings.
Step 2. Choose Update & Security and navigate to the Recovery section on the left side.
Step 3. Click on the Get started button under the Reset this PC section on the right side.
Step 4. Depending on your preferences, select Keep my files or Remove everything.
Step 5. Click Next, and then choose Reset to begin the process of restoring your PC.
How to Fix Driver Issues
Outdated or corrupted drivers can cause conflicts and unexpected shutdowns for the computer.
These drivers, which serve as crucial intermediaries between your operating system and hardware components, may fail to maintain compatibility with the latest system updates or software applications.
Method 1. Update the Drivers
Outdated drivers on your computer could be causing your system to shut down. You can inspect and refresh the drivers in Device Manager to resolve this issue.
Step 1. Press Win + X and select Device Manager from the Power User menu.
Step 2. Right-click on each device and select Update driver.
Step 3. In the pop-up window, select Search automatically for drives.
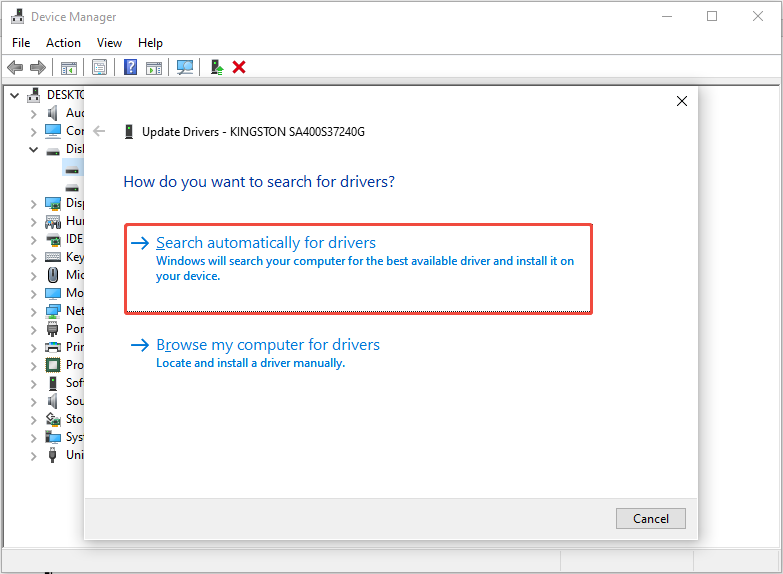
Step 4. If anything is available, follow the on-screen instructions to update your drives.
Method 2. Roll Back the Drivers
If a recent driver update caused the PC’s random shutdown issue, try rolling back to a previous version.
Here’s how to roll back the drive:
Step 1. Right-click the Windows button and select Device Manager.
Step 2. Find the device you want to roll back in Device Manager and expand the hardware categories.
Step 3. Right-click the device and select Properties.
Step 4. Switch to the Driver tab and click the Roll Back Driver button.
Step 5. Select a reason for the rollback and click OK.
Step 6. The previous driver will be restored, and the Roll Back Driver option will be greyed out. Close the Properties window.
Step 7. You’ll see a prompt to restart your computer. Click Yes to reboot.
Method 3. Update BIOS
The BIOS plays a crucial role in your computer’s functionality. Incorrectly configuring the settings can sometimes lead to shutdowns. Therefore, it’s important to check the BIOS update.

How to Fix Hardware Issues
Faulty parts such as RAM, CPU, or motherboard can lead to instability and unexpected shutdowns. In this situation, consider using the following methods.
Method 1. Reseat RAM
Take out and reinstall the RAM modules, making sure that they are properly aligned and seated firmly to avoid any potential connection issues.
If you have several RAM sticks, try testing them one at a time to identify a defective module.
Method 2. Perform Hardware Diagnostics
Random shutdowns on Windows 11 can occasionally be caused by hardware problems such as hard drive failures.
Similar to other components, hard drives also have a usable life span. Sometimes, even if a hard drive hasn’t reached the end of its life, it can still encounter errors.
MiniTool Partition Wizard, a versatile partition management tool, enables you to carry out a range of tasks associated with hard drives and partitions.
MiniTool Partition Wizard FreeClick to Download100%Clean & Safe
How to Fix Malware Infection
Malware can be designed to shut down the computer or create other issues with system stability.
You should be wary that your computer may be under attack from viruses or malware if it shuts down when you run a specific program/tool at certain times.
In this case, you should promptly clear the virus by utilizing a robust anti-virus program.
Method 1. Run a Virus Scan
You can check your computer for viruses or malware using the built-in Windows utility or a third-party anti-virus program like Malwarebytes.
Here’s how to scan your system for viruses with Windows Security.
Step 1: Type Windows Security in the search bar and press Enter.
Step 2: Click on Windows Security under Best match to launch it.
Step 3: In the next window, select Privacy & security > Windows Security.
Step 4: Then select Open Windows Security to access the app.
Step 5: On the main screen of Windows Security, click on the Virus & threat protection option.
Step 6: Under the Virus & threat protection section, click Manage settings to adjust Windows Defender.
Step 7: Turn on the Real-time protection toggle and any other toggles on this page to initiate a virus scan on your computer.

Method 2. Run SFC and DISM
The System File Checker (SFC) and DISM are the main tools used to detect and fix missing or corrupted system files.
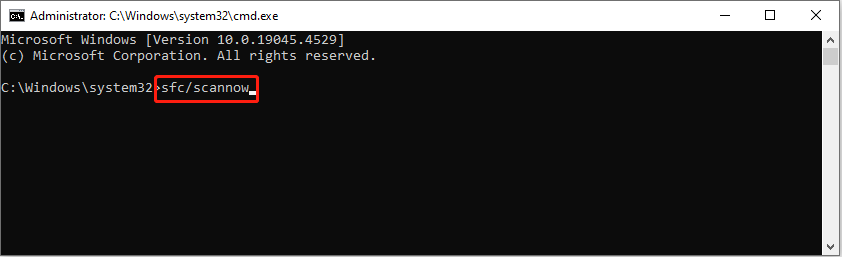
Step 1. Type cmd in the Windows Search box, right-click Command Prompt, and select Run as administrator.
Step 2. Click Yes in the UAC prompt.
Step 3. Copy the command and press Enter:
sfc /scannow
Step 4. After the scan, copy and sequentially paste the following commands, pressing Enter after each line:
Dism /Online /Cleanup-Image /CheckHealth
Dism /Online /Cleanup-Image /ScanHealth
Dism /Online /Cleanup-Image /RestoreHealth

Wrap Up
To sum up, this post provides several feasible solutions to fix the computer’s random shutdown issue due to overheating, power supply issues, operating system issues, driver issues, hardware issues, and malware infection on Windows.
No matter what causes this issue, you can try the methods mentioned above to resolve your problem.
What’s more, we introduce a powerful data recovery tool to help you recover your lost data after a sudden shutdown.
Welcome to share your puzzles with us when using MiniTool Power Data Recovery via [email protected].
About The Author

Position: Columnist
Sandy became an English editor after graduation. She is devoted to finding effective solutions for diverse IT problems and provides articles on data recovery, data backup, and computer partitions and drives. In her spare time, she likes listening to music and playing games.
User Comments :