This post introduces 4 ways to allow you to run CHKDSK on startup in Windows 10 to check and fix computer hard drive errors. It also explains how to stop CHKDSK from running at startup if you find that CHKDSK runs at every startup in Windows 10. Best free CHKDSK alternative and hard drive data recovery services from MiniTool are also offered.
If you’d like to run CHKDSK on startup in Windows 10 to scan and repair hard disk errors, you can check the solutions below. This post also includes ways to run Windows 10 disk check on startup when your PC or laptop won’t turn on.
Besides, if you feel troublesome that CHKDSK runs at every startup in Windows 10, you can also easily stop CHKDSK on startup in Windows 10 by following the operation below.
Hard disk errors often cause some data loss. So, MiniTool Software will also introduce professional data recovery software to help you recover your lost and deleted files in all versions of Windows.
Also read: Discover the essential steps for successful hard drive recovery in this informative article.
How to Run CHKDSK on Startup Windows 10 – 4 Ways
- Run CHKDSK on Startup from Command Prompt
- Run CHKDSK on Startup from Advanced Options Screen
- Run CHKDSK on Startup with Recovery Disk/USB
- Run CHKDSK on Startup with Installation Media
How to Run CHKDSK on Startup Windows 10 – 4 Ways
If your computer can boot and you want to scan the Windows system C drive (where the OS is installed) or other system related drives, you need to run CHKDSK in Windows 10 before boot since CHKDSK can’t run if the drive is in use. Check how to run CHKDSK before booting into Windows below.
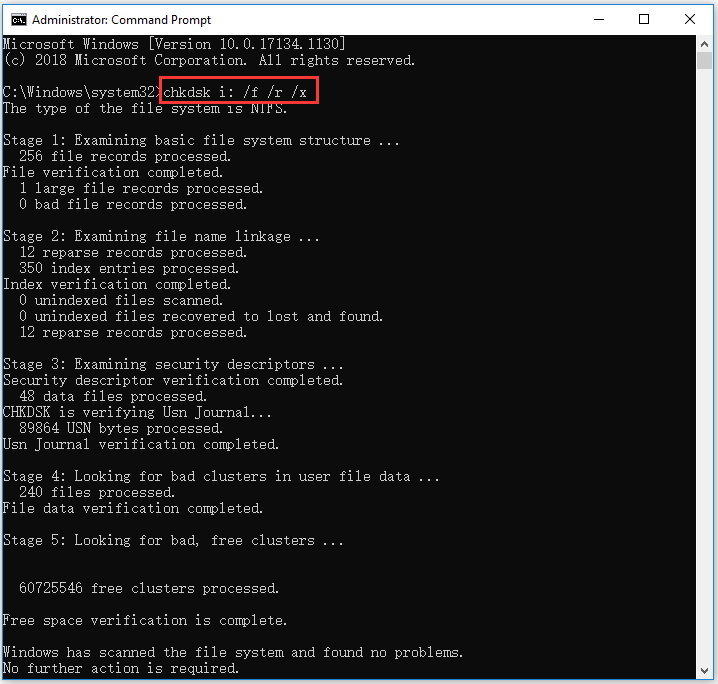
1. How to Run CHKDSK on Startup from Command Prompt
- Press Windows + R, type cmd, press Ctrl + Shift + Enter to open elevated Command Prompt in Windows 10.
- In command Prompt, type this command: chkdsk C: /f /r /x, and press Enter. Replace “C” with the drive letter of the target drive. Please do not miss the spaces in this command.
- If you are trying to scan the system C drive, CHKDSK will pop up a message saying that cannot lock current drive, the volume is in use by another process, and asking you if you want to schedule this volume to be checked the next time the system restarts. You can type Y and press Enter.
- Restart your computer and Windows will automatically run CHKDSK on reboot to scan and fix hard drive errors.
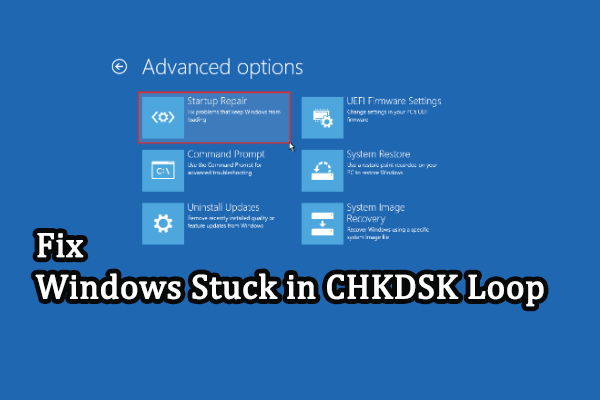
2. How to Run Windows 10 Disk Check on Startup from Advanced Options Screen
If you know how to access advanced startup options in Windows 10, you can select Command Prompt in Advanced options screen to boot your computer into Command Prompt window. And then you can run CHKDSK command in Command Prompt window to check and fix computer hard drive errors before booting into Windows.
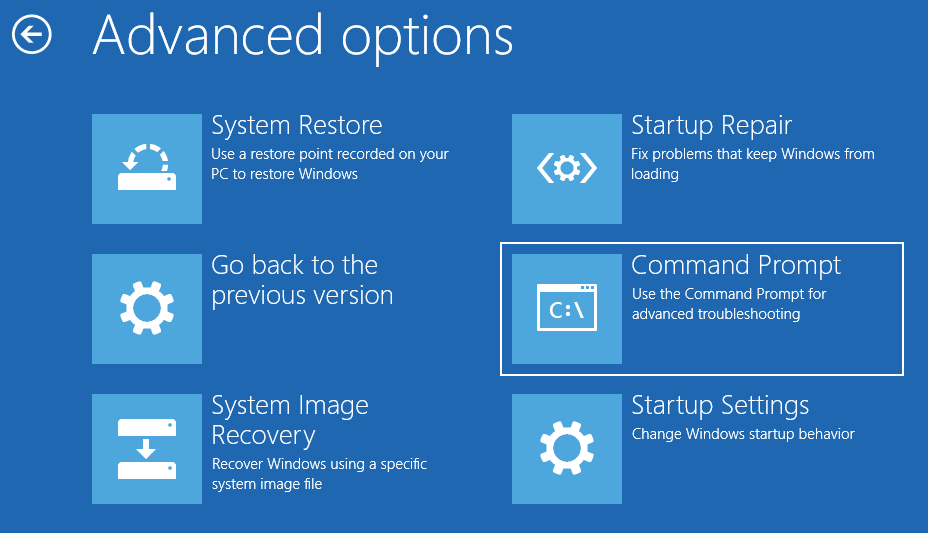
3. How to Run CHKDSK on Startup with Recovery Disk/USB
If your Windows 10 computer can’t boot, but if you know how to create a Windows 10 recovery USB drive or disk, you can then use the recovery USB or disk drive to boot your Windows 10 computer into Windows Recovery Environment (Windows RE). Then you can click Troubleshoot -> Advanced options, click Command Prompt in the blue Advanced options screen and use it to run chkdsk /f /r command.
4. How to Run CHKDSK on Startup with Installation Media
If you don’t have a Windows 10 installation media at hand, you can check how to create an installation media with Windows 10 media creation tool. After you get the installation USB or disc, you can use it to boot your computer into WinRE and get into Advanced options screen to choose Command Prompt option. Then you can run CHKDSK command in Command Prompt to scan and fix disk errors.
Best Free CHKDSK Alternative – MiniTool Partition Wizard
Instead of struggling to run CHKDSK on startup, you can use third-party free disk check tool like MiniTool Partition Wizard to easily check and fix disk errors.
MiniTool Partition Wizard is an all-in-one disk partition manager for Windows. Aside from scanning and fixing disk errors and checking disk bad sectors, you can also use it to easily create/resize/format/delete/wipe partitions, copy disk, migrate OS, convert partition format, analyze disk space usage, test hard drive speed, etc.
Free download and install MiniTool Partition Wizard on your Windows computer, and check the guide below for how to use it to check and fix disk errors as well as how to detect bad sectors on hard drive.
MiniTool Partition Wizard FreeClick to Download100%Clean & Safe
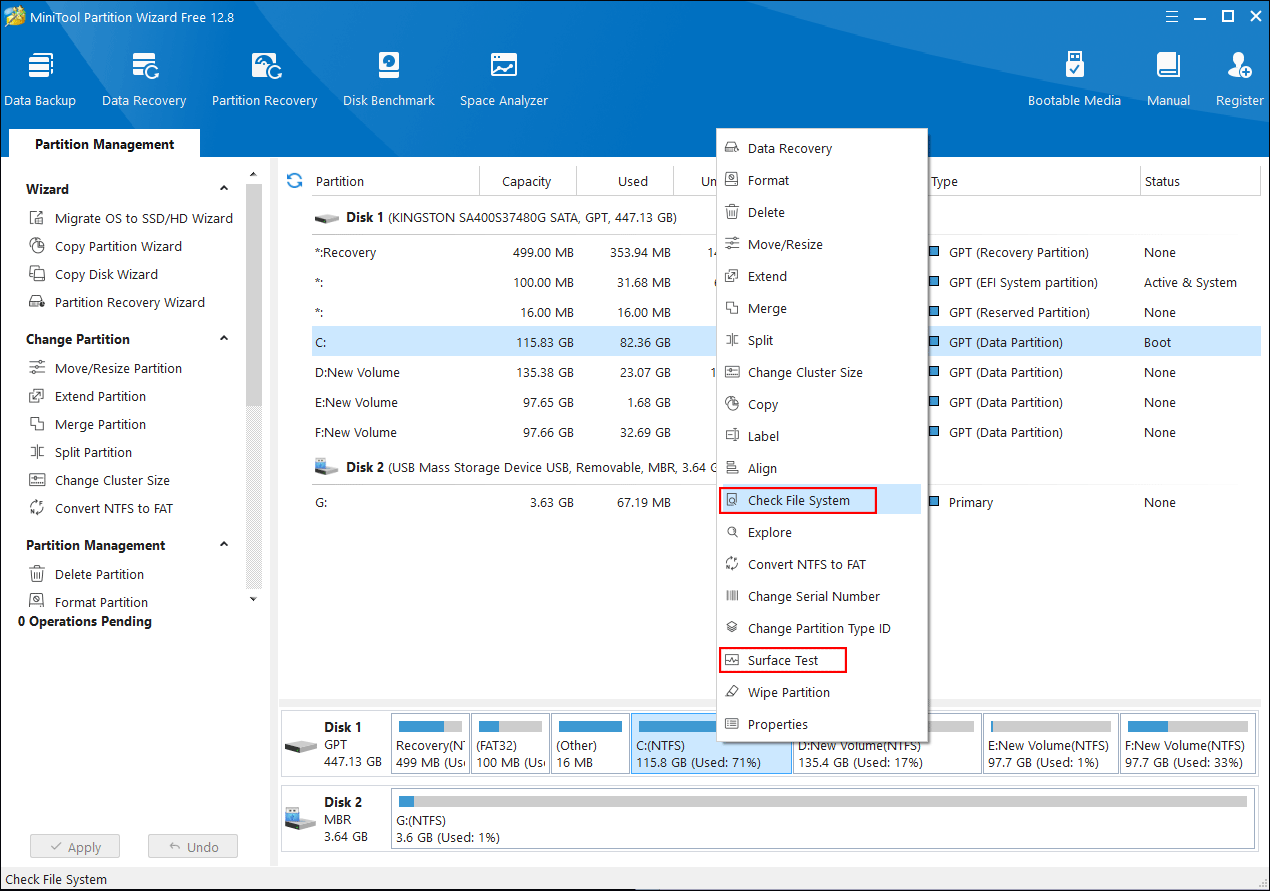
Step 1. Launch MiniTool Partition Wizard and click Yes if it pops up the User Account Control window to enter into the main interface of the software. Locate the target hard drive and the target partition which you want to check disk errors.
Step 2. Right-click the target partition and select Check File System option. In the new window, you can click check & fix file system error option, and click Start button. MiniTool Partition Wizard will automatically scan and fix detected file system errors on the disk.
Step 3. To diagnose if the hard drive has bad sectors, you can go back to the main interface, and right-click the target partition to choose Surface Test option. Click Start Now button to begin checking bad sectors on the disk.
How to Stop CHKDSK on Startup Windows 10 – 3 Ways
- Press Any Key to Cancel the Disk Check
- Stop CHKDSK on Startup via Command Prompt
- Disable CHKDSK on Startup with Registry Editor
How to Stop CHKDSK on Startup Windows 10 – 3 Solutions
Some users have the problem that CHKDSK always runs at startup. CHKDSK scanning can be very time-consuming. If you want, you can stop CHKDSK from running at startup in Windows 10. Check the solutions below.
Solution 1. Press Any Key to Cancel the Disk Check
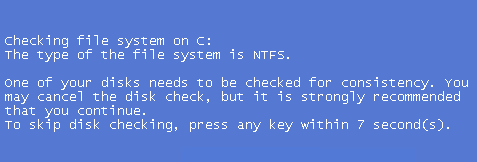
If your computer didn’t shut down properly, Window CHKDSK may automatically run when you start your computer next time. It will appear a message on booting saying that one of your disks needs to be checked for consistency. It advises you to conduct the disk check, but also gives an option to cancel the disk check by pressing any key within several seconds. You can press any key to stop CHKDSK on startup in Windows 10.
Solution 2. Stop CHKDSK on Startup via Command Prompt
By using solution 1, you can skip the CHKDSK scanning for once. But if you restart your computer next time, CHKDSK may automatically run again since it thinks one of your computer hard drive still needs to be checked. If CHKDSK runs at startup in every restart, you can use Command Prompt to disable it if you want.
- Press Windows + R, type cmd, and press Ctrl + Shift + Enter to open elevated Command Prompt.
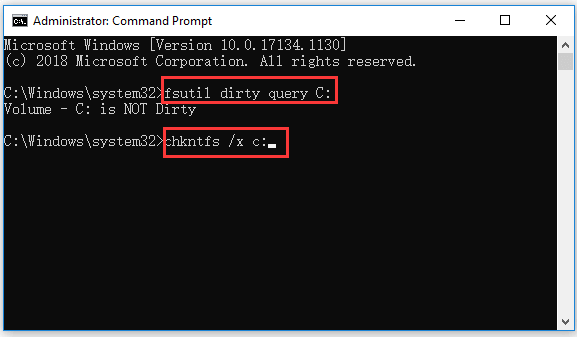
- Optional action: Type the command fsutil dirty query C: in Command Prompt, and press Enter to execute the command. This can help check if the drive has been marked with a dirty bit value, since CHKDSK will automatically check the disk that is marked as dirty.
- Next you can type chkntfs /x c: command, and press Enter to disable CHKDSK from scanning C drive on startup.
- If you want to stop CHKDSK on startup for several drives, you can add the drive letters in the command, e.g. chkntfs /x c: d: e:. Please do not forget the spaces in the command line.
Solution 3. Disable CHKDSK on Startup with Registry Editor
You can also stop check disk on startup by using Registry Editor.
- Press Windows + R, type regedit in Run box, and press Enter to open Registry Editor in Windows 10.
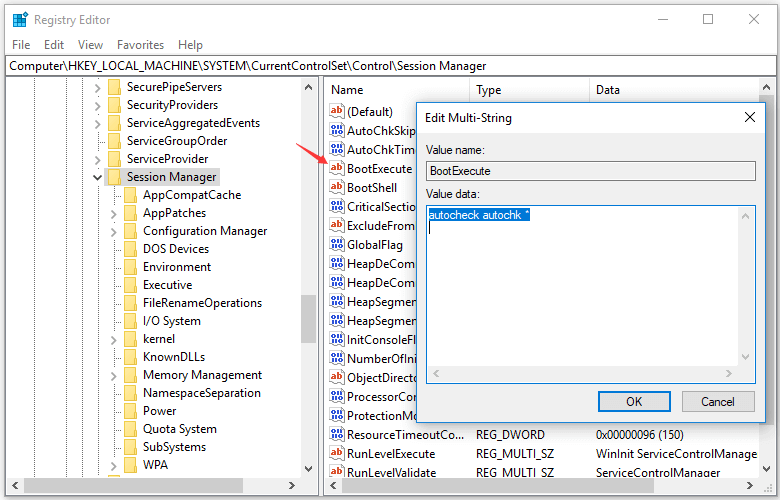
- Navigate the following path in Registry Editor: HKEY_LOCAL_MACHINE\SYSTEM\CurrentControlSet\Control\Session Manager.
- Double-click BootExecute key in the right window. And delete all lines under Value data except autocheck autochk *.
- Close Registry Editor and restart your computer to check if CHKDSK runs at startup.
How to Recover Lost/Deleted Files from Windows 10 PC or Laptop
In case you lost some important data after CHKDSK scan or lost some important files due to hard drive failures or other reasons, here we introduce an easy and fast way to help you recover any lost or deleted files from Windows 10 computer and other storage devices.
MiniTool Power Data Recovery is best free data recovery software for Windows. You can use this tool to easily recover lost/deleted files from Windows PC or laptop, external hard drive, SSD, USB flash drive, SD memory card, etc. in simple steps. Various data loss situations are covered.
It delivers fast scan speed, high recovery result, and keeps original file. Extremely easy-to-use and 100% safe. Download and install MiniTool Power Data Recovery in your Windows 10 computer, and check how to recover data from Windows 10 computer below.
MiniTool Power Data Recovery FreeClick to Download100%Clean & Safe
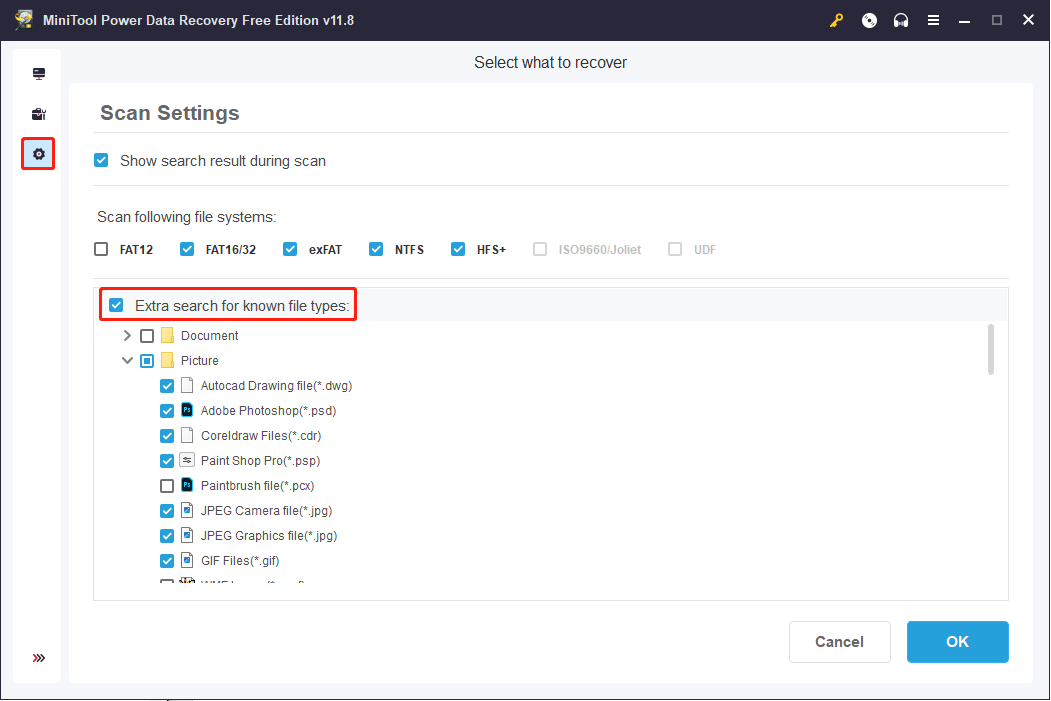
Step 1. Launch MiniTool Power Data Recovery. Optionally, before starting the scanning process, you can also click the Scan Settings button in the left menu bar to select specific file types and click OK to save the change.
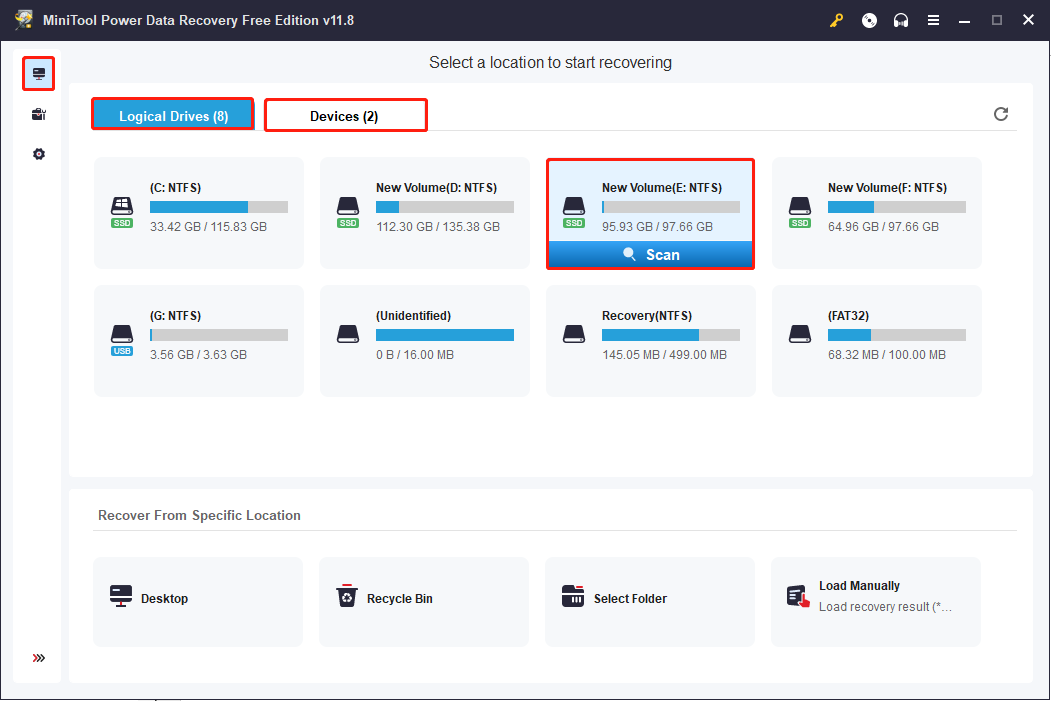
Step 2: Return to This PC interface, choose the target partition that contains your lost/deleted files, and click the Scan button. If you want to select the whole disk to scan, you can click the Devices tab and choose the disk.
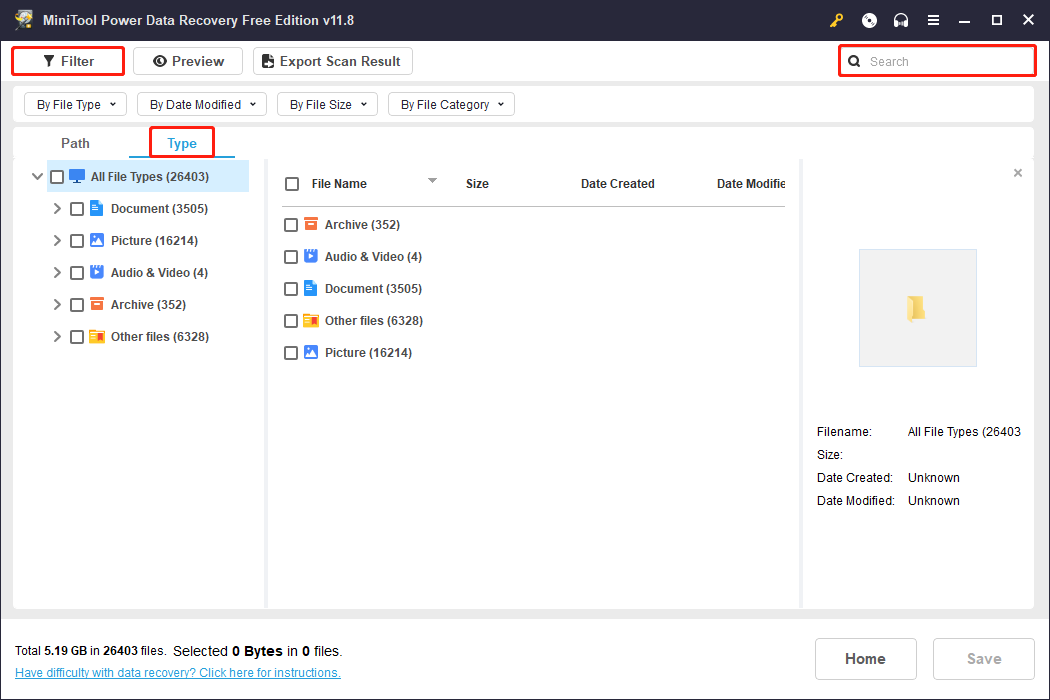
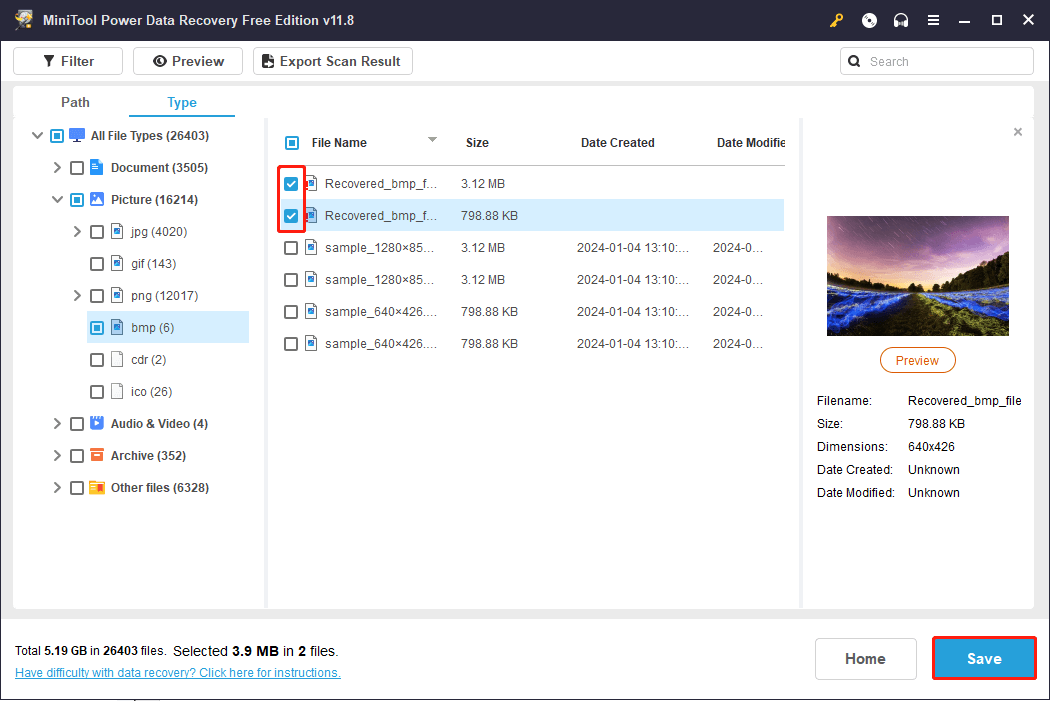
Step 3: The software will list files according to their paths on the result page. You can shift to the Type tab to discover wanted files by their types. To help you locate wanted files quickly, the Filter and Search features work significantly.
Step 4: Tick the needed files and click the Save button to choose a new destination path to store the recovered files.
Conclusion
This tutorial explains how to run or stop CHKDSK on startup in Windows 10. If you have other questions about how to use MiniTool Partition Wizard or MiniTool Power Data Recovery, please contact [email protected].
Run or Stop CHKDSK on Startup FAQ
- Press Ctrl + Shift + Esc to open Task Manager.
- Find CHKDSK in Task Manager window, right-click it and click Details to find out PID of the CHKDSK task.
- Next you can press Windows + R, type cmd, and press Ctrl + Shift + Enter to open elevated Command Prompt.
- Then type the command taskkill /F PID PID number in Command Prompt window, and press Enter. Replace “PID number” with the PID of CHKDSK.
You may use this way to force stop CHKDSK if the scanning and repairing drive gets stuck in Windows 10. However, it’s not a good idea to force stop CHKDSK in progress after you manually run chkdsk /f /r command in Windows 10. It may cause damage to the hard disk and cause data loss. So it’s not recommended.
User Comments :