Problem Overview: My Laptop Won’t Turn On
You may feel so frustrated if your HP, Dell, or Lenovo laptop won’t turn on. When you try to start your device, you may run into one of the following symptoms:
- Laptop is not starting after pressing the Power button
- Laptop won’t start up just a black screen
- Laptop won’t turn on but power light is on
- Laptop won’t turn on even when plugged in
- …
What is causing the laptop startup issue? Let’s look at some possible reasons why your laptop refuses to turn on.
Why My Laptop Is Not Starting After Pressing the Power Button
Typically, there are two main types of reasons why your laptop does not start after pressing the Power button: physical issues and logical issues. Physical problems usually involve power supply or display failures, while logical problems are related to software or system errors.
Physical Issues
Power-related issues
A faulty power adapter, battery, charging cable, or charging port may prevent your computer from turning on. This happens especially when the battery runs out of power.
Internal hardware failures
Problems with the internal RAM stick, motherboard, or hard drive may interfere with the normal startup of your computer.
Screen issues
Sometimes, the laptop is actually turned on, but a disconnected or broken monitor makes it look like nothing happens after pressing the Power button.
Logical Issues
System errors
Corrupted system files or problematic Windows updates may cause the laptop to fail to start.
Software conflicts
Some incompatible programs or malware can prevent the laptop from starting properly and result in a black screen.
BIOS configuration issues
Incorrect BIOS settings or a failed BIOS update may also prevent your computer from starting properly.
Try These Simple Fixes When Your Laptop Refuses to Turn On
When the laptop does not turn on as expected, you can try some easy troubleshooting steps. They include checking the power supply and battery, verifying the display issues, performing a hard reset, disconnecting all external devices, and giving the computer time to cool before turning it on again.
They can fix many common startup issues without needing advanced tools or complicated operations.
Check the Power Supply and Battery
Make sure your laptop is properly connected to a stable power source. You can plug the computer into another outlet to rule out a faulty outlet. If possible, remove the battery, wait for a few seconds, and then reinsert it into your computer.
Check the Display Connection
Your computer may actually be turned on, but it shows a black screen because the monitor is broken or has become disconnected. This can happen especially when your laptop won’t turn on but the power light is on.
In this case, try connecting to an external monitor. Or, disconnect the current external monitor and reconnect it.
Remove All External Devices
Sometimes, external devices can interfere with the boot process. Try removing all USB flash drives, external hard drives, SD card readers, external keyboards, printers, and other devices.
Do a Hard Reset
A hard reset can sometimes resolve boot issues by clearing the system’s memory. How to perform a hard reset?
- Unplug the power cord and remove the battery (if possible).
- Press and hold the Power button for 30 seconds.
- Reconnect the power cord but not the battery, and then try starting your laptop.
Wait for the Laptop to Cool Down
When your laptop is overheating, it may not start properly. If it is hot or makes a loud noise, wait for some time before trying to turn it on.
If none of the troubleshooting steps above restore your computer to normal, try booting into Safe Mode and performing advanced repairs.
Try Booting Into Safe Mode
When your system is not booting normally, follow the steps below to enter Safe Mode:
Press and hold the Power button for 10 seconds to turn off the computer. Then press the Power button to boot the laptop. When the manufacturer’s logo appears, press the Power button again for 10 seconds to turn off the computer.
Duplicate this process 3 times, and your computer should enter the Automatic Repair window. When the message “Automatic Repair couldn’t repair your PC” appears, click Advanced options to enter WinRE.
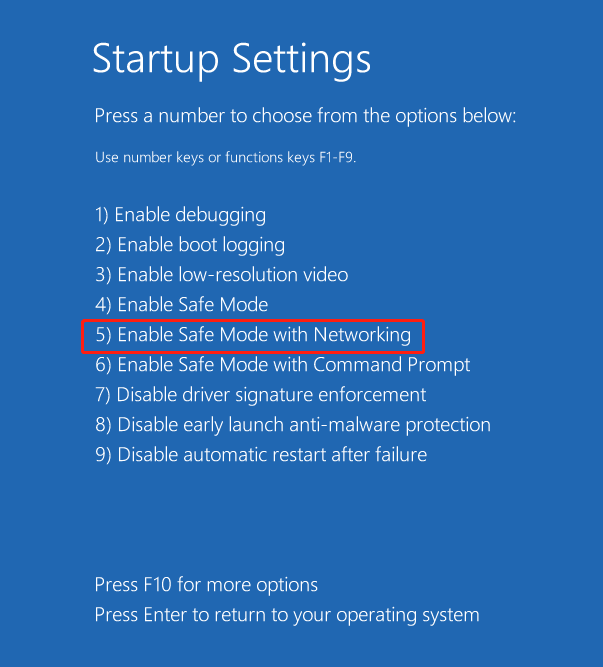
Next, click Troubleshoot > Advanced options > Startup Settings > Restart.
Once the nine recovery options show up, press F5 on your keyboard to enable Safe Mode with networking.
The data transfer and laptop repair methods depend on whether you can access Safe Mode. I will discuss both cases separately. Refer to the one that matches your situation.
Case 1. You Can Enter Safe Mode
If you can enter Safe Mode, you can transfer your files directly without using any hard drive recovery service. You can also try various repair methods, such as running Startup Repair, uninstalling the latest Windows update, performing a system restore, or rebuilding the MBR.
In addition, you can attempt some hardware-related fixes that have worked for many users on forums. These include replacing the CMOS battery or reseating the RAM stick.
Transfer Important Files First
Once you boot into Safe Mode, you can transfer your important files for data safety, just like you are in normal mode. You can use an external hard drive or a cloud storage service.
Use an external hard drive:
Connect the external hard disk to your laptop. Then open File Explorer, locate the files or folders you want to transfer, and copy and paste them to your external drive.
Use a cloud storage:
Since you enter Safe Mode with networking, you can upload the desired files to the cloud.
Sign in to your cloud account, such as OneDrive, Google Drive, or Dropbox. Next, select and upload the files you want to protect. Later, you can download them to your computer.
After rescuing your files, you can try the following repair solutions without worrying about file loss or corruption.
Solution 1. Run Startup Repair
Startup Repair is a built-in Windows tool designed to fix common boot problems. It can automatically scan and repair missing or damaged system files. When your laptop won’t start up, you can run it from the Windows Recovery Environment (WinRE).
Step 1. Turn your computer off and on 3 ~ 5 times until you enter WinRE.
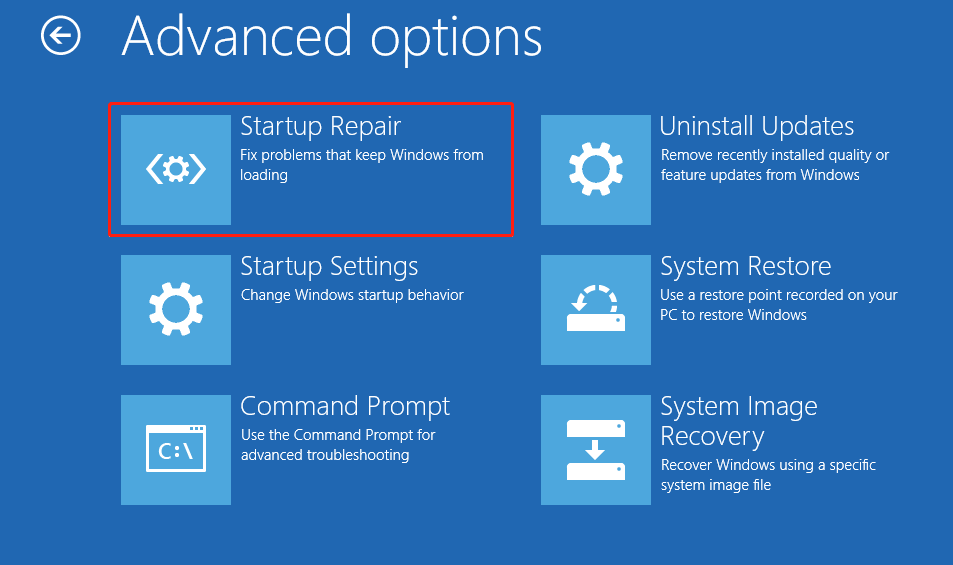
Step 2. Select Troubleshoot > Advanced options > Startup Repair.
If Startup Repair detects any of the damaged system files, incompatible drivers, or registry errors, it will attempt to fix them automatically. If it cannot fix the problem, it will provide a detailed report of the issues it found.
Solution 2. Uninstall Windows Update
If your laptop won’t turn on after a Windows update, the update files might be corrupted or incompatible. In this case, try uninstalling the latest update and see if the problem is resolved.
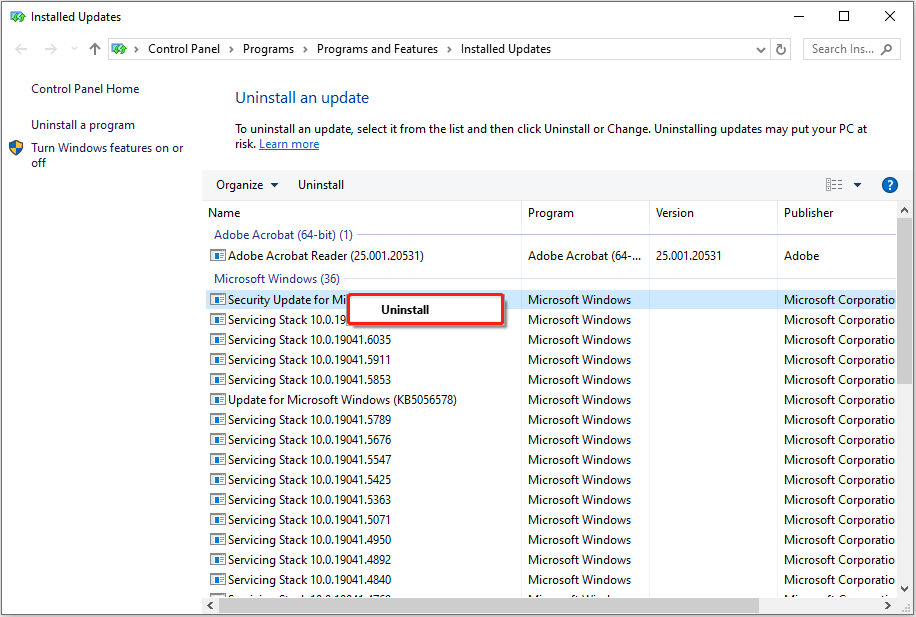
How to uninstall Windows updates? I take Windows 10 for example to show you the steps.
Step 1. In Safe Mode, press Windows + I to open Settings.
Step 2. Navigate to Update & Security > Windows Update > View update history > Uninstall updates.
Step 3. Right-click the update you want to remove and choose Uninstall.
Solution 3. Scan for Virus
Some malicious programs or viruses may damage important system files and lead to boot issues. Running a full virus scan is a good way to check if your system has been infected. If yes, the antivirus software will remove the viruses.
How to scan your computer for viruses? Follow the steps below.
Step 1. In Safe Mode, open Settings and go to Update & Security > Windows Security > Virus & threat protection.
Step 2. Click Quick scan and wait for the process to finish. You can also click Scan options to choose from Quick scan, Full scan, Custom scan, or Offline scan.
Solution 4. Perform a System Restore
If you have created a system restore point before your computer started experiencing boot failures, you can restore your system to a previous healthy state. To do this, you need to access the Windows Recovery Environment and follow these steps.
1. Enter WinRE
Shut down your computer.
Turn on the laptop, and during the boot process, press and hold the Power button to turn off your device again. Repeat this process 2 ~ 3 times until you enter WinRE.
2. Navigate to System Restore
In WinRE, select Troubleshoot > Advanced options > System Restore.
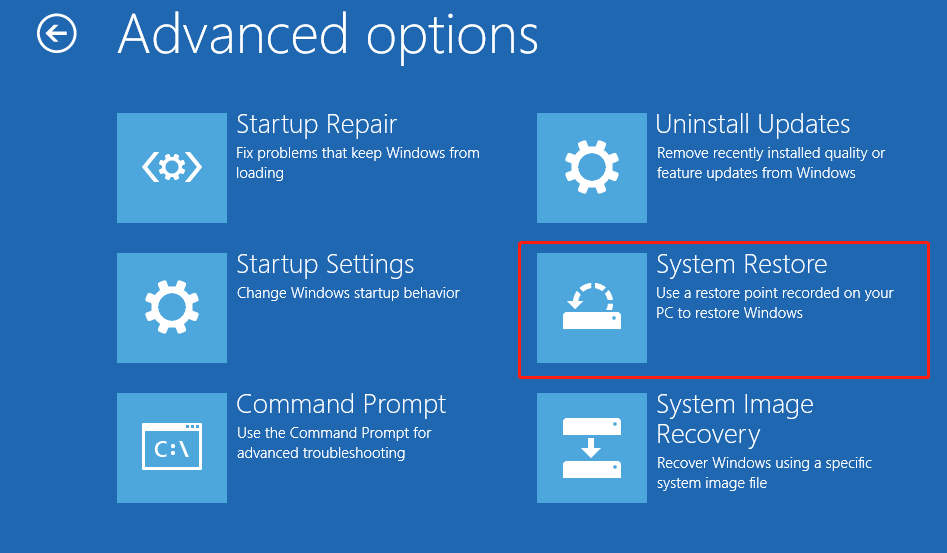
3. Select a Restore Point
Select the restore point that you want to use in the list of results, and then click Next > Finish.
After the restore point is applied, click Restart.
Solution 5. Rebuild MBR
The Bootrec.exe tool can also help troubleshoot and repair boot issues, especially when the Master Boot Record (MBR) is damaged. To be specific, you will run these commands: bootrec /fixmbr, bootrec /fixboot, bootrec /scanos, bootrec /rebuildbcd to repair or rebuild the MBR.
Step 1. Boot into WinRE.
Step 2. Choose Troubleshoot > Advanced options > Command Prompt.
Step 3. Input the following command lines and press Enter each time:
- bootrec /fixmbr
- bootrec /fixboot
- bootrec /scanos
- bootrec /rebuildbcd
Step 4. Restart your PC and verify if it runs well.

Solution 6. Replace CMOS Battery
The CMOS battery gives power to the BIOS settings even when your computer is turned off. If the battery is dead, your laptop may not start properly. Replacing it can sometimes fix the black screen.
Here is how to replace the CMOS battery:
- Shut down your laptop and unplug all cables.
- Open the laptop case and find the CMOS battery. It is usually a silver coin-shaped battery.
- Carefully remove the old battery, and then place the new one in the same orientation as the old one.
- Close the case, reconnect all cables, and start your computer.
Solution 7. Reseat the RAM Stick
When I looked through some forums about laptops that won’t start, I saw many users say that reseating the RAM helped them fix the problem. So, you can give it a try.
Here are the steps to reseat RAM:
- Turn off your laptop and remove all cables.
- Open the computer case to access the RAM slots.
- Identify the RAM modules and the corresponding slots.
- Push the clips securing the memory module outward to release the RAM, and then remove it.
- Reinsert the RAM sticks and push them down firmly.
- Close the case and start your computer.
Case 2. You Cannot Access Safe Mode
If you cannot boot into Safe Mode, you need to create a bootable data recovery media to access and recover your files. Then, reinstall Windows with an installation media or send the computer to a repair center.
Rescue Your Files First
Two ways are available to rescue files from an unbootable laptop: connect the hard drive to another computer or use professional data recovery software to create a data recovery drive. I will explain them one by one.
Way 1. Remove the Hard Drive and Connect It to Another PC
This is the most straightforward solution if you have access to another working computer. After removing the hard drive from the unbootable laptop and connecting it to another device, you can directly copy and paste your files without using paid or free data recovery software.
However, this method also has some drawbacks:
- Not suitable for drives soldered to the motherboard, such as some ultra-thin laptops.
- Requires physical tools like a USB adapter or docking station.
- Requires certain skills. If it is not done properly, the drive may be damaged.
Way 2. Create a Bootable Media
If removing the hard disk is not feasible, you can use professional data recovery software that allows you to create a bootable drive to access the system and retrieve your files. MiniTool Power Data Recovery is recommended.
MiniTool Power Data Recovery FreeClick to Download100%Clean & Safe
MiniTool Power Data Recovery is an easy-to-use bootable data recovery tool for Windows. It offers a snap-in MiniTool Bootable Media Builder (not available in the free edition) that helps create a bootable USB or CD/DVD. With this tool, you can recover all types of files from HDDs, SSDs, and removable disks.
How to use MiniTool Power Data Recovery Bootable to recover files? Use the bootable device to boot your computer first, then select the hard drive that has the lost files saved to make a deep scan. Finally, choose the wanted files and save them to a safe location.
>> Process 1. Create a Bootable Disk.
Step 1. Insert a blank USB drive into a working computer. Recommended USB drive size: 4 GB – 64 GB.
Step 2. Visit the MiniTool Power Data Recovery Bootable page and get the software installed.
Step 3. Launch the software, and click the Bootable Media Builder icon.
Step 4. In the new window, click WinPE-based media with MiniTool plug-in.
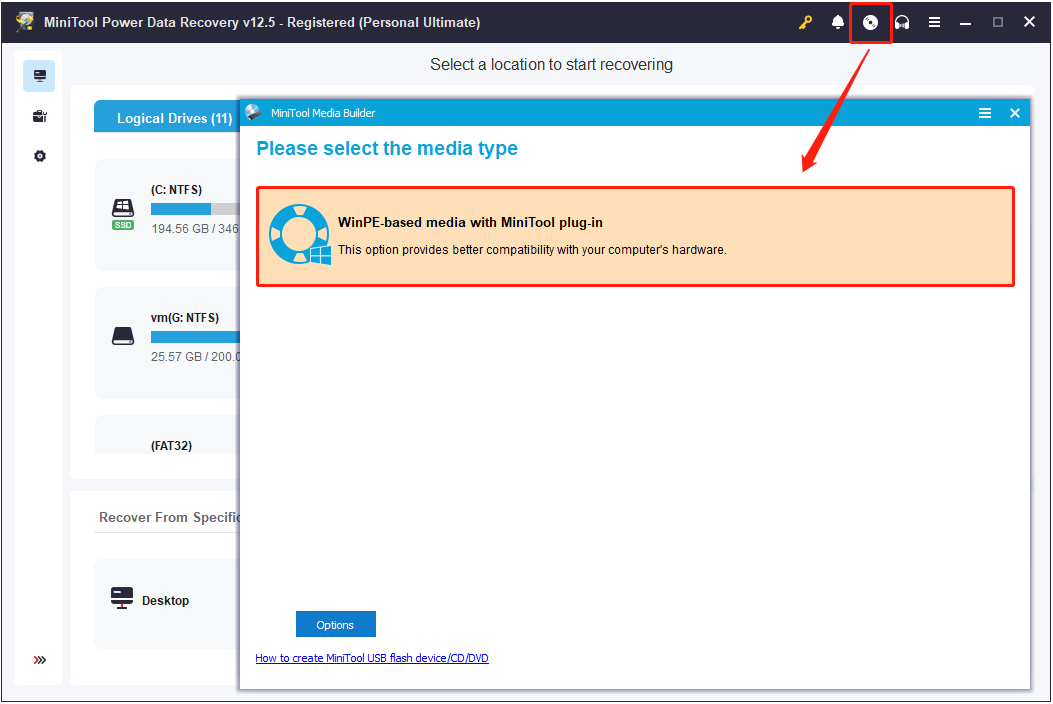
Step 5. Select the option to create a bootable USB drive and finish the process.
>> Process 2. Boot Your Laptop From the Bootable Disk and Launch the Software.
Step 1. Insert the bootable USB disk into the problematic laptop.
Step 2. Power on your computer. During startup, press the BIOS key, like F2, F12, Esc, Delete, etc., to enter BIOS.
Step 3. Once in the boot menu, use the arrow keys on your keyboard to find the option that corresponds to your USB drive. Select it and press Enter to boot from it.
Step 4. Follow the on-screen instructions to decide whether to change the screen resolution, and then launch the MiniTool data recovery tool.
>> Process 3. Scan Your Disk and Recover Your Files.
Step 1. On the main interface of MiniTool Power Data Recovery, you are in the Logical Drives section by default. Select the target partition where the wanted files are stored and click Scan. Or, you can go to Devices and select an entire disk to scan for files.
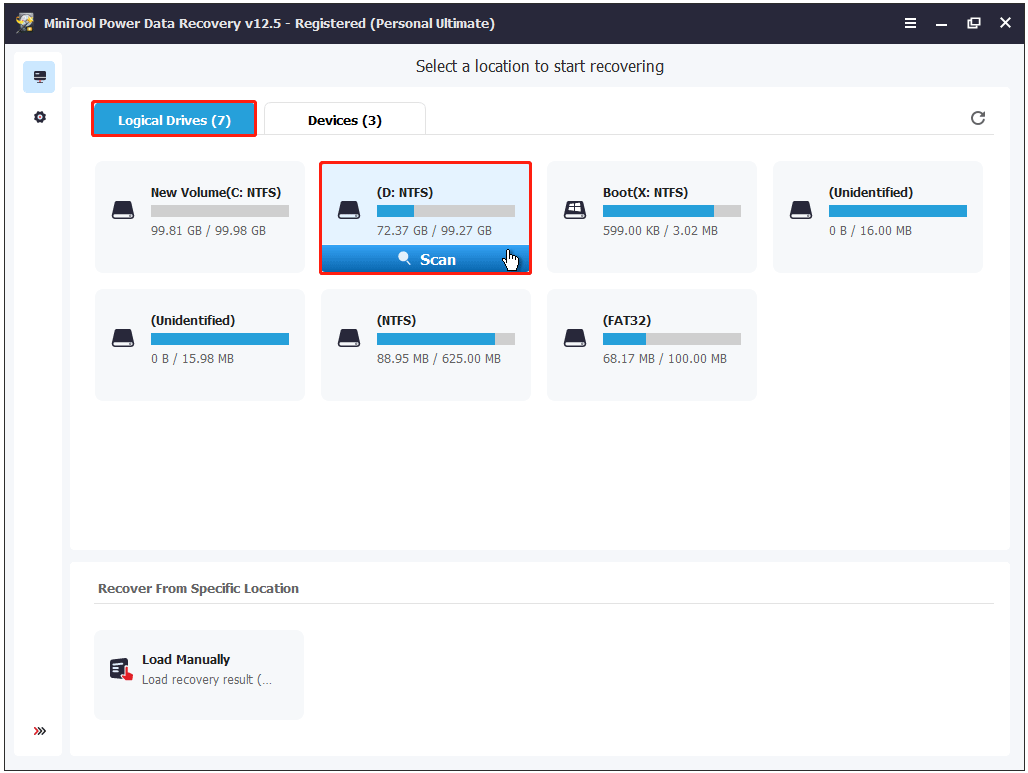
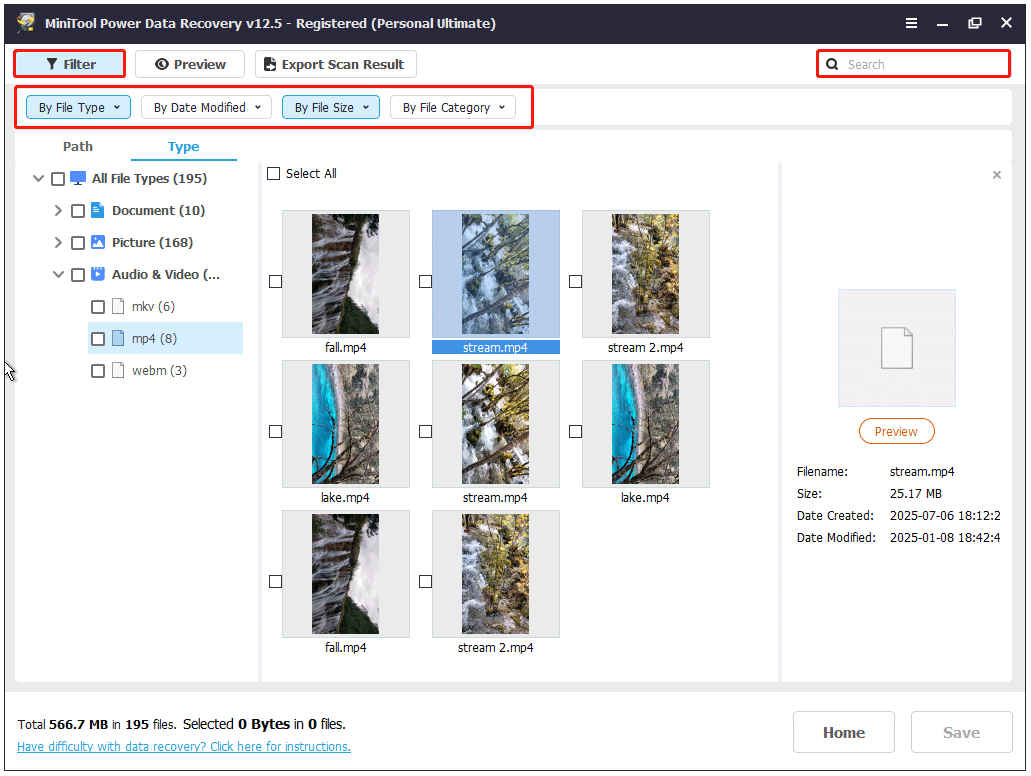
Step 2. Once the scan is completed, expand each folder under Path to find and tick the files you want to recover. Moreover, you can move on to the Type category to view found files by file type.
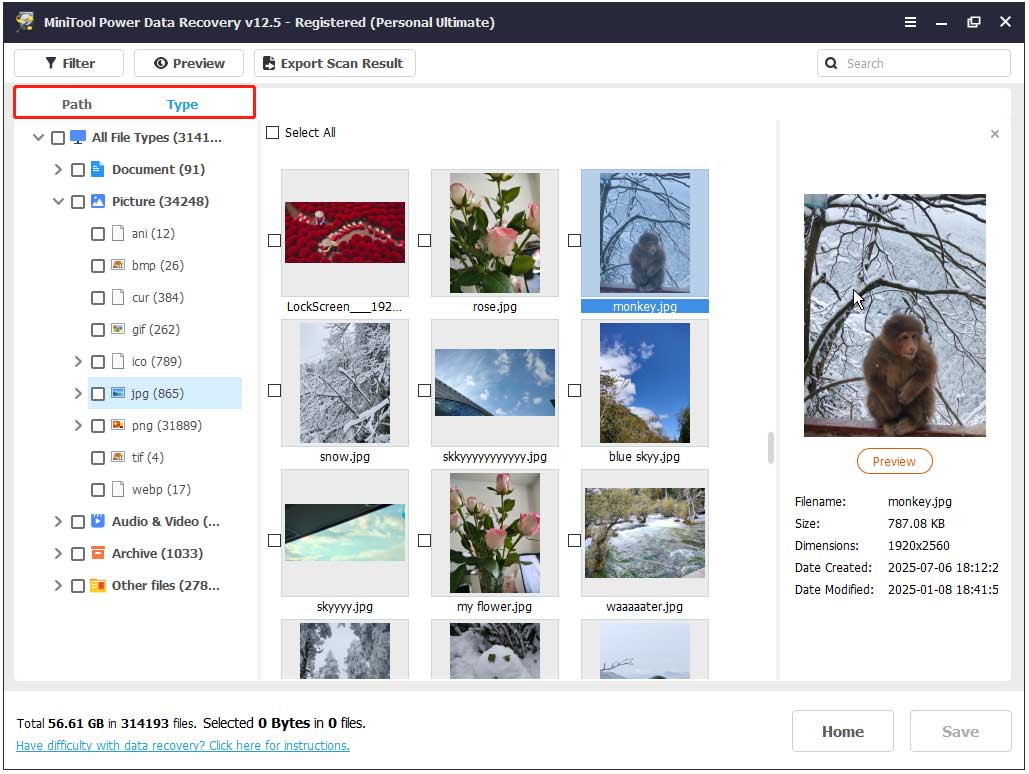
Want to filter listed files more accurately? The Filter and Search features can help you.
- Filter: Filter out unwanted files by file type, file modification date, file size, and file category.
- Search: Search for a specific file or folder by typing a partial or complete file name in the search box and pressing Enter.
Step 3. Double-click on each of the target files to preview them.
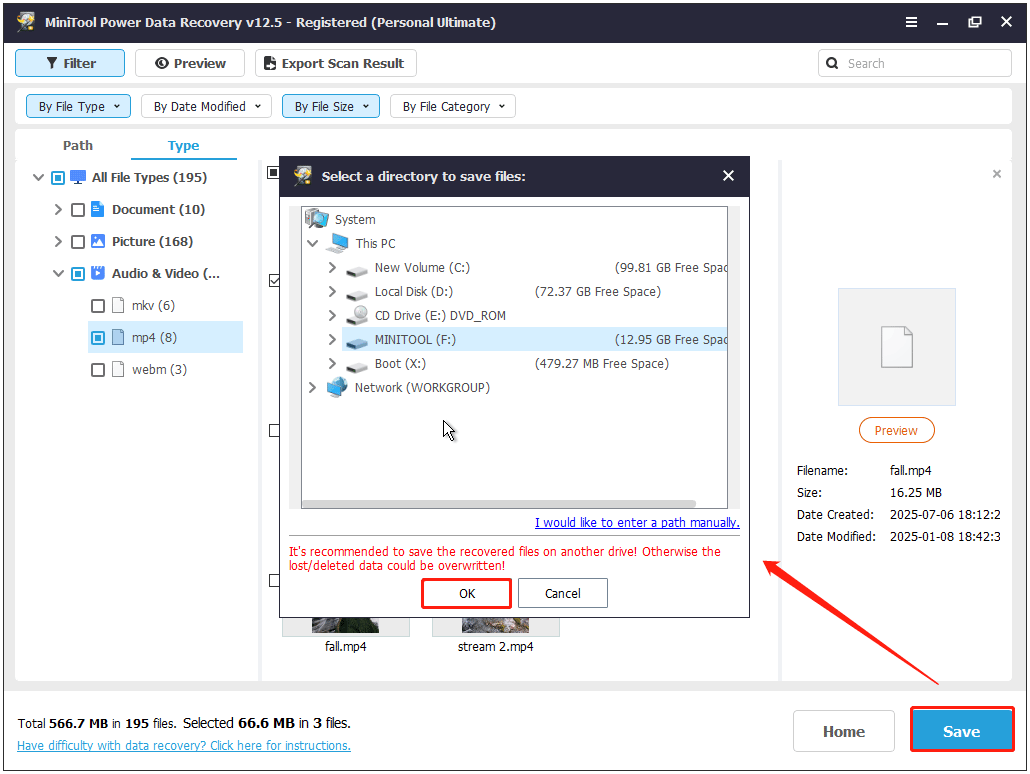
Make sure all the files you want to recover are ticked. Finally, click Save and choose an external disk to store the recovered files, and click OK.
Now that your files have been restored, the next step is to create a Windows installation media and use it to reinstall Windows.
Solution 1. Perform a Clean Installation
Note that a clean installation removes all personal files, programs, computer customization, and system settings.
Process 1. Create a Windows Installation Media.
Step 1. Insert a blank USB flash drive with at least 8 GB of space into a functioning computer.
Step 2. Visit the following websites to download the Windows installation media creation tool.
Step 3. Launch the MediaCreationTool.exe tool and use it to create an installation media.
Process 2. Install Windows.
Step 1. Connect the installation media you created to your nonfunctional laptop, and start your device from it.
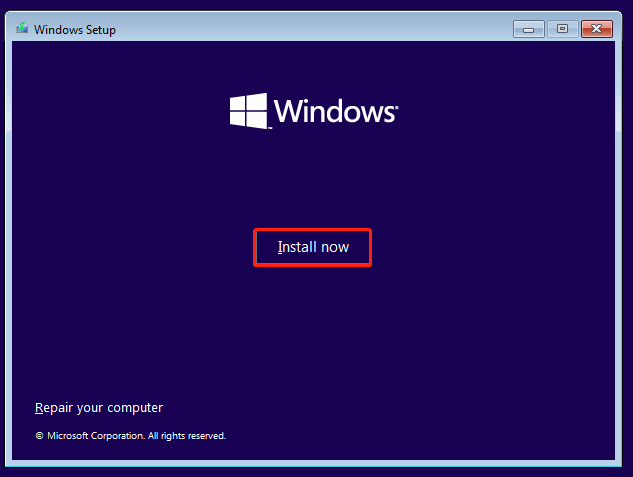
Step 2. In the Windows Setup page, select the preferred language, time format, and input method, and click Next.
Step 3. Click Install now, and then follow the instructions on your computer to complete the installation.
Solution 2. Take the Laptop to a Repair Shop
If you are unable to handle the data recovery or system reinstallation yourself, or the solution fails, taking your laptop to a professional repair shop is a safe choice. Technicians can troubleshoot the problem accurately and rescue your files with specialized tools.
Recommendation: Back Up Files/System Regularly to Prevent Data Loss
To prevent data loss and system failures in the future, I strongly recommend creating regular backups of your files and system. In my experience, backups have been invaluable during hard disk upgrades, system reinstalls, and device changes.
How to back up files or systems? MiniTool ShadowMaker can help. It supports backing up files, folders, partitions, disks, and Windows systems to an external hard drive or other file storage devices.
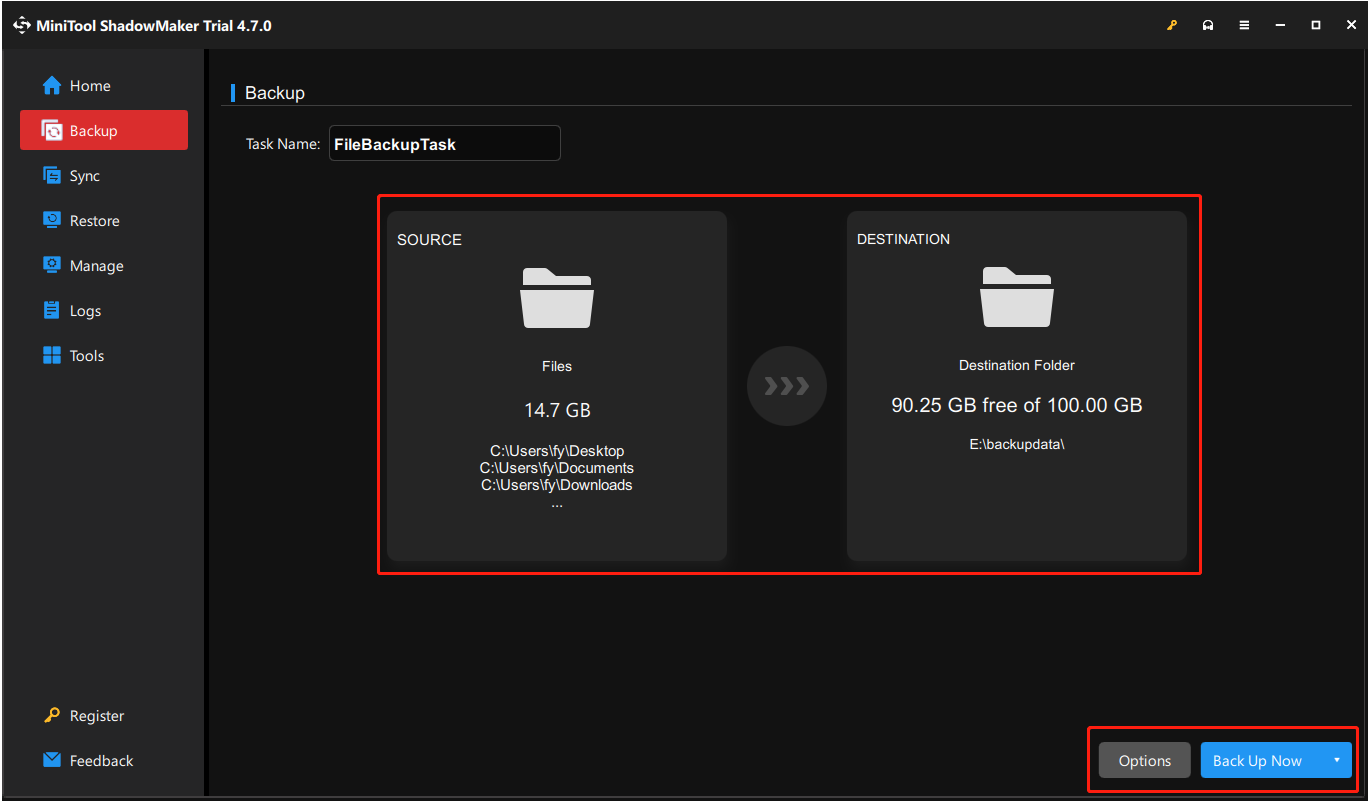
To back up files with MiniTool ShadowMaker, go to the Backup tab, choose files or disks as the source, specify a destination for the backup image, and start the backup. Here are the specific steps.
Step 1. Download and launch MiniTool ShadowMaker. Then click Keep Trial to continue.
MiniTool ShadowMaker TrialClick to Download100%Clean & Safe
Step 2. Click Backup from the left sidebar.
Step 3. In the right panel, click SOURCE to choose the files/folders or partitions/disks to back up. Then, click DESTINATION to choose a location to store the backup image.
Step 4. (Optional) Click Options from the lower right corner.
Then you can go to the Backup Scheme tab to enable this feature and choose between a full, incremental, or differential backup. You can also go to Schedule Settings to enable it and configure the backup interval.
Step 5. Click Back Up Now and wait for it to finish.
Conclusion
Is your laptop not turning on? Do not worry. First, try removing and reinserting the power cables, battery, or monitor connections.
If that does not work, boot into Safe Mode and transfer your important files. Then, run Startup Repair or System Restore in Windows Recovery Environment, uninstall recent Windows updates, scan for viruses, and reseat the RAM.
If you are unable to enter Safe Mode, use MiniTool Power Data Recovery to recover your files, and then proceed to reinstall Windows.
Should you have any questions about MiniTool products, please send an email to the support team via [email protected].
About The Author

Position: Columnist
Shirley holds a bachelor’s degree in English and has been an editor at the MiniTool Team for many years. She specializes in IT-related content, with a focus on data recovery, file backup, disk management, and other technical topics. She is committed to delivering clear, accurate, and practical solutions to help users resolve common computer issues.
User Comments :