MiniTool Mobile Data Recovery for iOS
User Manual
Interface Introduction
Register Window
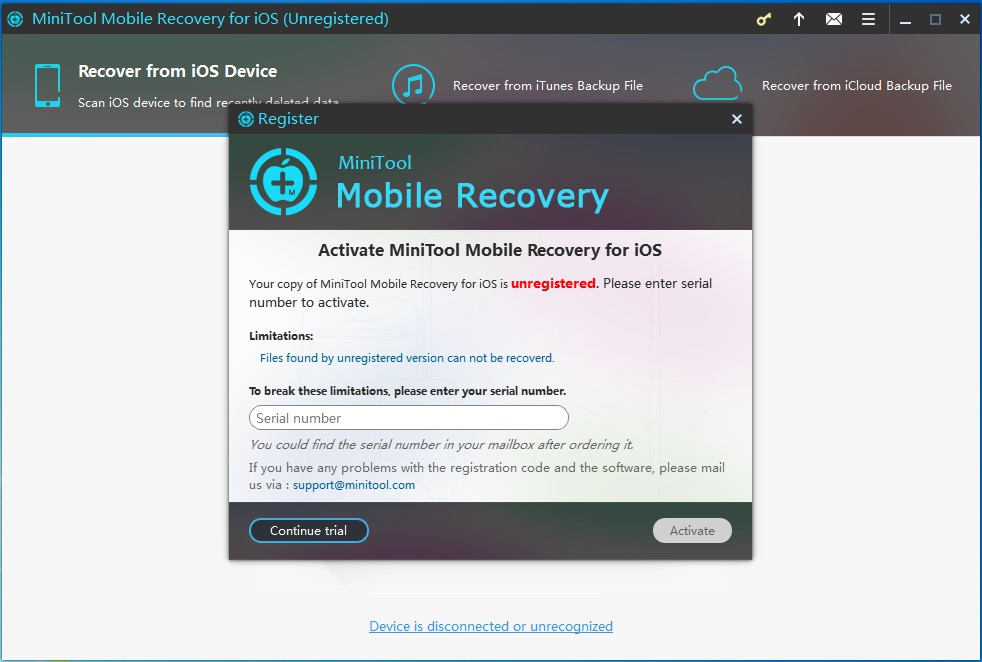
Paid version: You can see the register window after double-clicking MiniTool Mobile Recovery for iOS. If you have bought the paid version of this tool, we should have sent the serial number to your reserved mailbox. You need to copy the serial number from the mailbox, paste it to the "Serial number" input box and then click "Activate" to smoothly register. If you haven't bought MiniTool Mobile Recovery for iOS from our official website, you can click "Continue trial" to try using the three modules in the software to see whether it can find the certain data you need.

Free version: this version allows users to recover a small amount of data at a time. Although you will still be prompted to enter the serial number after opening the software, you can directly click "Continue trail" to try this tool first to see whether it can find the data you need. There is no difference between the free version and the paid version after users input the serial number.
Note: the differences between the registered and unregistered version lie in functions. To know the details, please refer to Functional Limitations in MiniTool Mobile Recovery for iOS.
Main Window

Device is connecting to software

Tutorial F1: click it to quickly go to the help document page.
Purchase: click it to go to the purchase website.
Register: click it to pop out the register window.
Check for Updates: click it to check whether the current software is the latest version or not and see the corresponding updated information.
About: click it to see the basic information of the software.
File List Window

Click "Back" to go back to the scan interface
Click "Back" to go back to the iTunes backup file list window from "Recover from iTunes Backup File"
Click "Back" button to get back to iCloud backup file list window from "Recover from iCloud Backup File"
iCloud Sign In Window
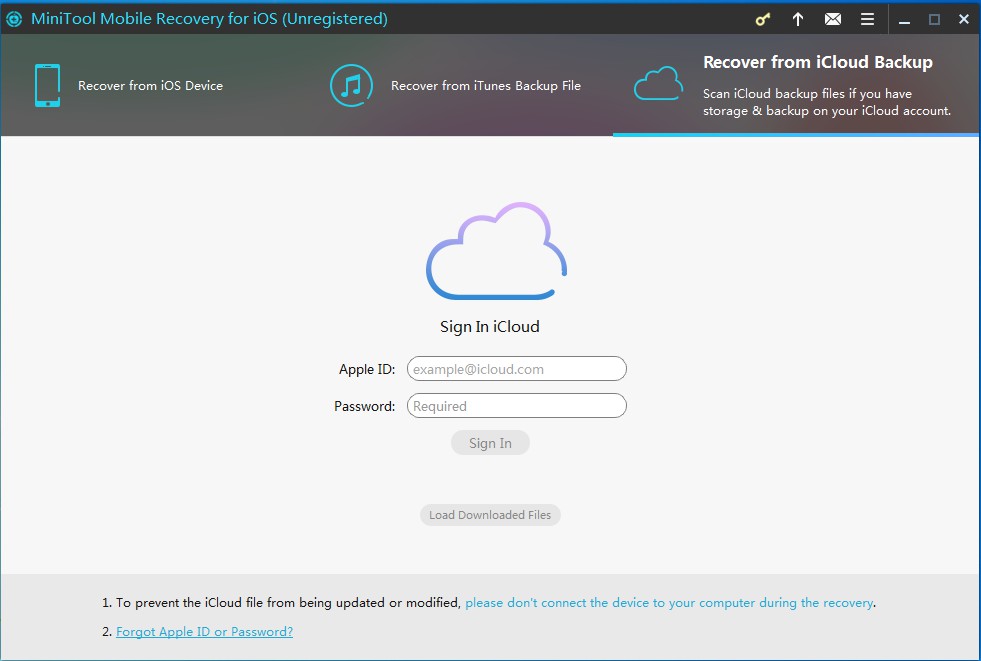
After this button was clicked, the software will load all the downloaded iCloud backup data in computer. No matter the data were completely or partially downloaded, they will be displayed by this tool.
If you failed to sign in iCloud after trying several times, you may have forgotten your Apple ID and password. You can go to Apple's official site to get back your ID by clicking this link.
Downloaded iCloud Backup File List Window
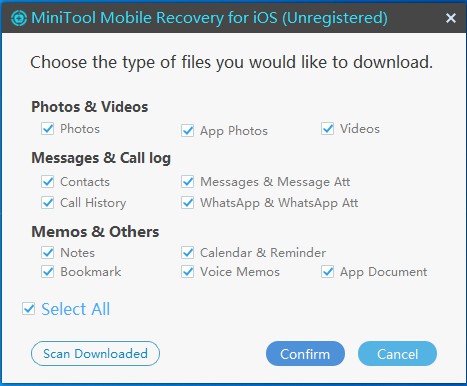
After you clicked "Load DownLoaded Files" under the "Recover from iCloud Backup File" module, you will see downloaded iCloud backup file list:
iCloud File List Window

| The Explanation of Backup Files Download State | ||
| State | Operational Button | Explanation |
| None | "None" represents no data are downloaded. The "DownLoad" button will appear after selecting the file backup whose state is "None". You can click "DownLoad" to start downloading the iCloud backup data. | |
| Downloaded | "DownLoaded" represents that data have been completely downloaded. The "Start Scan" button will appear after selecting the file backup whose state is "DownLoad". You can click "Start Scan" to begin scanning. | |
| PartsDown | "PartsDown" means that partial data have been completely downloaded. The "DownLoad More" button will appear after selecting the backup file whose state is "PartsDown". After you clicked this button, the selecting classification window will appear. And you can select other file types which haven't been downloaded or click "Scan DownLoaded" to scan the downloaded data. | |
| Suspend | "Suspend" means that you chose to stop downloading before the operation is finished. The "Continue" button will appear after selecting the certain file whose state is "Suspend". After clicking this button, the selecting classification window will appear. And you can choose other file types which haven't been downloaded or click "Scan DownLoaded" to scan the downloaded data. | |
When the state of the backup file is "PartsDown" or "Suspend", users can click "Scan DownLoaded" to start scanning after double-clicking this backup file or directly clicking "PartsDown" or "Suspend".