Lock Screen Timeout Is Not Working Windows 10/11
The Windows lock screen feature is an essential component for keeping data security and system integrity. Turning on this feature, your computer screen will be locked automatically after several seconds or minutes, depending on your configuration. This can effectively protect your system against unauthorized access.
However, several users complained that their screens remained active after the timeout they set. Based on user experience, this issue is usually caused by incorre ct Windows lock screen timeout settings, malfunction of the Windows operating system, misconfiguration of group policies, and so on.
Here we provide you with a couple of efficient solutions to assist you in resolving this issue.
Solution 1. Check Windows Lock Screen Timeout Settings
Before implementing advanced troubleshooting steps, it is necessary to double-check the lock screen timeout settings. The major steps to change lock screen timeout in Windows 10 are as follows.
Step 1. Press the Windows + I key combination to open Settings.
Step 2. Select the System option.
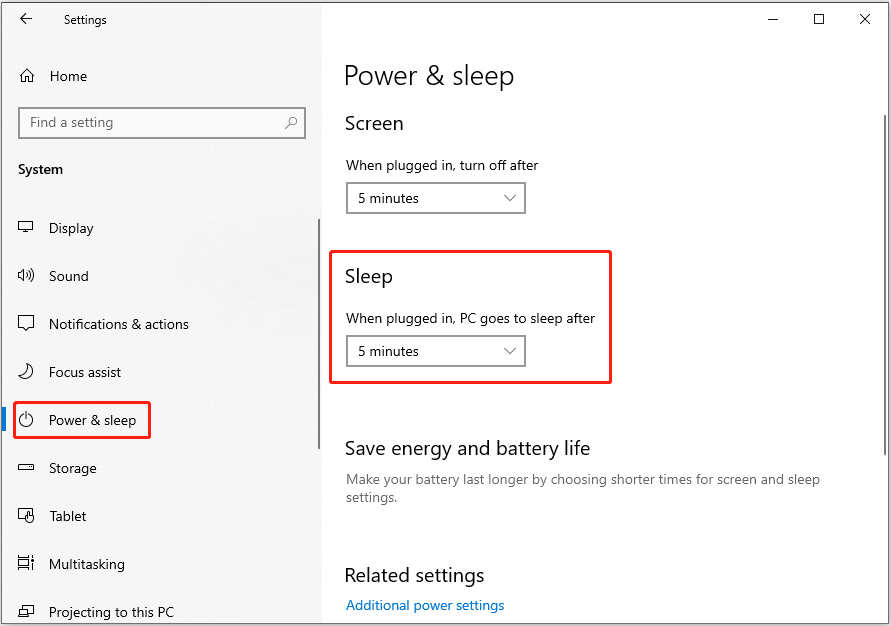
Step 3. In the new window, move on to the Power & sleep tab. In the right panel, specify the lock screen timeout from the drop-down menu under When plugged in, PC goes to sleep after.
Step 4. Wait until the set time passes and check if the Windows lock screen timeout settings not working issue has gone away.
See Also: How to Change Lock Screen Timeout in Windows 11 | 4 Ways
Solution 2. Change Screen Saver Settings
Misconfiguration of the screen saver settings may trigger lock screen timeout not working. To rule out this cause, you can try the steps below to check and change screen saver settings.
Step 1. In the Windows search box, type change screen saver. Then click it from the best match outcome to open it.
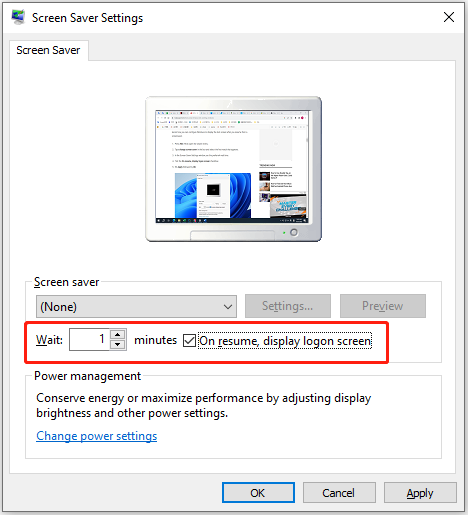
Step 2. In the pop-up window, tick the On resume, display logon screen option, then set a desired duration next to Wait.
Step 3. Click Apply and OK sequentially to make this change take effect.
Solution 3. Change Group Policies
If after you changed the screen saver settings, the lock screen timeout is still not working as expected, you can try to enable screen saver by editing group policies.
Step 1. Press the Windows + R keyboard shortcut to open the run window.
Step 2. In the new window, type gpedit.msc and press Enter.
Step 3. In Local Group Policy Editor, navigate to the following path:
User Configuration > Administrative Templates > Control Panel > Personalization.
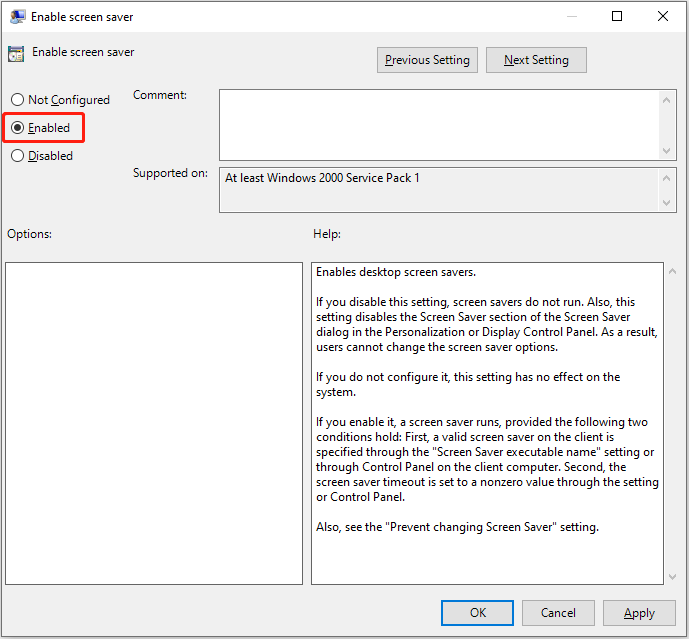
Step 4. In the right panel, double-click Enable screen saver. Make sure to check the Enabled option, then click Apply > OK.
Solution 4. Run the Power Troubleshooter
Windows provides you with a power troubleshooter to help you solve power-related problems. Here you can see how to run this troubleshooter.
Step 1. Open Windows Settings and select the Update & Security option.
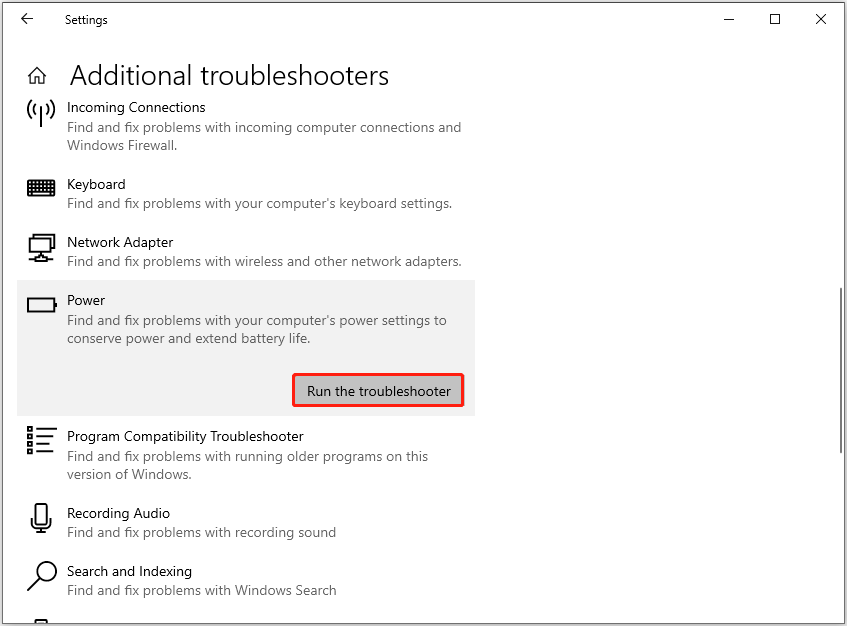
Step 2. In the Troubleshoot section, click Additional troubleshooters.
Step 3. In the next window, scroll down to find and click Power > Run the troubleshooter.
Step 4. Wait until the process is completed. Then check if the “lock screen timeout is not working” issue persists,
Solution 5. Install Windows Updates
Windows updates resolve reported bugs and add new features. If your screen remains unlocked after the lock screen timeout after trying all the methods above, you can try to check for and install the latest Windows updates. For details, you can check: Update Windows 11/10 to Download & Install Latest Updates.
MiniTool Power Data Recovery FreeClick to Download100%Clean & Safe
Final Words
This post shows you what measures you can try when the lock screen timeout is not working.
Should you have found any other useful solutions for resolving this issue, or if you have any concerns about MiniTool Power Data Recovery, feel free to contact us via [email protected].
About The Author

Position: Columnist
Shirley holds a bachelor’s degree in English and has been an editor at the MiniTool Team for many years. She specializes in IT-related content, with a focus on data recovery, file backup, disk management, and other technical topics. She is committed to delivering clear, accurate, and practical solutions to help users resolve common computer issues.
User Comments :