Some players reported encountering the Monster Hunter Wilds Fatal D3D error or RE Engine Aborted error while gaming, leading to the game crashing. This post from MiniTool introduces possible reasons for this vexing issue and several effective methods to fix it.
Monster Hunter Wilds Fatal D3D Error
Monster Hunter Wilds utilizes Capcom’s exclusive RE Engine to create and animate its stunning landscapes and the monsters players must pursue. As we all know, the RE engine relies on Direct3D for graphics rendering.
Therefore, players may encounter the Monster Hunter Wilds RE Engine Aborted error with different error messages.
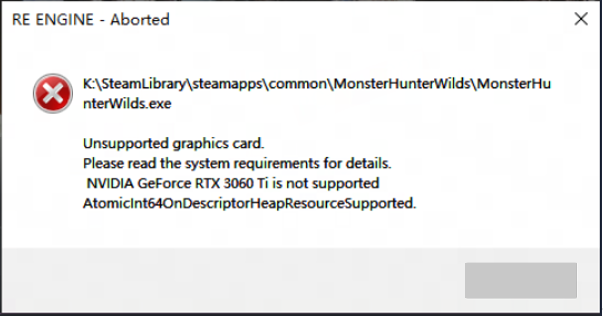
1. If the RE Engine crashes, you may receive an error message pop-up as follows:
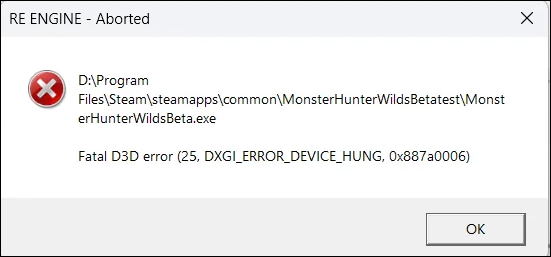
2. If the game crashes due to D3D rendering failure, causing the RE engine to report an error, you may receive the following error message:
- Fatal D3D error (26, DXGI_ERROR_DEVICE_RESET, 0x887a0007)
- Fatal D3D error (6, E_OUTOFMEMORY, 0x8007000e)
- Fatal D3D error (25, DXGI_ERROR_DEVICE_HUNG, 0x887a0006)
As you can see, when the Fatal D3D error occurs, it is often accompanied by the RE Engine Aborted error. Sometimes, the RE Engine Aborted error may occur individually due to insufficient memory, script errors, or other triggers. In this guide, I will specifically explain the RE Engine Aborted problems caused by D3D errors.

Common Causes for Monster Hunter Wilds Fatal D3D Error
As a graphics-related issue, there are several possible causes for the Monster Hunter Wilds Fatal D3D error.
- Outdated or corrupted GPU drivers
- Corrupted game files
- DirectX issues
- No necessary permissions
- Overlays from other apps like Discord or Steam
- Hardware problems
- Compatibility settings
- Outdated Windows updates
How to Fix Monster Hunter Wilds Fatal D3D Error on PC
Encountering Monster Hunter Wilds Fatal D3D error or RE Engine Aborted error can be frustrating, but these issues are often resolvable with troubleshooting. Here’s a structured approach to fix them.
Some Simple Steps to Take
The solutions outlined below are simple and easy and you can consider using them one by one to fix the issue:
- Run Monster Hunter Wilds as an administrator.
- Reboot Steam and Monster Hunter Wilds.
- Disable Discord or Steam overlay.
- Close non-essential apps via Task Manager.
- Update Windows.
- Enable Hardware-accelerated GPU scheduling. (If available)
After trying these fixes, if the issue still exists, let’s jump into the advanced methods to fix the Monster Hunter Wilds Fatal D3D error.
MiniTool Power Data Recovery FreeClick to Download100%Clean & Safe
Fix 1. Update Graphics Driver
Outdated GPU drivers are a common cause of Direct3D (D3D) errors. Therefore, you can update your Graphics driver to fix the Monster Hunter Wilds Fatal D3D error. Here’s the way:
Step 1. Right-click the Windows logo button on the taskbar and select Device Manager.
Step 2. Expand the Display adapters section by double-clicking on it.
Step 3. Right-click on your graphics card and select Update device.
Step 4. Select Search automatically for drivers and then follow the on-screen instructions to finish the rest process.

Fix 2. Verify Game Files on Steam
Damaged or absent files can lead to a Fatal D3D error, leading to the game crashing. To examine and fix these files, consider using the built-in file repair tool provided by Steam:
- Open the Steam application and navigate to your Library.
- Right-click on Monster Hunter Wilds and select Properties.
- In the Local Files section, click on Verify Integrity of Game Files.
- Run a scan with Steam and recover any necessary files if they are missing or defective.
Fix 3. Disable Overclocking
If you’ve overclocked your CPU, make sure to disable the overclocking to resolve the Monster Hunter Wilds Fatal D3D error on PC. Unsure how to do that? Take a look at this guide on How to Disable CPU Overclocking.
Fix 4. Modify Game Launch Options
Monster Hunter Wilds requires DirectX 12 for operation, but it also provides support for DirectX 11. The implementation of DX12 is leading to crashes during gameplay, resulting in a “DXGI_ERROR_DEVICE_HUNG” Fatal D3D error.
Although there isn’t an option to switch DirectX on PC within the game, you can enforce DX11 to resolve the fatal D3D error. Here’s how to enforce Monster Hunter Wilds to utilize DirectX 11 and eliminate the fatal error crash:
- Right-click on Monster Hunter Wilds in your Steam library and choose Properties.
- Navigate to the General tab, under the Launch Options section, type -force-d3d11.
- Start playing MHW, and the Fatal D3D error should now be resolved.
Fix 5. Run MHW in Windows 8 Compatibility Mode
Compatibility issues with Windows 10 or 11 may cause Monster Hunter Wilds to crash with a Fatal D3D error. Running the game in compatibility mode for Windows 8 has resolved this problem for some PC users. Here’s how to enable Windows 8 compatibility mode for MHW:
Step 1. Open Steam and go to your Library.
Step 2. Right-click Monster Hunter Wilds and select Properties.
Step 3. Navigate to the Installed Files tab and click the Browse… button.
Step 4. In the pop-up window, find and right-click the game executable file, then select Properties.
Step 5. Navigate to the Compatibility tab, tick mark on Run this program in compatibility mode for under the Compatibility mode section, and select Windows 8 from the drop-down menu.
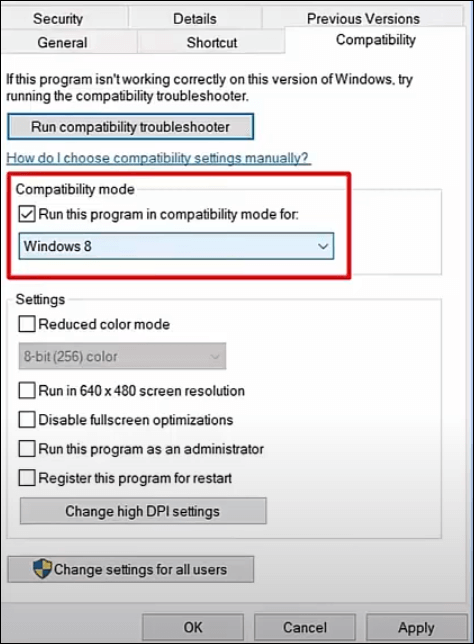
Step 6. Click Apply > OK to save the change.
Fix 6. Underclock Graphics Card
Underclocking is a process akin to overclocking, but it may result in a minor decrease in your hardware’s performance to reduce heat generation or to prevent compatibility problems. Some players reported that they were able to resolve the Monster Hunter Wilds Fatal D3D error by decreasing the clock speed of their graphics card by 300 MHz.
Fix 7. Adjust In-Game Settings
If the game is using excessive resources, consider adjusting the settings:
- Decrease Texture Quality and Shadows.
- Lower the Render Resolution.
- Turn V-Sync Off.
Fix 8. Install Microsoft Visual C++ Redistributable
The lack of required files is another factor contributing to the Monster Hunter Wilds Fatal D3D error, especially the absence of the essential Microsoft Visual C++ Distributable. You may want to download the latest version of the Visual C++ packages directly from the Microsoft official website. Once you’ve done that, launch the game to see if it runs properly.
Fix 9. Update DirectX
Installing the latest version of DirectX could help resolve the Fatal D3D error in Monster Hunter Wilds. If you’re interested in giving it a shot, you can check out this article: DirectX Update, What DirectX Do I Have, What Is DirectX.
Fix 10. Increase Virtual Memory
For numerous players, increasing virtual memory can effectively address the Fatal D3D error in MHW, as virtual memory not being enough. Virtual memory permits data to be temporarily relocated from RAM to disk storage, assisting in alleviating a lack of physical memory.
Step 1. Type advanced system settings into Windows Search and select the appropriate result to open System Properties.
Step 2. Go to the Settings found under Performance.
Step 3. In the Advanced tab, click on Change under Virtual memory.
Step 4. Make sure to deselect the option that states Automatically manage paging file size for all drives, pick the drive where WHM is installed, and opt for Custom size and set the initial size and the maximum size.
- If your installed PC RAM is 16GB, set the initial size as 24576 MB and the maximum size as 49152 MB.
- If your PC installed RAM is 32GB, set the initial size as 49152 MB and the maximum size as 98304 MB.
- If your installed PC RAM is 64GB, set the initial size as 98304 MB and the maximum size as 196608 MB.
Step 5. Press OK and restart your PC.
Fix 11. Delete CrashReport.exe and CrashReportDLL.dll
Some players reported deleting CrashReport.exe and CrashReportDLL.dll files can fix the Fatal D3D error in WHM. Here’s how to do it:
Step 1. Open Steam. Go to Library, right-click on Monster Hunter Wilds, and click on Manage > Browse local files.
Step 2. Select CrashReport.exe and CrashReportDLL.dll and delete them.
MiniTool ShadowMaker TrialClick to Download100%Clean & Safe
Step 3. Now, launch the game and check whether the issue is gone.
Fix 12. Adjust Windows Timeout Detection and Recovery
Timeout Detection and Recovery (TDR) is a Windows feature that aims to recover the GPU driver if it freezes. However, its default settings can cause games, including Monster Hunter Wilds, to crash with Fatal D3D errors. You can resolve this by adjusting the TDRLevel and TDRDelay settings.
>> Create the TdrLevel file:
Step 1. Launch Regedit with administrative privileges.
Step 2. Navigate to HKEY_LOCAL_MACHINE > SYSTEM > CurrentControlSet > Control > GraphicsDrivers.
Step 3. In the right panel, right-click in an empty space and choose New in the Windows Registry.
Step 4. Opt for DWORD (32-bit) Value and name it TdrLevel.
Step 5. Double-click on the TdrLevel entry and select Modify.
Step 6. Ensure that the value is set to 0.
Step 7. Reboot your computer.
>> Set up TdrDelay:
Step 1. Type regedit in the Windows search bar and run it with administrative privileges.
Step 2. Navigate to HKEY_LOCAL_MACHINE > SYSTEM > CurrentControlSet > Control > GraphicsDrivers.
Step 3. In the right panel, right-click on the empty space and choose New in the Windows Registry.
Step 4. Select DWORD (32-bit) Value and name the new entry TdrDelay.
Step 5. Double-click on TdrDelay and click Modify.
Step 6. Ensure the value is set to 10.
Sep 7. Reboot your computer.

Bottom Line
This post covers almost all the methods of the Monster Hunter Wilds Fatal D3D error. If no one helps you fix this issue, the final method is reinstalling WHM. Hope the information can be useful for you and you can enjoy your game again.
About The Author

Position: Columnist
Sandy became an English editor after graduation. She is devoted to finding effective solutions for diverse IT problems and provides articles on data recovery, data backup, and computer partitions and drives. In her spare time, she likes listening to music and playing games.
User Comments :