If one printer can only connect to one computer, you can imagine how messy the environment will become no matter in the office or school. Windows makes this simple by allowing PCs to connect to one printer on a local network. However, you might encounter an error that the printer sharing not working after you make an upgrade on Windows.
Please read the following content and try the methods listed below to fix your problem.
How to Fix Printer Sharing in Windows
Before you address the problem with the following methods, please make sure that you have enabled the printer-sharing feature on your computer.
Way 1: Run the Printer Troubleshooter
The easiest way is to let the Windows snap-in tool to resolve this problem. The printer troubleshooter can find and fix the problem automatically. You can try this method first.
Step 1: Press Win + I to open Windows Settings.
Step 2: Click on Update & Security > Troubleshoot.
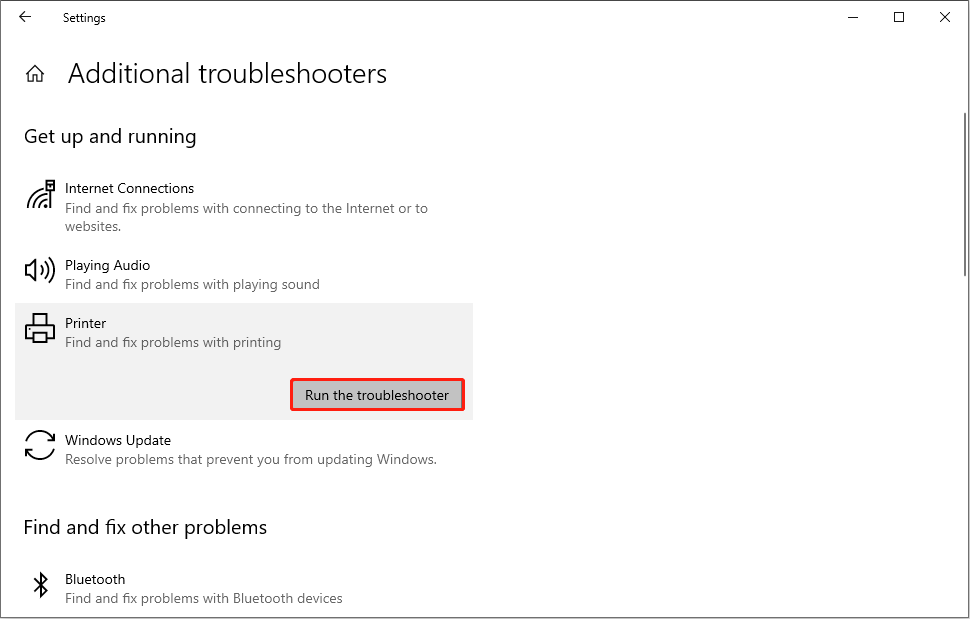
Step 3: Choose Additional troubleshooters on the right pane.
Step 4: Find and click on the Printer option, then click Run the troubleshooter.
Way 2: Temporarily Disable Windows Defender Firewall
Considering the computer security, your PC might block some public devices, such as the shared printer. You can turn off the Windows Defender Firewall for a while to see if it helps solve the issue.
Step 1: Press Win + S and type Windows Defender Firewall into the search box.
Step 2: Hit Enter to open the window.
Step 3: Select Turn Windows Defender Firewall on or off on the left pane.
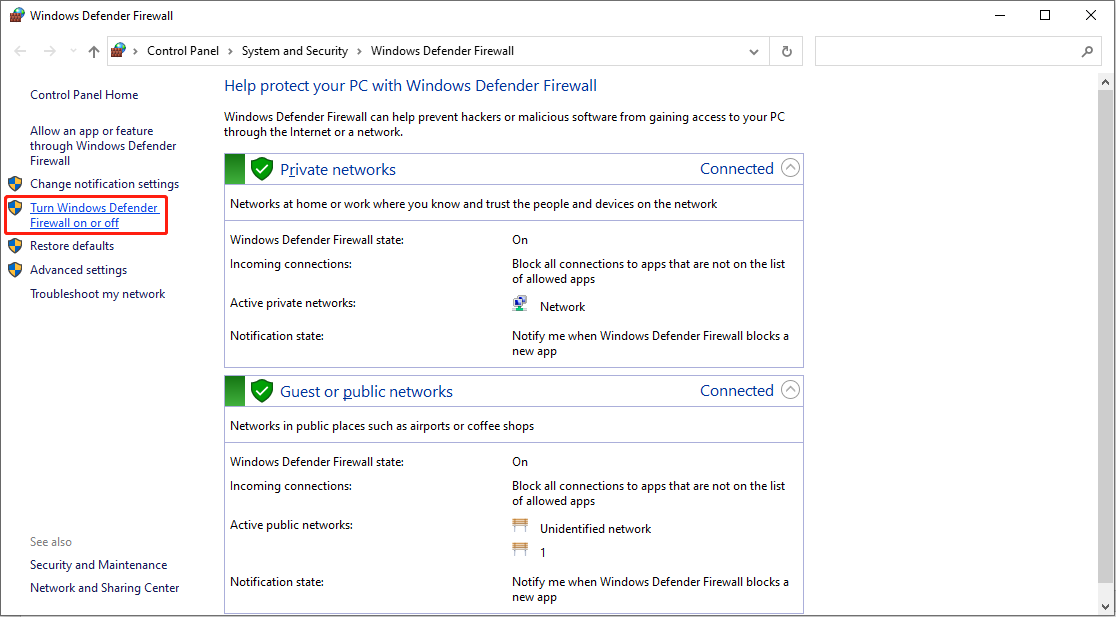
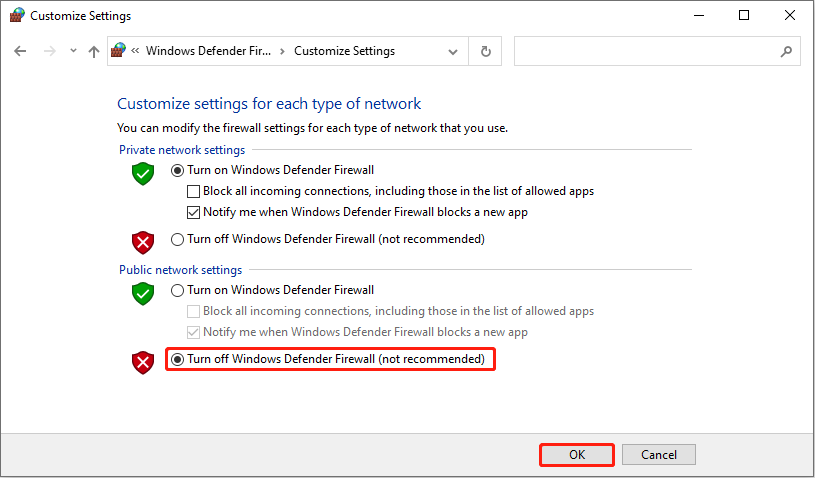
Step 4: Choose Turn off Windows Defender Firewall (not recommended) under the Public network settings, then click OK to save the change.
After this setting, you can try to connect the printer again. If this method works, follow the next steps to add the shared printer to the whitelist.

Add Printer Sharing to the Whitelist of the Windows Firewall
1: Click on the Windows icon and click on the gear icon to open the Settings window.
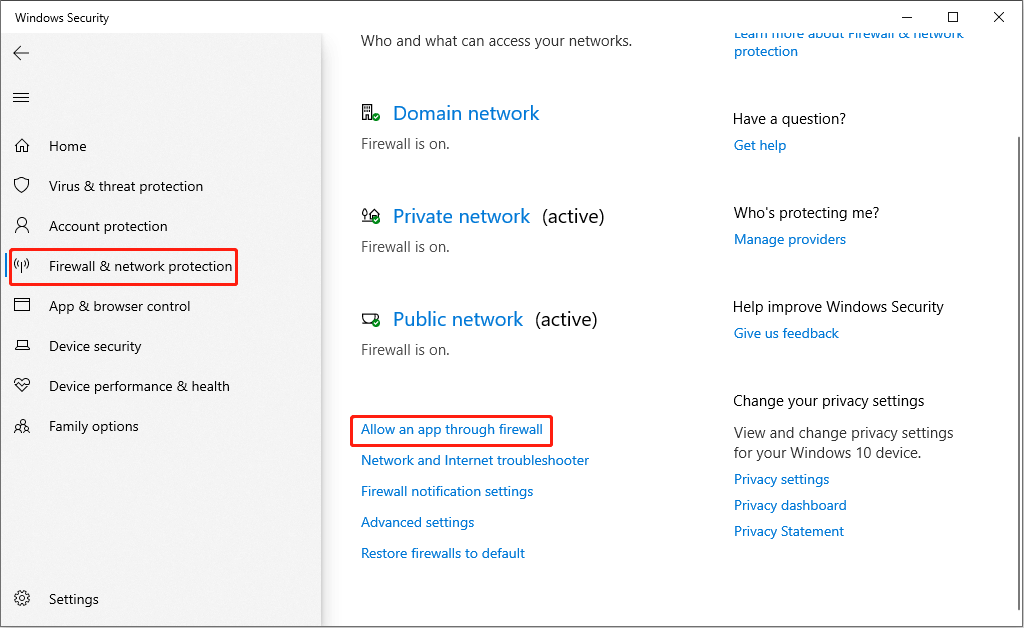
2: Navigate to Update & Security > Windows Security > Firewall & network protection.
3: Choose Allow an app through firewall on the right pane.
4: In the prompt window, click on Change settings, then check the File and Printer Sharing option both on Private and Public to add it to the whitelist of the Windows Firewall.
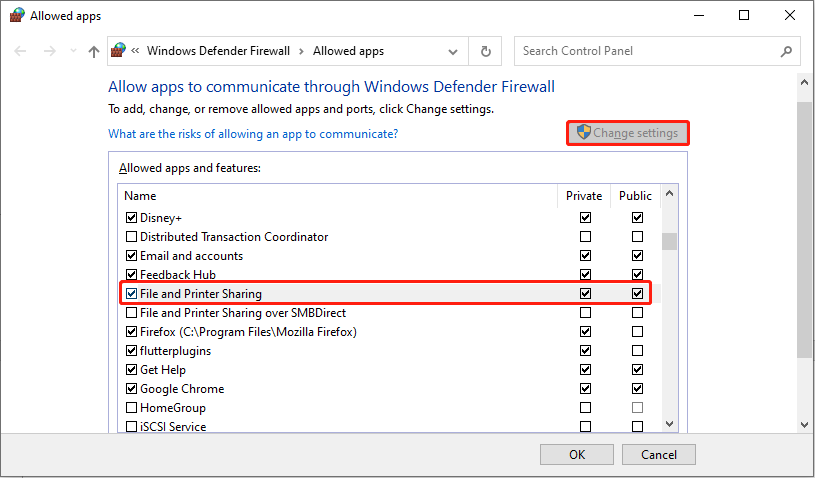
5: Click OK to save the change.
Now, you can use the shared printer normally and turn on the Windows Firewall again for safety reasons.
Way 3: Restart the Print Spooler Service
If you find the shared printer not working or can’t be found, you can think about the Print Spooler Service. This service is responsible for the printer’s normal working. If it is turned off, you are unable to print or find the printer.
Step 1: Press Win + R to open the Run window.
Step 2: Type services.msc into the text box and press Enter to open the window.
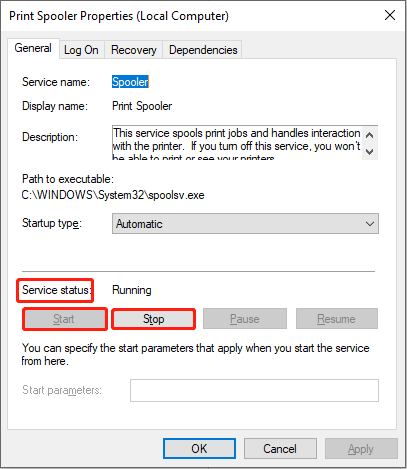
Step 3: Scroll down to find and double-click on the Print Spooler option.
Step 4: On the properties window, you need to click on the Stop button in the Service Status section, then click Start to run it again.
Way 4: Change the Policy via the Local Group Policy Editor
The last method is to change the Limits print driver installation to Administrator policy. If your computer doesn’t have the corresponding print driver, you are unable to connect to the printer as well. This policy is disabled by default. If you are not running an administrator account, try this method to rectify the problem.
Step 1: Press Win + R to open the Run window.
Step 2: Type gpedit.msc and hit Enter to open the Local Group Policy Editor window.
Step 3: Navigate to Computer Configuration > Administrative Templates > Printers.
Step 4: Find and double-click on the Limits print driver installation to Administrators.
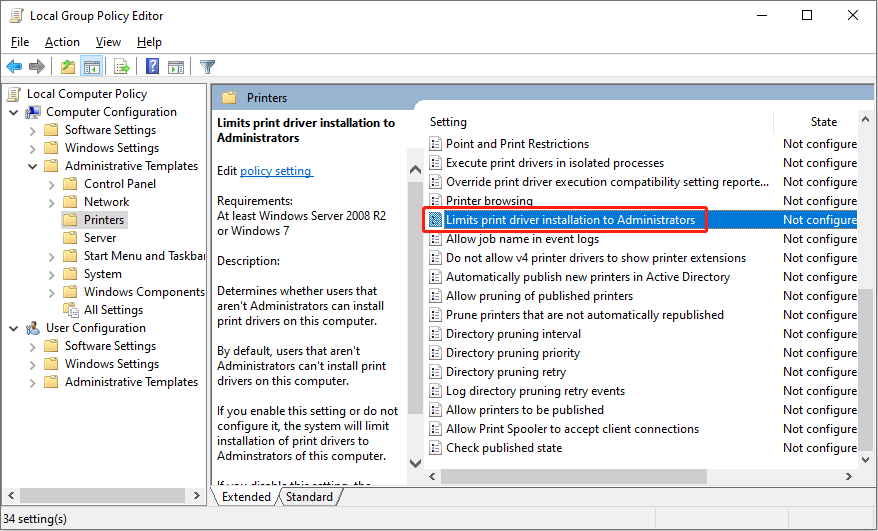
Step 4: Choose Disable in the following window, then click on Apply > OK to confirm.

Bottom Line
You can also fix the printer sharing not working problem by uninstalling the latest update, like KB5005565. Hope one of these methods works on your problem.
MiniTool is devoted to helping you manage your computer and protect private and important files. MiniTool Power Data Recover is one of the popular software that is designed to recover deleted files from your devices. If needed, you can try MiniTool Power Data Recover free to scan and restore up to 1GB of files without any charge.
MiniTool Power Data Recovery FreeClick to Download100%Clean & Safe
Welcome to share your problems with MiniTool software via [email protected].
User Comments :