Want to save power when using the battery on your Windows 11 laptop? You can turn on battery saver to meet your requirements. However, if you don’t want to miss any system update, you’d better turn off battery saver on Windows 11. If you don’t know how to turn on or turn off battery saver on your Windows 11 laptop, this post is helpful.
How to Turn on or Turn off Battery Saver on Windows 11?
Battery saver is a very useful feature on Windows to help you save power to extend your battery life. However, if it is enabled on your laptop, you might miss some important notifications, emails, and messages that are related to the system updates. Due to this, you may want to turn off battery saver on Windows. Well then. How to disable battery saver on Windows 11? There are 4 ways.
You can find battery saver in the Quick Settings and then you can turn it off or on there. You can also do this job in the Settings app. If you are an advanced user, you can also run a command in Windows Terminal to turn on or turn off battery saver on Windows 11.
In this post, MiniTool Software will introduce these four ways in detail.
Way 1: Use Quick Settings to Turn on or off Battery Saver on Windows 11
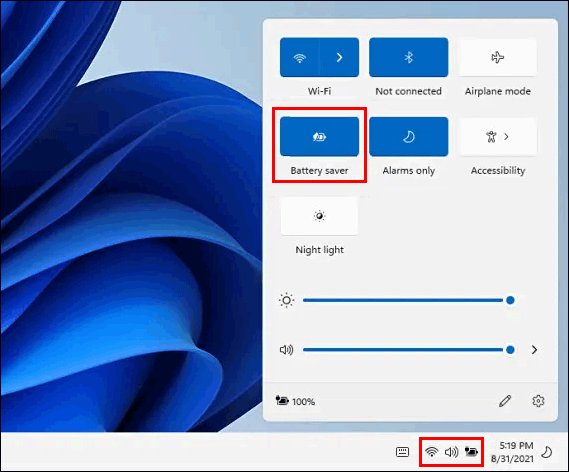
The Battery saver is available in the Quick Settings on Windows 11. So, the direct way to turn off or turn on battery saver on Windows 11 is to use Quick Settings.
If you are using a laptop, Quick Settings is the combination of the icons of Wi-Fi connection, audio, and battery in the taskbar. You can just click that area, then click the Battery saver option to turn it on or off. If battery saver is enabled, the background is highlighted. If you want to turn off battery saver on Windows 11, you need to click it to cancel the highlight.
Way 2: Use the Settings App to Turn on or off Battery Saver on Windows 11
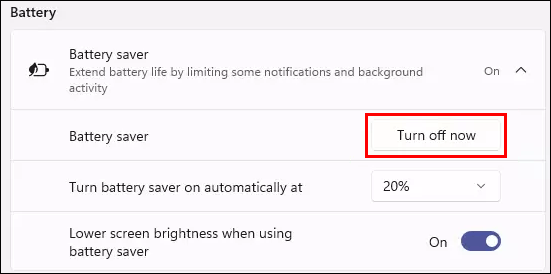
Step 1: Press Win + I to open the Settings app.
Step 2: Go to System > Power & battery.
Step 3: Click the Turn on now button to turn it on. However, if battery saver is already turned on and you want to turn it off, there will be a Turn off now button. You can click it to disable battery saver on Windows 11.
Way 3: Turn Battery Saver on or off Automatically in the Settings App
You can also set a value. When the battery level reaches that value, the battery saver will be automatically turned on.
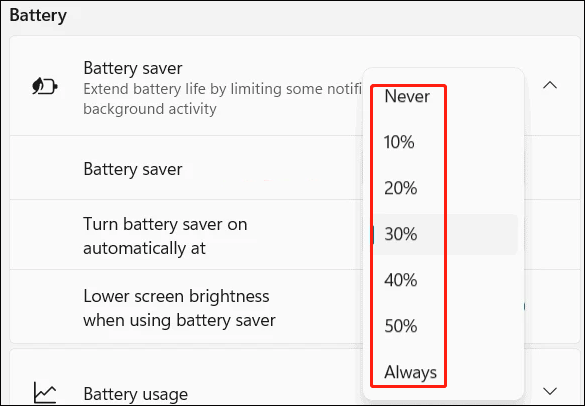
Step 1: Go to Setting > System > Power & battery.
Step 2: Expand Battery saver.
Step 3: Expand the options next to Turn battery saver on automatically at, then select the percentage as per your requirements. Well, how to disable battery saver on Windows 11 using this method? You can just select Never.
Way 4: Turn Battery Saver on or off Automatically Using Windows PowerShell
For advanced users, they can run command in Windows Terminal to turn on or off battery saver on Windows 11. You can also use this method to automatically open battery saver when the battery power reaches a level.
Step 1: Open Windows PowerShell on Windows 11.
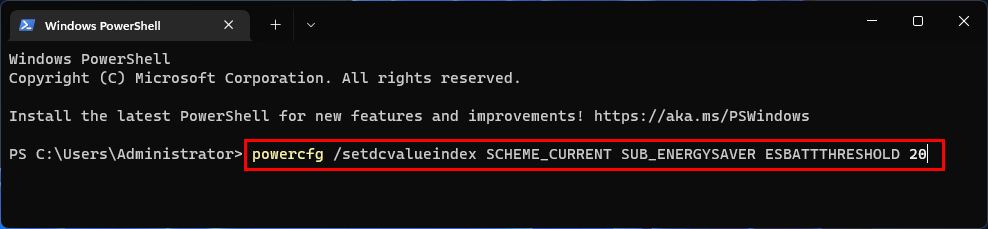
Step 2: Type the following command and press Enter to run the command:
powercfg /setdcvalueindex SCHEME_CURRENT SUB_ENERGYSAVER ESBATTTHRESHOLD <percentage>
Replace <percentage> with a number from 1 to 100. Here are some simple explanations:
- 0 percent is equal to Never.
- 20 percent is the default setting.
- 100 percent is equal to Always.
These are the four methods to turn on or turn off battery saver on a Windows 11 computer. We hope you can find your needed method here.
Additionally, if you want to recover your lost and deleted files on Windows 11, you can try MiniTool Power Data Recovery, a professional data recovery software.
MiniTool Power Data Recovery TrialClick to Download100%Clean & Safe
Should you have any other related issues, you can let us know in the comments.
About The Author

Position: Columnist
Stella has been working in MiniTool Software as an English Editor for more than 8 years. Her articles mainly cover the fields of data recovery including storage media data recovery, phone data recovery, and photo recovery, videos download, partition management, and video & audio format conversions.
User Comments :