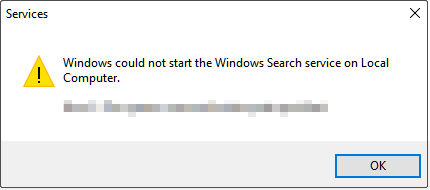
Windows Could Not Start the Windows Search Service on Local Computer
The Windows search bar helps you quickly find videos, pictures, other files, or applications. However, the search bar sometimes exhibits some bugs. Recently, many users reported that they received the “Windows could not start the Windows Search service on Local Computer” error message when trying to search for something.
This error is generally caused by Windows search related services not being enabled, too many cache files, incorrect group policy settings, system file corruption, etc. Keep reading to see how to get rid of this problem.

How to Fix Windows Could Not Start the Windows Search Service
Fix 1. Restart Windows Search Related Services
If Windows search related services are disabled, you may receive the error message “Windows could not start the Windows Search service on Local Computer”. So, to fix it, you need to restart relevant services.
Step 1. Press Windows + R keyboard shortcut to open the Run window.
Step 2. In the text box, type services.msc and press Enter.
Step 3. In the services window, scroll down to select the Windows Search service. Then click the Restart button as shown in the figure below.
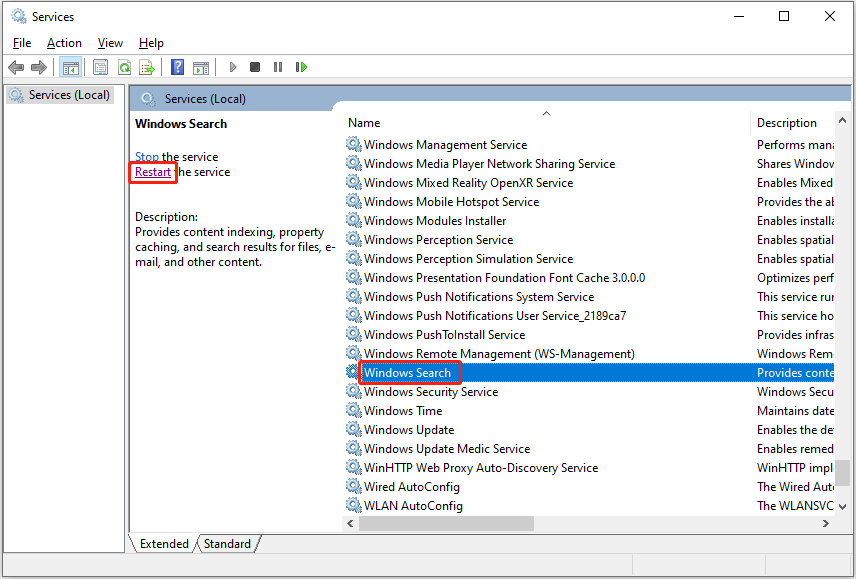
Step 4. Repeat the same steps to restart the Background Tasks Infrastructure Service.
After that, restart your computer to check if the issue has gone.

Fix 2. Enable Windows Search Related Policies
Misconfigured group policy settings can cause many issues such as background apps permissions missing and Windows Search service not starting Windows 10/11. Therefore, you need to follow the instructions below to edit relevant policies.
Step 1. Press Windows + R key combination to open the Run dialog box.
Step 2. Type gpedit.msc in the input box and press Enter.
Step 3. In the new window, navigate to Computer Configuration > Administrative Templates > Windows Components > Search.
Step 4. In the right panel, find and double-click Do not allow web search. Then select the Disabled or Not Configured option.
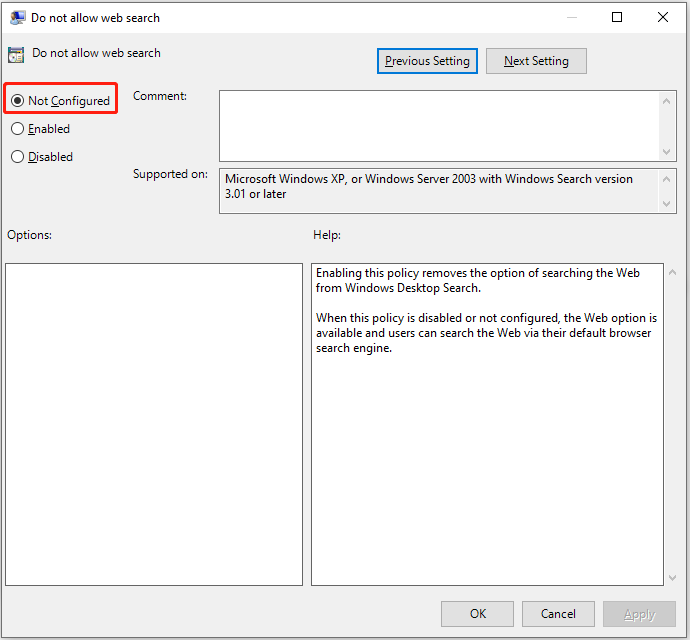
Step 5. Click Apply and OK sequentially to make this change take effect.
Step 6. Repeat the steps to disable the Don’t search the web or display web results in Search policy.
Fix 3. Run the Search and Indexing Troubleshooter
Windows built-in troubleshooters can help with various Windows issues. For instance, you can run the System Maintenance troubleshooter to fix the “apps and programs automatically minimize” issue. Here, since the Windows Search service cannot be started, you need to run the Search and Indexing troubleshooter.
Step 1. Press Windows + I key combination to open Settings.
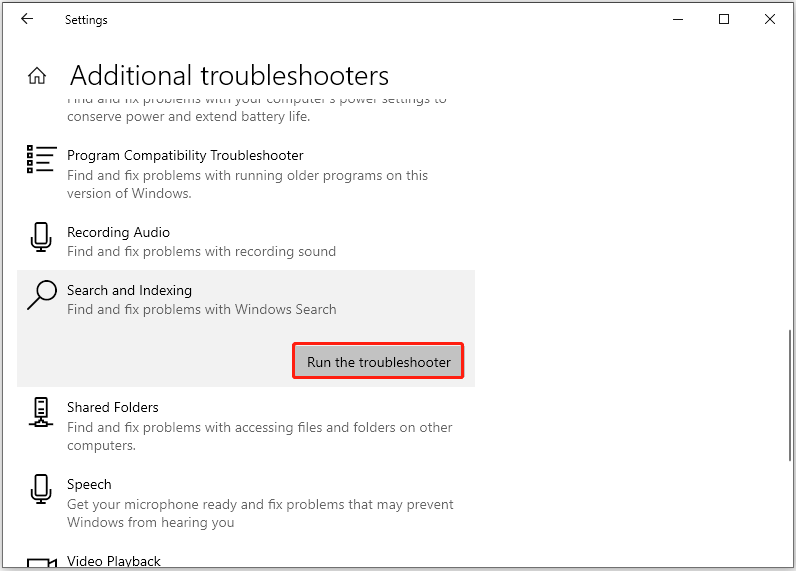
Step 2. Click Update & Security, then move on to the Troubleshoot section and click Additional troubleshooters.
Step 3. In the new window, scroll down to click Search and Indexing > Run the troubleshooter.
Wait patiently until the error detection and repair process is complete. Then check if the “Windows could not start the Windows Search service on Local Computer” error persists.
Fix 4. Delete Temporary Files
Abandoned temporary files not only take up a lot of hard disk space, and reduce system performance, but may also cause Windows search to fail to start. In this case, you need to delete Windows temporary files.
Step 1. Press Windows + R key combination to open Run.
Step 2. Type %temp% in the text box and press Enter. This operation will lead you to the folder where temporary files are stored.
Step 3. Select all temporary files and right-click them to select Delete.
Top Recommendation
If your important files are deleted by mistake, you can use MiniTool Power Data Recovery, the best free data recovery software, to recover deleted files.
MiniTool Power Data Recovery supports disappeared USB copied files recovery, SD card data recovery, computer hard drive recovery, external hard drive file recovery, and so on.
Free download MiniTool Power Data Recovery and give it a try.
MiniTool Power Data Recovery FreeClick to Download100%Clean & Safe
Fix 5. Run System File Checker
As mentioned before, corrupted system files can also cause the “Windows could not start the Windows Search service on Local Computer” error. To scan and repair corrupted system files, you can run the System File Checker tool by referring to this page.
Final Words
Facing the Windows Search service not starting Windows 10/11 issue, you can try the solutions listed above.
Should you have found any other effective fixes for this error message, welcome to contact us via [email protected]. Thank you so much.
About The Author

Position: Columnist
Shirley holds a bachelor’s degree in English and has been an editor at the MiniTool Team for many years. She specializes in IT-related content, with a focus on data recovery, file backup, disk management, and other technical topics. She is committed to delivering clear, accurate, and practical solutions to help users resolve common computer issues.
User Comments :