Is your Windows 10 or Windows 11 search not working? In this MiniTool post, we are going to demonstrate several solutions to you, such as restarting the Windows Search Service, running Search and Indexing Troubleshooter, rebuilding the Search Index, disabling antivirus, and more.
Why Is Windows Search Not Working Properly?
As everyone knows, Windows Search is a feature that allows users to quickly find files, applications, settings, and information on their computer. If it malfunctions or doesn’t work, it might seriously affect the user experience and even delay the work progress.
The following situations may cause your Windows search bar to fail to function properly.
- Some software glitches may cause Windows search bar to stop working.
- Issues related to the network connection could be the culprit.
- Windows 10/11 search bar can be affected by Windows updates.
- If Cortana malfunctions, it can hinder your ability to search for items.
- Some preinstalled software may become damaged or malfunction.
- When your computer is overloaded, the Windows search tool will not load correctly.
- More.
After knowing the underlying causes of the Windows search not working problem, it’s time to make it usable again. Want to know how? Keep digging!
How to Fix Windows 10/11 Search Bar Not Working?
Here is a video guide:
Option 1: Restart Your Computer
For many minor problems on computers, a simple restart can fix them easily. Windows Search crashing can be regarded as a relatively common problem. If you encounter it, don’t panic, restarting your computer should do the trick.
To do so: click on Start > select the Power icon > hit Restart.
If you still cannot use the Windows Search tool, try the next method then.
Option 2: Check for Windows Update
The latest Windows update can help resolve the problem and make the Search tool work well again. Check if your system is up-to-date or if there are any available updates.
To do so: select Start > Settings > Update & Security > Windows Update > Check for updates.
If it requires an update, download and install it at once. Then restart your machine and fire up Windows Search again.
Option 3: End Cortana Process
What is Cortana? It is Microsoft’s virtual assistant that operates via text and voice commands. It can accomplish a variety of tasks such as answering user questions, sending emails, opening applications, and so forth.
You can try to stop the Cortana process to solve Windows 10 search not working. Here’s a step-by-step tutorial:
Step 1. Right-click on the taskbar and choose Task Manager.
Step 2. In the Processes section, scroll down to find the Cortana process, right-click on it, and then select End task to disable it.
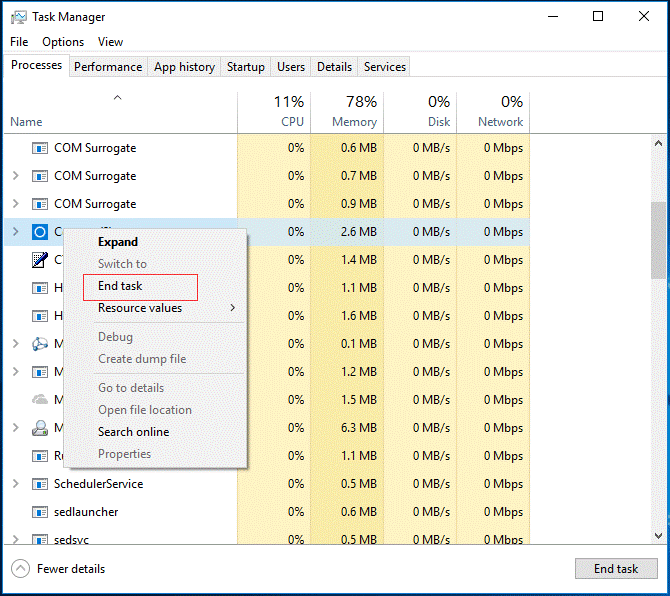
Step 3. After that, reboot the computer and check whether the Search issue is solved or not.

Option 4: Restart Windows Font Cache Service
The Windows Font Cache Service is responsible for managing and optimizing the font cache on your computer. In some cases, it can cause conflicts with the search function. Restarting it can resolve the search problem.
Here’s how to restart the Windows Font Cache Service:
Step 1. Type service.msc in the Run dialog (Win + R) and hit OK.
Step 2. Scroll down the list to find Windows Font Cache Service.
Step 3. Right-click on the service and hit Restart.
Option 5: Reboot the Taskbar
When the search bar is not working on Windows 10/11, you can also try restarting the taskbar. It may help use the search bar again. It’s an easy operation, and here are the steps to do that.
Step 1. Press Ctrl + Shift + Esc to launch Task Manager.
Step 2. Go to the Processes section and scroll down until you find Windows Explorer.
Step 3. Right-click on it and choose Restart from the shortcut menu.
After that, the taskbar will disappear. You just need to wait until it comes back and then try using the search bar again.
Option 6: Restart Windows Search Service
When your Windows Search service is stuck, the search bar won’t load properly. In this case, you can try to restart the search service to resolve the problem.
Here’s how to do it:
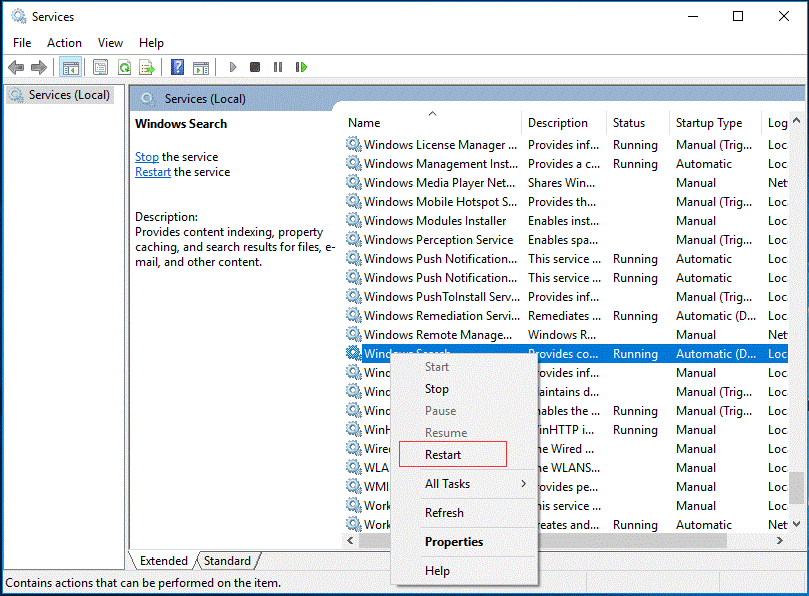
Step 1. Fire up the Run dialog by pressing Win + R.
Step 2. Type services.msc and hit Enter.
Step 3. In the Service window, look for Windows Search, right-click on it, and choose Restart from the context menu.
Upon completion, restart your computer to check if the search bar works fine.

Option 7: Rebuild the Search Index
If the search bar still fails, you can rebuild the Windows Search Index. By doing so, this process will update the index of the search function, enabling the search to locate files and data within your system. At the same time, it can also solve the problem.
To do that:
Step 1. Launch the Run window, type Control Panel, and then hit OK.
Step 2. Then navigate to Indexing Options.

Step 3. In the Indexing Options window, select Advanced and click Rebuild from the Troubleshooting table.
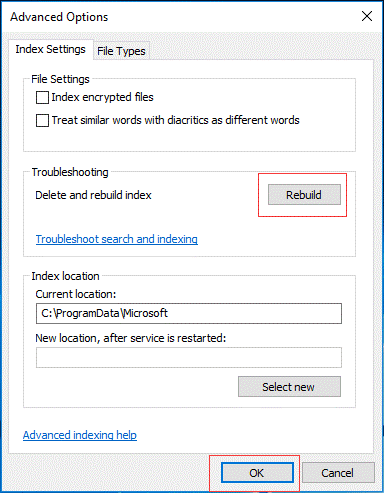
Step 4. It will remind you that the rebuilding process will take a long time. Tap OK to confirm.
Once done, restart your PC.
Option 8: Run Search and Index Troubleshooter
Windows PC is equipped with a dedicated troubleshooting tool, which is designed to diagnose and solve problems related to search and indexing features. It should be a good option to fix the Windows 10 search bar not working issue.
Proceed with the following instructions:
Step 1. Launch Control Panel and find Troubleshooting.
Step 2. In the Troubleshooting window, choose View all in the left pane.
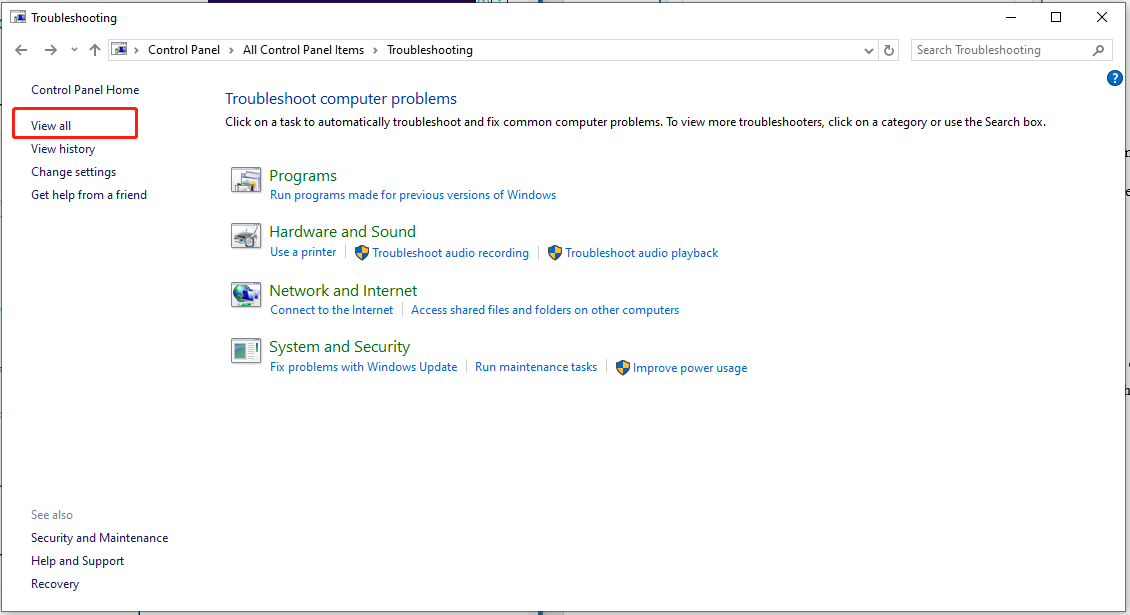
Step 3. Navigate to Search and Indexing and click Next in the newly popped-up window.
Step 4. Check the problems you have encountered and hit Next.
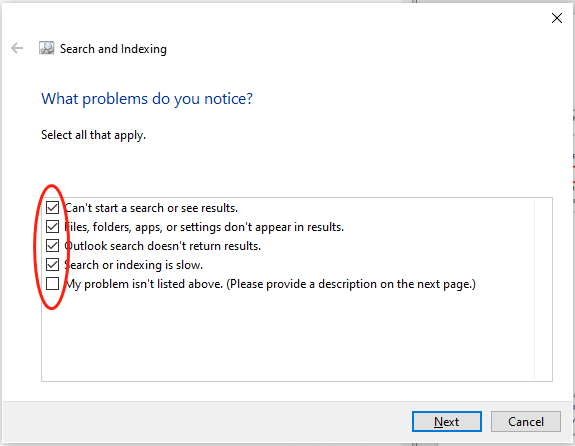
Step 5. Then the Windows troubleshooter will run automatically, detecting and fixing the problems.
When the troubleshooting is finished, reboot the device and use your search bar again.
Option 9: Perform System File Checker & DISM tool
Corrupted system files on your computer could result in the Windows search bar failing to work. To address this Windows Search issue, it’s necessary to run the System File Check/DISM tool.
Follow the detailed steps:
Step 1. Go to Task Manager and click the File tab in the top left corner.
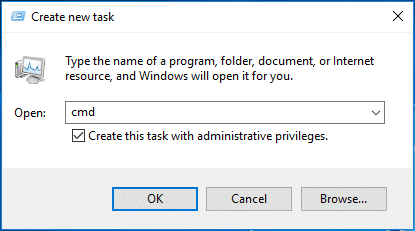
Step 2. Choose Run new task, type cmd in the new box, check Create this task with administrative privileges, and then hit OK to continue.
Step 3. In the Command Prompt window, input sfc /scannow and hit Enter.
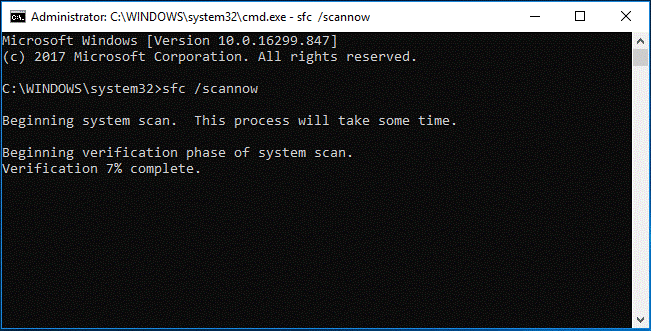
When the scanning process is completed, restart your PC to check if the issue is gone. If not, run the following DISM commands:
DISM.exe /Online /Cleanup-image /Scanhealth
DISM.exe /Online /Cleanup-image /Restorehealth
Similarly, reboot the PC and check the result.
Option 10: Disable Antivirus Temporarily
Sometimes, third-party antivirus software can interfere with Windows search. You can turn off your firewall or antivirus to verify if it’s causing the Windows Search issue.
To do so:
#How to Disable Windows Firewall?
Step 1. Open Control Panel through the Run dialog (Win + R).
Step 2. Look for Windows Defender Firewall and click Turn Windows Defender Firewall on or off from the left menu.
Step 3. Choose Turn off Windows Defender Firewall under Private network settings & Public network settings.
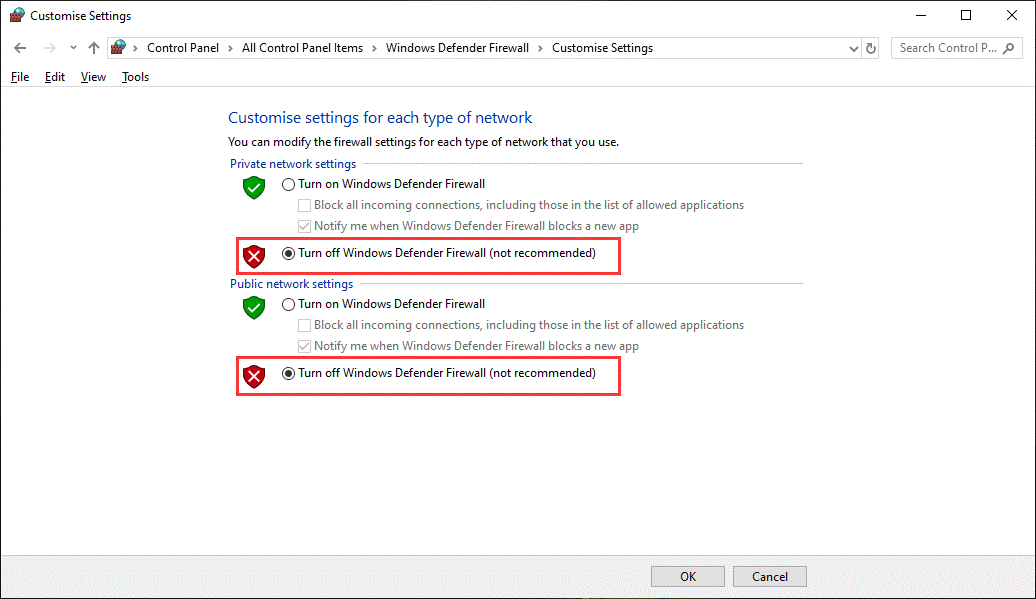
Step 4. Then tap on OK to save the changes.
#How to Turn off Windows Antivirus?
Step 1. Press Win + I to bring up Windows Settings.
Step 2. Go to Update & Security > Windows Security > Virus & threat protection.
Step 3. Locate Virus & threat protection settings and click Manage settings.
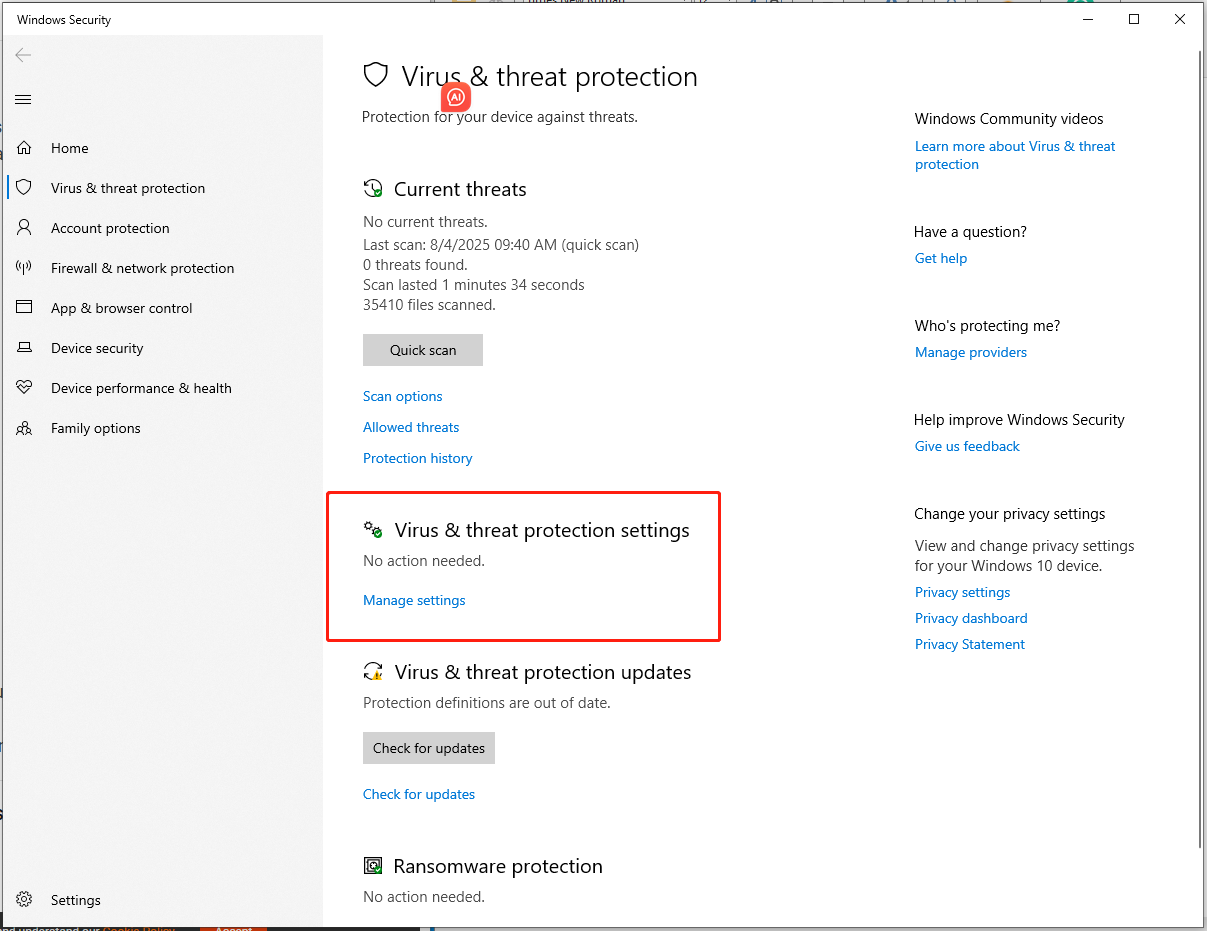
Step 4. Toggle off the Real-time protection option.
Option 11: Reset Your Windows PC
If none of the solutions work for you, then you need to reset your PC to solve the Windows search not working issue.
Important Notice:
It’s strongly suggested that you back up important files before resetting your computer. This is to prevent the occurrence of accidental data loss during the resetting process. When it comes to data backup, MiniTool ShadowMaker is a good choice.
It is a professional backup software, allowing you to back up files from the desktop, library, Users, and computer. Meanwhile, system backup, disk backup, and partition backup are also supported.
Furthermore, MiniTool ShadowMaker also has abundant features. Examples include creating automatic backup schedules, modifying the image compression level, cloning HDD to SSD, cloning an SSD to a larger SSD, setting password protection, etc.
Now, let’s see how to create a backup with MiniTool ShadowMaker.
Step 1. Download, install, and then launch this program.
MiniTool ShadowMaker TrialClick to Download100%Clean & Safe
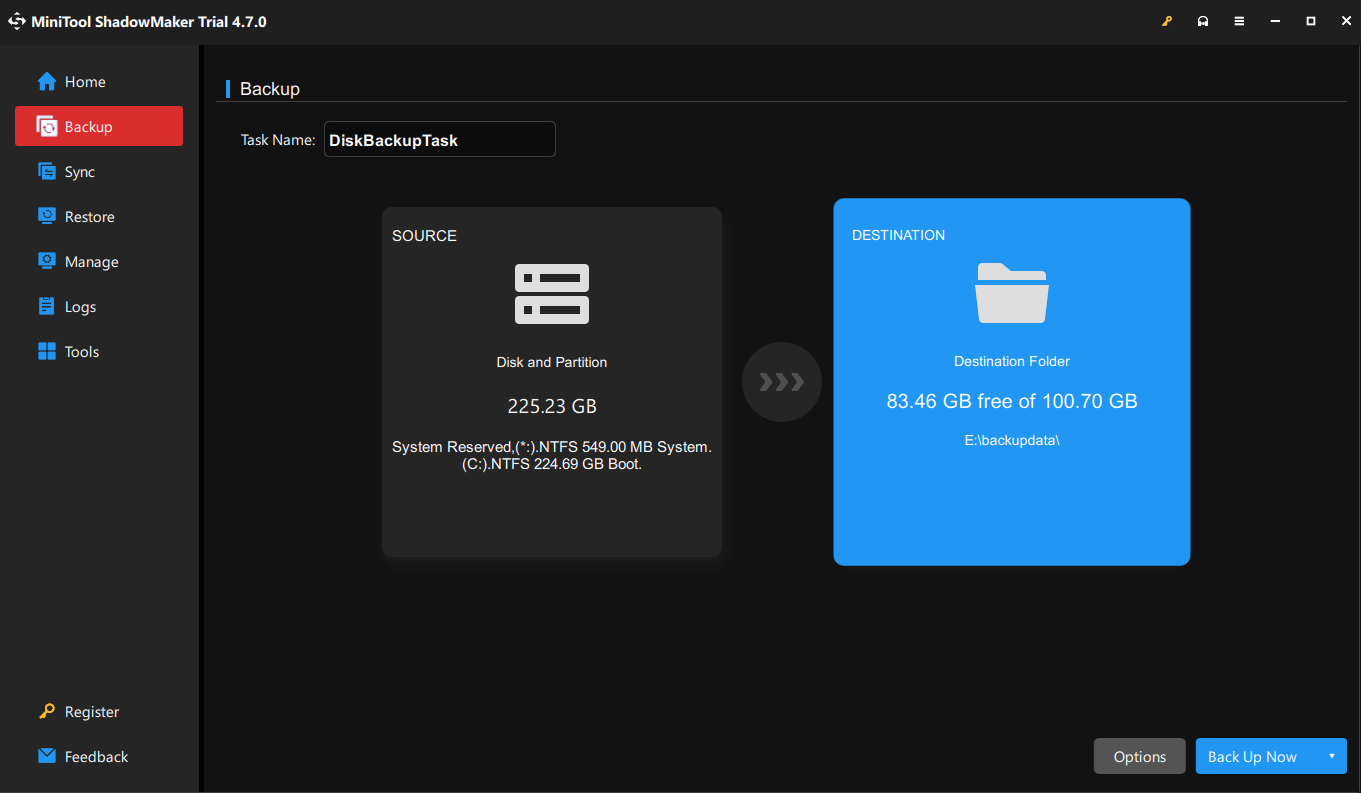
Step 2. In the Backup page, highlight the SOURCE section > Folder and Files to choose the items you want to back up.

Then, go to DESTINATION to pick a storage path for the backup.
Create an automatic file backup: go to Options > Schedule Settings > set the task on a regular basis.
Encrypt the backup image: go to Option > Backup Options > Password > Enable Password Protection.
Step 3. Click on Back Up Now to start the backup process immediately.
With the backups in hand, you can restore your data in the event of system crashes, malware infection, hard drive failure, and more.
Now, you can safely perform a PC reset. Follow the instructions:
Step 1. Open Settings through the left side of the Start menu.
Step 2. Select Update & Security > Recovery.
Step 3. Click on Get started under Reset this PC.
Step 4. Choose Keep my files, and then follow the prompts on the screen to complete the reset.

Wrapping Things Up
To sum up, we introduce a series of methods to solve the Windows Search not working problem. Just try them one by one until you find the one that works for you.
Please don’t hesitate to contact us via [email protected] if you experience any problems with MiniTool ShadowMaker.
Windows Search Not Working FAQ
Try the keyboard on another computer.
Adjust the registry.
Update keyboard drivers.
Re-log in to your account.
Create a new user account.
Run the Microsoft Start menu troubleshooter.
Check and repair Windows files.
Reinstall Windows apps.
Make the Start menu full screen.
Enable Tablet mode and Start screen.
Disable third-party antivirus programs.
1. Restart Windows Explorer
Press Ctrl + Shift + Esc to fire up Task Manager.
Find Windows File Explorer and right-click on it to choose Restart in the drop-down menu.
2. Check for updates
Go to Settings > Update & Security > Check for updates.
3. Boot into Safe Mode
If the taskbar works well in Safe Mode, then the root cause could be software conflicts.
Perform a full scan with Windows Defender.
Switch to another user account.
Perform System Restore.
Open Task Manager via Registry/Local Group Policy.
Upgrade your system.
Re-register Task Manager via Windows PowerShell.
User Comments :