What Is Attrib Command Windows 10/11?
The attrib command is a command prompt whose main purpose is to delete and set file attributes like read-only, hidden, system and archive. Attrib command can run from the Command Prompt in all versions of Windows and it offers security to your software programs and important documents.
There are 4 conventional attributes in files and folders in Microsoft Windows:
Hidden – It makes the files and folders invisible. Therefore, if others use your device, these files and folders will be safe because they cannot see and access the files.
Read-only – You may not change or delete the specified read-only file.
Archived – It provides a backup of the file to help recover the file when it is corrupted or missing.
System – Mark the file as an important file hence changing its priority.
Do you know what the difference between data archiving and backup is? See this guide to get the answer: What’s Data Archiving & What’s Difference Between It and Backup.
The Parameters of Attrib Command
In this part, we will show you the most common attrib command parameters:
attrib: run this command alone to see the attributes set on the files within the directory that you execute the command form.
+h: make the file attributes as hidden and not visible to the user.
-h: clear the hidden file attribute.
+r: set the read-only attribute to the file or directory.
-r: clear the read-only attribute.
+a: set the archive file attribute to the file or directory.
-a: clear the archive attribute.
+s: set the file attribute as a system file.
-s: clear the system file attribute.
/s: process files in all directories in the specified path.
/d: only used with /s and it includes directories, not only files, to whatever you executing.
*.*: for all the files with all different types of file extensions.
Like all the commands in Command Prompt, you should use double-quotes around a folder or file name that has spaces. If you don’t add double-quotes, you will receive a “Parameter format not correct” error message.
How to Use Attrib Command to Hide or Unhide Folder?
As mentioned above, some attribute commands can hide folders and files, let’s see how it works.
Preparation
Before doing that, you need to know the actual folder path of the desired file/folder. Go to File Explorer > find the folder/file you want to hide > copy the folder/file path on the address bar.
Method 1: Hidden Folders via Command Prompt
Step 1. After getting the folder path, type cmd in the search bar to locate Command Prompt.
Step 2. Right-click it to choose Run as administrator.
Step 3. Type the following command and hit Enter. Don’t forget to change D:\MiniTool ShadowMaker\data into your target folder path.
attrib +s + h “D:\MiniTool ShadowMaker\data”
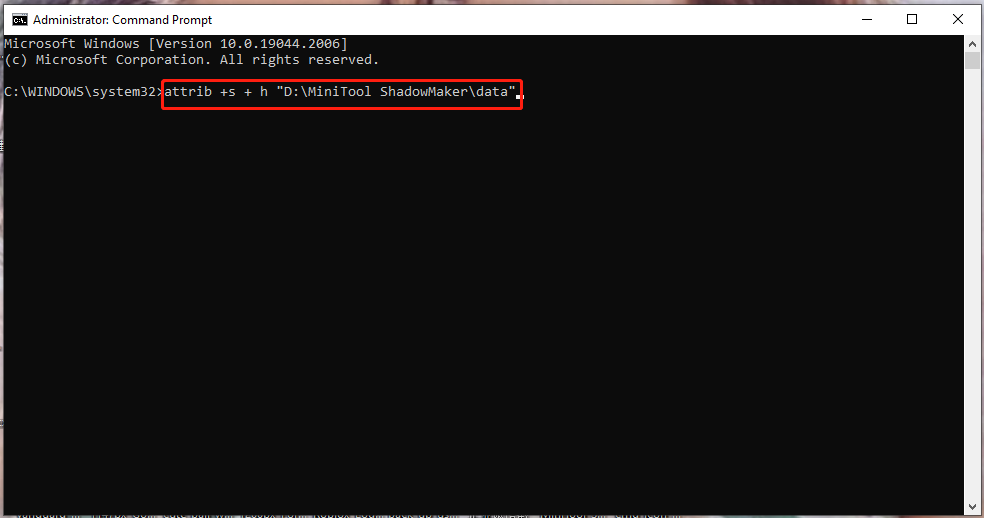
Step 4. After the command is executed successfully, the folder will become invisible even when you check the Hidden files option in the View tab.
If you want to unhide this folder, you can run the command below:
attrib -s -h “D:\MiniTool ShadowMaker\data”
After the execution, the folder will appear in File Explorer.
Method 2: Hidden Folders via Windows PowerShell
You can use the same technique to hide folders in Windows 10/11 PowerShell because it supports almost all the CMD commands. Here’s how to do it:
Step 1. Open File Explorer and locate the file or folder you would like to hide.
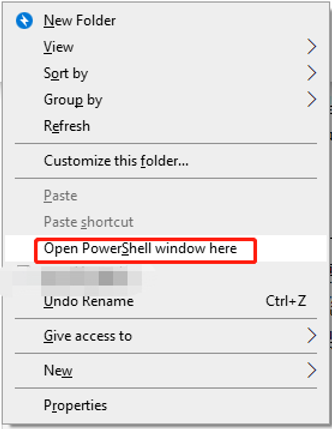
Step 2. For Windows 10, press Shift and do a right-click in File Explorer and choose Open PowerShell window here in the context menu. For Windows 11, select Open in Windows Terminal. Now, you can just use the folder name rather than the full folder path in Windows PowerShell command.
Step 3. Type the following command and hit Enter. Also, remember to replace the Folder_Name with your actual folder name.
attrib +s +h “Folder_Name”
If you want to unhide the folder, run this command below:
attrib -s -h “Folder_Name”
Both PowerShell and Command Prompt are command-line tools in Windows and there are some similarities and differences between them. To make a distinction between them, see this guide - PowerShell vs CMD: What Are They? What Are Their Differences.
How to Use Attrib Command to Recover Hidden Files?
Sometimes, a file might be hidden because of virus attacks, system errors, human causes and other unknown reasons. In this case, you can find the hidden files with attrib command. To do so, you need:
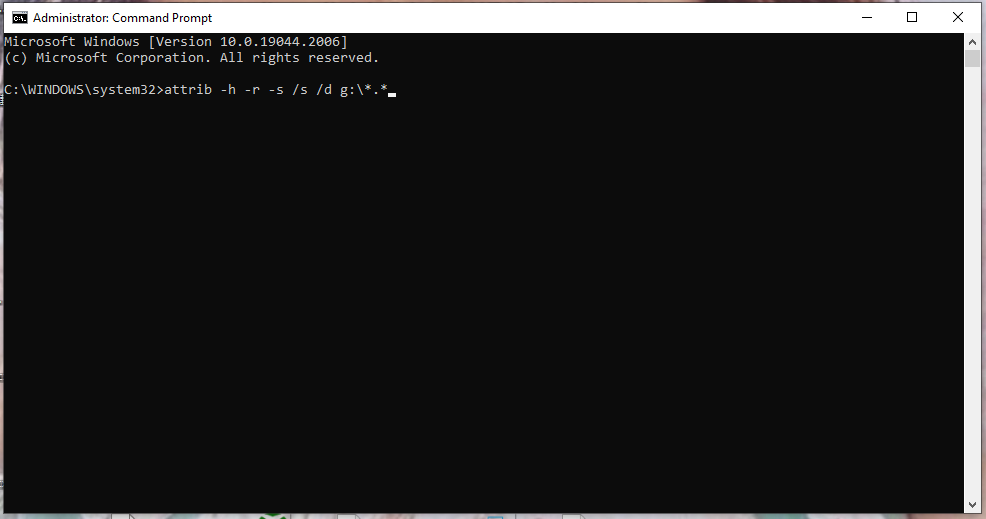
Step 1. Run Command Prompt as an administrator.
Step 2. Type the following command and hit Enter. (Replace g: with the drive letter of your hard drive, or external storage device where your file disappears.)
attrib -h -r -s /s /d g:\*.*
After the process is done, you can go to the destination place to check these files according to the results.
If you doubt that there are some infected files in this hard drive, you can show them and deleting them using the steps below:
Step 1. Type dir and hit Enter, you will see all the files under the assigned drive.
Step 2. The virus name may contain words like autorun with .inf as extension. You can type del autorun.inf and hit Enter to remove them.
To remove other infected files with extensions like .ink or .exe in your target drive, just type del*.ink or del*.exe and press Enter to get rid of them.
Step 3. After the deletion, you can run the attrib -h -r -s /s /d g:\*.* command again to see whether the deleted files still exist or not.
How to Fix Attrib Command Not Working?
As mentioned above, you can use attrib command to check whether the file is hidden by virus infection or other reasons. If you cannot find the files after running the attrib -h -r -s /s /d g:\*.* command for the first time, chances are that the files are not hidden ones but deleted or missing due to formatting, partition turning RAW and more.
If your attrib command is not working and you cannot find the files, what should you do to recover the deleted files?
Fix 1: Recover the Deleted Files from Recycle Bin
You may consider recovering your deleted files from Recycle Bin first because you can find discarded items in it.
Step 1. Double-click on the shortcut of Recycle Bin on your desktop.
Step 2. Look for the file you want to recover. Right-click it, choose Restore and then the file will be restored to its original location.
What if your Recycle Bin is corrupted? If you have the same experience, you can go to this post for help - Recycle Bin Corrupted in Windows 10? Recover Data & Fix It.
Fix 2: Recover the Deleted Files via MiniTool Power Data Recovery
If you cannot find the desired file in Recycle Bin, you can try MiniTool Power Data Recovery, the professional data recovery software to recover it from your computer. This product is designed to help you to recover deleted, lost or formatted files on different types of data storage devices like an internal/external hard drive, SSD, USB flash drive, SD card, pen drive and more. You can restore your file in just a few clicks with this tool. To do so:
Step 1. Download, install, and launch MiniTool Power Data Recovery Trial.
MiniTool Power Data Recovery TrialClick to Download100%Clean & Safe
Step 2. Move the cursor on the drive where your file is supposed to be and hit the Scan button.
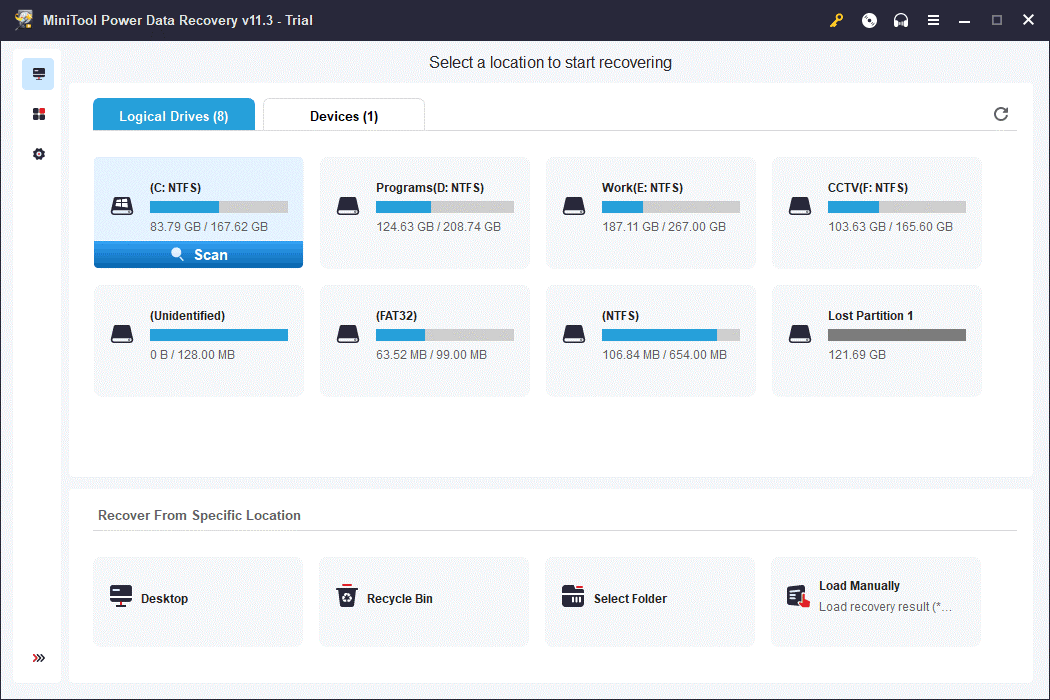
If you forget the original location of the lost or deleted file, you can go to the Devices tab to select the whole disk to scan.
Step 3. After the scanning is complete, you can see all the files that this product can find. Open the folders one by one to find the file you want to recover.
To recover your file, you need to go to MiniTool official website to get a license key and use it to register MiniTool Power Data Recovery in the scan results interface.
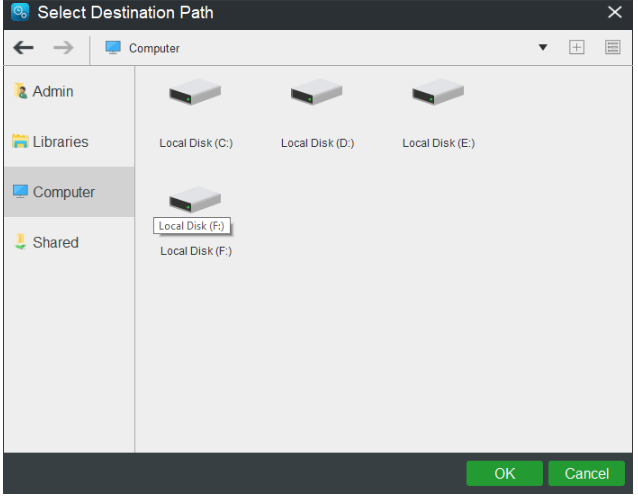
Step 4. Select the file you need and hit the Save button to choose a suitable location to store it.
Suggestion: Back up Your Precious Files to Avoid Data Loss
File loss must be a frustrating experience. If you don’t want to suffer from it again, you can take some preventative measures such as creating a regular backup. As for backing up files, it is highly recommended to try MiniTool ShadowMaker, the free and reliable backup software. This backup tool enables you to create a daily, weekly, monthly or on-event backup for files/folders, drives, systems and partitions. Now, follow the instructions below to create an automatic file backup with us.
Step 1. Download and install MiniTool ShadowMaker Trial.
MiniTool ShadowMaker TrialClick to Download100%Clean & Safe
Step 2. After a successful installation, launch it and press Keep Trial.
Step 3. Go to the Backup functional interface and you can see the Source button on the left and the Destination button on the right.
Step 4. Press Source > Folders and Files and then you can select the files or folders that are important to you.
Step 5. Press Destination and you can choose a storage path for your files.
Step 6. Hit Schedule at the lower right of the Backup functional interface and turn on this feature manually. Then, you can set some particular time points to execute the scheduled backup each day, week, month or on event.
Step 7. Click on Back up Now to start the file backup task at once and your task will be finished quickly.
After knowing how to back up your files quickly and easily with MiniTool ShadowMaker, do you know other ways to create a file backup in Windows 10/11? Go to this guide for more details - How to Backup Files on Windows 10? Try These Top 4 Ways.
Wrapping Things up
This post provides you with a detailed description of the definition and parameters of attrib command and how to use it to hide or unhide files. At the same time, there are some special cases in which attrib command is not working because your file is deleted, lost or corrupted.
We also provide you with some workable fixed and suggestions to get your files back and avoid file loss. If you are curious about attrib command and our products, welcome to share your ideas with us in the comment area below or send an email via [email protected]. A million thanks to you!
User Comments :