Why Boot from M.2
To improve overall system performance, storage speed plays a critical role.
An M.2 NVMe SSD connects directly to the motherboard through the PCIe interface. Compared with traditional SATA-based drives, it delivers higher throughput and lower latency, making it well-suited as a Windows boot drive.
Advantages
Here are the advantages of an M.2 SSD.
- Ultra-fast speeds: NVMe (Non-Volatile Memory Express) uses the high-speed PCI Express (PCIe) bus protocol. It can offer breakneck speeds, about 3,500 MB/s or higher.
- Fast boot and load times: The boot time is significantly reduced. Moreover, apps and large games load much faster.
- Streamlined build: The small M.2 form factor enables the SSD to directly plug into the motherboard, eliminating cable clutter and saving space, particularly in a laptop.
- Power efficiency: An M.2 NVMe SSD is power-efficient due to efficient data transfer and lower latency, which helps reduce heat and extend battery life.
- Superior multitasking and demanding tasks: NVMe supports a massive number of command queues, up to 65,535 queues. This feature enables the computer to handle vast tasks simultaneously without bottlenecks. Also, it is ideal for heavy workloads like 4K video editing.
When to Choose an M.2 SSD as a Boot Drive
In the following cases, you can set an M.2 SSD as the boot drive for lightning-fast boot-ups and quick app loading:
- High-performance work: If you need to handle demanding tasks such as video editing and graphic rendering, or deal with large datasets, use an M.2 NVMe solid-state drive.
- Gaming: You want the optimal performance for games that leverage the DirectStorage technology.
- New PC builds: When building a new PC, consider an NVMe M.2 drive that provides a single, cable-free, and compact solution.
Preparation for Using M.2 NVMe as Boot Drive
Before using an M.2 NVMe SSD as a boot drive, proper preparation is required. This includes verifying motherboard compatibility, confirming UEFI boot support, and installing the SSD correctly.
#1. Check Hardware Compatibility
Ensure your motherboard has an M.2 slot that supports NVMe.
To verify this:
Step 1: Type System Information in Windows Search and press Enter to open this tool.
Step 2: Locate BaseBoard Manufacturer and BaseBoard Product to check the motherboard information.

Step 3: Visit the manufacturer’s website, search for the model page, and check the specifications. Look for relevant information regarding M.2 slots, and check if it supports NVMe, PCIe x4, or other PCIe generations.
Additionally, it is also important to verify which form factor of the NVMe M.2 SSD the PC supports. The common form factors include 2230, 2242, 2260, 2280, and 22110.
To check the form factor, find the information related to physical length/size on the motherboard website or manual.
#2. Check the Boot Mode
Ensure the computer is using the UEFI boot mode when using an M.2 NVMe SSD as the boot drive.
NVMe drives typically require UEFI firmware with a GPT partition scheme rather than the legacy BIOS mode. This offers native support for the NVMe protocol and ensures optimal performance and enhanced security.
Follow these steps to check the boot mode:
Step 1: Open the System Information window.
Step 2: Find the BIOS Mode item and check if it says UEFI.
If yes, proceed with the following steps.
#3. Purchase a Proper M.2 Drive
If the computer meets the conditions to boot from M.2, purchase a compatible drive from a reliable retailer.
#4. Install an M.2 SSD in a PC
After preparing an M.2 NVMe SSD, securely install it in your computer.
Note: If you are not familiar with computers, send the machine to a professional and request assistance. If you decide to install that drive in the PC, be careful. Otherwise, improper handling during the installation can damage the hardware.
Here is how to install an M.2 SSD:
Step 1: Completely shut down your computer and unplug the power cord.
Step 2: Open the computer case.
Step 3: Touch an unpainted metal object or use an anti-static wrist strap connected to a ground point to ground yourself to prevent static damage.
Step 4: Locate the M.2 slot on the motherboard. It may be under a heatsink or cover, or near the GPU or CPU.
Step 5: Unscrew the screw, insert the new SSD, and secure it with the screw you removed.
Step 6: Reassemble the computer case and all components.
How to Make M.2 Boot Drive
To boot from M.2, there are two simple methods you can try.
- Clone the old drive to the M.2 SSD to make the drive bootable
- Clean install Windows on the solid-state drive for a fresh, fast system
Option 1: Clone Old Disk to M.2 SSD
Disk cloning is an effective way to migrate your operating system, settings, configurations, personal files, and other data from one disk to another. Without reinstalling the OS and apps, the target disk can be directly bootable after the clone.
To do that, use a third-party software, such as MiniTool ShadowMaker, that offers a simple, user-friendly interface. Its Clone Disk feature can copy your entire drive and migrate Windows to another drive.
This utility is compatible with major NVMe SSD brands, including Seagate, Crucial, Western Digital, Samsung, SanDisk, Kingston, and other brands.
See how MiniTool ShadowMaker handles NVMe disk cloning.
Step 1: Download, install, and open MiniTool ShadowMaker on your computer.
MiniTool ShadowMaker TrialClick to Download100%Clean & Safe
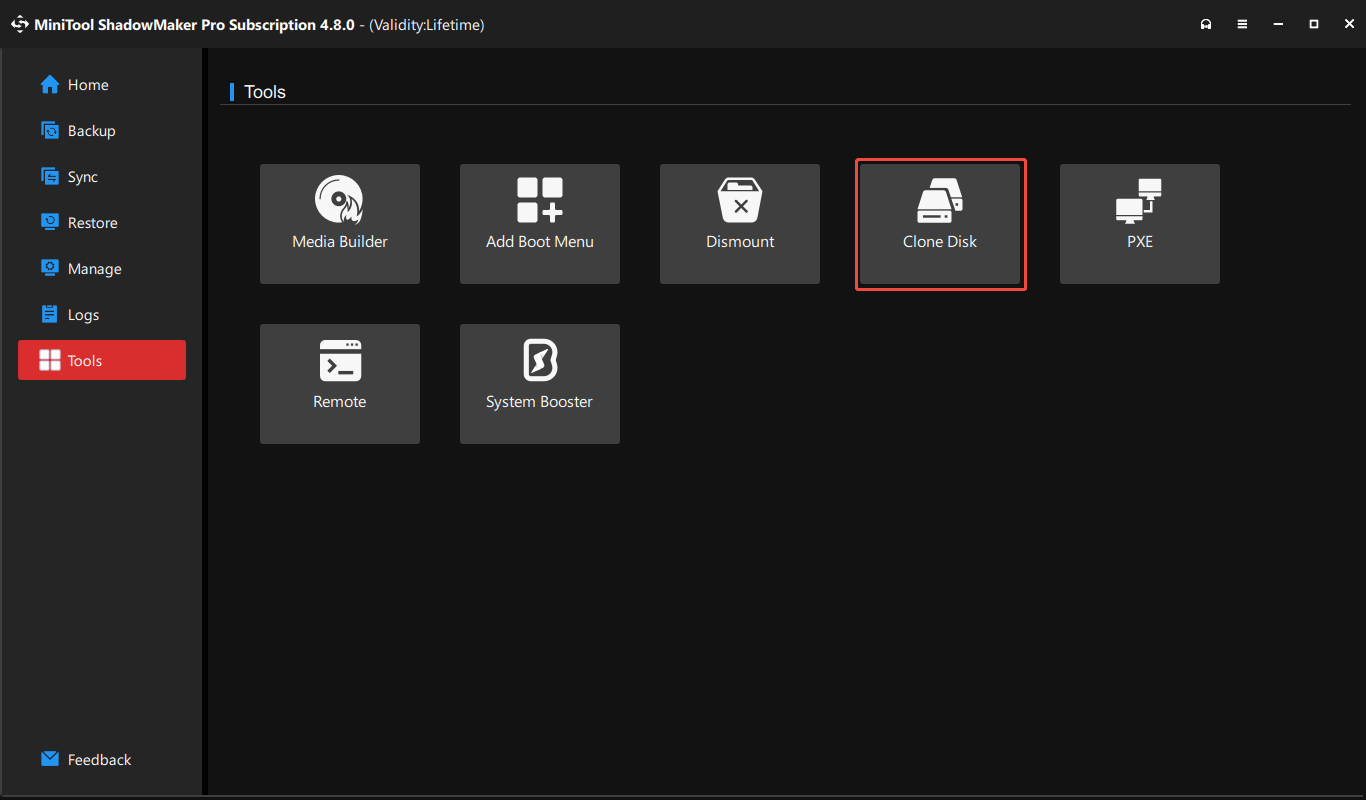
Step 2: Choose Tools from the left pane and click the Clone Disk feature to proceed.
Step 3: Select the system disk as the source drive and click OK.
Further Tips:
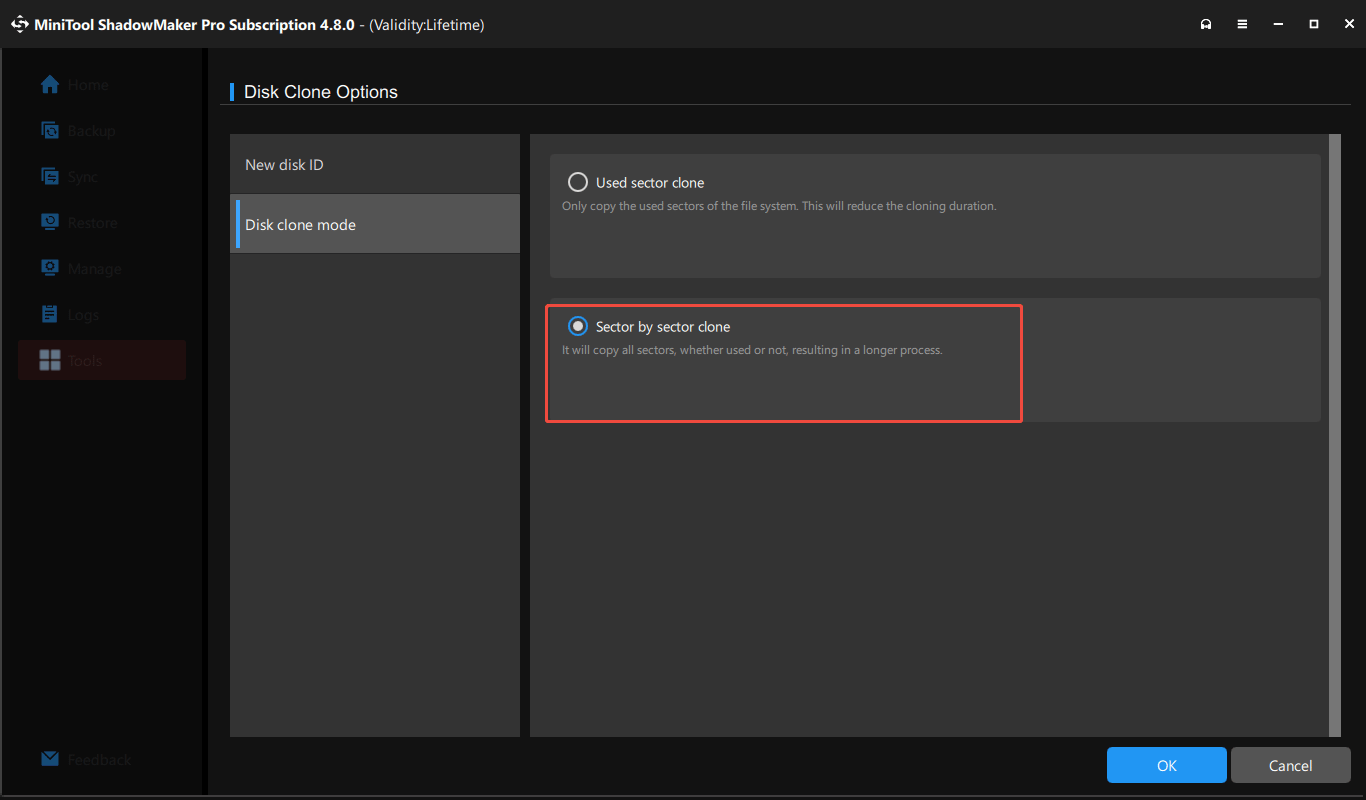
For sector by sector cloning, choose Options, tick Sector by sector clone under the Disk clone mode tab, and click OK. This mode will copy all sectors, including the used or unused ones, resulting in a longer cloning process.
In addition, ensure you use a new disk ID (default setting) under Options. Otherwise, a disk signature collision will occur since both the old drive and the new drive have the same unique identifier. Windows will mark one disk as offline to prevent conflicts.
Step 4: Set the new SSD as the target drive and choose Start to begin the cloning process.
Wait until the process finishes, then skip to the post-cloning or clean installation part to learn the subsequent steps.
Option 2: Clean Install Windows on M.2 Drive
Alternatively, making a clean installation on your new SSD is an approach to set M.2 as the boot drive. It is ideal, especially when you want the best performance and a clean operating system.
Follow the instructions to clean install Windows on an M.2 NVMe SSD.
Step 1: Create a Bootable USB Flash Drive
1. Download Windows 10/11 Media Creation Tool from Microsoft’s download page and launch this tool.
2. Accept the license terms.
3. Configure your preferences, including the language and edition.
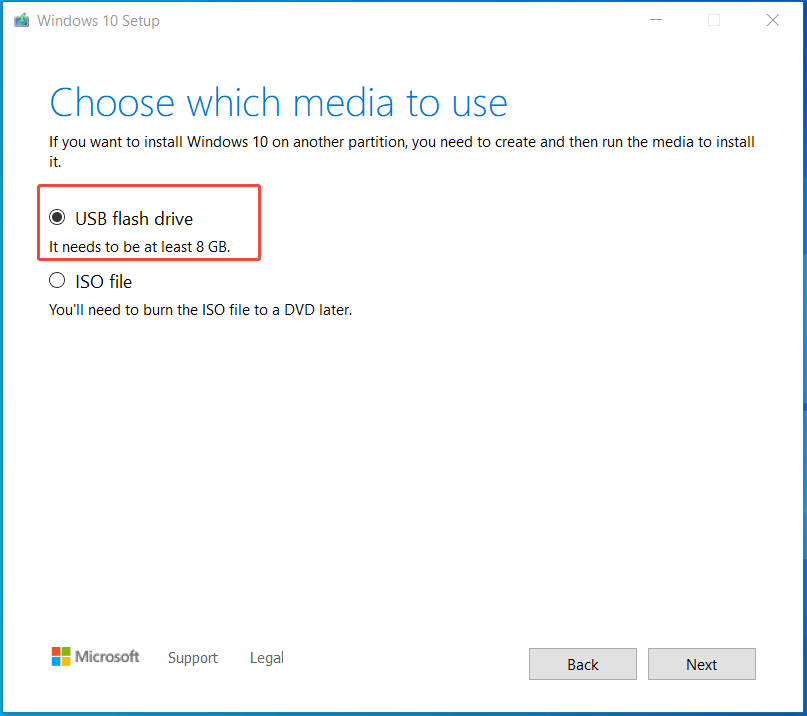
4. Choose USB flash drive to proceed.
5. Insert a USB drive into the computer and refresh the window.
6. Follow the on-screen instructions to create a bootable USB flash drive.
Step 2: Start Windows from USB.
1. Restart the system and press Esc, Del, F2, or another boot key, depending on the manufacturer, to enter the BIOS menu.
2. Under the Boot option, set Windows to boot from that USB flash drive.
Step 3: Install Windows on the M.2 drive.
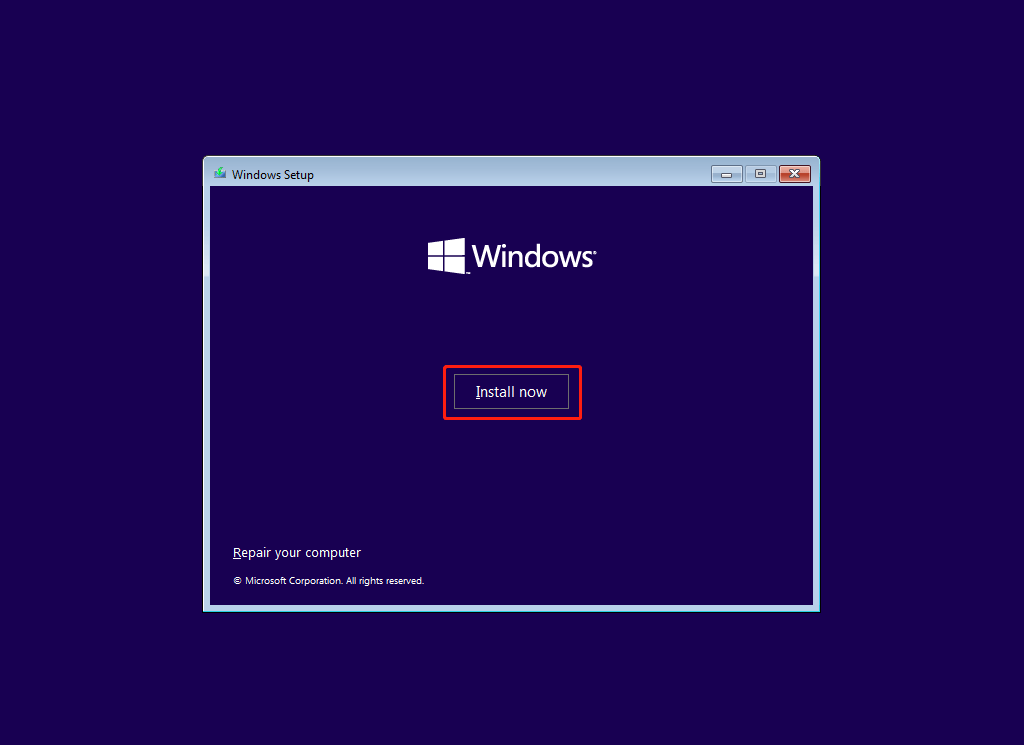
1. The Windows Setup interface appears.
2. Select a language, time format, and keyboard method depending on your needs.
3. Click Install now to proceed.
4. Click I don’t have a product key and accept the license terms.
5. Choose a Windows edition, such as Windows Pro.
6. Select Custom: Install Windows Only (advanced) for a fresh installation.
7. Choose the M.2 drive to install Windows.
8. Start installing the system.
9. Follow the prompts to finish the setup.
Post-Cloning or Clean Installation
#1. Configure BIOS Settings
To boot from M.2, an important step is to configure the SSD as the boot drive in BIOS.
Here is how to boot Windows from an M.2 SSD:
Step 1: Restart the computer and enter the BIOS setup during startup.
Step 2: In the Boot tab, set the M.2 NVMe drive as the first boot device, and press F10 to save the change.
Then, Windows will boot and load the desktop.
#2. Format Your Old Drive
Moreover, it is recommended to format the old system drive to store new data.
To do that:
Step 1: Launch Disk Management via the Win + X menu.
Step 2: Right-click the drive and select Format.
Step 3: Choose a file system and click OK to start formatting.
Once finished, you can use the old drive as a data storage device.
PC Won’t Boot from M.2
In some cases, the computer fails to boot from the M.2 drive. The problem may stem from incorrect BIOS settings, an outdated BIOS version, or a SATA port sharing issue (SATA ports are disabled when using an M.2 drive).
To fix it, try these methods:
1. Ensure you install the SSD securely.
2. Disable CSM (Compatibility Support Module).
3. Make the M.2 SSD the first boot device.
4. Set the boot mode to UEFI.
5. Update the BIOS to a new, compatible version.
To learn the details, refer to the guide on being unable to load Windows from an M.2 SSD.
Bottom Line
In this detailed guide, we cover why to boot from M.2 in a computer, how to prepare the SSD, how to set M.2 as the boot drive, and how to fix PC not booting from M.2.
To enjoy fast speeds, now follow the instructions to install the drive, clone the old disk or install Windows, and finish some configurations.
If you meet issues with MiniTool ShadowMaker when cloning a hard drive, send an email to [email protected].
Boot from M.2 FAQ
To fix this issue, check the physical connections, disable CSM, run Bootrec commands, set the SSD as the boot device, and reset BIOS to defaults.
1. Use a high-speed USB-C or Thunderbolt enclosure.
2. Run Rufus to write the Windows ISO to the external SSD.
3. In BIOS, set BIOS to the UEFI mode, disable Secure Boot, and set the NVMe SSD as a boot drive.
2. Go to Advanced, Onboard Devices Configuration, or Peripherals.
3. Locate settings for the M.2 slot in a section like NVMe Configuration, CPU PCIe Configuration, or similar, and select Enabled or PCIe x4 mode.
4. Be aware of the SATA conflicts. If needed, check the motherboard manual and adjust SATA connections.
About The Author

Position: Columnist
Vera has been working at the MiniTool Team for over 10 years as a technical editor and content writer. She mainly focuses on disk and partition management, data recovery, Windows backup and restore, and PC troubleshooting. Through in-depth software testing and hands-on experience, she has helped users solve a wide range of computer problems and better protect their data on Windows devices.
User Comments :