It commonly happens for Windows users that hard drives do not show up. Some people choose Samsung SSD for data backup or disk upgrade but it turns out to be failed with the “Samsung SSD not showing up” issue. why does that happen and how to fix it? For details, please read the post on MiniTool.
Samsung SSD Not Showing up
About Samsung SSD not showing up, there are five situations you may take into consideration.
Case 1. Samsung SSD Not Detected in BIOS
Some people would like to choose Samsung SSD, such as Samsung SSD 850 EVO, to upgrade their hard drives with Samsung cloning software.
During this process, you need to clone SSD to larger SSD, otherwise, cloning HDD to SSD. In this way, when you try to boot your computer from the Samsung SSD, the target is gone and can’t be detected.
Many users reported this usually occurred on them, such as Samsung SSD 850 EVO not detected in BIOS. Targeting this issue, you can check the BIOS settings first and that is not the only fix.
Case 2. Samsung SSD Not Showing up When Installing Windows
When you choose the location for the Windows installation, you may fail to locate the Samsung SSD drive. Besides, with the issue, you may see an error code accompanied. That can be related to the problem of UEFI firmware and you can try to update this firmware drive.
Case 3. Samsung SSD 850 EVO Not Detected by Samsung Magician
Samsung Magician is an SSD management utility designed for all Samsung SSD products, enhancing a drive’s performance with a wide range of customization features. People reported the utility can’t work sometimes, especially when “Samsung SSD 850 EVO not detected” happens.
If your Samsung SSD 850 EVO can show up on your computer but fails to be detected by Samsung Magician, you can check if your Samsung SSD is connected to a RAID/SCSI storage device controller, which can lead to “Samsung SSD 850 EVO not showing up”.
For this situation, you can go to this post for troubleshooting methods: Samsung Magician Is Unable to Find a Samsung SSD? [100% Solved].
Case 4: Samsung SSD Not Showing up in Disk Management
People may want to configure the Samsung SSD drive in Disk Management, for example, you can initialize a new drive, shrink/extend a basic volume, change a drive letter, etc.
If Disk Management can’t identify the drive, that will be troublesome because the issue culprits may lie with either the drive or the system, or both of them. You need to go to the next part to follow every method for try.
Case 5: Samsung SSD Not Showing up in File Explorer
Another condition you may run into is Samsung SSD not showing up in File Explorer/This PC. The possibility is that some glitches or bugs occur on your PC and you can try to restart the File Explorer service first and restart your PC. If that does not work, you can try the next moves.
Fix: Samsung SSD Not Showing up
Fix 1: Check for Your Faulty Hardware
First of all, you need to check if your Samsung SSD is well connected. You can unplug the SSD’s USB cable and wait for a while to re-connect your SSD drive. Just make sure your cable is plugged into the correct port.
If that doesn’t work, you can check if the hardware has been damaged and the following tips can be helpful to identify the culprit.
- Try another computer with the Samsung SSD drive. If that works, the issue lies with the port or computer itself.
- Try a different SSD USB cable and check the cable for any damage.
Fix 2: Update Disk Drives
When you connect your Samsung SSD to the computer, communication will be transferred between the system and the drive. If your drive has been outdated, the compatibility issue can prevent the recognition, leading to “Samsung SSD not showing up”.
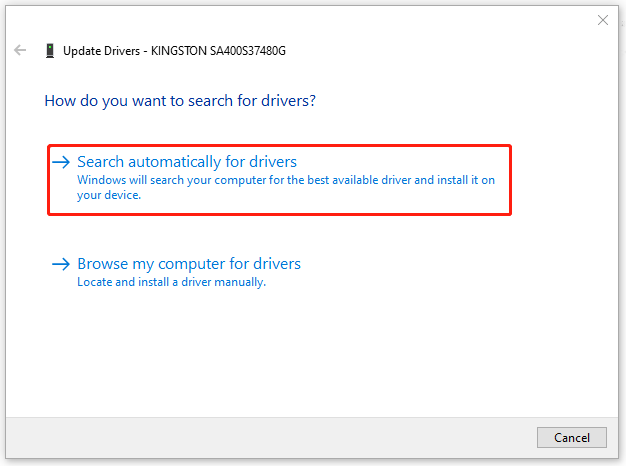
Step 1: Open the quick menu by pressing Win + X and choose Device Manager.
Step 2: Expand Disk drives and right-click on the drive to choose Update driver.
Step 3: Choose Search automatically for drivers from a prompt and proceed to the next moves according to the instructions.
Fix 3: Use Hardware and Device Troubleshooter
You can check for some common issues that easily occur on hardware and devices by using a Windows built-in troubleshooting utility – Hardware and Devices Troubleshooter.
Step 1: Open Settings by pressing Win + I and go to Update & Security > Troubleshoot > Additional troubleshooters.
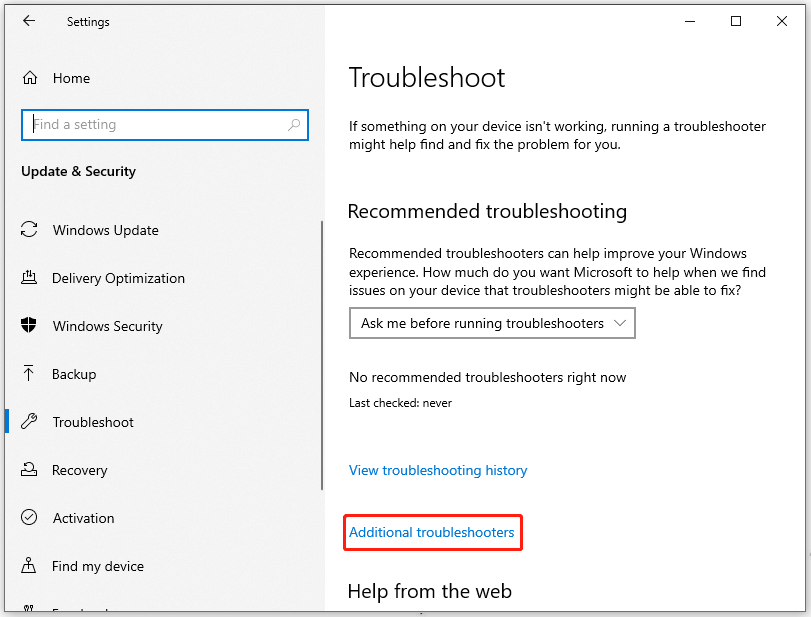
Step 2: Locate Hardware and Devices and click on it to choose Run the troubleshooter. Then follow the instructions to finish the work.
Some people may find the troubleshooter is not there, that’s because Microsoft hides it in the system. you can read this article to run the hidden utility: Fixed! Hardware and Device Troubleshooter Is Missing Windows 10.
Fix 4: Configure BIOS Settings
If you find Samsung SSD not detected in BIOS, you can try to configure some settings to make the system able to recognize and use the SSD, such as the SATA controller mode.
Step 1: Please restart your computer and press some dedicated keys, such as F2, Delete, F10, etc., to get into BIOS.
Step 2: Go to Peripherals > SATA Configuration and then choose SATA Mode Selection as IDE.
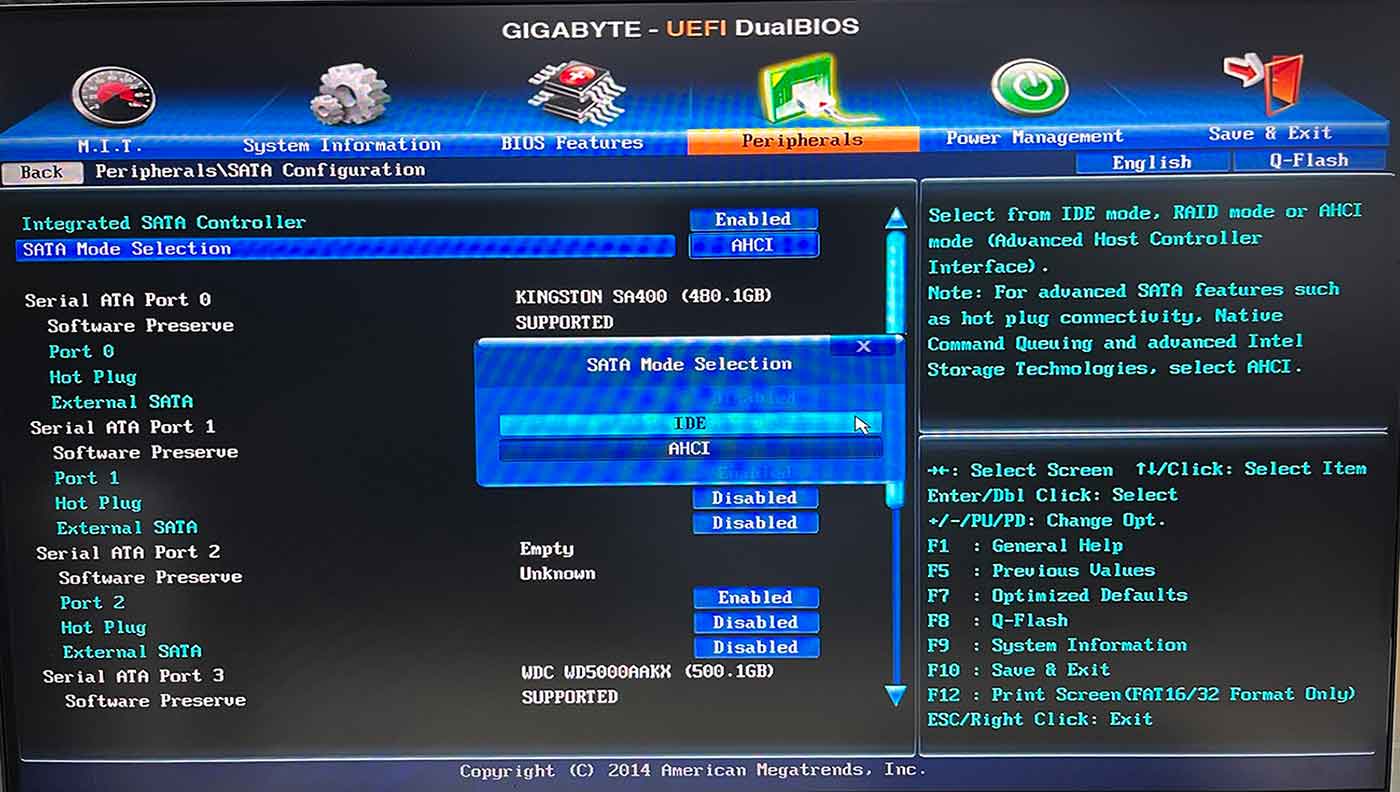
Then choose to save the changes and exit BIOS. Now you can check if the Samsung SSD not showing up issue get fixed.
Fix 5: Check SSD Drive for Errors
Check your SSD drive for corruption and errors. It is important to make sure your SSD drive can run well so that the system can recognize and communicate with the drive.
MiniTool Partition Wizard can take effect in managing and checking drives. So you can use this program to check for errors with easy steps.
Besides, this professional partition manager has more powerful functions and features that help configure your disks, for example, create/delete/format partitions, copy disks/partitions, convert FAT to NTFS, etc.
Download and install the program and when done, open it.
MiniTool Partition Wizard DemoClick to Download100%Clean & Safe
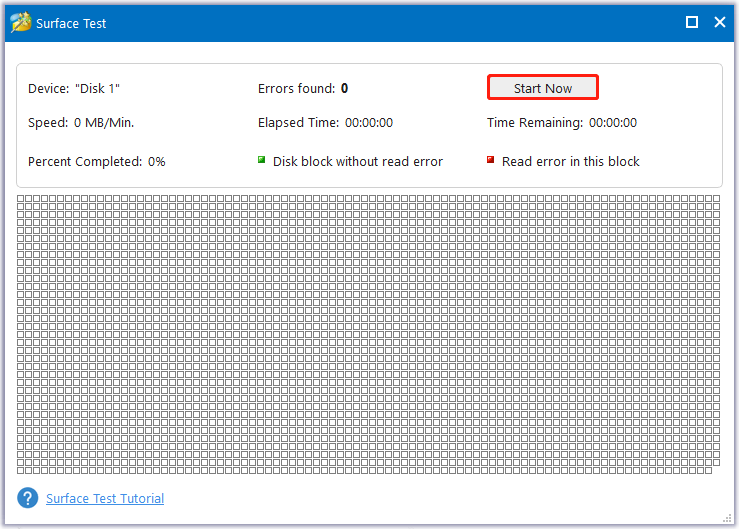
Locate the SSD drive and right-click on it to choose Surface Test. Then click Start Now, and it will start an automatic scanning and show you the result.
Since this issue can happen for some errors in Disk Management, if you can’t find the SSD drive in the utility, you can try to run MiniTool Partition Wizard for troubleshooting, which allows you to change drive letter, initialize, and format the SSD drive with easy and quick procedures.
If you find any corruption, please run the Check Disk utility.
Step 1: Open File Explorer and go to This PC.
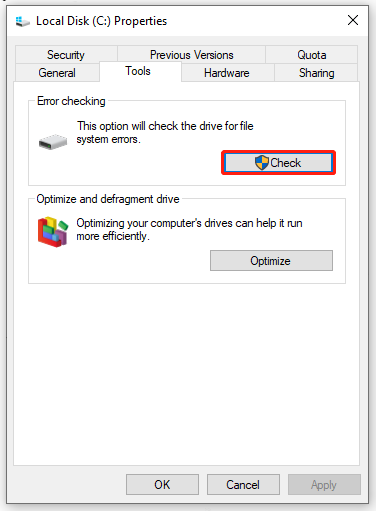
Step 2: Right-click on the SSD drive and choose Properties.
Step 3: Go to the Tools tab and click Check in the Error checking section.
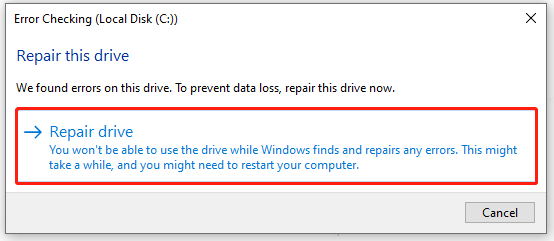
Step 4: If you see a prompt that tells you that you don’t need to scan the drive, which means everything runs well in your system, you can continue with the step by clicking Scan drive. If something wrong occurs in your system, the utility will ask you to repair this drive by clicking Repair drive.
Then you can continue your troubleshooting with the prompts. When that finishes, restart your PC to see if the error has been gone.
Under the circumstance of Samsung SSD not showing up in File Explorer, you can use another way to check the disk. For details, you can read this post: CHKDSK Commands: Fix Hard Drives Errors on Windows.
Fix 6: Assign or Change SSD Drive Letter
Some people may forget to assign a drive letter for your new volume and that can make your hard drive unrecognizable. You can do the following steps to add drive letters.
Step 1: Open Run by pressing Win + R and input diskmgmt.msc to enter Disk Management.
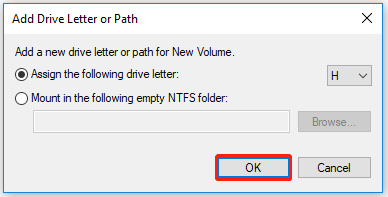
Step 2: Right-click on the drive to choose Change Drive Letter and Paths… and click Add….

Step 3: Select the new drive letter from the drop-down menu and click OK to save it.
Then please check for the error after restarting your system.
Fix 7: Initialize SSD Drive
The last method is to initialize your Samsung SSD drive. When you initialize a disk, everything on the disk is erased and the disk is prepared for use by Windows.
Step 1: Open Disk Management and a prompt will jump out to ask you to initialize the disk if you have an uninitialized disk.
Step 2: Choose the partition style for the selected disks between MBR and GPT. Then right-click on the unallocated partition to choose New Simple Volume… from the list.
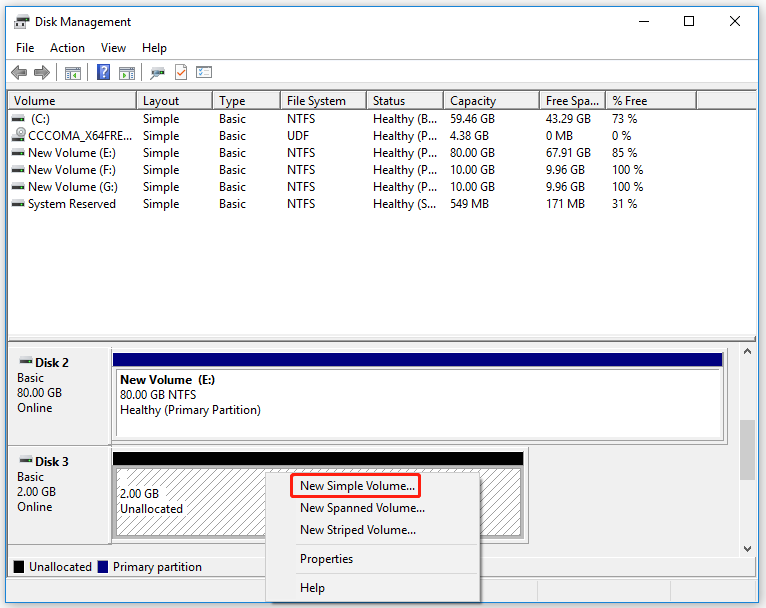
Then you can specify the volume size, driver letter, volume name, etc.

Suggestion: Protect Your Data with MiniTool ShadowMaker
After you have fixed the “Samsung SSD not showing up” issue, you’d better backup data regularly. In this way, if you have a backup of your data or a copy of the drive, you can easily get your data recovered when you run into the similar drive issues.
You can use this backup software free – MiniTool ShadowMaker – to perform a disk backup or disk cloning; if you want an automatic backup, you can click the Options feature to configure the settings.
Please download and install the program by clicking the button and you will get a 30-day free trial version.
MiniTool ShadowMaker TrialClick to Download100%Clean & Safe
Step 1: Open the program and click Keep Trial.
Step 2: Go to the Backup tab where you can choose the items you want to backup from the SOURCE section. If you just want to backup files, you can also locate your source in Folders and Files.
Note: The system-included partitions have been selected by default so you don’t need to change it if you want a Windows backup.
Step 3: When you finish, choose the location where you want to save the backup from the DESTINATION section. Then click Back Up Now to start the task.

There is another choice in that you can have a copy of your drive – Clone Disk. Just make sure your target drive has been connected and go to the Tools tab to choose Clone Disk. Then choose your source and target disks and follow the on-screen prompts to do the next steps. It will be easy and quick to complete.
Bottom Line:
Is Samsung SSD not showing up? There are seven solutions provided for you to address the problem. However, when your hard drive can’t be detected and accessed, you may face the risk of data loss. That’s the most important thing you should do when you have some cherished data stored – data backup.
MiniTool software is worth trying in data backup and if you have any issues with the software, you can contact us via [email protected].
User Comments :