Although the Microsoft Surface Pro series has won many users’ praise and taken a place in the market, it still has some places for reproach. Every computer might encounter all kinds of booting issues and Surface Pro is not an exception. If you have some related issues, you can refer to the following article:
- How to Fix Microsoft Surface Black Screen with Logo/Cursor?
- [Solved] Surface Pro Won’t Turn on or Wake up from Sleep
Surface Pro 3 Stuck at the Surface Screen
When you open your Surface Pro 3, you might find your screen just stuck on the “Surface” logo and fails to get into the Windows, even can’t close it. This is a much tough issue because the reasons are still underground and we cannot directly troubleshoot it.
When you find Surface Pro stuck on the Surface screen, you can ask for some professionals to check if the culprit roots in some hardware technical issues or contact Microsoft support service for help.
However, before that, you can try the following methods to see if the issue can be fixed on your own.
Fix Surface Pro 3 Stuck at the Surface Screen
Fix 1: Reset Frozen Surface Pro 3
The first method you should try is to do a forced reset on your Surface Pro 13 when Surface is stuck loading on the Surface screen. This method is effective for Surface Pro booting issues, no matter for the black screen issue or the frozen display issue.
Step 1: Press and hold the Power button on your Surface Pro 3 for at least 30 seconds until your laptop has been turned off.
Step 2: Now, you need to hold the Volume up button and Power button together for a span of 15 seconds.
Step 3: Then after 15 seconds, please release the buttons and wait up to 10 seconds.
Step 4: At last, you can press the Power button to turn on your Surface device to see whether it is bootable now.
Even though your Surface Pro 3 has gone back to normal, the steps are not finished yet. The above steps to force reset your laptop just treat the symptoms, not the root causes. To avoid these similar issues, you need to make sure your driver and firmware are up to date.
To download the drivers and firmware updates, please follow these steps:
Before you start the updates downloading, please make sure you have a stable Internet connection and you have been logged into your Surface with administrator rights.
Make sure that your Surface device is charged at least 40% and your Surface is plugged in and turned on while it’s updating, or the downloading might be a failure.
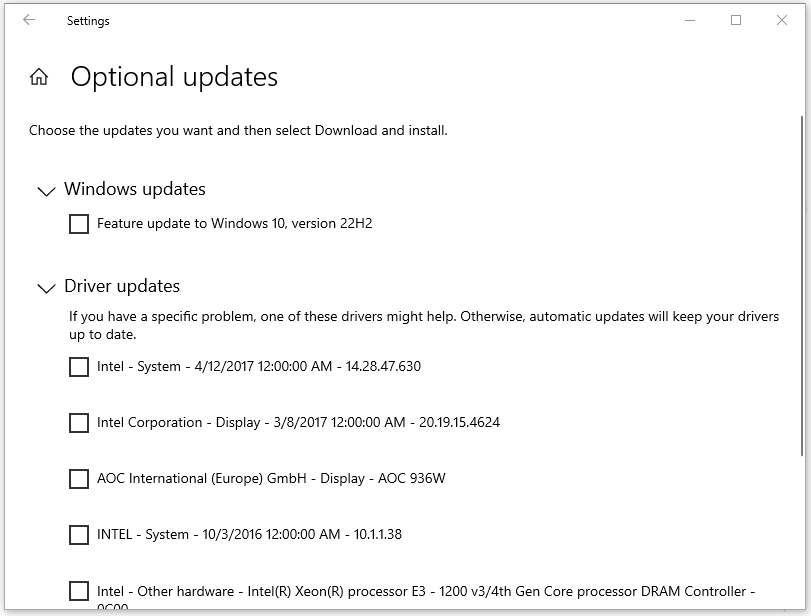
You can directly go to the Windows icon > Settings > Update & Security > Windows Update > Check for updates. Choose to update your Windows if there is any available version.
It is recommended to install all available optional updates. Under the Check for updates, choose View optional updates and on the next page, you can choose to download all available driver updates with Surface named.
If you have issue with the above steps of diver and firmware updates, you can try to manually update them. Luckily, Microsoft Download Center allows Surface Pro, Surface Laptop, Surface Book, and other Surface devices to download the latest firmware, drivers, and software in one package.
You need to be clear about your Surface model; open your Microsoft Surface app on Surface Pro 3 and you will see your Surface model in the device information.
To find your Windows version, you can do as follows:
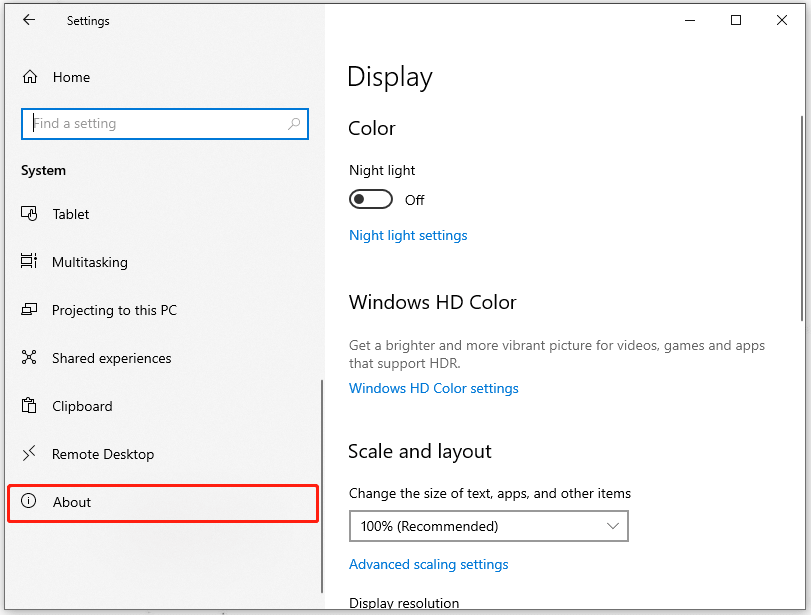
Step 1: Click on the Windows icon on the menu bar and choose Settings.
Step 2: Choose System and then scroll down to choose About from the left panel.
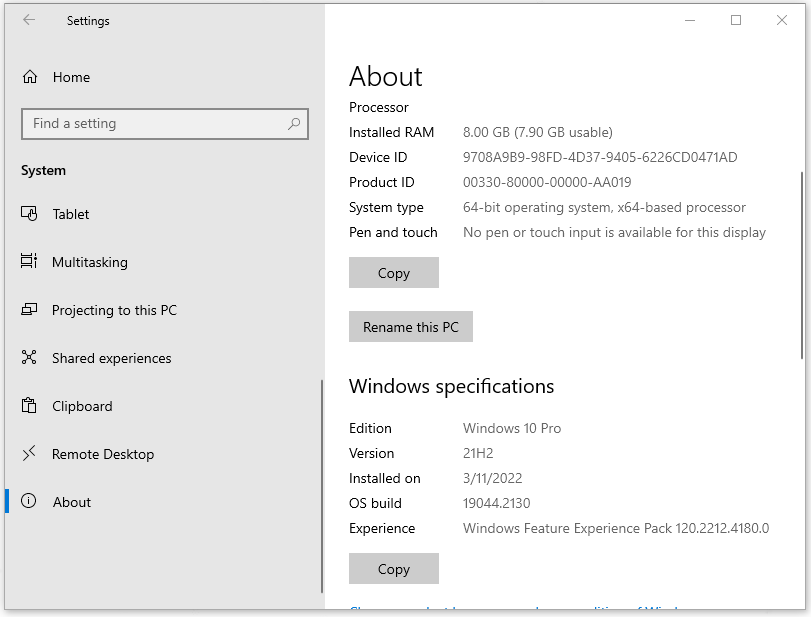
Step 3: Here, you will find your operating system version and OS build number under Windows specifications.
Next, you can go to download and install the latest firmware and drivers for sound, display, Ethernet, and Wi-Fi for your Surface Pro 3 by clicking here.
On the Microsoft Download Center, click Download to update your Surface with the latest drivers and firmware.
Fix 2: Restore Your Windows on Surface Pro 3
If you find your Surface Pro 3 still stuck on the Surface screen after trying the volume key, you can restore your Windows to the previous normal state. Because your computer fails to boot, you need to restore your system from Windows Recovery Environment.
Note: This method is only available for those who have created a restore point before. To create a restore point, you can refer to this article: What Is System Restore Point and How to Create It? Look Here.
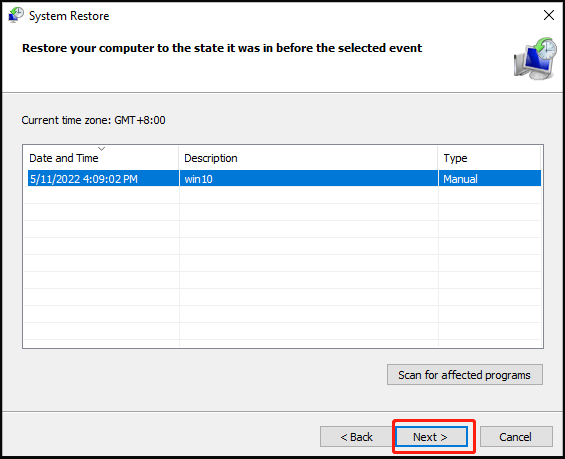
Step 1: Press and hold the Power button till the screen turns off and do that three times.
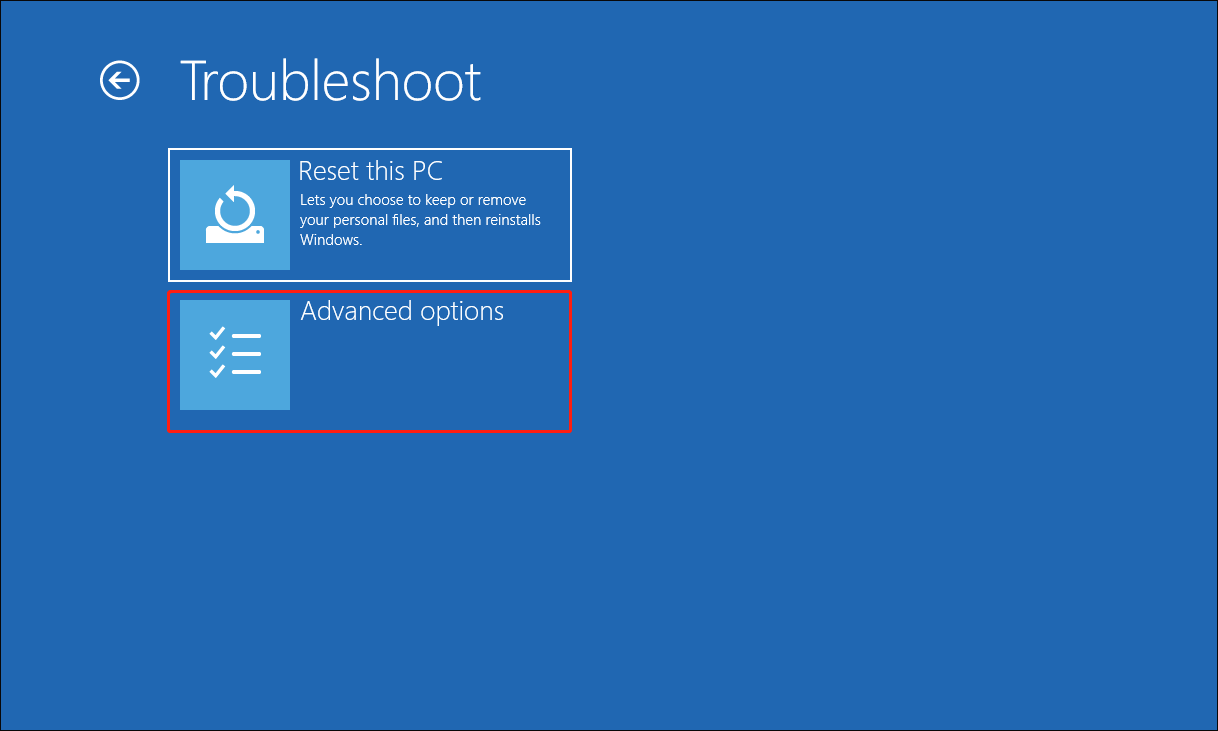
Step 2: When the words Preparing Automatic Repair under the Windows logo appear, you will enter WinRE and then choose Advanced Options > System Restore.
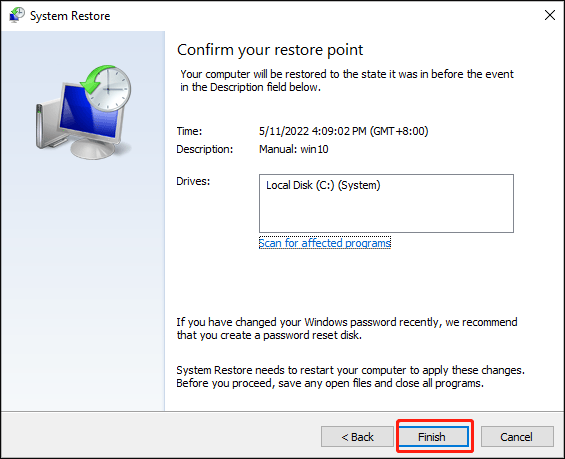
Step 3: Click Next on the pop-up window and select the restore point you have created before. Click Next.
Step 4: To initiate the restoring process, click Finish.
Then your computer will recover and you’d better update your driver and firmware as we mentioned before to exclude some errors.
If you need other methods to get into WinRE, this article will be helpful: How to Boot into Windows Recovery Mode on Bootable/Unbootable PCs.
Fix 3: Install a Clean Copy of the Windows
If you have not created any restore point for your Windows, another method to turn on your Surface Pro 3 is to install a clean copy of the Windows. A clean installation can resolve many booting issues but the major problem is that the data on your device won’t go back.
That’s why we always stress how important to have a backup for your laptop. As for that matter, the next part will focus on protecting your data in a better way.
To install a clean copy of the Windows on your unbootable Surface Pro 3, you need to create a bootable USB drive from another PC and plug it into your Surface Pro 3.
To create a bootable installation media, this article has detailed steps: How to Install Windows 10 on a New Hard Drive.
Then turn on your Surface Pro 3 and boot from the flash drive, or you can directly go to BIOS and change your boot sequence to the flash drive first.
Related articles:
- How to Enter BIOS Windows 10/8/7 (HP/Asus/Dell/Lenovo, any PC)
- How To Change Boot Order Safely On Windows Device
After that, you will see the Windows logo and you can follow the instruction to choose your language and format to continue the installation.
In the next pages, you will be asked to enter the license key and choose installation types, just do as you are required. At last, choose the drive you want to install your Windows and your installation will begin.
MiniTool ShadowMaker – Back up in Advance
PC booting issue is hard to recover for non-professionals. Even though you are lucky enough to get Windows back to normal, the risks of losing data still exist, not to mention that your Surface Pro 3 still has trouble turning on.
No matter what kind of hampers you encountered on your way, data becomes valuable and easily lost assets on the Internet. To better safeguard your digital assets, an excellent Backup expert – MiniTool ShadowMaker – has more features and functions to satisfy your demands.
First of all, download and install MiniTool ShadowMaker and you will get a free trial version for 30 days.
MiniTool ShadowMaker TrialClick to Download100%Clean & Safe
Step 1: Open MiniTool ShadowMaker and click Keep Trial in the right bottom corner to get into the interface.
Step 2: Go to the Backup page and choose the SOURCE section to choose what you want to back up. Here, it is recommended to back up your system; in this way, you don’t need to change your backup source and your system has been selected by default.
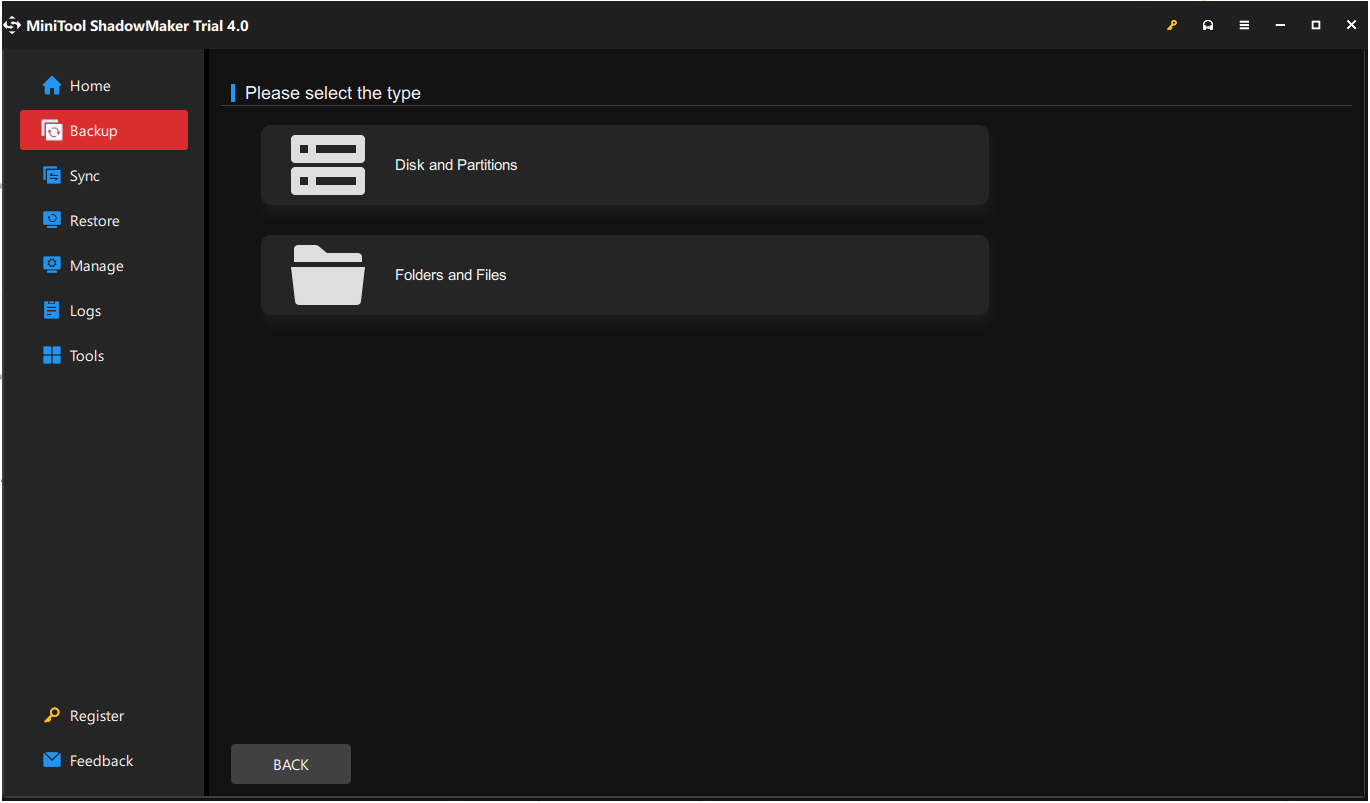
MiniTool ShadowMaker allows you to back up system, disk, partition, folders, and files. Choose to back up your important data.
Step 3: Go to the DESTINATION section to choose where to store the data and there are four locations you can back up to, including User, Computer, Libraries, and Shared. You can do a NAS backup by choosing Shared to add your network path.
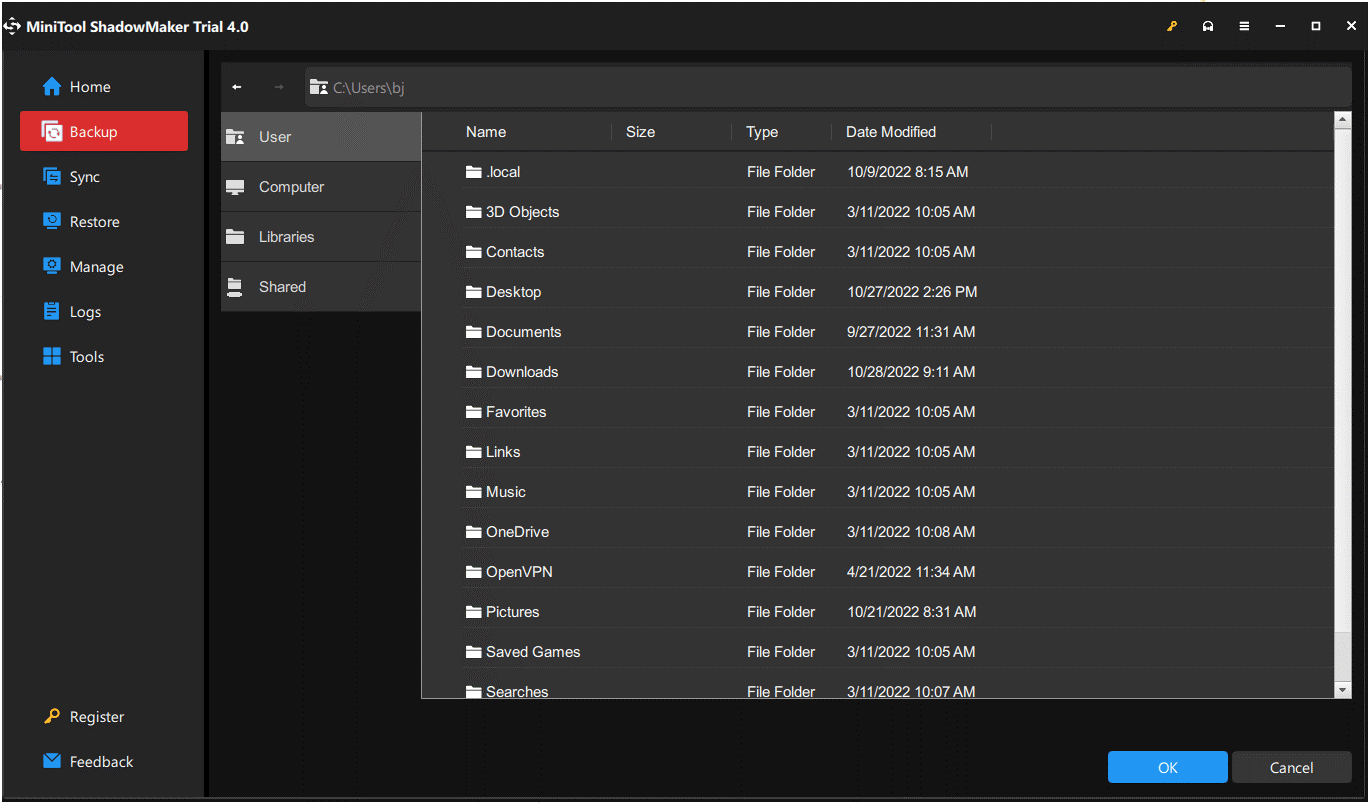
Note: It is recommended to back up your data with an external drive. Especially, if you are preparing for a bootable media, please plug your external drive beforeopening the program so that MiniTool can identify it.
Step 4: You can choose Back Up Now to start the process immediately or Back Up Later to delay the backup. The delayed backup task is on the Manage page.
Apart from the Backup feature, we recommend MiniTool ShadowMaker for its other amazing features. You can clone your system disk by simple steps. It would be a better choice to make an external drive as your destination.
Step 1: Plug in your external drive to your computer and open MiniTool ShadowMaker. Click Keep Trial.
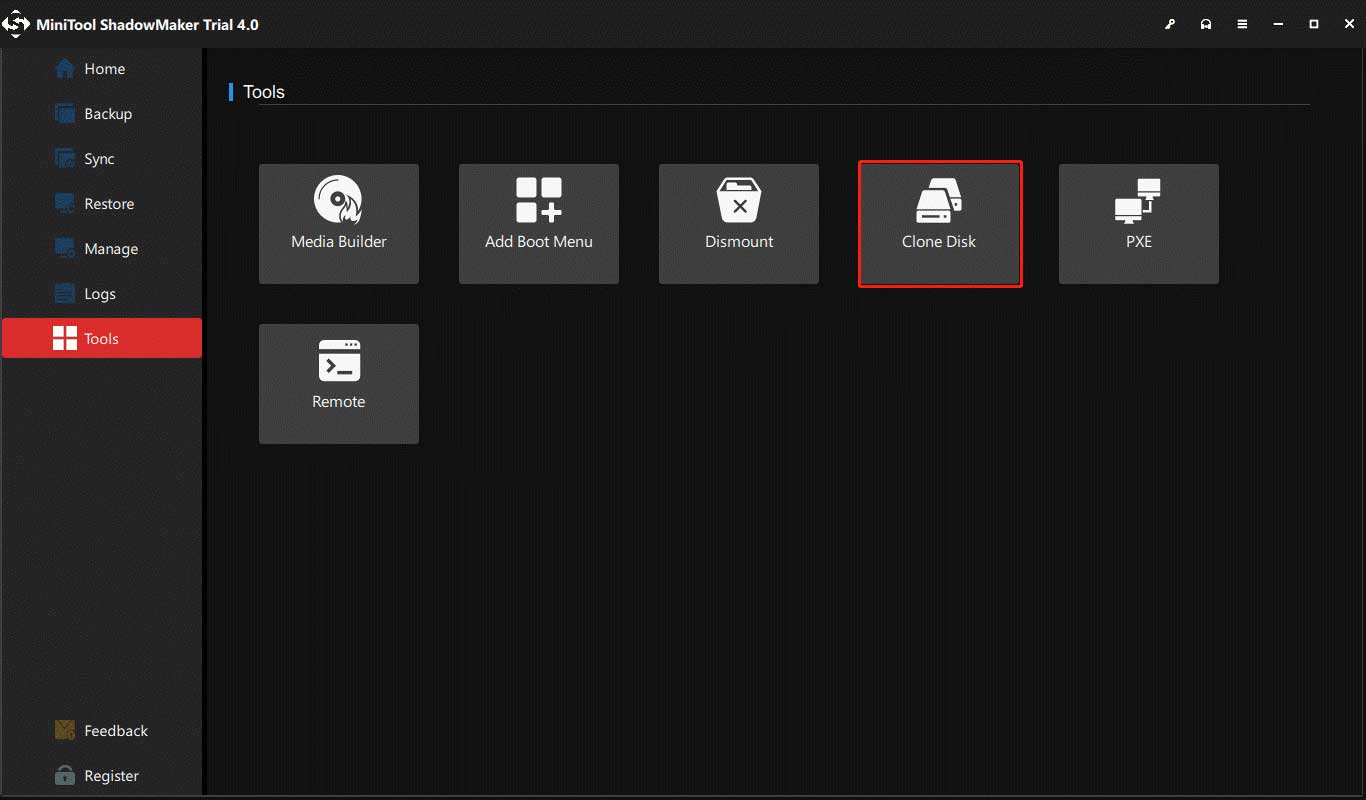
Step 2: Switch to the Tools page and choose Clone Disk.
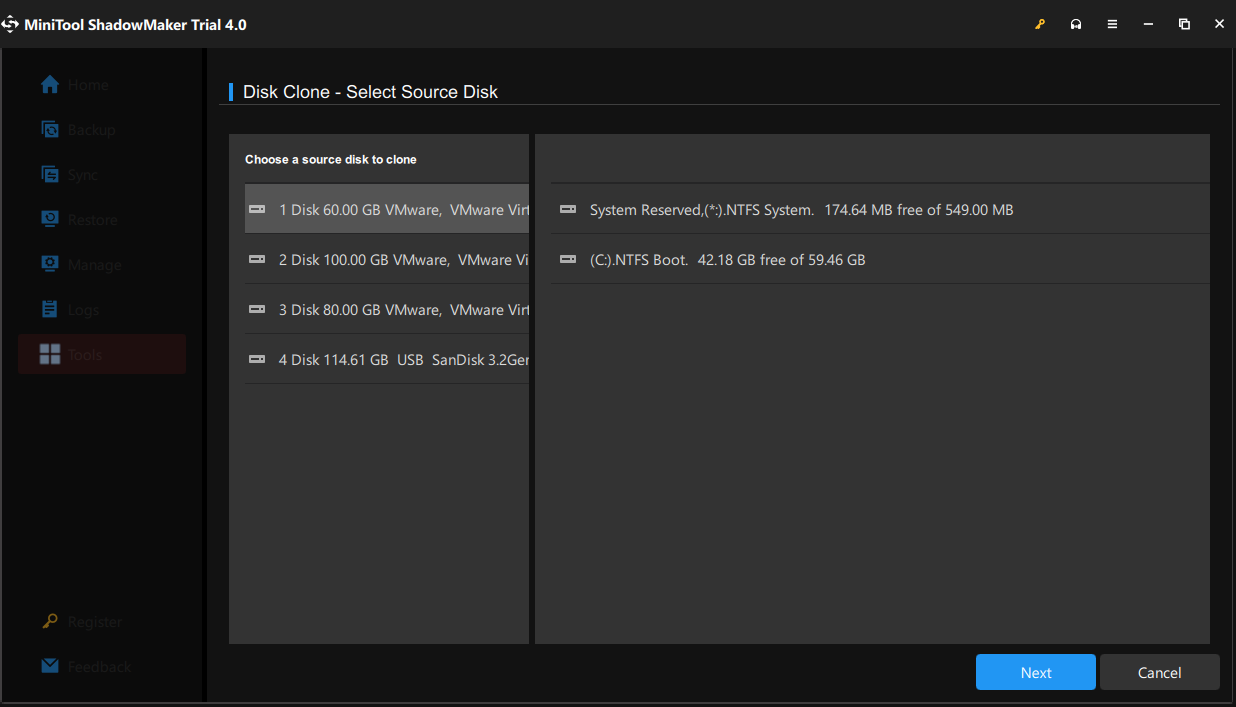
Step 3: Choose your system disk and click on Next to choose your external drive. Then, click Start to initiate the cloning process.
Step 4: You will see a prompt that your data on the destination disk will be destroyed. Make sure the disk has no important data and click OK to start cloning.

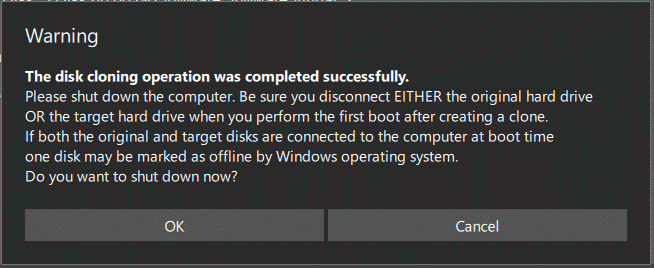
Wait for a while, your cloning will end and you can click Finish.
There will be a message you should take care of after finish, which means one disk is marked as offline by Windows and you can choose to shut down now or later.
Further Reading: Common Surface Pro 3 Issues
Apart from the stuck issues happen on Surface Pro 3, some users also reported others. We will enumerate some for reference.
Issue 1: Slow and Limited Wi-Fi
Some users find their Surface Pro 3 has a slow and limited Internet connection. The issue often happens when waking the device from sleep. To fix this issue, you can try to disconnect and then re-connect the Internet. That would be helpful.
Issue 2: Overheating Issue
A lot of Surface Pro 3 owners have had problems with the tablet overheating, specifically the Intel Core i7 version. Overheating can occur regardless of what the owner is doing. To fix that, you can minimize unnecessary running processes via Task Manager.
Issue 3: Cursor Disappears
Folding the Type Cover keyboard backwards causes the cursor to disappear, and it refuses to return when the keyboard is flipped backward. Besides, when they used the mouse, the cursor would randomly disappear.
To fix the issue, you can try to remove and reattach the cover and update your system.
Bottom Line:
The booting issue is often triggered by some serious problems and once happens, your data in computers will be at risk of being lost. Therefore, backing up your data regularly is a guarantee for your data integrity in the long run. MiniTool ShadowMaker is by your side protecting your online data.
If you have encountered any issues when using MiniTool ShadowMaker, you can leave a message in the following comment zone and we will reply as soon as possible. If you need any help when using MiniTool software, you may contact us via [email protected].
User Comments :