What Causes “The Mapped Network Drive Could Not Be Created”?
First of all, a network drive is only accessible over a network by entering the network path. This shared storage device, either a physical or virtual device, allows users to store and access files from devices within the same network. Once mapped, the network drive will be assigned a drive letter and act as a local drive.
For some reason, people will choose to map the network drive and these two posts shared detailed steps for you to check:
- How to Map a Network Drive in Windows 10? – Get Answers Now
- How to Map a Network Drive in Windows 11? [Step-by-Step Guide]
Recently, we found that some people reported that the “The mapped network drive could not be created” error occurs when accessing a mapped network drive on Windows 10 and 11. Even though you get the same error message, the box will show you different details telling you why the error happens.
There are some common reasons that can trigger the “The mapped network drive could not be created” issue we concluded from what users reported.
- Damaged or corrupted Windows installations. If this error message occurs after you perform a Window update, you can consider if the installation goes wrong.
- Inaccessible network drive. Check if the network drive is missing or damaged. That can make the network drive not available and won’t appear in the list of network locations.
Related article: How to Fix Network Drive Not Showing Issue
- Disabled SMB protocol. SMB (Server Message Block) protocol is used to connect to network drives, so you need to enable it.
- Incorrect folder path. Since the network drive can only be accessed by its network path, if the path is incorrect or doesn’t exist on the server, the mapped network drive could not be created.
- Already mapped network drive. You cannot map a network drive that has been mapped before.
- Internet connection issues. If your device is undergoing some connection issues, the “The mapped network drive could not be created” issue can happen.
- Pending Windows updates. Windows updates sometimes can fix bugs and glitches in Windows, so it is important to make sure your Windows is up to date.
After knowing those possible culprits, the next part will teach you how to fix “The mapped network drive could not be created”. Please choose to try them based on your situation.
Tip:
Your network drives are used to store important data and sometimes, it is easy to get lost unwittingly because of some mistaken operations or cyber-attacks. Besides, Network drives increase the risk of files being deleted, misplaced, and duplicated. So, we highly recommend you should back up your important data to the local drives.
How to Fix “The Mapped Network Drive Could Not Be Created”?
Solution 1: Enable SMB Protocol
As we mentioned that enabled SMB protocols are a precondition for allowing file sharing over complex, interconnected networks, you need to make sure the required protocols have been enabled.
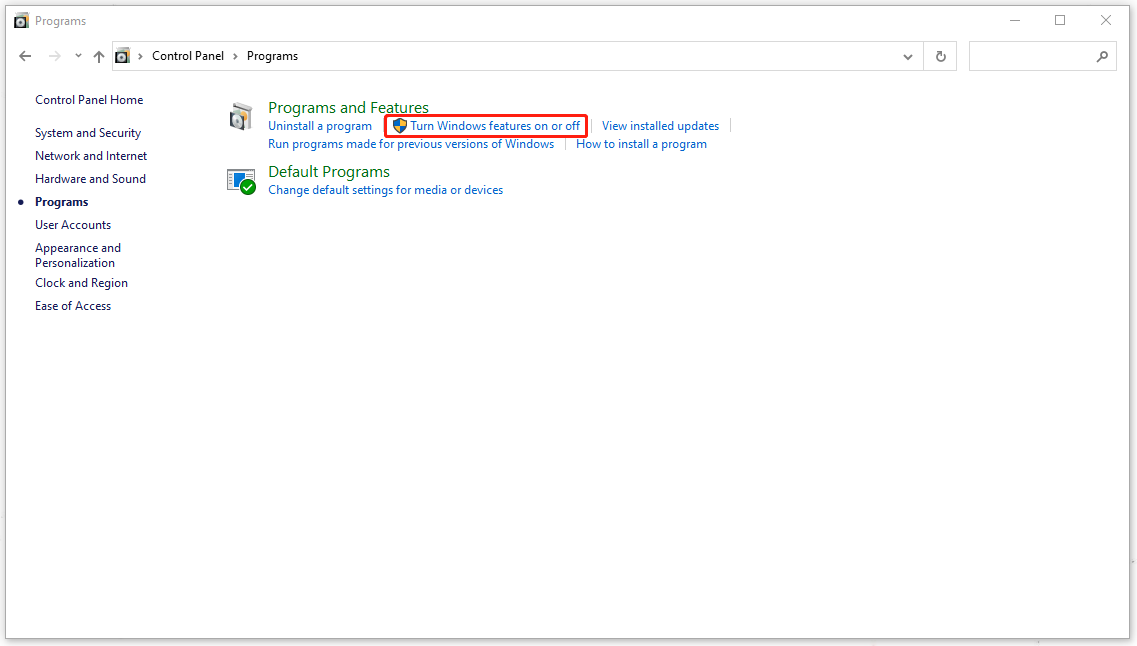
Step 1: Type Control Panel in Search and open it.
Step 2: Click Programs and then Turn Windows features on or off under Programs and Features.
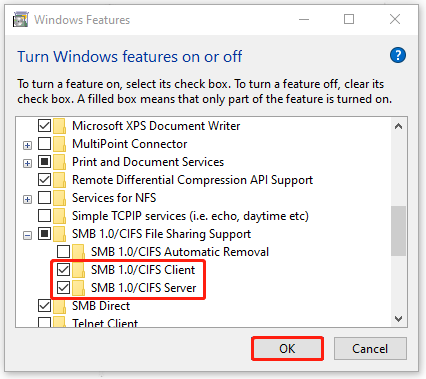
Step 3: In the Windows Feature box, expand SMB 1.0/CIFS File Sharing Support and check the boxes of SMB 1.0/CIFS Client and SMB 1.0/CIFS Server. Then click OK to save the changes.
Then you can try to access the network drive again to see if that can be created. If not, please go to the next troubleshooting.
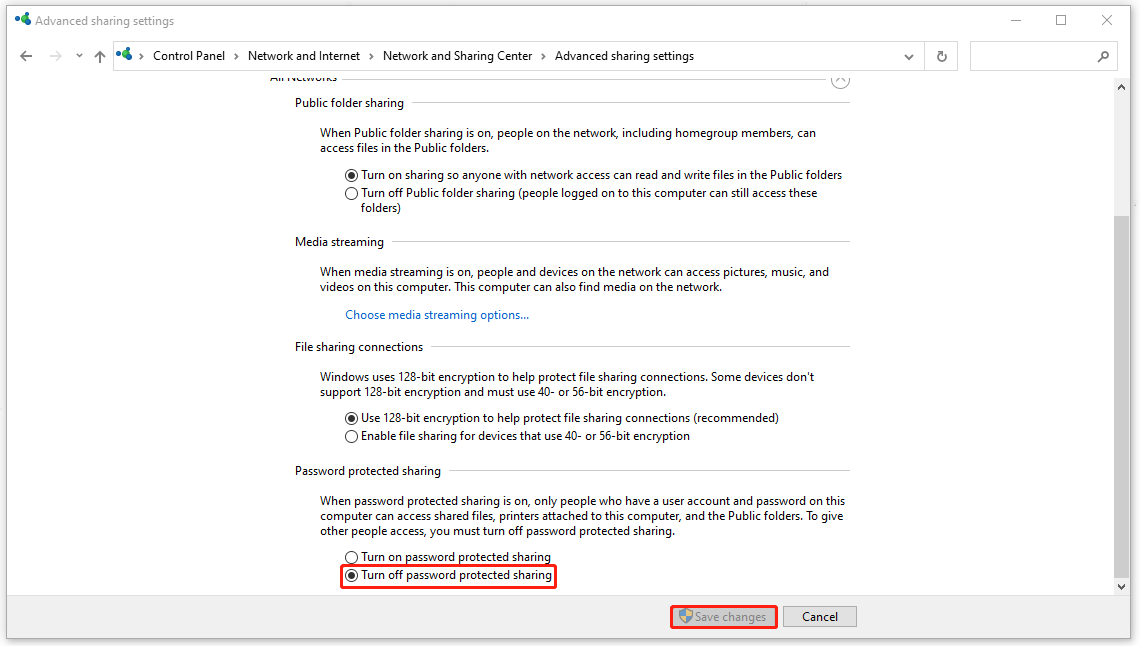
Solution 2: Disable Password Protected Sharing
Password protected sharing only allows users who have an account and password to access the computer files. you can try to disable the feature to see if the “The mapped network drive could not be created” issue can be resolved.
Step 1: Open Control Panel and choose Network and Internet.
Step 2: Click on Network and Sharing Center and choose Change advanced sharing settings from the left panel.

Step 3: Expand All Networks and scroll down to the bottom to check the box next to Turn off password protected sharing under Password protected sharing. Then click Save changes.
![Full Guide – Password Protect Google Drive Folder [3 Ways]](https://images.minitool.com/minitool.com/images/uploads/2020/09/password-protect-google-drive-folder-thumbnail.png)
Solution 3: Remove Microsoft Account Credentials
Some people fix “The mapped network drive could not be created” by removing Microsoft account credentials. It is worth trying! Please do the following steps.
Step 1: Type Credential Manager in Search to open it and choose Windows Credentials.
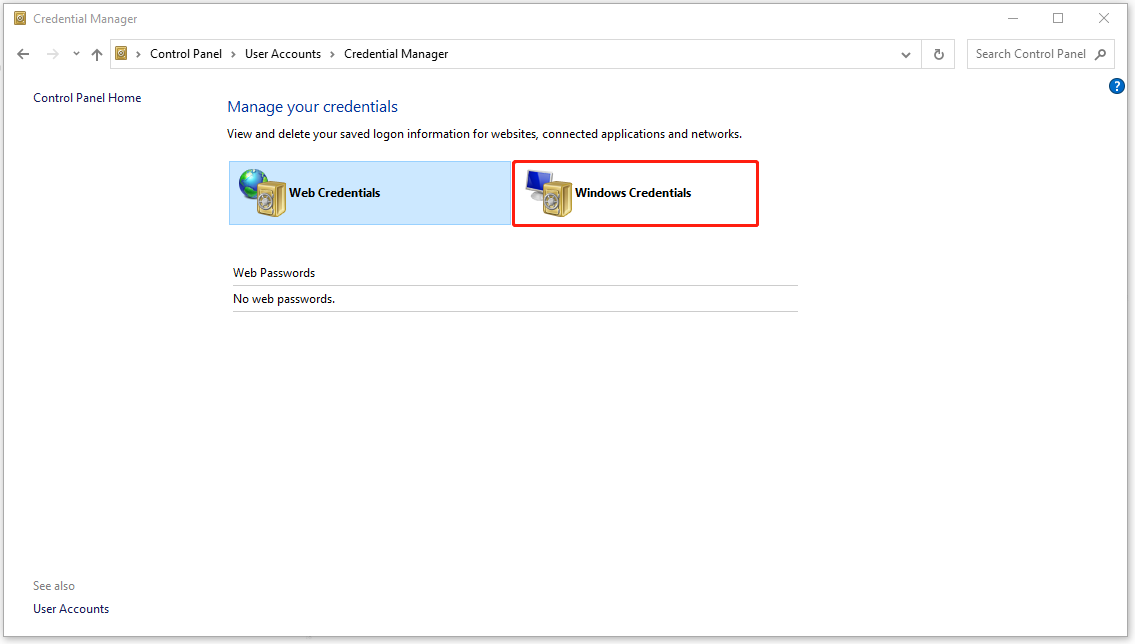
Step 2: Choose to expand MicrosoftAccount and click on Remove to delete it. when you encounter a confirmation for the move, click Yes.
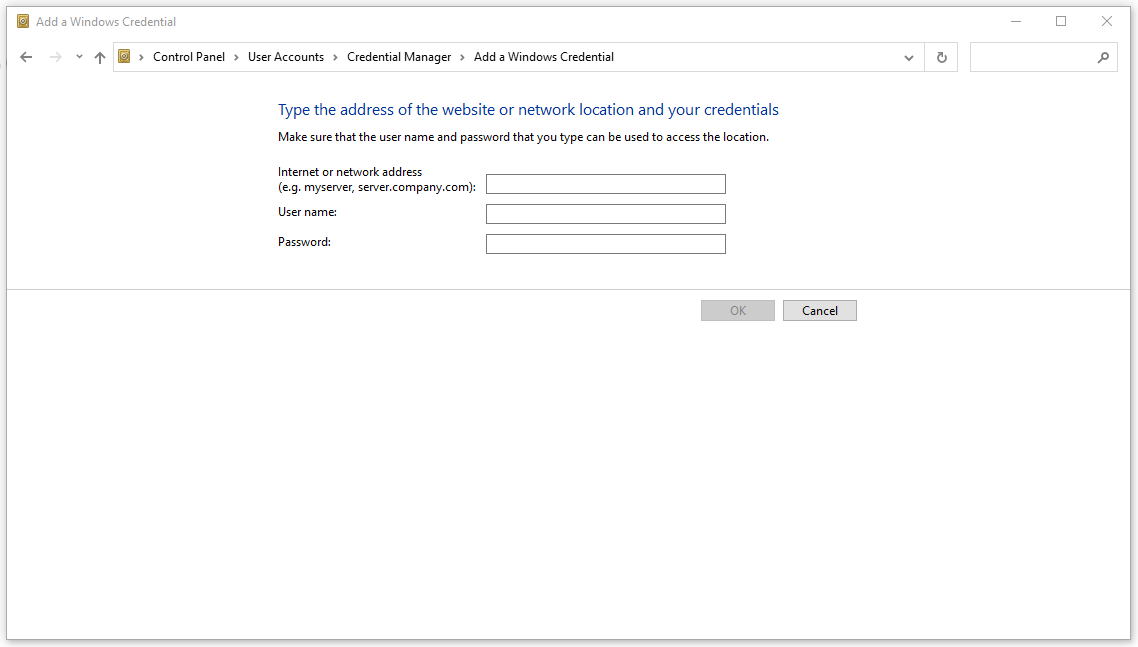
Then check if the error has been fixed; if not, you can try to add the network share via Windows Credentials Manager to see if it helps.
Still, click Windows Credentials in the Credential Manager window and click on the Add a Windows Credential link. On the next page, input your Network drive address, user name, and password, and click OK to save the changes.
Related article: How to Fix We Can’t Sign You in With This Credential Error?
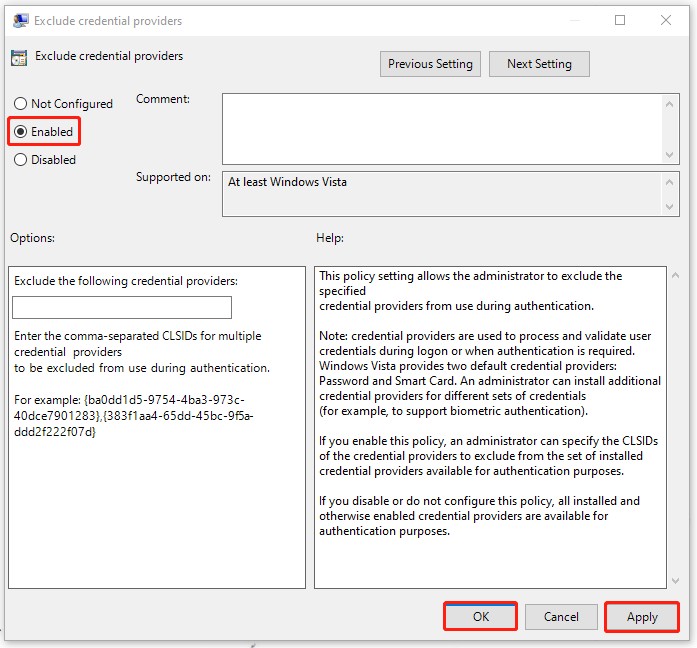
Solution 4: Edit the Group Policy
To fix “The mapped network drive could not be created”, you need to change some settings in Group Policy.
Step 1: Open the Run dialog box by pressing the Win + R keys and input gpedit.msc to enter Local Group Policy Editor.
Step 2: Then please follow the next path to locate Logon from the left panel.
Computer Configuration/Administrative Templates/System/Logon
Step 3: Locate and double-click on Exclude credential providers from the right panel.

Step 4: In the next window, check the Enabled box and click Apply and OK to save the changes.
Solution 5: Modify the Registry
It is possible that the duplicated name issue makes Windows fail to create a mapped network drive. You can try to change the computer name or configure the registry to disable the StrictNameChecking feature.
Note: Before you modify the registry, you’d better back the registry up or create a restore point for your system in case any mistaken deletion makes unrecoverable results.
Step 1: Open the Run dialog box and type regedit to enter Registry Editor.
Step 2: Then copy and paste this path into the address bar and press Enter to locate it.
Computer\HKEY_LOCAL_MACHINE\SYSTEM\CurrentControlSet\Services\LanmanServer\Parameters
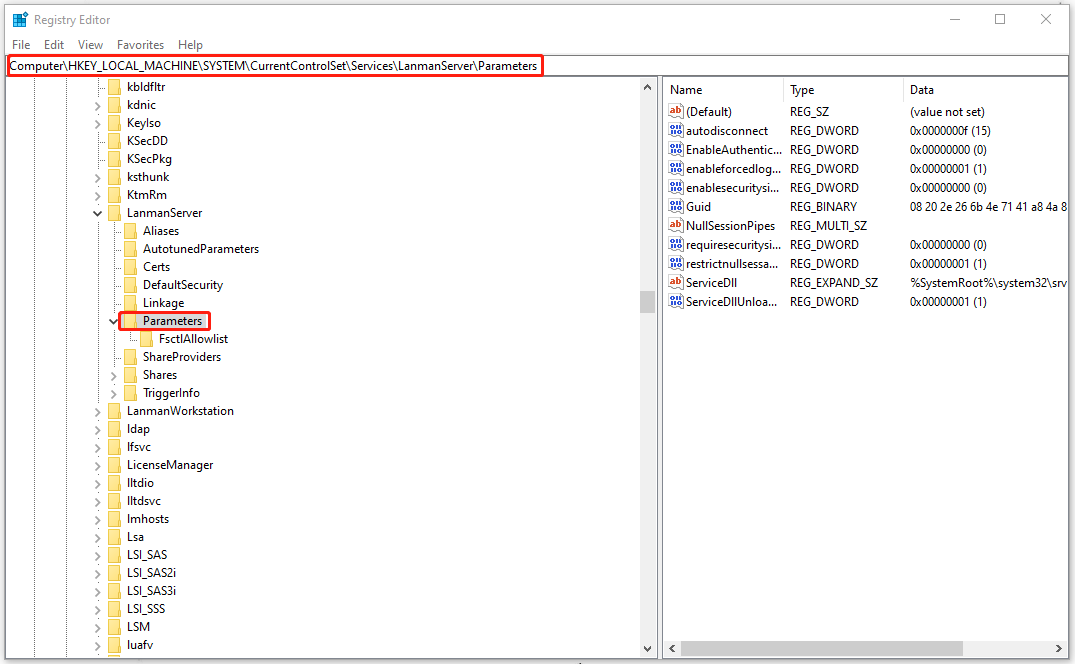
Step 3: After the Parameters key has been selected, check if the DisableStrictNameChecking value is in the right panel. If it is not, you need to create one.
- Right-click in the empty space from the right panel.
- Click New > DWORD (32-bit) Value.
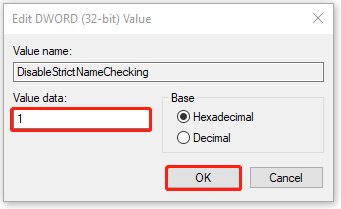
- Rename the value as DisableStrictNameChecking.

Step 4: Double-click on the DisableStrictNameChecking value and change the Value data to 1. Then click OK to save it.
Now, you close the window to restart the system and check if the error persists.
Solution 6: Change Your Folder Sharing Settings
If all the above methods can’t resolve the “The mapped network drive could not be created” issue, you can try to change your Network File and Folder Sharing settings.
Step 1: Locate the files or folders you want to access or share in File Explorer and right-click on them to choose Properties.
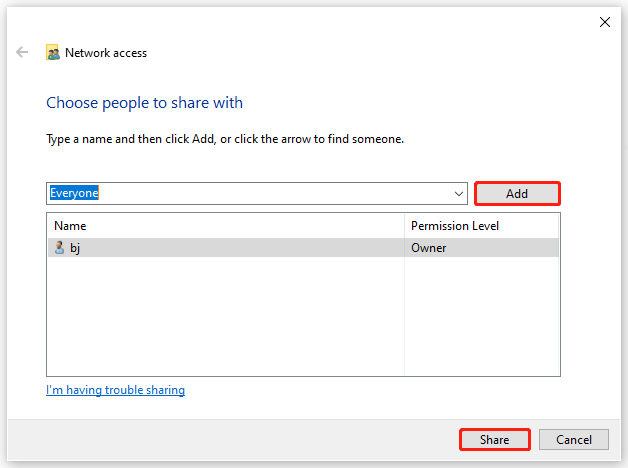
Step 2: In the Sharing tab, click on Share… and then expand the drop-down list to choose Everyone.
Step 3: Click Add and then Share.
Then you can try to access the mapped drive.
Solution 8: Remap the Drive
Another useful method to fix “The mapped network drive could not be created” is to remap the drive. You can delete the mapped network drive first and then remap it. The process is easy to go and you can try this.
Step 1: Input Command Prompt in Search and run it as an administrator.
Step 2: Then please type his command – net use [Mapped Drive Letter] /delete and press the Enter key to execute the command.
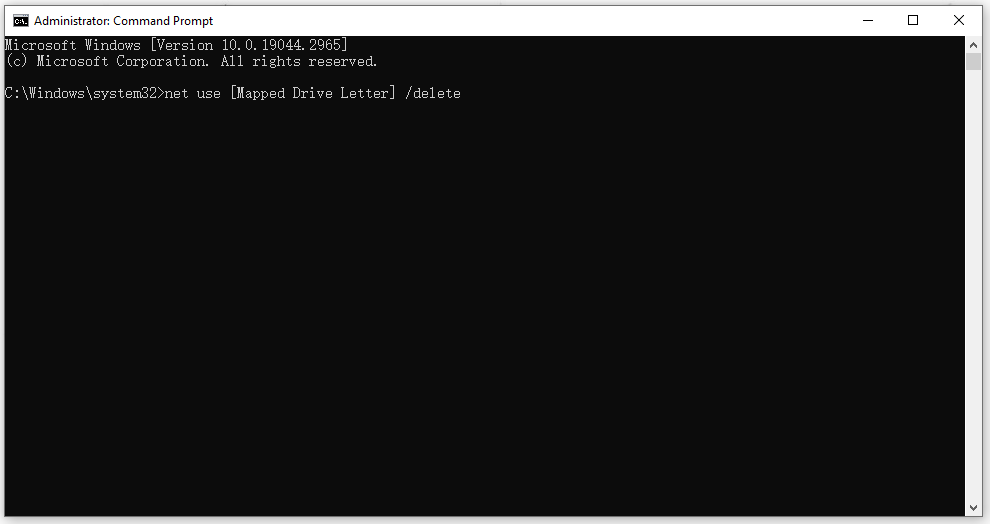
Note: Remember to replace [Mapped Drive Letter] with the drive letter you want to remove. For example, if you want to remove drive F, please input net use F: /delete to enter.
Or you can use this command – net use * /delete to remove all the active connections on a local computer. Then you can start the next move to remap the drive.
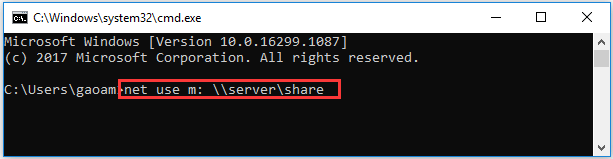
Step 3: When you receive the feedback that tells you the network drive has been erased successfully, you can perform this command net use DRIVE: PATH, in which DRIVE: means the drive letter you want to assign to the network drive and PATH means the full path of the folder you want to connect to.
For example, to map the drive m, you need to execute the command net use m: \\server\share.
Solution 9: Uninstall the Latest Windows Update
If you have installed Windows updates recently, you can uninstall that to try to fix the error.
Step 1: Go to Start > Settings > Update & Security > Windows Update > View update history > Uninstall updates.
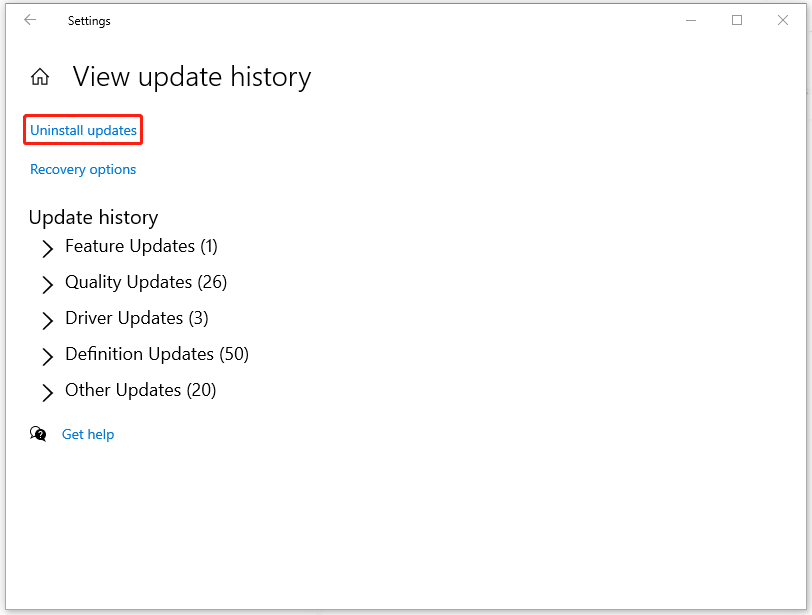
Step 2: Locate and right-click on the update you want to remove and choose Uninstall.
Recommendation: Back Up Your Files
After trying these methods, you may have successfully resolved the issue.
Apart from the network drives, we also use local drives to store data. If you have a need to back up the data stored on your local drive, you can download and install this free backup software, MiniTool ShadowMaker, to protect your important files and folders.
This program can help back up systems, files & folders, and partitions & disks. It can perform a remote backup and NAS backup.
Beyond that, if you need to share files between devices, the Sync function with various accompanied features can give you a surprise.
MiniTool ShadowMaker TrialClick to Download100%Clean & Safe
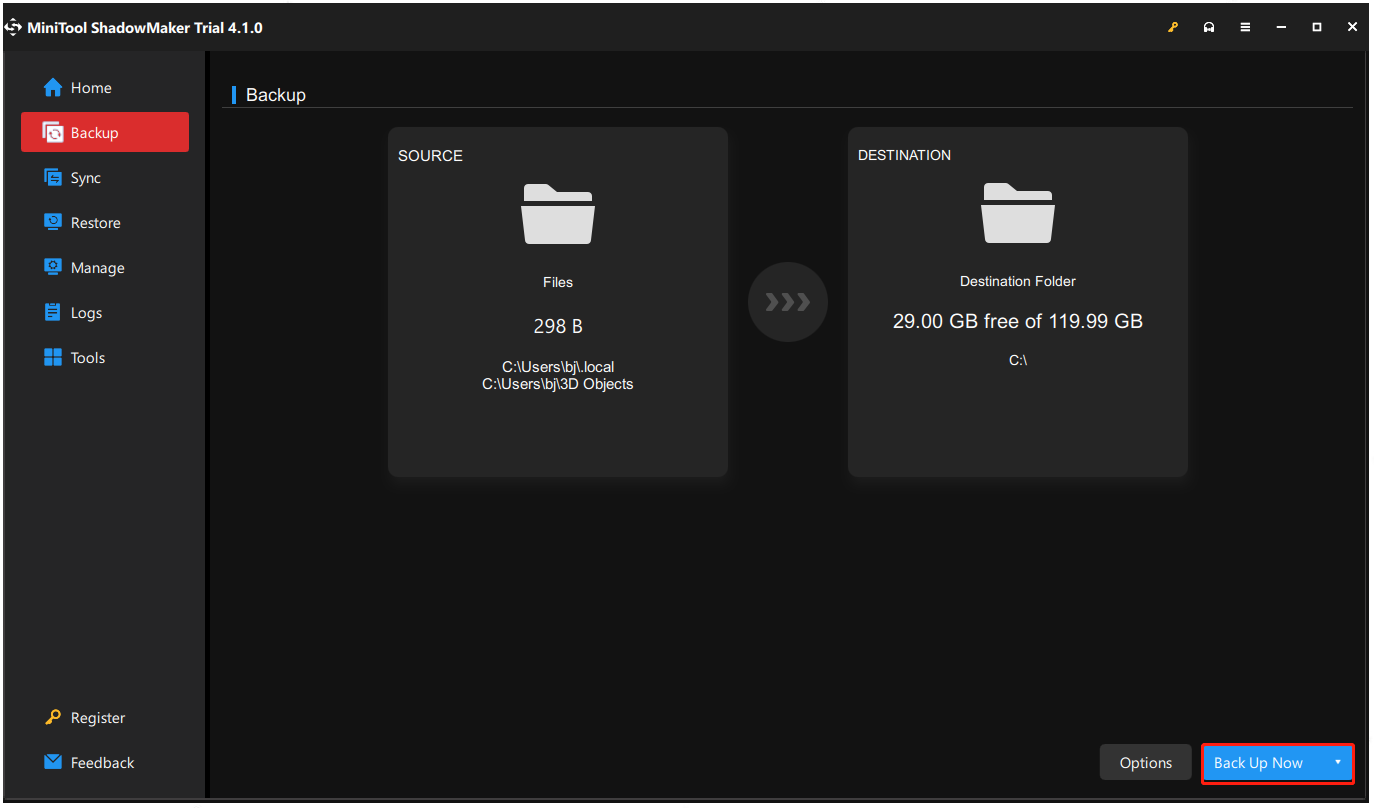
Step 1: Launch the program to click Keep Trial and go to the Backup tab.
Step 2: Click the SOURCE section to choose Folders and Files and then choose the file you want to back up.
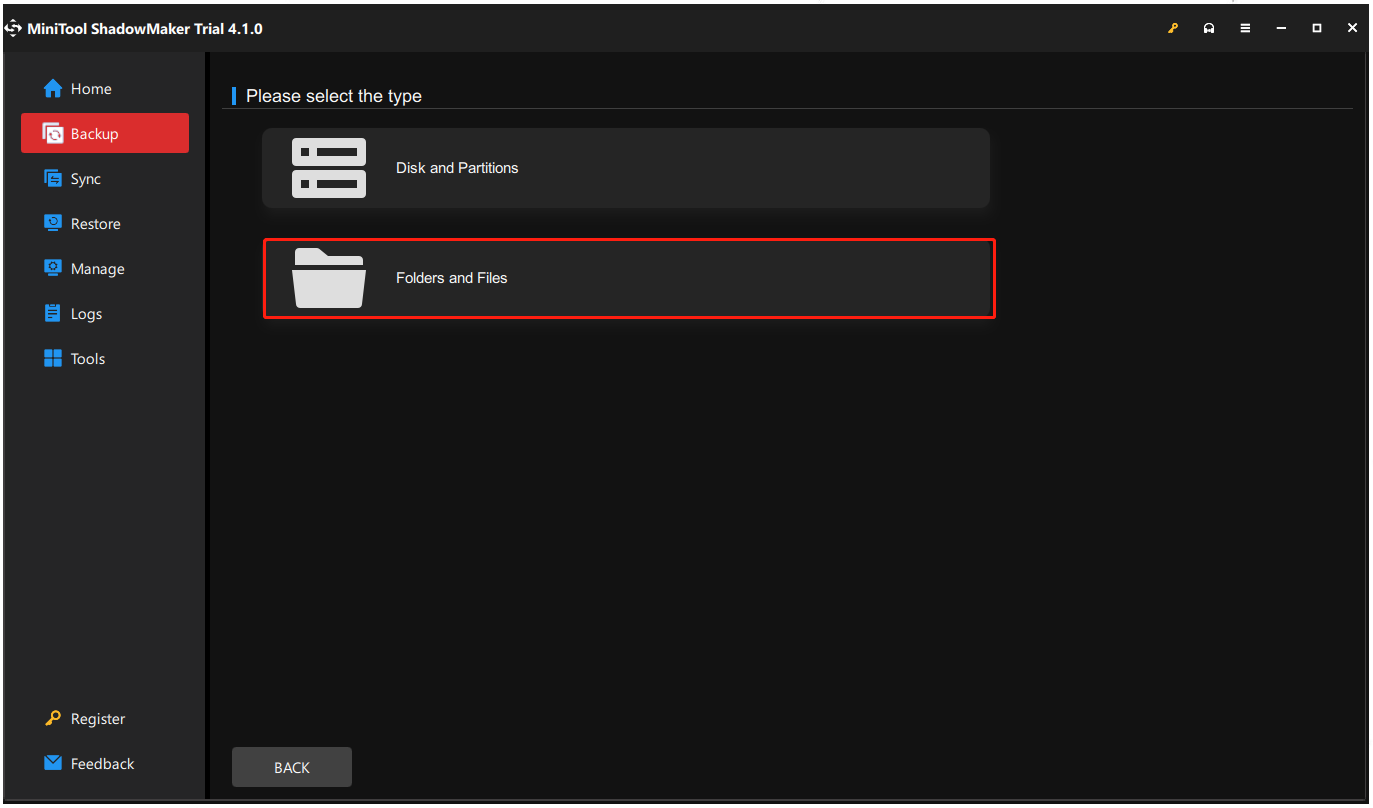
Step 3: Then go to the DESTINATION section where you can choose the place you want to store the backup. After that, click Back Up Now or Back Up Later to execute the task.
Wrapping It Up
After trying these methods, you may have got rid of the “The mapped network drive could not be created” error. This message can happen for different kinds of reasons that will be displayed under the code. You should apply tailored methods to troubleshoot this error message.
If you have encountered any issues when using MiniTool software, you can leave a message in the following comment zone and we will reply as soon as possible. If you need any help when using MiniTool software, you may contact us via [email protected].
User Comments :