Over time, the system performance of your computer might downgrade due to hardware wear and tear, software bloat, and inefficient resource management. To make your PC faster, you can upgrade your system with a Verbatim SSD. This guide from MiniTool will walk you through how to clone the whole disk with Verbatim SSD clone software.
Verbatim SSD Upgrade
Verbatim SSDs are known for offering competitive sequential read and write speed and build of high quality. Some of them, like the Vi7000G, come with a heatsink, which is helpful to maintain optimal operating temperatures and prevent throttling.
When your computer is running out of storage space or sluggish all the time, upgrading the current HDD or SSD to a Verbatim SSD can significantly speed up the overall system performance, data access, and work efficiency. Meanwhile, Verbatim SSD upgrade can also extend the lifespan of your computer because the new SSD consumes less power and they are more resistant to damage from shocks and vibrations than HDD.
Preparation Before Verbatim SSD upgrade
- Prepare a SATA-to-USB adapter, external hard drive enclosure, screwdrivers, and more.
- Make sure the new Verbatim SSD has sufficient capacity to hold the data on the old disk.
- Back up crucial files with MiniTool ShadowMaker before performing any hardware/software modifications.
MiniTool ShadowMaker TrialClick to Download100%Clean & Safe
Move 1: Connect Verbatim SSD to Your Computer
First of all, you can connect the new Verbatim SSD to your computer. To do so:
Step 1. Shut down your computer.
Step 2. Unplug the power cable.
Step 3. Press and hold the Power button for a few moments to discharge any remaining electricity.
Step 4. Locate your existing hard drive and access points. If you have no idea about where they are, please refer to the user manual of your computer.
Step 5. Insert your Verbatim SSD into the SSD slots. There are 2 cases for you:
- For a computer with a single drive bay: insert your Verbatim SSD into your computer via a USB-to-SATA adapter.
- For a computer with 2 disk slots: find an available SATA connector and then insert the new SSD into another available slot.
Step 6. Secure all access panels and then power on your computer.
Move 2: Initialize the Verbatim SSD
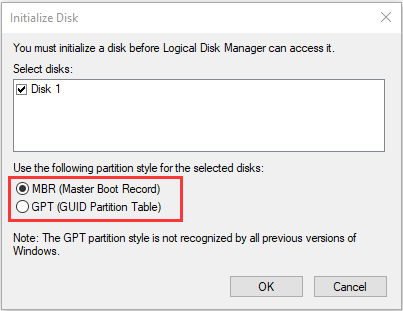
Since the newly installed Verbatim SSD hasn’t been initialized or partitioned, it is not usable. Here’s how to initialize and format it in Disk Management:
Step 1. Right-click on the Start menu and select Disk Management.
Step 2. In most cases, the Initial Disk window will pop up automatically. Select a partition style and hit OK.
Step 3. Then, right-click on the unallocated space, select New Simple Volume and click on Next to continue.
Step 4. In the Specify Volume Size window, leave the default number to create a partition that fills the entire disk.
Step 5. Assign a drive letter from the drop-down menu and hit Next.
Step 6. Select a desired file system and volume label. Tick the Perform a quick format option and hit Next.
Step 7. Click on Finish to start the quick format.
Move 3: Conduct System and Data Migration
After the drive is ready for use, now you can migrate your data and system with Verbatim clone software. MiniTool ShadowMaker makes it convenient to create an exact copy of an entire hard drive including the operating system, applications, and all data to another drive. This program is reputable for lightweight and ease to follow.
Meanwhile, it also serves as a PC backup software works well on almost all the Windows systems. It enables you to back up files, the operating system, selected partitions, and even the whole disk. Here’s how to copy your old disk with this Verbatim SSD clone software:
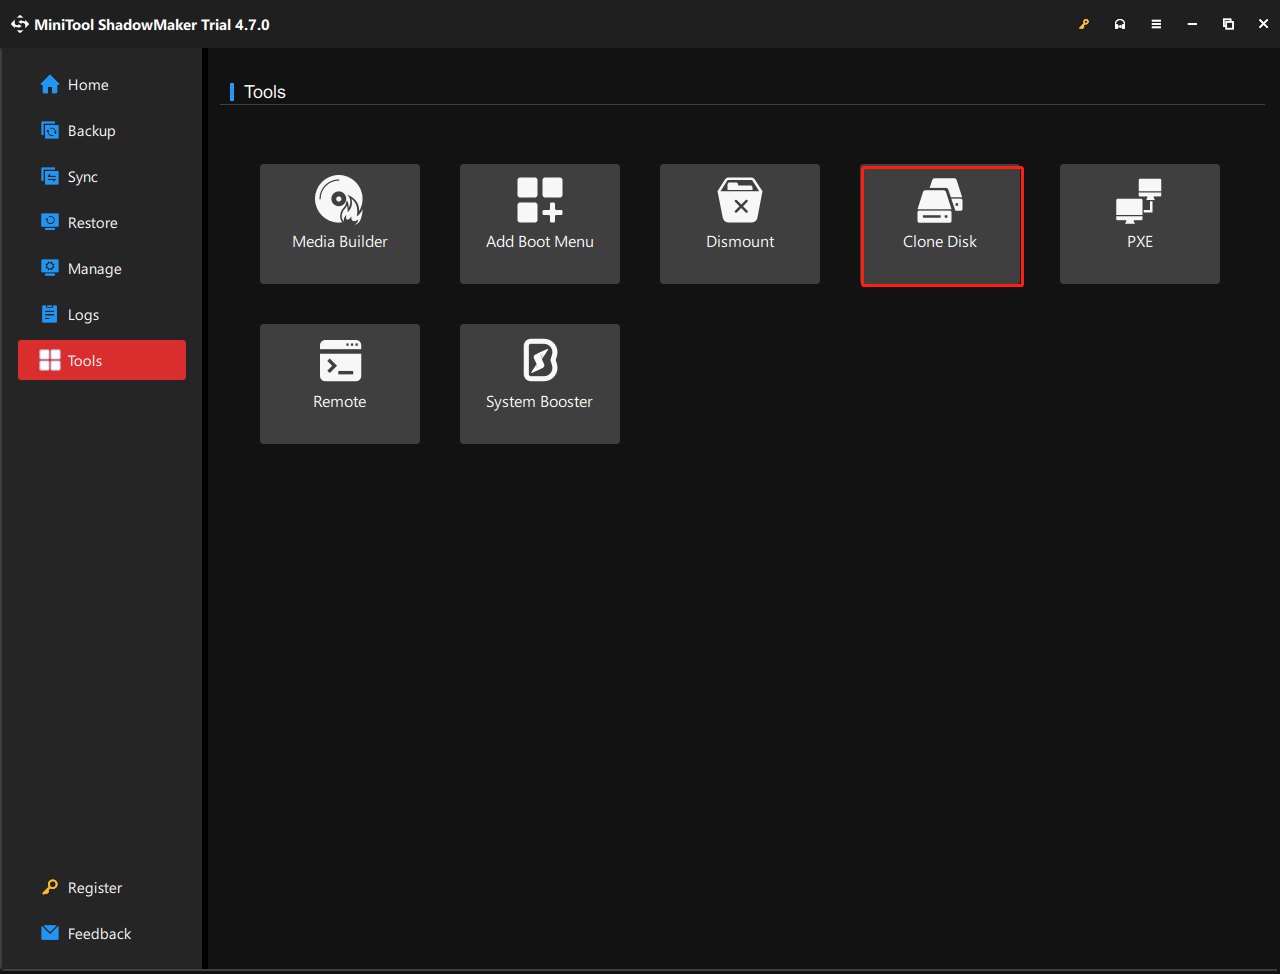
Step 1. Download, install, and launch MiniTool ShadowMaker. Click on Keep Trial to enter its main interface.
MiniTool ShadowMaker TrialClick to Download100%Clean & Safe
Step 2. Go to the Tools section and then select Disk Clone.
Step 3. Now, you need to specify the source disk and the target disk.
- Source disk – can be a system disk or a data disk. If you select a system disk, it requires a registered program.
- Target disk – refers to your new Verbatim SSD. It’s noted that all the data on this disk will be wiped out during the process, so make sure there’s nothing important on it.
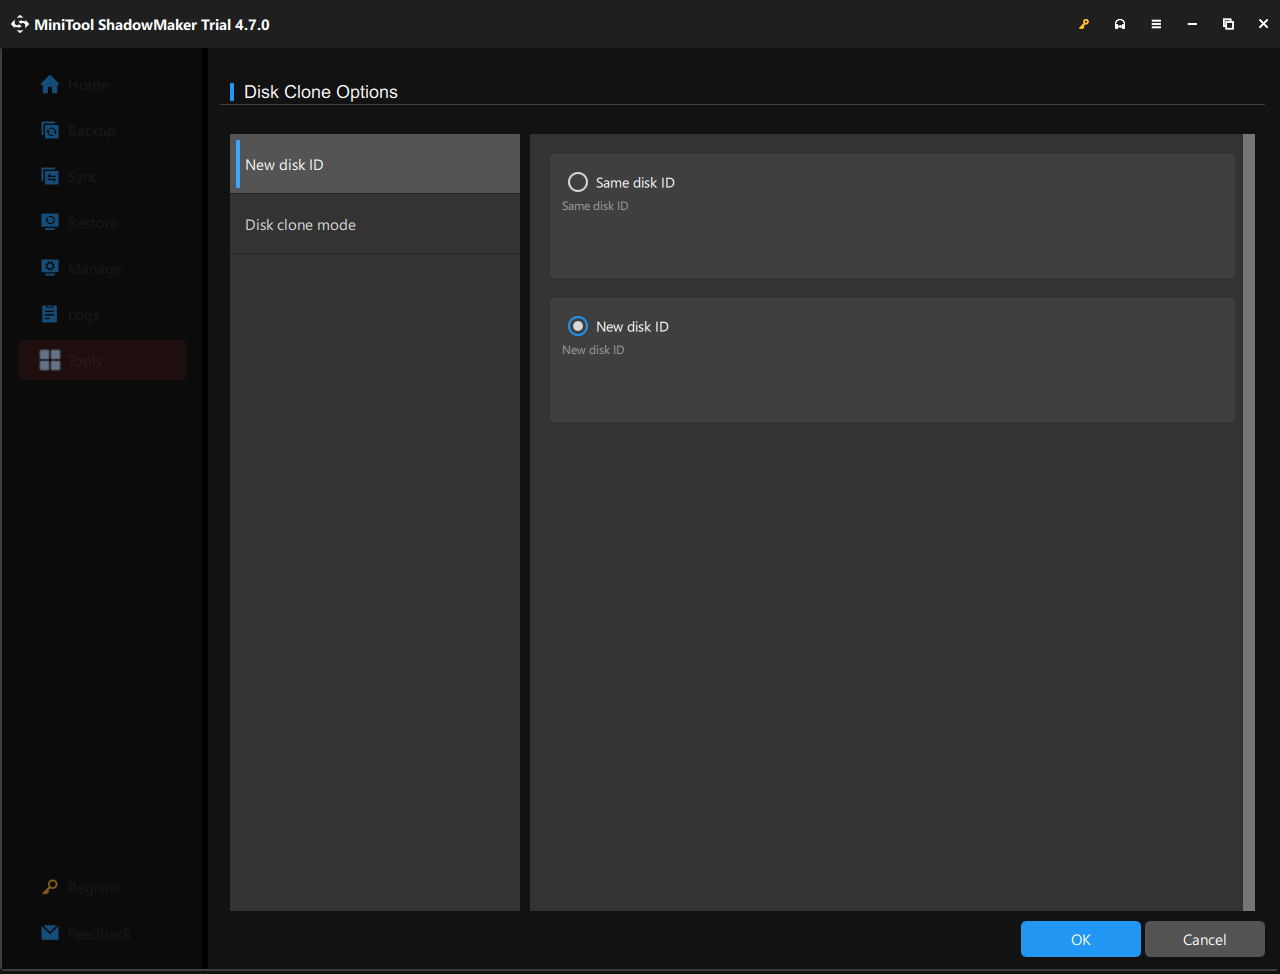
To modify disk clone parameters, click on Options in the lower right corner:
New disk ID – Here, it’s recommended to select New disk ID. If you select Same disk ID, you had better remove either of the disks after cloning to avoid disk signature collision.
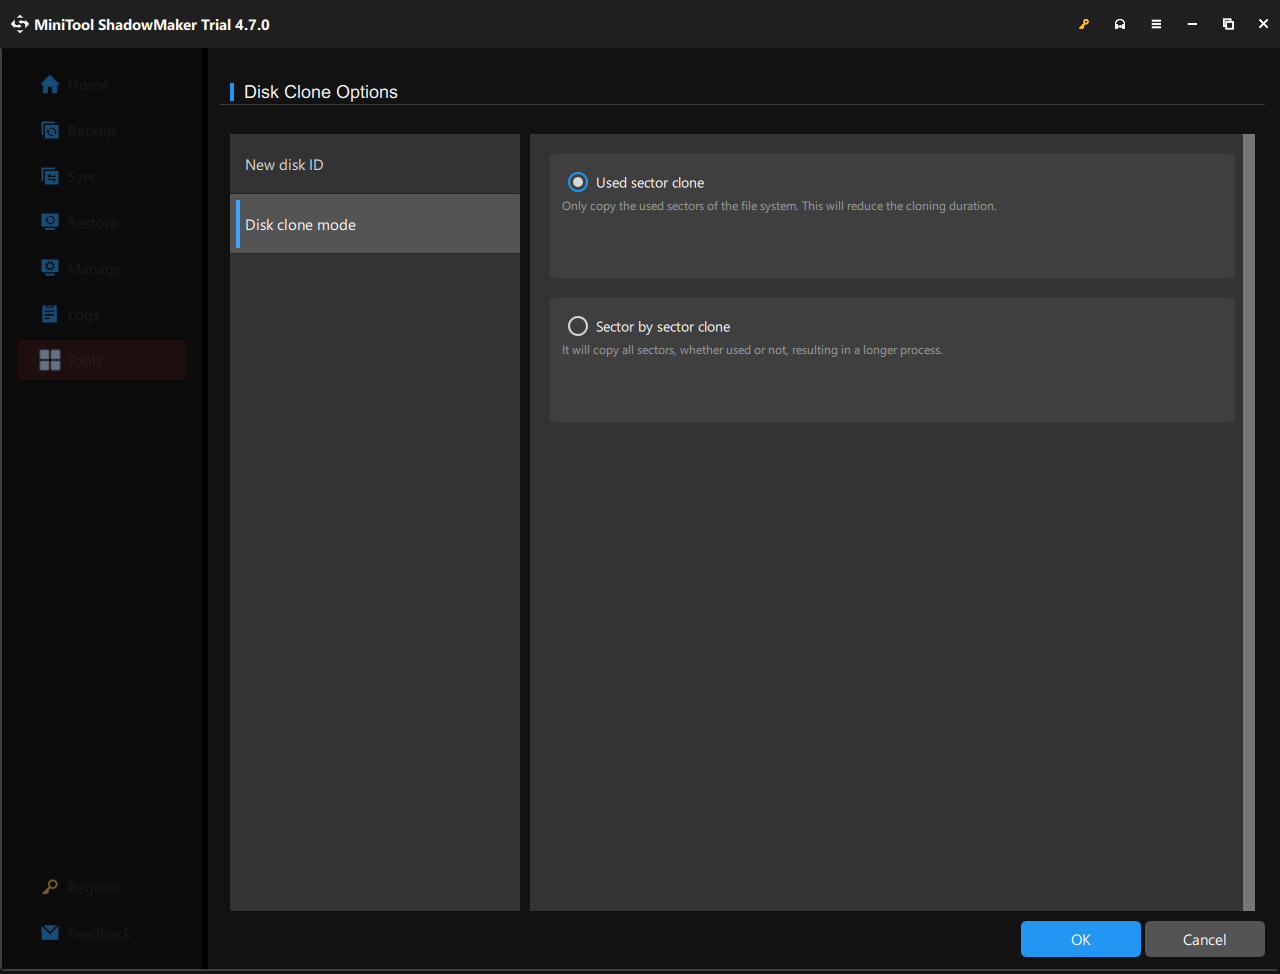
Disk clone mode – This program supports Used sector clone and Sector by sector clone. The former will save more time because it only copies the used sectors of the system.
Step 4. After making your choice, click on Start to begin the process.
Move 4: Change the Boot Order
If you cloned a system disk, you can directly boot your system from the new disk. Before that, you need to set the new Verbatim disk as the first boot device. To do so:
Then, you can boot from the new disk without changing the boot or
Step 1. Power off your computer.
Step 2. Press the Power button to restart it.
Step 3. Before the manufacturer logo appears on the screen, press the BIOS key repeatedly until entering the BIOS menu. The BIOS key varies from manufacturer to manufacture, please refer to your user manual to check for more information. Here are some common keys for different computers:
- ASUS: F2
- Dell: F2 or F12
- HP: F10
- Lenovo: F2 or Fn +F2
- Samsung: F2
Step 4. Then, press the Up or Down arrow key on the keyboard to locate the Boot option and hit Enter.
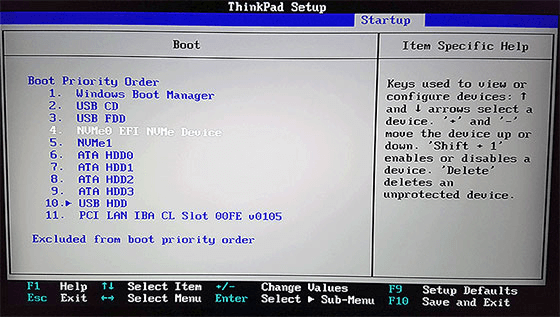
Step 5. In this section, set the cloned SSD as the first boot device.
Step 6. Press F10 to save the change and exit. Then, your computer will boot from the new disk.
Move 5: Format and Repartition the Source Disk
Here comes the question, how to copy with the old disk after cloning? Can you still use it? No matter if you want to keep it or send it to others, formatting and partitioning are necessary. On the one hand, it can prevent boot issues or conflicts with the new system. On the other hand, disk format can also wipe all your data on your old disk so as to protect privacy leak issues.
To do so, MiniTool Partition Wizard is a good option for you. As a professional PC manager, this program is dedicated to formatting, creating, deleting, and resizing partitions. This program is particularly useful for managing hard drives and SSDs for better performance. Here’s how to employ it to format and repartition your old disk:
Step 1. Power on your computer.
Step 2. Launch MiniTool Partition Wizard.
MiniTool Partition Wizard FreeClick to Download100%Clean & Safe
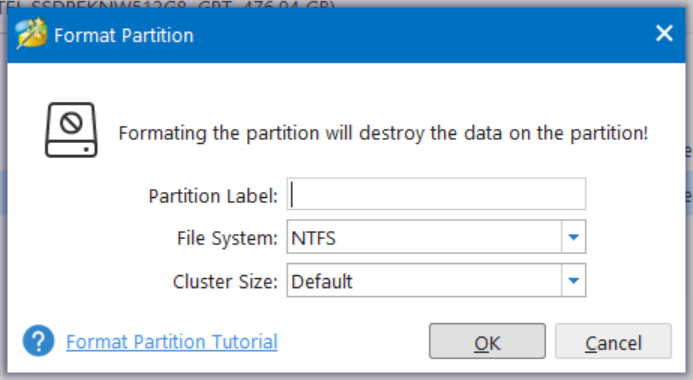
Step 3. In the right pane, right-click on the partition you want to format and select Format Partition.
Step 4. Select a partition label, file system, and cluster size.
Step 5. After previewing the changes, click on Apply to start the process.
Step 6. Once done, right-click on the unallocated space and select Create from the context menu.
Step 7. Confirm parameters including Partition Label, Partition Type, Drive Letter, File System, Cluster Size, Partition Volume, Partition Location, and Partition Alignment Method and then hit Apply.
MiniTool System Booster TrialClick to Download100%Clean & Safe
We Need Your Voice
That’s everything you should know about Verbatim SSD upgrade or Verbatim hard drive replacement. To upgrade or replace your hard drive with a new SSD, a Verbatim data migration tool like MiniTool ShadowMaker can streamline the whole process for you. With just a few clicks of mouse, all your data, programs, settings, and system will seamlessly be transferred to the new SSD.
MiniTool ShadowMaker TrialClick to Download100%Clean & Safe
Do you have any suggestion about our product? Welcome to share them with our support team. We will spare no effort in delivering best service and software to you!
User Comments :