There’s nothing worse than struggling with the crashing File Explorer. According to this guide on MiniTool, you can fix it by clearing File Explorer history, running CHKDSK and SFC, checking installed add-ons, disabling Quick access, etc.
Windows 10 Explorer Keeps Crashing
Windows Explorer, also called File Explorer, is one of the most frequently used programs on Windows PC. While it is versatile and reliable, bugs and glitches occur occasionally.
Some of you might find that this tool stops responding and loading incorrectly. This issue can be very frustrating, especially when it happens at work.
Windows File Explorer keeps crashing for various reasons, often linked to:
- Software Glitches
- Incorrect Display Settings
- Conflicts Between the Explorer and a Third-Party Application
- Damaged or Missing Cached Files
- A Problematic File Explorer Configuration Option
- Outdated Graphics Card Drivers
- An Outdated Windows System
After figuring out the causes, it’s time to take some countermeasures. Here are all the fixes you can use to remedy a crashed Windows Explorer.
How to Fix the Frequent Crashes of Windows Explorer
Way 1: Update Windows
Usually, minor updates containing bug and security fixes are issued regularly. You should always check if your PC is out of date. If there are new system updates, install them at once.
Here’s how to do it:
Step 1. Right-click on the Windows icon and choose Settings.
Step 2. Choose Update & Security > Windows Update > click on Check for updates.
Once Windows detects any available updates, download and install them.
Way 2: Clear File Explorer History
When the historical data of File Explorer becomes damaged, its overall stability may be affected. In such a case, you may encounter problems such as slow response, abnormal interface loading, and even program crashes.
To solve these issues, clearing the File Explorer history is an effective attempt. By clearing it, Windows Explorer can regenerate new records, repairing the potential issues and restoring it to normal.
Here we’ve broken the steps down:
Step 1. Press Win + R to open the Run window > type control folders > hit Enter.
Step 2. A File Explorer Options window will show up. Under the General tab, go to the Privacy section.
Step 3. Click the Clear button next to Clear File Explorer history.
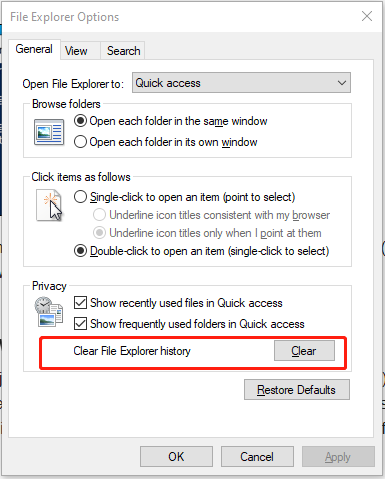
Step 4. Click Apply and then OK.
Way 3: Rebuild Indexes
A corrupted or inconsistent search index can cause File Explorer to malfunction or crash. Rebuilding the index creates a new and clean database of your system’s files and folders. This way resolves the problems in the old data that result in File Explorer not responding on Windows 10.
Follow the steps outlined below:
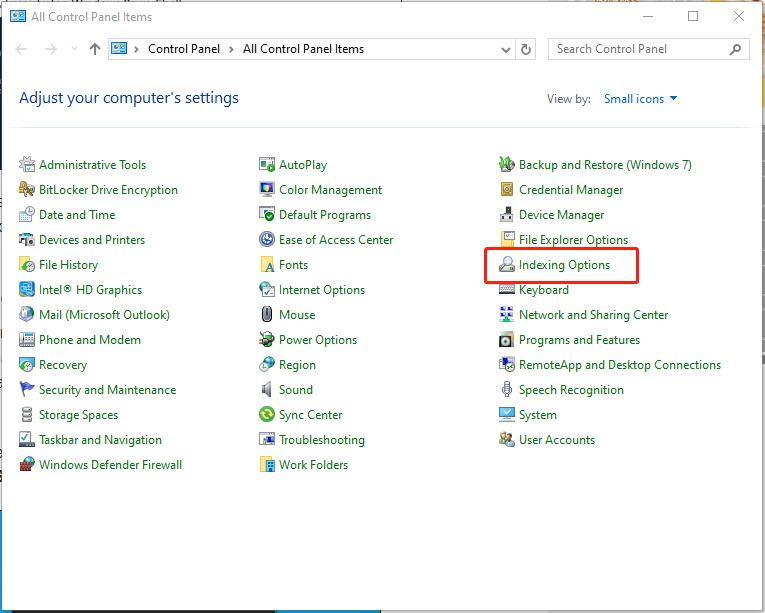
Step 1. In the Search box, search for Control Panel and hit Enter.
Step 2. Set View by to Small icons > find & tap on Indexing Options.
Step 3. In Indexing Options, click on the Advanced button at the bottom. A new dialog opens.
Step 4. Locate the Troubleshooting section and tap on Rebuild.
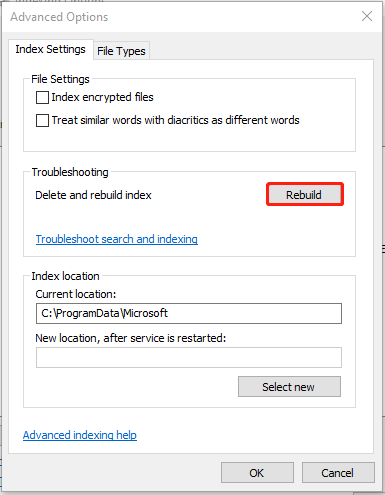
Step 5. Once they’re done, your Windows File Explorer will begin working again.
Way 4: Separate File Explorer Process
By running each folder window in its own explorer.exe process, it becomes much easier to manage and troubleshoot issues within individual windows. When a File Explorer window crashes or freezes, it does not affect other windows. This also enhances system stability.
Here is a quick guide:
Step 1. Open Control Panel via Windows Search > set View by to Small icons > navigate to open File Explorer Options.
Step 2. Go to the View tab > see Advanced settings > scroll down to find and check Launch folder windows in a separate process.
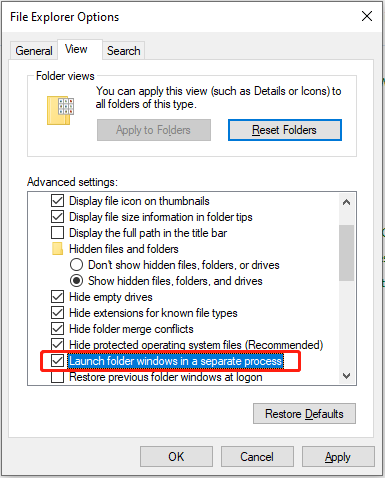
Step 3. Then hit Apply and OK to save the change.
Way 5: Run CHKDSK and SFC Scans
You can try running CHKDSK and SFC scans to effectively solve the problem of File Explorer caused by system file corruption or disk errors.
CHKDSK is a built-in disk checking tool in the Windows system. It can scan and repair some errors on the hard drive.
In addition, SFC (System File Checker) is also a very useful tool. It can scan the integrity of Windows system files and repair damaged or lost system files.
Before running these two tools, it is recommended to save all the files being edited and close unnecessary programs. This is to ensure the smooth progress of the scanning process.
# Perform CHKDSK
Step 1. Type cmd in the Search box > right-click Command Prompt to choose Run as administrator > hit Yes.
Step 2. Enter chkdsk /f /r in the window and press Enter.
Step 3. Hit the Y and Enter key to confirm that you want to run a hard disk check when the system starts the next time. Then exit the command window.
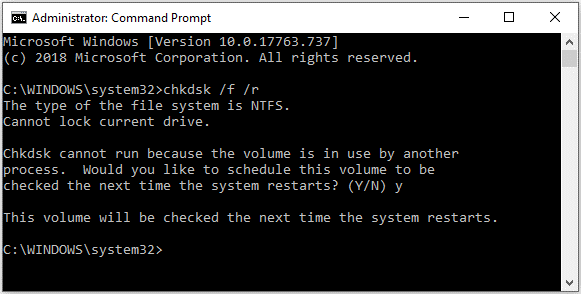
Now restart your computer to make Windows perform the hard disk check.
# Run SFC
If running CHKDSK doesn’t work, then you can try to perform a system file check.
Step 1. Run Command Prompt as administrator.
Step 2. Type sfc /scannow in the window and hit Enter.
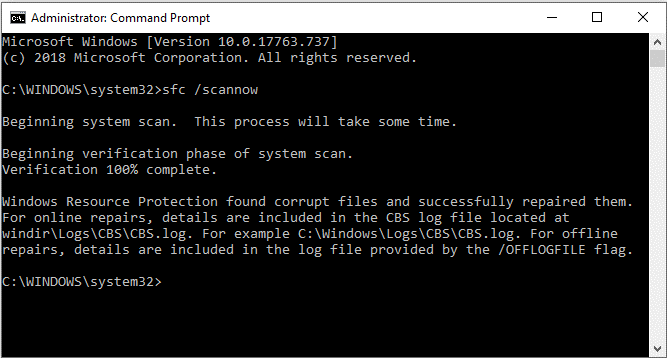
Then wait for Windows to detect whether you have damaged system files. If there are, Windows will fix them automatically. After scanning, restart your computer to check if Windows Explorer keeps freezing or crashing.
Way 6: Reinstall Your Graphics Card Driver
Outdated graphics card drivers can cause Windows 10 File Explorer not responding. When these drivers are old or corrupt, they may fail to process requests from File Explorer, leading to crashes.
It’s essential to update drivers timely. Take the instructions to do that:
Step 1. Press Win + X and then choose Device Manager.
Step 2. Expand Display adapters in the newly popped-up window > right-click your driver > choose Uninstall device.
Step 3. Check Delete the driver software for this device and then tap Uninstall.
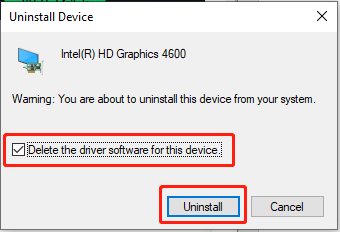
Step 4. After uninstalling, reboot your computer. Windows will automatically reinstall a new driver.
After the process has finished, check if Windows Explorer keeps crashing.
Way 7: Check Installed Add-ons
Some installed extensions may have defects, be incompatible with your system, or be damaged due to incomplete installation. This could cause conflicts during the operation of File Explorer.
For instance, when add-ons hog system resources, it might cause Windows Explorer to become unresponsive or restart unexpectedly.
If you notice that File Explorer frequently crashes, you can try disabling or uninstalling suspicious extensions. To do this, you can use a tool like ShellExView to identify and disable them one by one to find the culprit.
Way 8: Run Netsh & Winsock Reset
Sometimes, File Explorer can rely on network services to work correctly, especially when accessing network drives or performing network-related tasks. Corrupted or misconfigured network settings can interfere with the running of File Explorer.
The netsh winsock reset command can restore these network settings to their default state, resolving crashes that stem from network problems.
Step 1. Open Command Prompt as administrator.
Step 2. Type netsh winsock reset in the command window and hit Enter.
Step 3. Once done, reboot your computer to check if Windows 10 Explorer keeps crashing.
Way 9: Check Account Permission
Account permission issues can indeed cause File Explorer to crash. Particularly, this is likely to happen when you try to access specific files or folders for which you lack the necessary permissions.
Here’s how to check the account permission:
Step 1. Press Win + E to open File Explorer > right-click the folder you want to make changes > choose Properties.
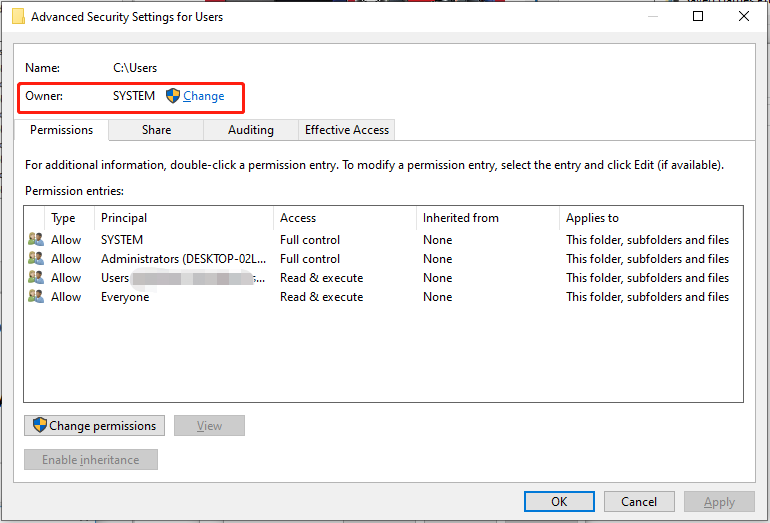
Step 2. Go to the Security tab > click on Advanced below > click Change next to Owner in the new window.
Step 3. Input administrator (your user account) in the Enter the object name to select box.
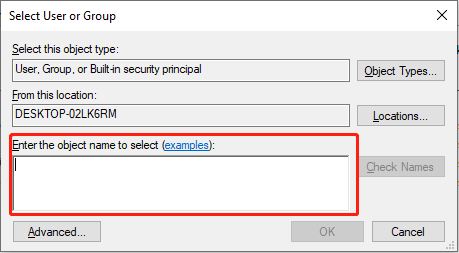
Step 4. Click Check Names nearby > click OK to save changes.
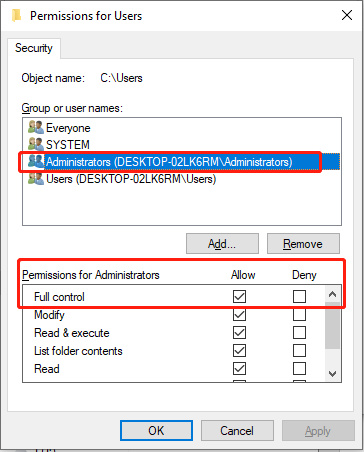
Step 5. In the Properties window, go to the Security tab > click Edit.

Step 6. Check Allow for Full Control in the Permission for Administrators section and then click OK to save changes.
After obtaining the full permission to access the folder, check if Windows 10 Explorer keeps crashing.

Way 10: Disable Quick Access
The Quick access feature in File Explorer makes it more convenient and faster to open a folder. However, this might be the reason why Windows 10 Explorer keeps crashing. In this case, you can try disabling Quick access to solve the problem.
Step 1. Launch Control Panel > set View by to Small icons > go to File Explorer Options.
Step 2. Under the General tab, set Open File Explorer to This PC instead of Quick access.
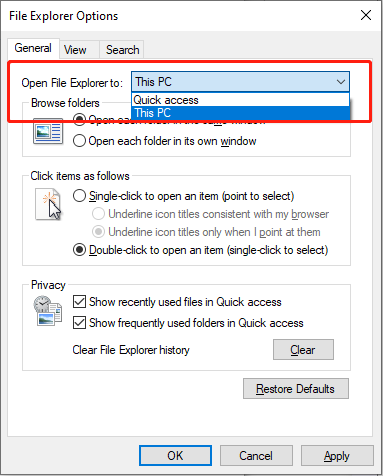
Step 3. Then go to the Privacy section > uncheck both Show recently used files in Quick access and Show frequently used folders in Quick access.
Step 4. Click Apply and OK to save changes.
Enlightenment: Regularly Protect Your System
As a computer user, I believe you have become accustomed to encountering all kinds of computer problems. Examples, including system crashes, hardware failures, or BSOD, are unpredictable. What you can do is to back up the system in advance. Once a crash occurs, you can quickly restore the computer.
About system backup, it’s highly recommended to try a professional backup and restore software – MiniTool ShadowMaker. It supports backing up files, folders, disks, partitions, and the operating system.
In addition, you can use this program to move Windows to another drive, sync files & folders, create bootable media, and so forth. What’s better, it’s free for new users within 30 days.
Without further ado, let me show you how to work with it:
Step 1. Download and install MiniTool ShadowMaker. After launching, click Keep Trial to enter its Home page.
MiniTool ShadowMaker TrialClick to Download100%Clean & Safe
Step 2. In the Backup page, MiniTool ShadowMaker selects the operating system and destination by default.
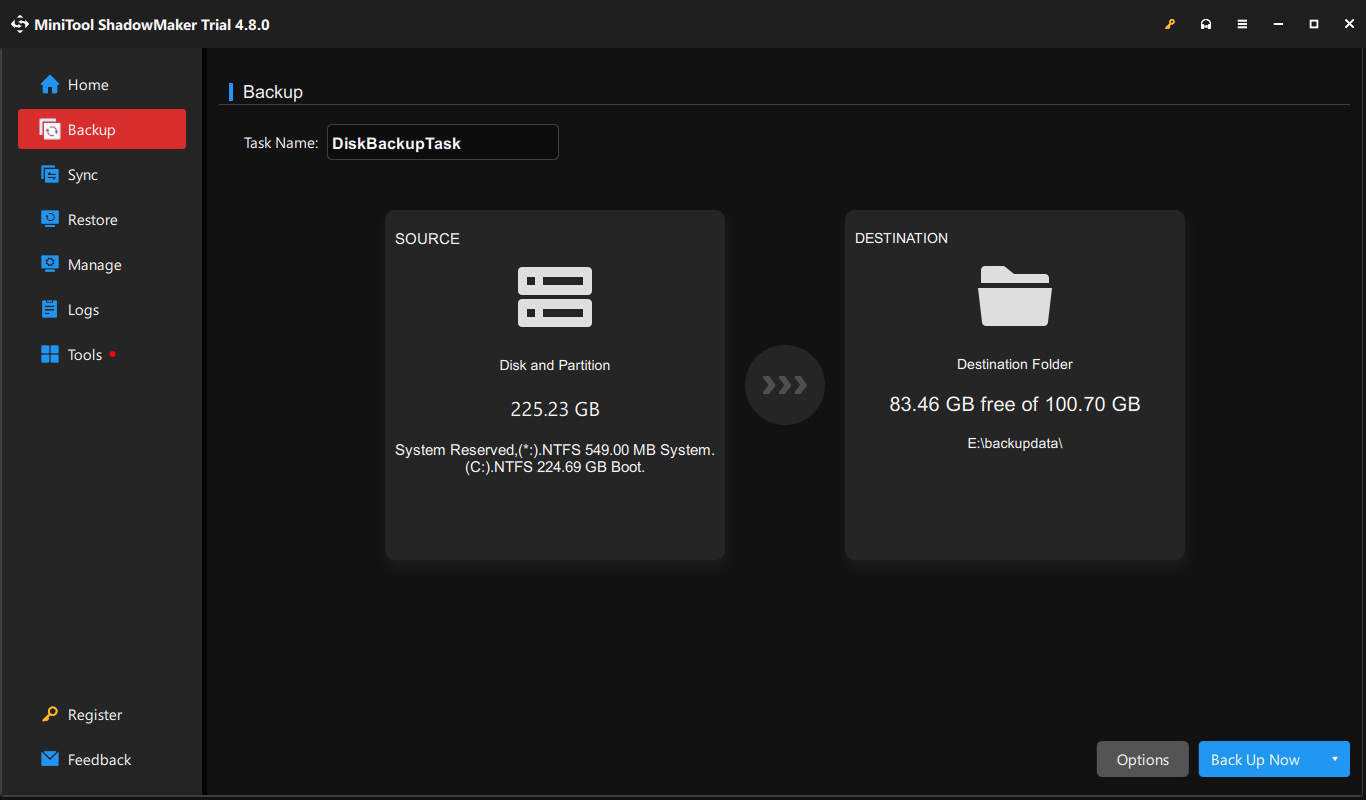
For the destination, we suggest you use an external hard drive or a USB flash drive. Click DESTINATION to change the storage path.
Step 3. After setting it up, tap on Back Up Now to start creating a system image.
Final Words
That’s all the information about File Explorer not responding on a Windows PC. In this post, we guide you through the causes of this issue and how to handle it in 10 ways. Which method do you prefer? Hopefully, one of them can help you out.
For more advice or problems with our product, please feel free to tell us via [email protected]. Have a nice day!
Windows 10 Explorer Keeps Crashing FAQ
You can try restarting the computer, cleaning up disk space, running a virus scan, or disabling unnecessary File Explorer add-ons to solve this problem.
In extreme cases, you can also reset Windows to clear the persistent viruses.
Solution 2: Restart Windows File Explorer.
Solution 3: Modify Folder Options Settings.
Solution 4: Run a CHKDSK Scan.
Solution 5: Update Your Graphics Drivers.
Solution 6: Change Advanced System Properties.
Solution 7: Perform a Malware Scan.
Solution 8. Run an SFC Scan.
Step 2. Select Advanced system settings from the left pane.
Step 3. In the Advanced tab, hit Settings under Performance > check Show thumbnails instead of icons.
Step 4. Hit Apply & OK and then restart the PC.
User Comments :