Are you suffering from the error message "FileType selected not supported by this app" when opening files in Teams or Excel? Now read this post from MiniTool to get several useful solutions to this issue.
FileType Selected Not Supported by This App
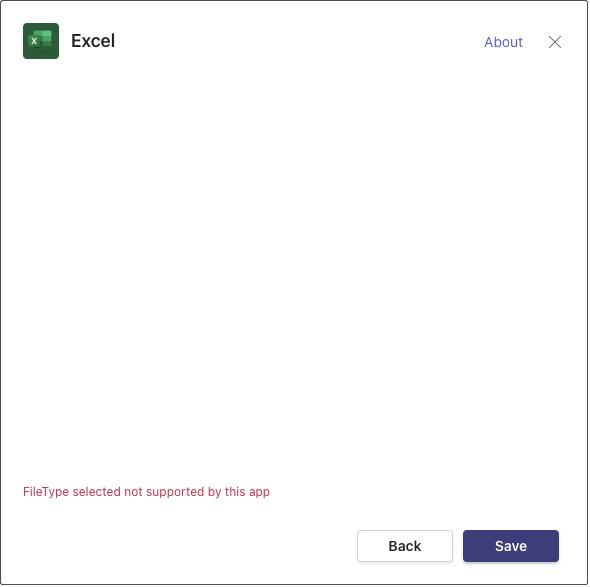
Recently, some users reported that they encountered the error message “FileType selected not supported by this app” when trying to access Excel files in Microsoft Teams and Excel. Here a user describes his problem as follows.
It will not allow me to select a new file via settings. I go to add a new Excel tab, still does not work. Error "FileType selected not supported by this app". We have been using this tab for over a year and changing the file it loads weekly. Nothing has changed and it's an .xlsx file.answers.microsoft.com
Now let’s see how to fix this annoying issue.
How to Fix FileType Selected Not Supported by This App Teams Excel
Before trying the advanced solutions, you need to perform some basic troubleshooting steps, such as restarting your computer, restarting Teams and Excel, updating Windows to the latest version, updating Teams and Excel, and so on.
If the initial troubleshooting approaches cannot help you get rid of the error, try the solutions below.
Solution 1. Delete Teams Cache
Outdated Teams cache files can cause the issue of “FileType selected not supported by this app”. To fix it, follow the steps below to delete Teams cache.
Step 1. Press Windows + E key combination to open File Explorer.
Step 2. In the top address bar, type %appdata%\Microsoft\Teams and press Enter. Or you can navigate to C:\Users\username\AppData\Roaming\Microsoft\Teams layer by layer.
Step 3. Press Ctrl + A keyboard shortcut to select all cache files and right-click them to select Delete.
After that, restart Teams and check if the error has gone.
Solution 2. Unhide Any Excel Sheets
According to user experience, hidden Excel sheets can be responsible for the unsupported file type issue. Therefore, you need to unhide all sheets.
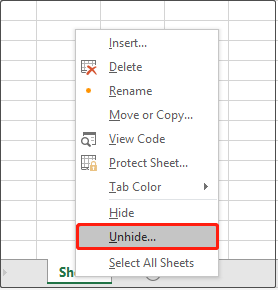
Open the target Excel file, right-click any sheet to select Unhide. If the Unhide option is grayed out, it means there is no hidden sheet in this Excel file, please turn to the next method.

Solution 3. Disable Hardware Graphics Acceleration
Windows hardware graphics acceleration helps speed up graphics performance to help you get a better experience. However, sometimes it results in the “Teams or Excel FileType selected not supported” issue. Here you can see how to disable hardware graphics acceleration.
Step 1. In Excel, click File > Options.
Step 2. Move on to the Advanced tab, and scroll down to check Disable hardware graphics acceleration under the Display section.
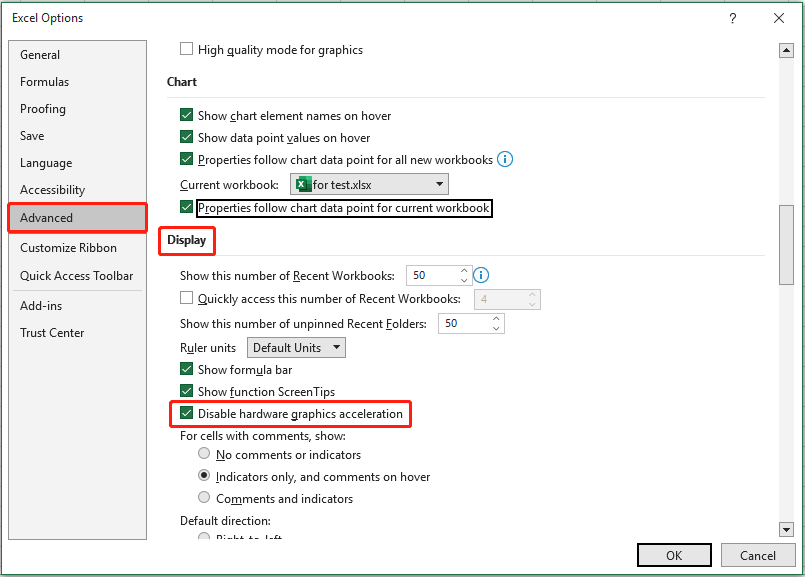
Step 3. Click OK to make this change take effect.
Solution 4. Use the Make This a Tab Feature
Some users reported that they have fixed the issue by using the “Make this a tab” feature in Teams. You can give it a try.
In Teams, go to the channel where you want the file as a tab and click the existing Files tab. Then click the three-dot icon of the target file and select Make this a tab from the context menu.
Top Recommendation
In addition to the Excel FileType selected not supported error, Excel encounters some other issues, such as Excel keeps closing without warning, Excel freezing when copying and pasting, and so on. Such problems often lead to the loss of Excel files.
To recover deleted or lost Excel files, you can use MiniTool Power Data Recovery. It not only works great on Excel file recovery, but also is effective in Word recent document recovery, Outlook email recovery, other Office file recovery, deleted photo recovery, and so on.
Free download MiniTool Power Data Recovery and try it out.
MiniTool Power Data Recovery FreeClick to Download100%Clean & Safe
Wrapping Things Up
In a word, this post shows you how to resolve the “FileType selected not supported by this app” error in Teams and Excel.
If you have come across any other effective solutions to this error, welcome to leave them in the comment zone below to help more users. Thank you in advance.
About The Author

Position: Columnist
Shirley holds a bachelor’s degree in English and has been an editor at the MiniTool Team for many years. She specializes in IT-related content, with a focus on data recovery, file backup, disk management, and other technical topics. She is committed to delivering clear, accurate, and practical solutions to help users resolve common computer issues.
User Comments :