Recover From a Drive Not Showing Under Troubleshoot Options
If you click Troubleshoot in the Windows Recovery Environment and there is no Recover from a drive option, this typically means there is a problem with the recovery drive or system configuration. Why does this situation occur? Here are some possible causes for it. Read on to get a better understanding.
- The recovery drive was not created correctly. If you did not check backup system files when using the Create Recovery Drive tool, the USB will only contain basic tools and will not support full recovery.
- The system is installed on an NVMe SSD. Microsoft has confirmed that if Windows is installed on an NVMe drive, the recovery drive may not show the option to recover from the drive.
- The recovery image is incomplete or formatted incorrectly. The USB must be formatted in FAT32 and contain a complete recovery image file (such as install.wim).
- Incompatible UEFI settings. Disabling Secure Boot or not enabling USB booting may result in missing recovery options.
- The recovery partition is not enabled. Use the reagentc /info command to check the Windows RE status. If it is Disabled, you need to enable it manually.
Fixes for No Option to Recover From a Drive
When you find that Recover from a drive doesn’t show up as an option when trying to reinstall Windows from a USB drive, follow the methods below to deal with it.
Way 1: Recreate the Recovery Drive
When Recover from a drive is missing in Windows Recovery Environment (WinRE), recreating the Recovery Drive is one of the most direct and effective solutions. It ensures that all recovery functions are fully displayed after USB boot, and improves stability after recovery.
Step 1: Press the Win + R keys, type recoverydrive.exe, and press Enter.
Step 2: Check Back up system files to recovery drive. This is a critical step to ensure that the recovery drive contains a complete system image, and then click Next.
Step 3: Insert the USB flash drive, select the target drive, and click Next.
Step 4: Click Create, and the system will copy the recovery environment and system files to the USB. The process may take several minutes, depending on the size of the system and the speed of the USB.
Step 5: Safely eject the USB when completed. It is recommended to store the recovery drive in a safe place and not use it for other purposes.

Way 2: Check the Status of the Recovery Environment
When this option does not appear, checking the status of the Recovery Environment is also one of the key troubleshooting steps. It can confirm whether WinRE is enabled, verify whether the recovery path is correct, etc.
Step 1: Open Command Prompt as an administrator.
Step 2: Type reagentc /info in the window and press Enter.
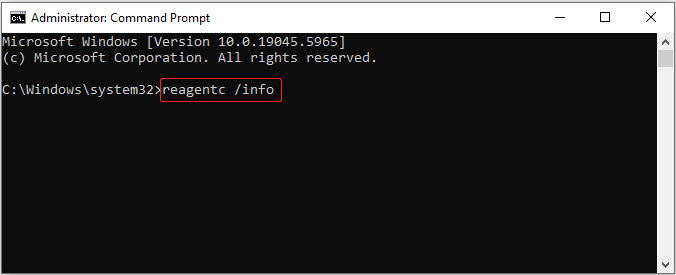
Step 3: When the process ends, the right status should be as follows:
- Windows RE status: Enabled
- Windows RE location: \\?\GLOBALROOT\device\harddisk0\partition4\Recovery\WindowsRE
- Boot Configuration Data (BCD) identifier: …
If the status is Disabled, you can enter reagentc /enable and press Enter to enable it.
In multiple user feedback, after executing reagentc /enable, it was found that the recovery environment was disabled or the path was missing, resulting in the missing Recover from a drive option. After re-enabling the recovery environment or repairing the configuration file, the recovery option was restored.
Way 3: Check BIOS/UEFI Settings
If USB Boot or External Device Boot is not enabled in the BIOS, the system may not recognize the recovery drive. And if the USB drive is not set as the preferred boot option, the system may skip it and go directly to the local disk or the wrong partition. At this time, you need to check the BIOS/UEFI settings to troubleshoot the error
Step 1: Open Settings and click System > Recovery.
Step 2: Click Restart now under Advanced startup.
Step 3: After the system restarts, enter the Choose an option interface.
Step 4: Click Troubleshoot > Advanced options > UEFI firmware settings in sequence.
Step 5: Click Restart to enter the BIOS/UEFI.

Way 4: Try Another USB Device or Port
USB interface compatibility issues, drive hardware incompatibility, insufficient or faulty port power, recovery drive creation failure or format error, USB controller or driver anomalies can all cause this problem. If you have tried the above methods and still can’t solve it, you can try changing the device or interface.
MiniTool Power Data Recovery FreeClick to Download100%Clean & Safe
Final Words
These methods can help you fix Recover from a drive not showing under Troubleshoot options on Windows 11. Try them one by one!
About The Author

Position: Columnist
Chelsea graduated from university with a major in English. She has a strong interest in English writing. It is this passion for writing that led her to become an English editor. Her articles mainly focus on data recovery and other computer industry news. As an energetic and outgoing girl, Chelsea enjoys listening to music, singing, riding bikes, and eating in her spare time.
User Comments :