Network drives offer many advantages, such as increased collaboration, centralized file management, and easy file sharing. Automatically syncing can make the operation more convenient. Follow this guide from MiniTool to learn how to auto sync folders to network drive.
Why Do You Need to Do Auto File Sync?
File synchronization is a powerful feature that keeps your folders or files stored in different locations up to date so any user has access to the most current version of a file. It can be regarded as a kind of backup but with more emphasis on data updates. If you make changes to the source, you can have the changes happen in the destination as well.
Here are the top benefits of file sync:
- Real-time updates: Changes in files are instantly reflected across all synchronized devices, ensuring everyone always has access to the latest version of data.
- Security: Synchronized files have been encrypted to avoid unauthorized access, which helps to maintain the privacy of your data.
- Cross-platform compatibility: Effective file sync software supports the synchronization among different devices.
- Version control: It allows you to roll back to the previous version if necessary, which can prevent accidental deletion or errors from occurring.
- Conflict resolution: File sync helps in managing conflicts that surface when files are edited simultaneously.

When many changes are created and modified, auto sync can simplify the process by eliminating the operation steps.
How to Automatically Sync Files from PC to Network Drive?
Option 1: Auto Sync Folders to Network Drive via MiniTool ShadowMaker
MiniTool ShadowMaker is a piece of auto sync software that allows you to sync your folders and files on Windows PCs. It is also equipped with many powerful features such as file backup, partition backup, system backup, disk backup, and disk clone.
This program can satisfy all your needs, like keeping your data safe or moving Windows to another drive. With it, you can configure a scheduled sync to eliminate the manual steps and save time. It allows you to exclude some unnecessary files to make the sync process faster. Now, let’s see how to carry out auto sync files to network drive with MiniTool ShadowMaker:
Step 1. Download and install this software for a 30-day free trial version. Then launch it and click on Keep Trial.
MiniTool ShadowMaker TrialClick to Download100%Clean & Safe
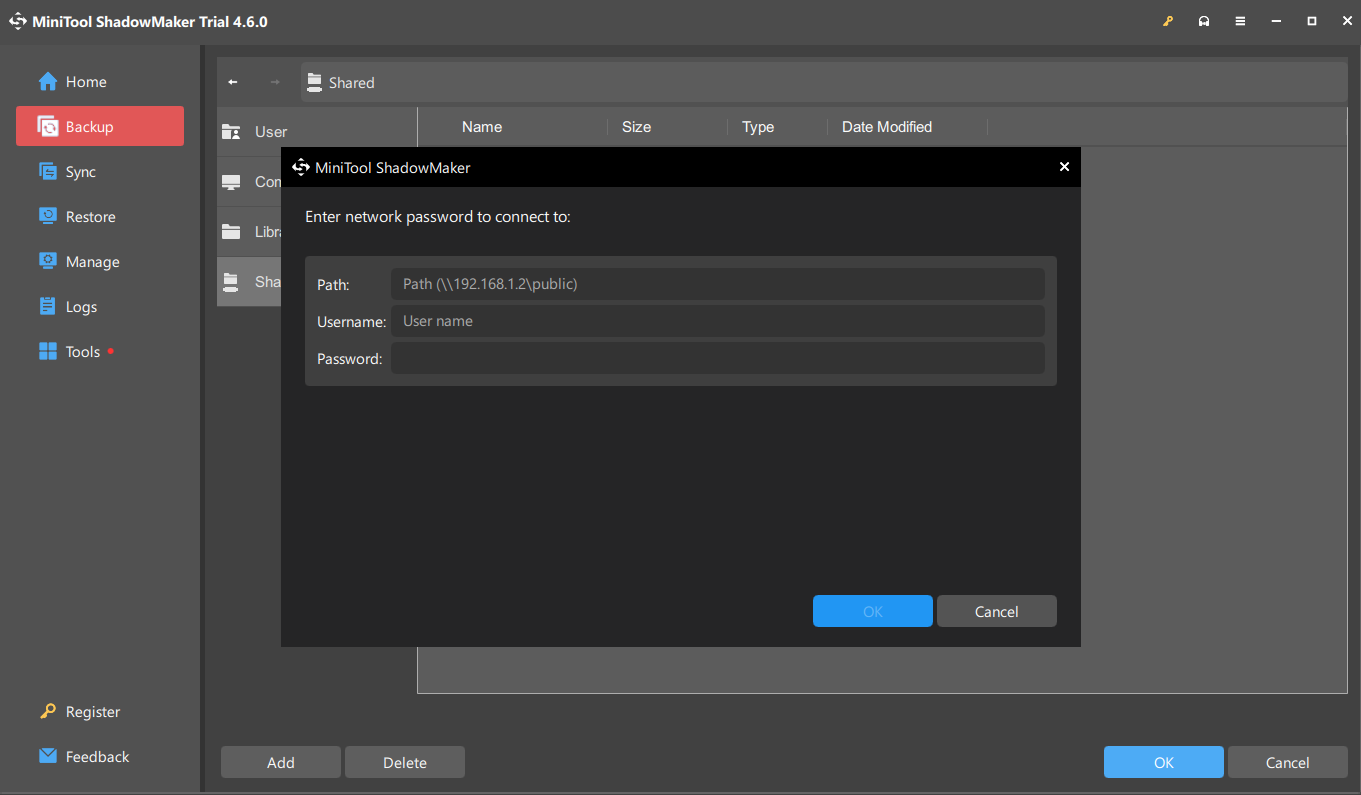
Step 2. Go to the Sync section > click on SOURCE to select the items you want to sync > turn to DESTINATION > choose Shared > click Add > enter access credentials to connect to your network drive.
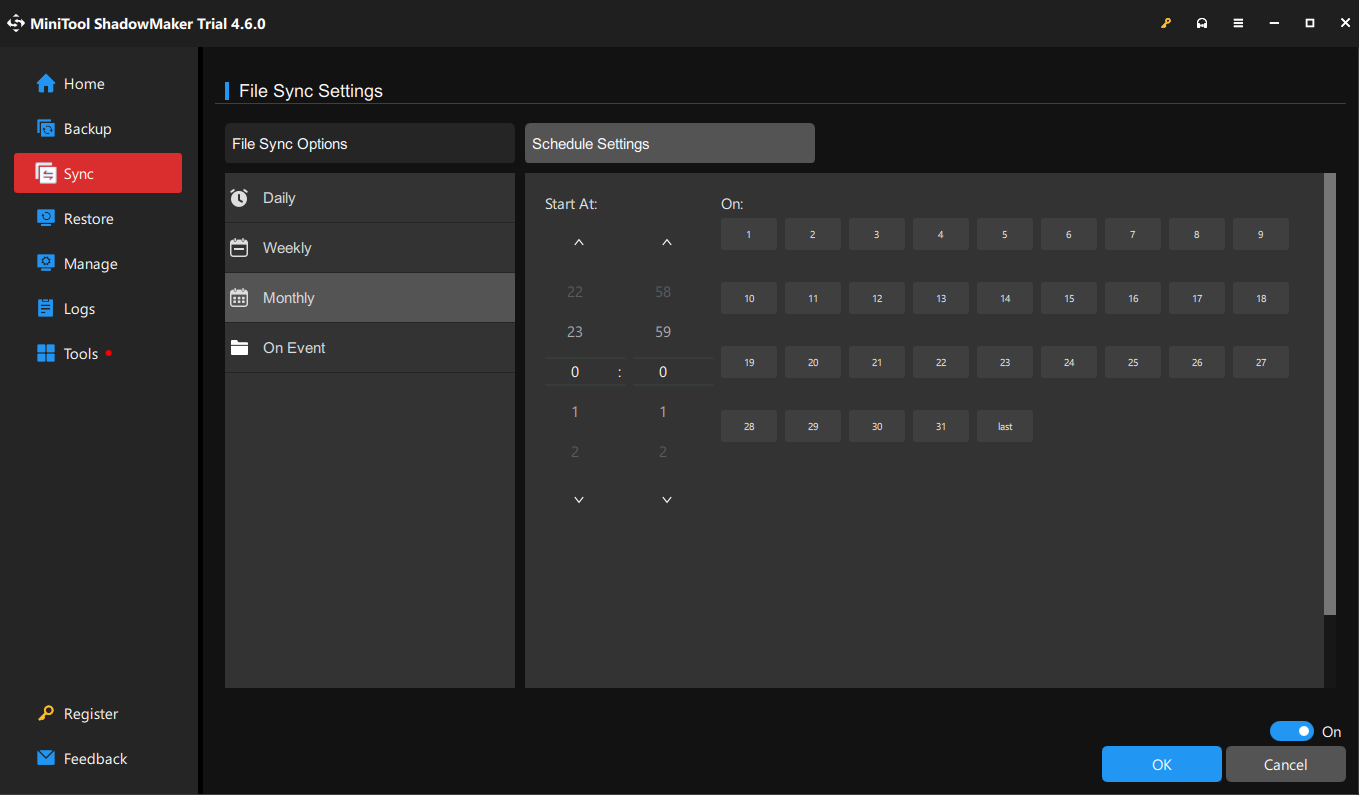
Step 3. Click on Options in the lower right corner > toggle on Schedule Settings > select a time point of a day, week, month, or on event > hit OK.
Step 4. Hit Sync Now to initiate the task at once.
Option 2: Auto Sync Folders to Network Drive via Sync Center
Sync Center is a feature of Microsoft Windows that allows you to set up your computer with a network server so that they can manage offline files & folders and check recent sync activities over a network. To sync files between PC and network drive, follow the steps:
Step 1: Create a shared folder
1. Create a new folder and right-click on it to choose Properties.
2. Go to Sharing > tap Share > click the down icon to select Everyone > click Add.
3. Under Permission Level, choose Read/Write and click on Share.
4. Go to Sharing again > click Advanced Sharing > tick Share this folder > tap on Permissions to check the Allow box beside Full Control > click Apply & OK.
5. Then note down the network path in New folder Properties.
Step 2. Map the network drive to the local computer
1. Open File Explorer, navigate to This PC and select Map network drive.
2. Type the path of your shared folder and click Finish.
3. Find the mapped network drive > right-click on the files or folder you want to access > choose Always available offline.
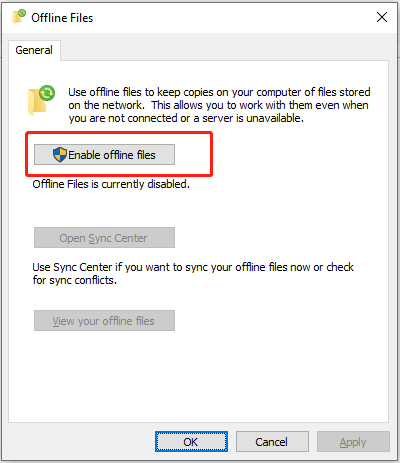
Step 3. Enable offline files
1. In Windows Search, type control panel and press Enter.
2. Navigate to Sync Center > click on Manage offline files > Enable offline files in the Offline Files box. Then restart your PC to activate it.
Step 4. Sync files to network drive
1. Launch Sync Center > right-click Offline Files under Folders > select Schedule for Offline Files.
2. Select an item you want to sync on schedule > click At a scheduled time > specify the sync interval > click Next > name the sync schedule task > hit Save schedule.

Option 3: Auto Sync Folders to Network Drive via Robocopy
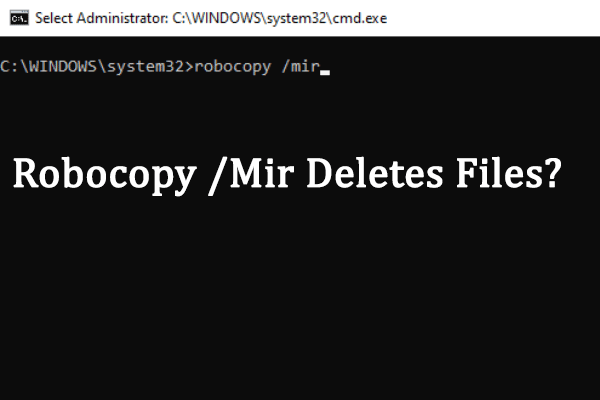
Robocopy, also called Robust File Copy, is a command line tool in Windows that allows you to transfer and synchronize files between computers. Here’s how to use it:
Step 1. Type cmd in the search bar and choose Run as administrator.
Step 2. Copy & paste the following command into the Command Prompt window and press Enter.
robocopy c:\robocopy k:robocopy_mirror /MIR
Step 3. After the process is complete, you can see its sync details in the destination path.
Wrapping Things Up
To auto sync folders to network drive, you get three free tools – MiniTool ShadowMaker, Sync Center, and Robocopy. Each of them has its advantages and disadvantages. For computer novices, MiniTool ShadowMaker might be the best choice as it has simple and easy steps. Anyway, choose the one that suits you best based on your real needs.
User Comments :