About Storport.sys
Storport.sys (Microsoft Storage Port Driver) is a critical Windows system driver. It manages communication between the operating system and high-performance storage hardware, such as NVMe, SATA SSDs, RAID controllers, and Fibre Channel adapters.
It is the modern successor to the older SCSI Port driver. However, some fatal issues are related to this driver, including:
- Blue Screen of Death (BSOD): Windows often displays DRIVER_IRQL_NOT_LESS_OR_EQUAL(Storport.sys). Additionally, INTERNAL_POWER_ERROR may appear sometimes.
- High Disk Usage/Latency: The driver often causes system slowdowns or freezes, especially during intensive disk operations.
What Causes Storport.sys BSOD Error
The storport.sys BSOD issue typically signals a storage-related driver conflict. It is often related to Intel Rapid Storage Technology (RST) drivers or recently installed SSDs. Here are the main causes of this error:
- Conflicting/missing/outdated device drivers, such as required RST/X399 drivers
- Failing or faulty SSD/HDD
- Power issues with SSD
- Wrong power configuration
- Anti-virus and firewall issues
- Corrupted system files
- RAM Issues
- Improperly configured AHCI/RAID settings
- System overheating
- Conflicting updates
- An outdated or corrupted OS
Preparation: Back Up Important Data
If your computer experiences a blue screen, the data is likely to be lost or corrupted. Backing up critical files is essential to ensure data security.
To back up important data, it is highly recommended to use MiniTool ShadowMaker. This professional Windows backup software can help you do data backup and system backup within a few clicks.
Here’s how to use this software:
Step 1. Connect a USB flash drive to a normal Windows PC. Then, download and install MiniTool ShadowMaker on this PC.
MiniTool ShadowMaker TrialClick to Download100%Clean & Safe
Step 2. Launch this software, register for a Pro or higher edition, and then enter its main interface.
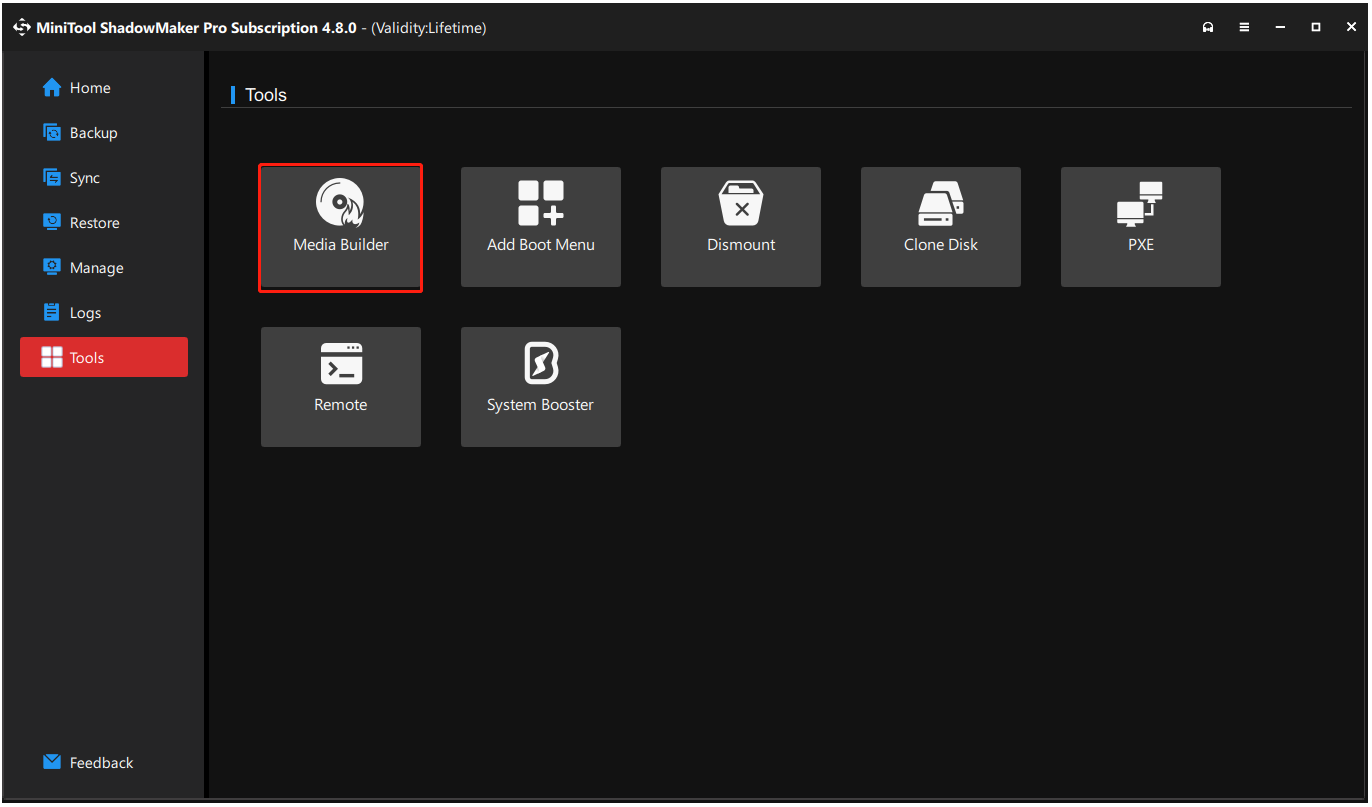
Step 3. Navigate to the Tools tab and select Media Builder.
Step 4. In the prompted window, click WinPE-based media with MiniTool plug-in.
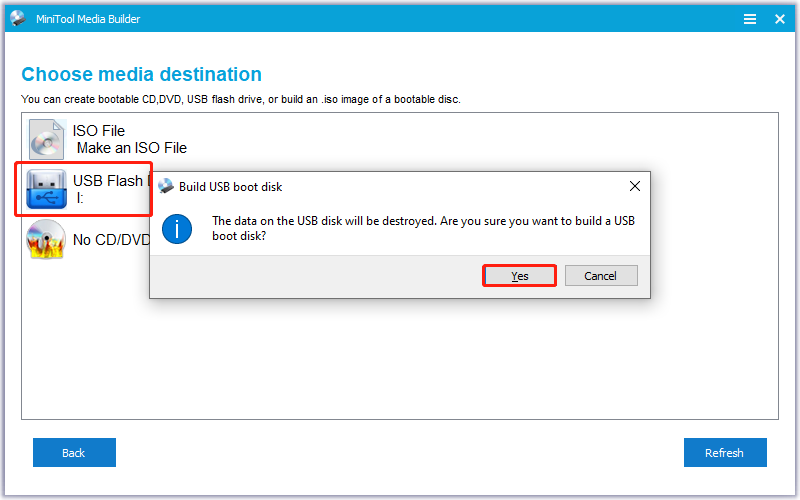
Step 5. Select USB Flash Disk and click Yes to confirm to create a bootable USB drive.
Step 6. Once the process is finished, click Finish.
Step 7. Connect the newly created USB bootable drive to your computer. Then, boot this PC into the BIOS menu.
Step 8. Go to the Boot tab and make your PC boot from the USB drive.
Step 9. During the startup process, two windows will pop up asking if you want to change your screen resolution or launch MiniTool ShadowMaker. Do nothing if you don’t want any change.
Step 10. In the main interface of MiniTool ShadowMaker, select Backup > SOURCE > Folders and Files.

Step 11. Choose the files that you want to back up and click OK.
Step 12. Go to DESTINATION, select a target location to save the backup file, and then click OK.
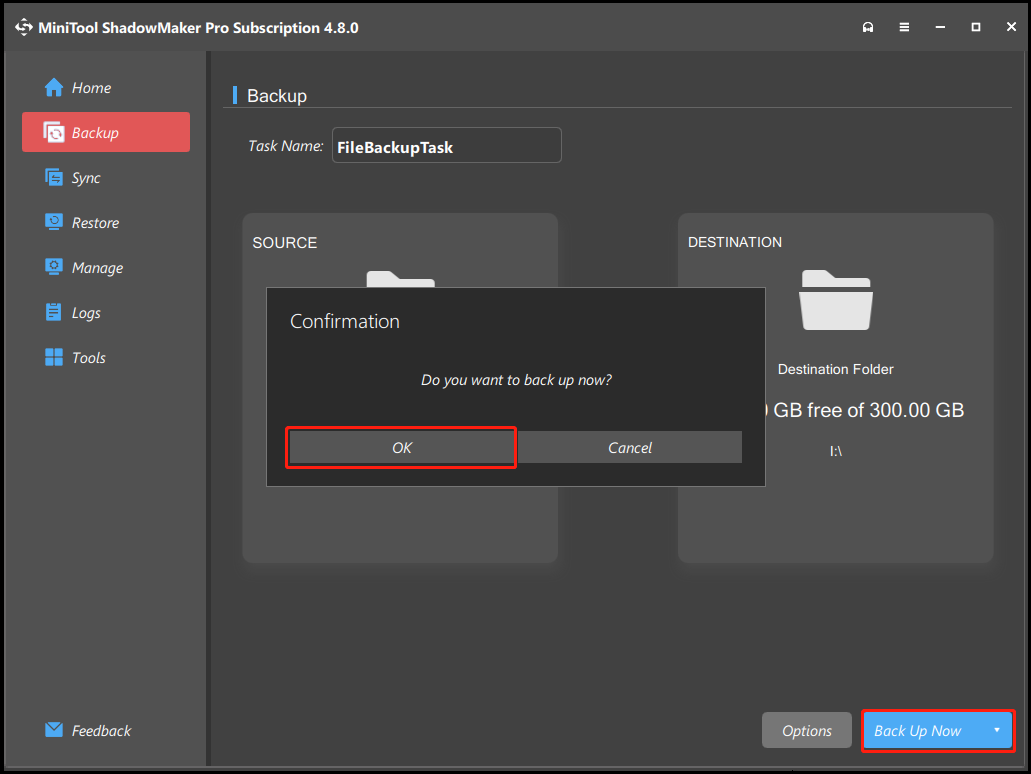
Step 13. Click Back Up Now and OK sequentially to confirm.
Once done, all the selected important data is backed up successfully.
How to Fix Storport.sys BSOD Error
If your computer can boot normally, try removing peripherals, updating Windows, or disabling Fast Startup to fix the error. If not, boot into safe mode, and then update/rollback driver, run SFC and DISM, power cycle an SSD, and reinstall Windows.
Here’s the detailed breakdown.
Boot into Safe Mode
If the storport.sys BSOD appears every time you try to start Windows, boot into safe mode, and then try the other troubleshooting methods. This mode loads only the most essential drivers and services. Here’s how to boot into that:
Step 1. Start your PC into the Windows Recovery Environment (WinRE).
- Turn off your PC.
- Press the Power button to turn on your PC.
- When the Windows logo (or manufacturer logo) appears, hold the Power button to turn it off again.
- Repeat this process 2-3 times.
- Windows will automatically access Automatic Repair mode on the next boot.
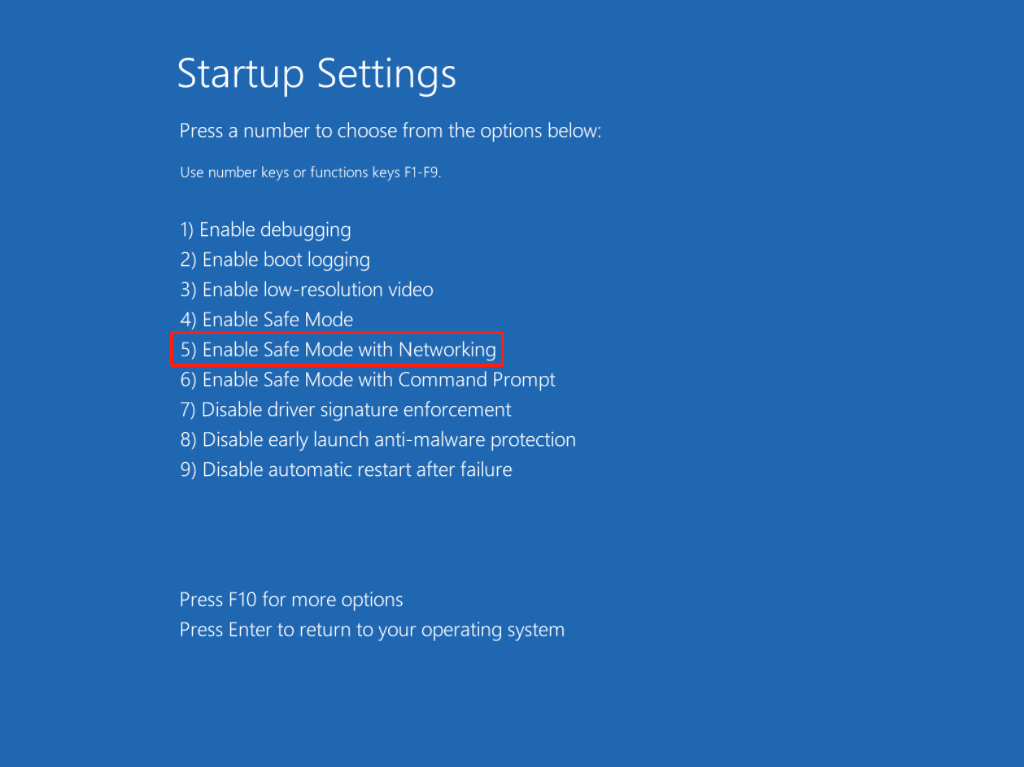
Step 2. Select Advanced options > Troubleshoot > Advanced options > Startup Settings and click Restart.
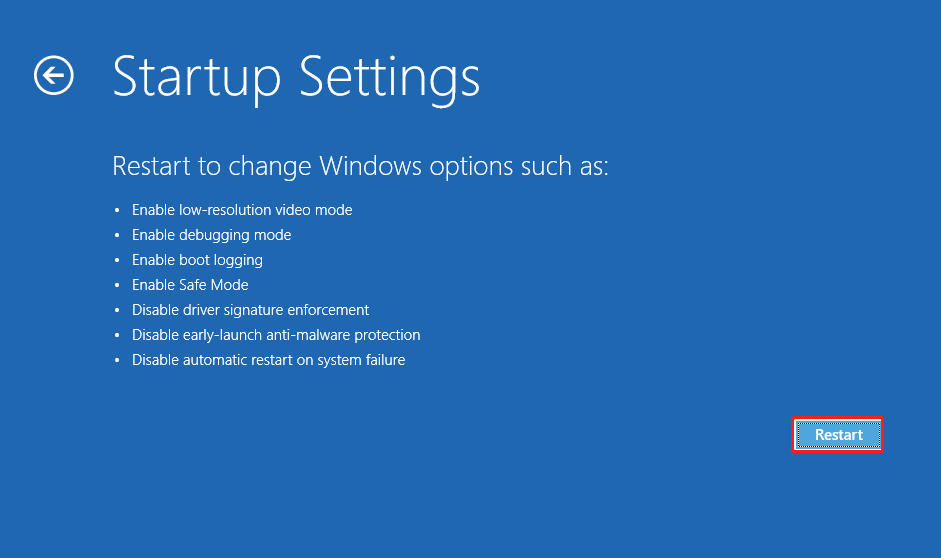
Step 3. In the next screen, press the 5 or F5 key to enable Safe Mode with Networking.
# 1. Update Rapid Storage Driver
The Intel Rapid Storage Technology (RST) driver manages SATA performance and data recovery. However, outdated RST drivers can cause storport.sys BSOD. To fix this issue, update the drivers through the following steps.
Step 1. Search for Intel Rapid Storage Technology drivers on your browser.
Step 2. Go to the official website and download the latest setup file. Make sure the file name is SetupRST.exe.
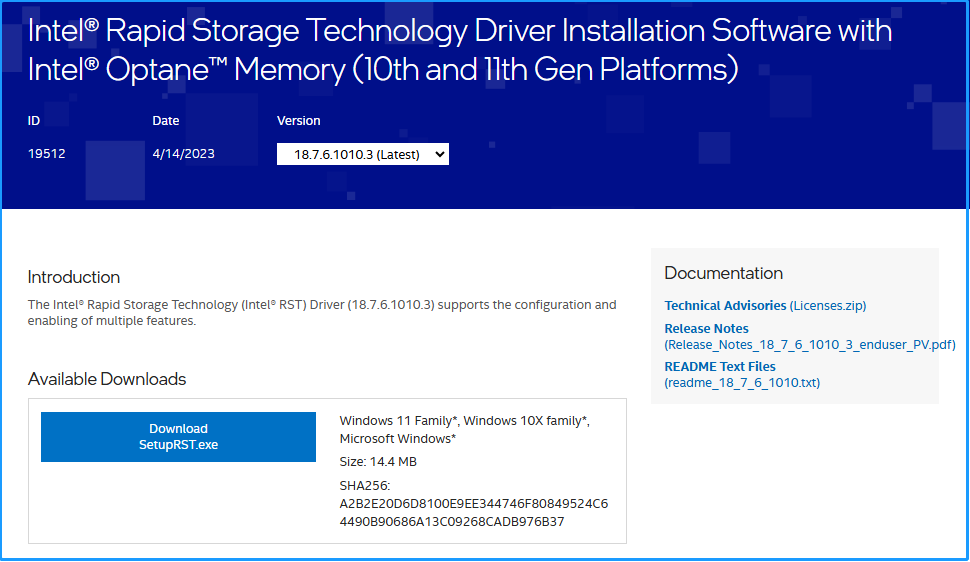
Step 3. Run the downloaded file and follow the on-screen instructions to complete the process.
# 2. Update/Rollback Drivers
If updating the Intel Rapid Storage Technology driver does not help you fix the storport.sys BSOD in Windows 10/11, try using Device Manager to update all other outdated drivers easily. Here’s how to do that:
Step 1. Press Win + R to open Run, type control panel, and press Enter.
Step 2. Set View by to Large icons and select Device Manager from the feature list.
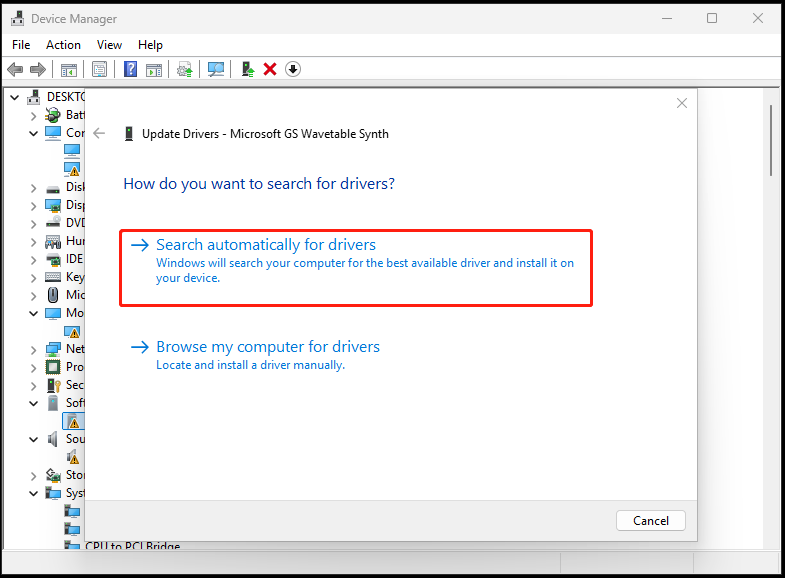
Step 3. Expand all categories and check any driver with a triangle icon. Right-click that driver and select Update driver.
Step 4. In the new window, select Search automatically for drivers. Then, follow the on-screen instructions to complete the update process.
Step 5. Repeat the above steps to update all the outdated drivers.
If you encounter the storport.sys failed error after updating drivers, try rolling back the driver to fix the error. Here’s how to do that:
Step 1. In Device Manager, expand the category that contains the driver you recently update.
Step 2. Right-click the target driver and select Properties.
Step 3. Go to the Driver tab and click Roll Back Driver.
Step 4. Follow the on-screen guide to complete the process.
# 3. Check Disk Errors
Disk errors may also trigger storport.sys BSOD in Windows 10/11. Check and fix disk errors with the following steps:
Step 1. Press Win + E to open File Explorer.
Step 2. Click This PC, right-click Local Disk (C:), and choose Properties.
Step 3. Switch to the Tools tab, click the Check button under the Error checking section.
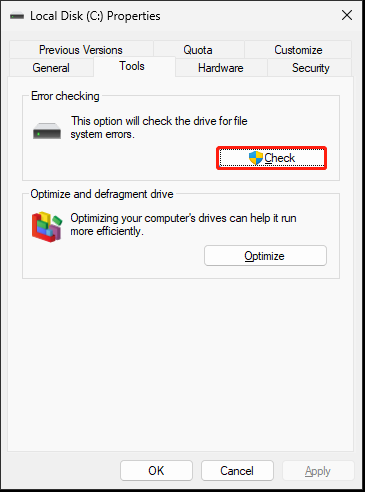
Step 4. Click Scan drive in the pop-up window, and follow the on-screen instructions to detect and fix errors.
Step 5. Restart your computer and check if the storport.sys blue screen issue is resolved.
# 4. Run SFC and DISM
Corrupted system files can cause the storport.sys failed error. SFC scans and repairs protected Windows files to fix corruption or changes. DISM detects and repairs corruption in the Windows image or system component store.
To resolve the blue screen error, run DISM and SFC with the following steps.
Step 1. Press Win + R to open Run, type cmd, and press Ctrl + Shift + Enter to run Command Prompt as administrator.
Step 2. In the prompted window, type the following commands and press Enter after each command:
- DISM.exe /Online /Cleanup-Image /CheckHealth
- DISM.exe /Online /Cleanup-Image /ScanHealth
- DISM.exe /Online /Cleanup-Image /RestoreHealth
Step 3. Type sfc /scannow and press Enter to run the scan.
Once done, restart your computer and check if the error has been resolved.
# 5. Recreate the Storport.sys File
Some people report that they fix the storport.sys BSOD error in Windows 11/10 successfully by recreating the storport.sys file. Here’s how to perform that:
- Press Win + E to open File Explorer.
- Locate this path: Local Disk (C:)\Windows\System32\drivers.
- Find storport.sys and change its name to storport.old.
- Now restart your PC and check if the storport.sys blue screen error has been resolved.
# 6. Power Cycle an SSD
Sudden power loss causes file system corruption, data loss, or drive detection failures, forcing Windows into a BSOD to prevent further hardware damage. Try performing a power cycle on the SSD to resolve the issue.
Step 1. Power off your computer and then physically remove the problematic SSD from it.
Step 2. Leave the SATA data cable unplugged and only connect the SATA power cable to the SSD.
Step 3. Turn on the computer and let it sit idle for 30 minutes.
Step 4. Turn off the power for 30 seconds.
Step 5. Repeat steps 3 and 4 for another 30 minutes.
Step 6. Turn off the power, plug the SATA data cable back in, and then power on the computer to check if the error is fixed.
# 7. Reset Power Configuration
The storport.sys BSOD may also be triggered by misconfigured power settings. Since these configurations can persist across system restarts and even clean OS installations, restoring them to defaults is a critical troubleshooting step. Here’s the guide:
- Run Command Prompt as administrator.
- Type powercfg -restoredefaultschemes and press Enter.
- Restart the system and check if the problem is solved.
- If not, proceed to the next solution.
# 8. Reinstall Windows
Reinstalling Windows can replace corrupted files and reset system settings to a “like-new” state. It resolves performance issues, malware infections, and crashes, such as storport.sys BSOD error. Although it optimizes the PC, it typically removes all personal files and applications.
If none of the above methods can help you solve storport.sys BSOD error in Windows 10/11, try performing this method.
Additional Info: How to Fix Storport.sys Latency Error
In addition to the storport.sys BSOD error, a latency error is related to the storport.sys file. Here are the common symptoms:
- Audio artifacts: Crackling, popping, or dropouts during playback.
- System latency: Unresponsive performance, freezes, or input delays.
- Multimedia stutters: Sound and video delays during gaming or intensive software.
To troubleshoot this error, switch from RAID to AHCI or NVME in BIOS, check and update the Intel Rapid Storage Technology, or disable the VMD Controller in BIOS/UEFI.
Tips to Prevent Storport.sys BSOD Error Occurs in the Future
Although you can use the methods above to solve storport.sys BSOD error, it may waste some of your time. To avoid time loss with useless faffing about in the future, perform the following key prevention strategies:
- Update chipset and storage drivers
- Run SFC
- Check disk for errors
- Keep BIOS updated
- Monitor SSD health
- Avoid overclocking
- Perform regular maintenance
- Power cycle SSDs
To Sum Up
The storport.sys BSOD error always stems from faulty or incompatible storage drivers, corrupt system files, improper BIOS/SATA settings, or failing hardware. To address this issue, try the methods mentioned in this post.
To avoid data loss, it is highly recommended to use MiniTool ShadowMaker to back up your important data.
If you have issues while using this software, feel free to contact us by sending an email to [email protected].
Storport.sys FAQ
For details, refer to the System Service Exception guide.
Common causes include corrupted system files, malware, outdated or incompatible drivers, or underlying hardware issues like RAM or disk errors.
Top blue screen errors include UNMOUNTABLE_BOOT_VOLUME (system cannot load), CRITICAL_PROCESS_DIED (core Windows file failure), and KERNEL_DATA_INPAGE_ERROR (storage/memory failure).
They often indicate imminent hardware failure or severe data loss.
About The Author

Position: Columnist
Charlotte is a technology columnist with a strong focus on the Windows operating system, specializing in disk management, backup, and data recovery. She is passionate about analyzing computer errors, identifying root causes, and delivering practical solutions. In her free time, she stays updated on the latest developments in computer systems and hardware while continuously learning new technologies to broaden her expertise. Her writing style is clear and easy to understand, making complex technical topics accessible even to users with limited computer knowledge.
User Comments :