This article summarized on MiniTool official web page explains the official system recovery-related feature – undo system restore. This is a less popular function known by fewer users than Windows Go back or factory restore, but it’s really useful in some situations.
What Is “Undo System Restore”?
System protection is a function to conduct a system restore that brings the computer back to its earlier date or point in time (system restore point). Each system restore point contains the necessary information required to restore the operating system (OS) to the selected state.
Restore points are generated automatically when you install a new program, driver, or system update; and are generated when you manually create one. Restoration will not affect your personal data in the %UserProfile% folder, but it does delete apps, drivers, and Windows updates that are received by the machine after the restore point was created.
However, undo system restore will cancel the changes that restoration does to your computer and return it back to the condition before you carry out the restoration.
Why Need to Undo System Restore?
If you encounter some problem while or after the system restoration, you can cancel this operation by undoing the system restore when it completes. For example, the system restoration stucks forever without progressing or it does not go the way you wanted.
The sooner you can undo after system restore, the better, especially when you find something goes wrong after restoration and you cannot fix it in current status.
Back up Data Before Undoing System Restore
Although both system restore and undo system restore won’t influence personal information, it is more secure to still create a backup of crucial files in case of some accidents like system restore undone failure. Also, if you would like to keep some applications and drivers after undoing the system restoration, you need a backup.
Then, how to build a backup of those items? You may feel at a loss about where to start for making a backup. If you rely on a professional and reliable backup software like MiniTool ShadowMaker, things become clear and easy.
MiniTool ShadowMaker TrialClick to Download100%Clean & Safe
- Download, install, and open MiniTool ShadowMaker on your computer. It also supports the newest Windows 11 if you are currently running the OS.
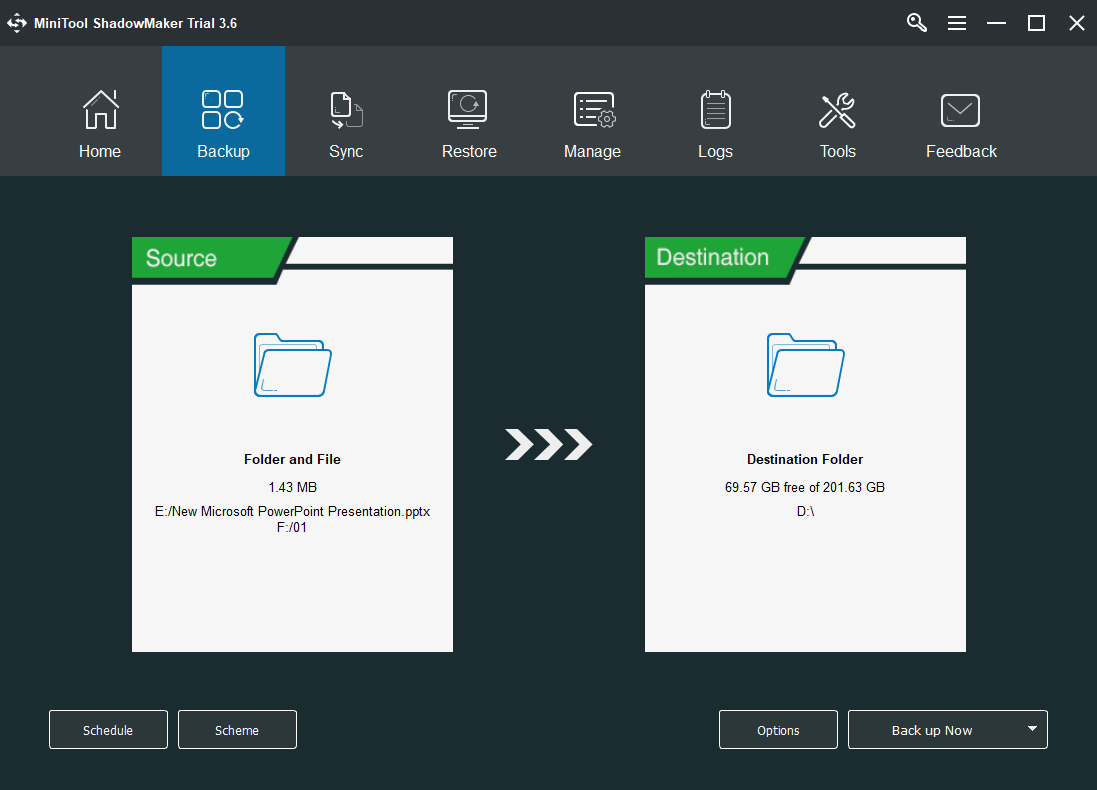
- Go to its main user interface (UI). Click on the second Backup
- There, click the Source module and select the items you would like to protect, documents, pictures, music, videos, apps, etc. Don’t forget to click the OK button to save your selection.
- Click the Destination module and pick up a location to save the backup image, either local addresses (internal or external) or shared network storages (NAS).
- Finally, click on the Back up Now button to start the process.
Wait until the task finishes and it will not take long. During its operation, you can do your other business.
MiniTool Power Data Recovery TrialClick to Download100%Clean & Safe
How to Undo System Restore Within Windows 11/10?
For this method, you have to log into Windows as an administrator.
1. Open System Restore. Go to Control Panel and choose the System option in the icon view.
2. If you are using Windows 10 build 20161 and later Windows versions including the newest Win11, you will be redirected to Windows Settings app. There, in the default System >About page, scroll down to find and select the System protection

If you are running a system older than Win10 build 20161, you stay in Control Panel. Just select System protection from the left panel.
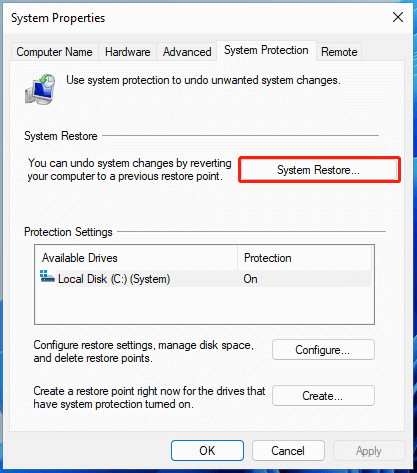
3. In the new pop-up window, under the System Protection tab, click on the System Restore
4. Next, choose Undo System Restore and click Next to continue.
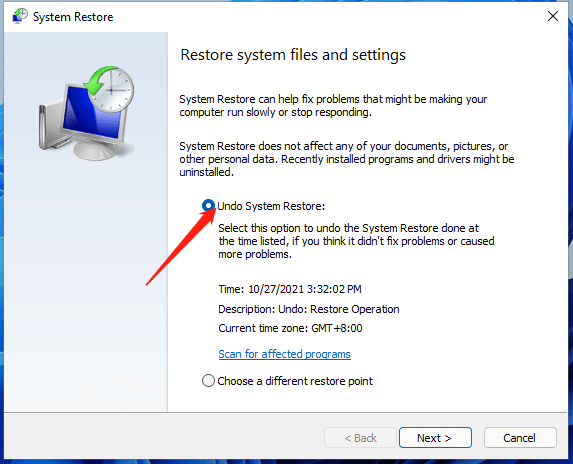
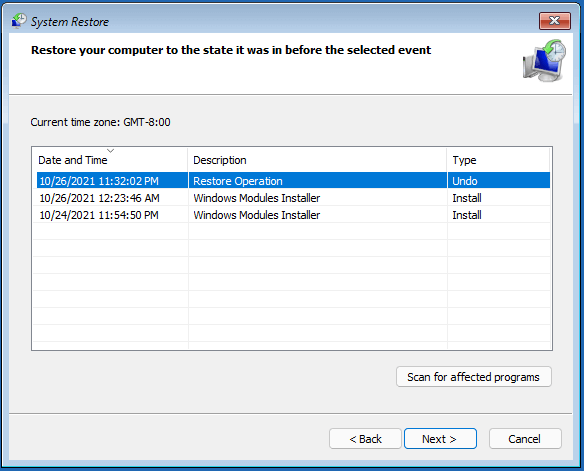
If you want to know what items will be affected after undoing the system restore point, including the added items after the system restore (will be moved) and the deleted items (will be added again), just click on the Scan for affected programs option.
5. Click Finish after confirming your restore point.
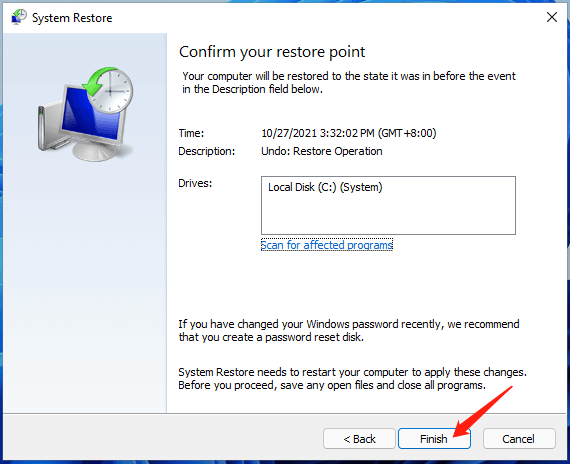
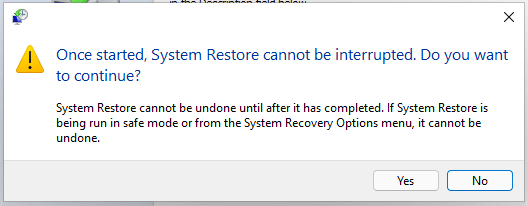
6. Click Yes to start the undoing process.
7. When the process completes, click the Restart button to reboot your PC.
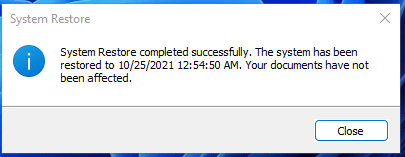
8. Once your machine starts up again, sign into your system and click on the Close button in the System Restore popup.
Undo System Restore at Computer Boot Windows 11/10
Now, let’s see how to undo a system restore when booting up Windows.
1. Boot up your computer into advanced startup options (WinRE). If you boot to Windows Recovery Environment from within Windows 11 or Windows 10, you must be signed in as an administrator to undo a system restore. If you boot to Windows RE from a Windows 11/10 installation media, you don’t need an administrator privilege to undo a system restore.
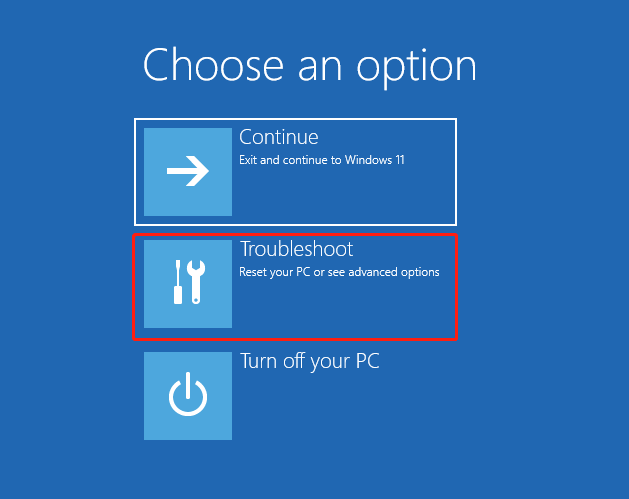
2. Select the Troubleshoot.
3. Choose the Advanced options.
4. Click on the System Restore.
5. If you booted from the current Windows 10/11, you may need to select an administrator account and provide its credentials (username and password). If you booted based on system installation media, select the Windows 11 or Windows 10
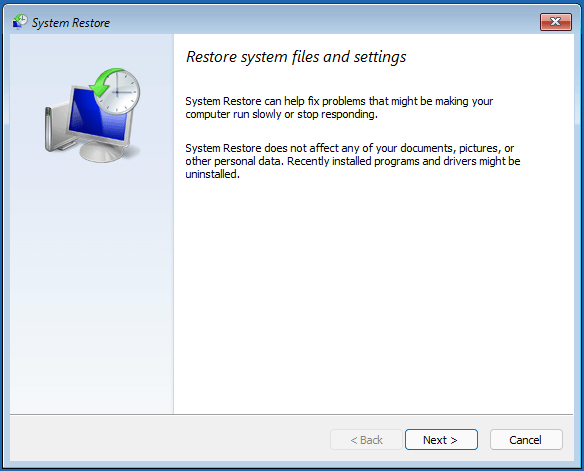
6. Then, you will enter the System Restore window. There, click Next to move on.
7. Next, choose the restore point that has Undo under its Type column.
8. Click Finish and Yes to start the task.
9. Click the Restart button to reboot your machine when the process finishes.
10. When you sign into Windows 11 after the restart, just Close the System Restore popup.
Undo System Restore Windows 8/8.1
Next, let’s see how to undo a system restore in Windows 8 and Windows 8.1.
- Press Windows + R to open the Windows Run box. Input shutdown /r /o /t 00 and press Enter to enter the Advanced options
- Select the System Restore
- Choose Undo System Restore.
- Then, just follow the on-screen steps to finish the task.
Undo System Restore Windows 7
In Microsoft Windows 7 system, you are able to undo a system restore changes right after it is finished. Simply, just run System Restore again and choose the Undo option that shows up in the System Restore window. Then, the system restoration will be removed, and your OS will be re-restored to the status it was before your last restoration.
- Search System Restore in from Start menu and open it.
- Click Undo my last restoration and click Next.
- Review the task and click Finish.
Your computer will restart once the undo is done.
Undo System Restore Windows XP
You can rely on the following steps to undo WinXP system restore.
- Close all your other running programs and services and save your data, especially the important files since the undo process will restart your computer.
- Start System Restore. From the Start menu, move to All Programs > Accessories > System Tools > System Restore.
- Select Undo My Last Restoration
- Click Next to go on.
- Click Next and Windows starts to undo the changes.
- When it is done, the PC will reboot and you should log into your Microsoft Account again.
- Click OK in the System Restore window.
Now, you will see that you have gone back to the system environment before restoring Windows.
Turn on System Protection in Windows 11/10
If you find the System Restore button is greyed out while trying to undo system restore within Windows, it is probably because you haven’t enabled your system protection! You can see the Protection status is Off in the below Protection Settings section.
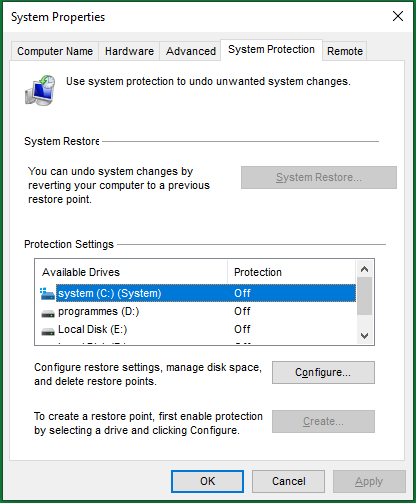
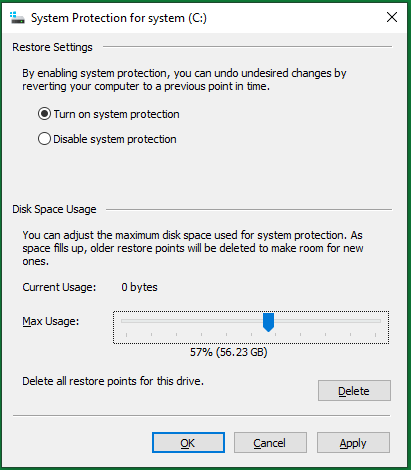
To turn on the system protection, click on the System item and select the Configure button below. Then, choose Turn on system protection and set up maximum disk space usage to manage the restore points. Finally, click Apply > OK.
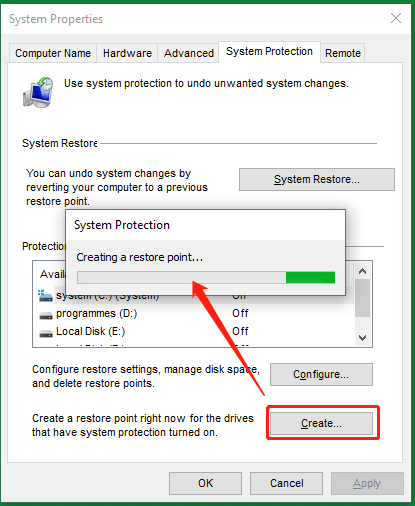
Then, you can create your first system restore point by clicking the Create button.
Create System Restore Point by MiniTool ShadowMaker
Besides data backup, MiniTool ShadowMaker can also back up OS regularly to create a necessary restore point for system protection. The below instructions apply to Windows 11, 10, 8, 7, XP, Vista.
MiniTool ShadowMaker TrialClick to Download100%Clean & Safe
1. Launch MiniTool ShadowMaker in Windows 11 and enter its main interface.
2. Still, move to its Backup tab.
3. It will automatically select the system-related items as the backup Source. Just keep its selection.
4. Click on the Destination module to determine the image file storage location.
5. Click on the Schedule button in the bottom left corner to open the schedule settings window.
6. Switch on the schedule settings and pick up a backup frequency that suits you most, daily, weekly, monthly, or on event (system log on or log off).

7. You can further choose backup type by clicking on the Scheme Switch on the scheme settings and select a backup scheme, incremental backup, differential backup, or just the full backup.
8. Moreover, you can customize the backup image file using the Options Click on it will show you the settings you can personalize. For example, split/compress/comment/encrypt/verify image file.
9. Finally, click on the Back up Now button to begin the task.
Then, MiniTool ShadowMaker will automatically create system restore points for you based on the set schedule. It will also automatically delete old system restore points according to the backup scheme you set up.
Perform System Restore with MiniTool ShadowMaker
Since you are able to make system restore points relying on MiniTool ShadowMaker, you can also make use of it to do a system restore in various Windows OSes including but not limited to Windows 11 and Windows 10.
MiniTool ShadowMaker TrialClick to Download100%Clean & Safe
1. Launch MiniTool ShadowMaker on your PC.
2. Go to its Restore tab to find the target system restore point creation task and click the Restore option on it.
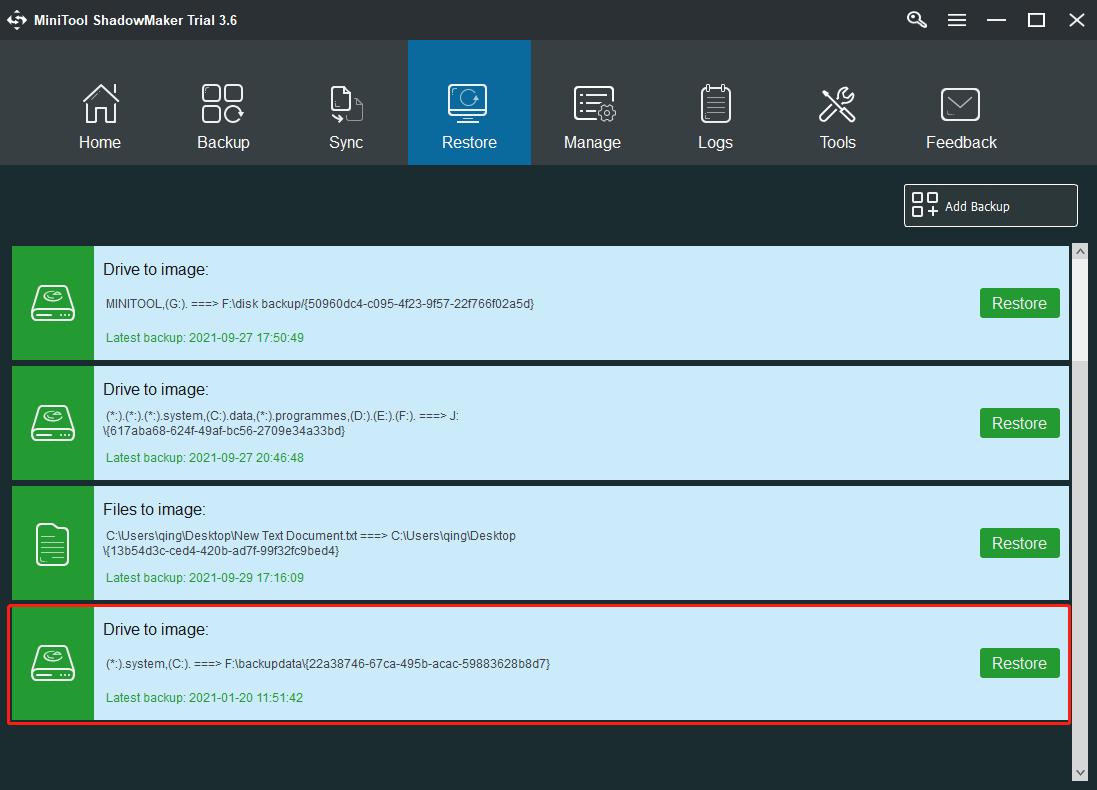
If you can’t find the task there but you know where the backup image is saved, just click the Add Backup option in the upper right and add the target system image to this list.
3. Select a backup version to restore.
4. Select which partitions/volumes to restore. All the system-related volumes are selected by default and you are recommended to keep the selection.
5. Select where to restore the system to. Just select your current system disk.
6. It will warn you about which partitions will be overwritten. Click OK to confirm and start the restoration.
Wait until it completes.
Undo System Restore Using MiniTool ShadowMaker
Of course, you can undo the system restore with the help of MiniTool ShadowMaker, but only apply to the restorations performed by the tool. If you have just conducted a system recovery to an earlier state with MiniTool ShadowMaker, you can repeat the process again but to the very latest system restore point. Then, you can enjoy your previous Windows environment again.
About The Author

Position: Columnist
Helen is a tech writer with over 10 years of experience. She specializes in creating easy-to-follow guides for video editing, media file conversion, and computer performance. Helen doesn't just write—she tests every software herself and listens to feedback from users and experts. Her goal is to make complex programs simple so that everyone can solve their tech problems with confidence.
User Comments :