The “Windows recovery drive not detecting USB” issue usually occurs due to disk size and file system limitations. To resolve it, ensure that the USB drive has a minimum capacity of 32 GB and can be formatted as FAT32. Alternatively, follow this MiniTool guide to create an installation media or a full system image as a backup solution.
A USB recovery drive is used to restore a computer to its original state, even when the system cannot boot normally.
This drive restores all Windows system files, updates installed when creating the drive, and customizations from the computer manufacturer.
Compared to a clean reinstallation of Windows, a recovery drive retains more customizations, making it a more inclusive backup solution.
However, in some cases, when you try to create a recovery drive, Windows may fail to recognize the USB drive and cannot continue the backup process.
“Create a recovery drive does not recognize my USB flash drive. The flash drive appears in File Explorer and is formatted and is 64 GB. I have tried several drives and get the same problem.”learn.microsoft.com
First, start exploring the possible reasons for this problem.
Why Is Windows Recovery Drive Not Detecting USB Drive
There are several reasons why Windows may not detect the USB drive when creating a recovery disk:
- The USB flash drive is not recognized by your computer.
- The current USB port is not compatible with the Windows recovery tool.
- Windows cannot format the USB drive to FAT32.
- The size of the USB drive does not meet the requirements for a recovery drive.
After identifying the underlying causes, proceed to fix the problem.
How to Fix if Windows Recovery Drive Does Not Detect USB Drive
Before attempting complex solutions, try some basic troubleshooting steps:
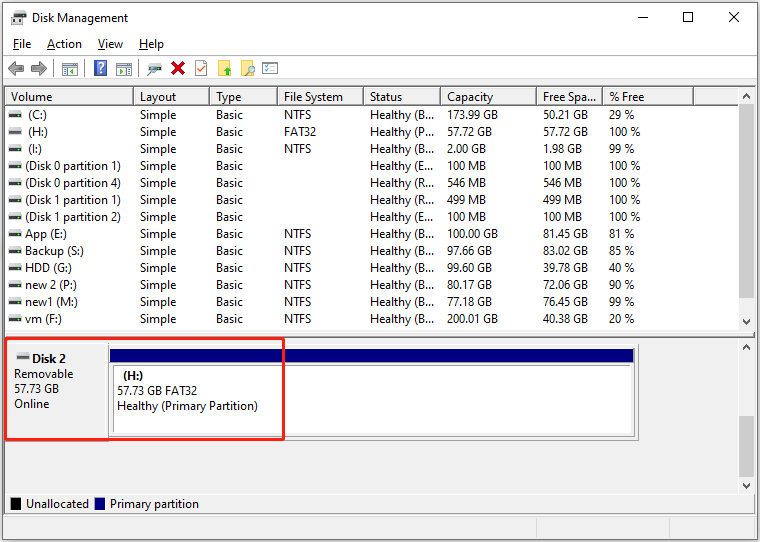
1. Check the USB drive in Disk Management
Open Disk Management and make sure the USB drive is displayed and appears normally. If it does not, there may be physical or logical issues with the USB drive that need to be resolved.
2. Reconnect the drive
Disconnect and reconnect the USB drive to ensure a stable connection. You can also try switching a USB port to rule out a damaged port.
3. Try another computer
Try initiating the recovery drive creation process on another computer to determine if the problem is associated with the current PC.
If none of these basic troubleshooting steps fix the issue, proceed with the following advanced solutions.
Fix 1. Make Sure the USB Drive Meets the Size Requirement
As the recovery drive creation wizard prompts, the minimum size for the USB drive is 16 GB. However, based on experimentation, backing up the system files to the USB drive typically requires a 32 GB drive.
If your USB drive does not meet this size requirement, try using a larger one and see if the issue is resolved.
Additionally, it is not recommended to use a drive larger than 32 GB, as many reports indicate that the recovery drive creation process works best with a 32 GB drive. This issue may be related to compatibility problems between the recovery tool and larger USB drives.
To check the disk size, right-click the Start button and choose Disk Management. The USB drive’s size and file system will be displayed.
If you are using a USB drive larger than 32 GB, proceed with the next solution to avoid detection issues.
Fix 2. Create a 32 GB FAT32 Partition
For larger USB drives, such as 64 GB or 128 GB, cleaning all existing partitions and specifying a 32 GB partition may resolve the issue.
This process eliminates potential conflicts caused by old data, the file system, and the partition table, which may prevent the recovery tool from detecting the USB.
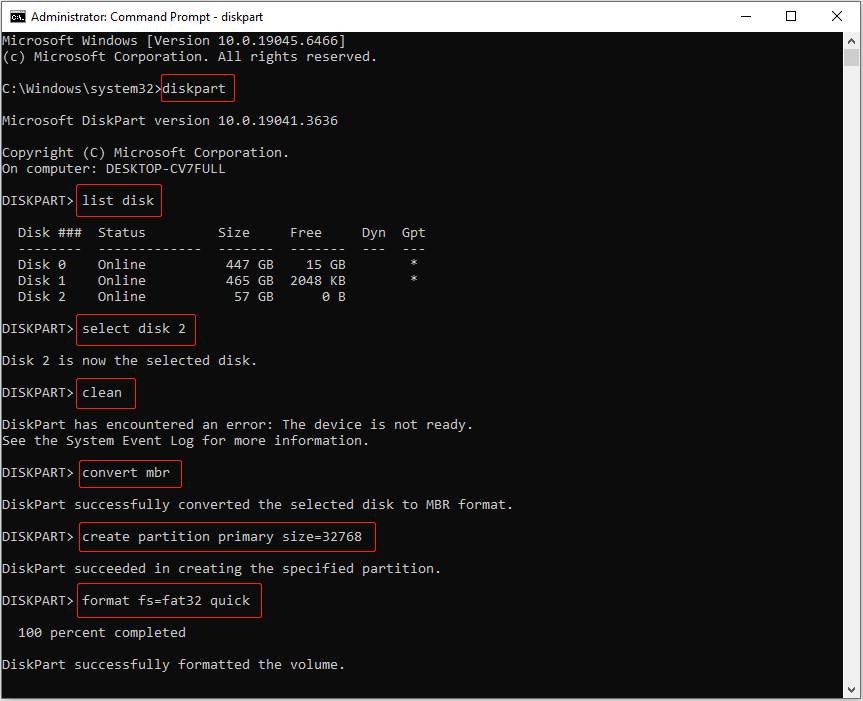
Follow the steps below to clean the disk and create a 32 GB partition:
Step 1. Type cmd in the Windows search box. When the Command Prompt option appears, right-click it and choose Run as administrator.
Step 2. Input the following commands one by one and press Enter after each:
- diskpart
- list disk
- select disk 2 (replace 2 with the actual number of your USB drive)
- clean
- convert mbr
- create partition primary size=32768
- format fs=fat32 quick
Now, try creating the recovery drive again and check if the USB drive is displayed. If not, use an alternative tool to create a system reinstallation media.
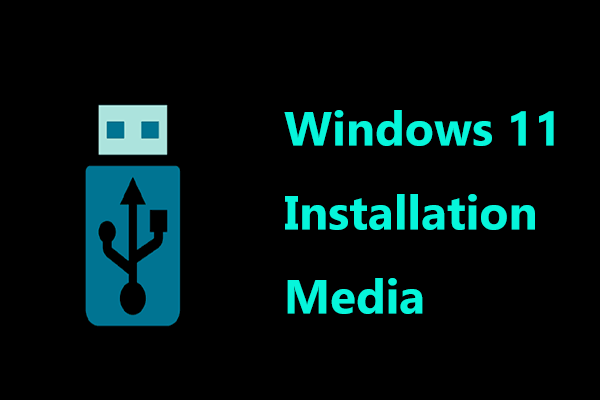
Fix 3. Use the Microsoft Media Creation Tool
If the recovery tool persistently refuses to detect the USB drive for recovery drive creation, consider creating a Windows installation media as an alternative approach.
The Microsoft Media Creation Tool is designed to create bootable media and allows you to perform either an in-place upgrade or a clean installation.
- In-place upgrade: Applicable when Windows boots normally, allowing you to preserve personal files, settings, and apps.
- Clean installation: Applicable when Windows fails to boot, removing all personal files, apps, and system customizations.
Step 1. Visit the following official websites and click Download Now under the Create Windows 11/10 Installation Media section.
Step 2. Launch the Media Creation Tool and follow the prompts to create a bootable drive.
System Backup Alternative – MiniTool ShadowMaker
Apart from the recovery drive and installation media, MiniTool ShadowMaker provides an effective solution for system backup.
It allows you to back up Windows 11/10/8.1/8/7 to a USB drive, external hard disk, or shared folder. Even if your computer fails to boot, you can restore your system from the backup image for free.
Furthermore, you can configure the backup file to update regularly (daily, weekly, monthly, or when an event occurs). This ensures that the backed-up system files and personal files remain up-to-date.
Download and install MiniTool ShadowMaker Trial to experience its backup features for free for 30 days.
MiniTool ShadowMaker TrialClick to Download100%Clean & Safe
Step 1. Launch MiniTool ShadowMaker and click Keep Trial to get the main interface.
Step 2. Switch to the Backup tab from the left sidebar.
Step 3. In the SOURCE section, all system-related partitions are selected by default. Click the DESTINATION tab to select an external disk or shared folder to store the backup image file.
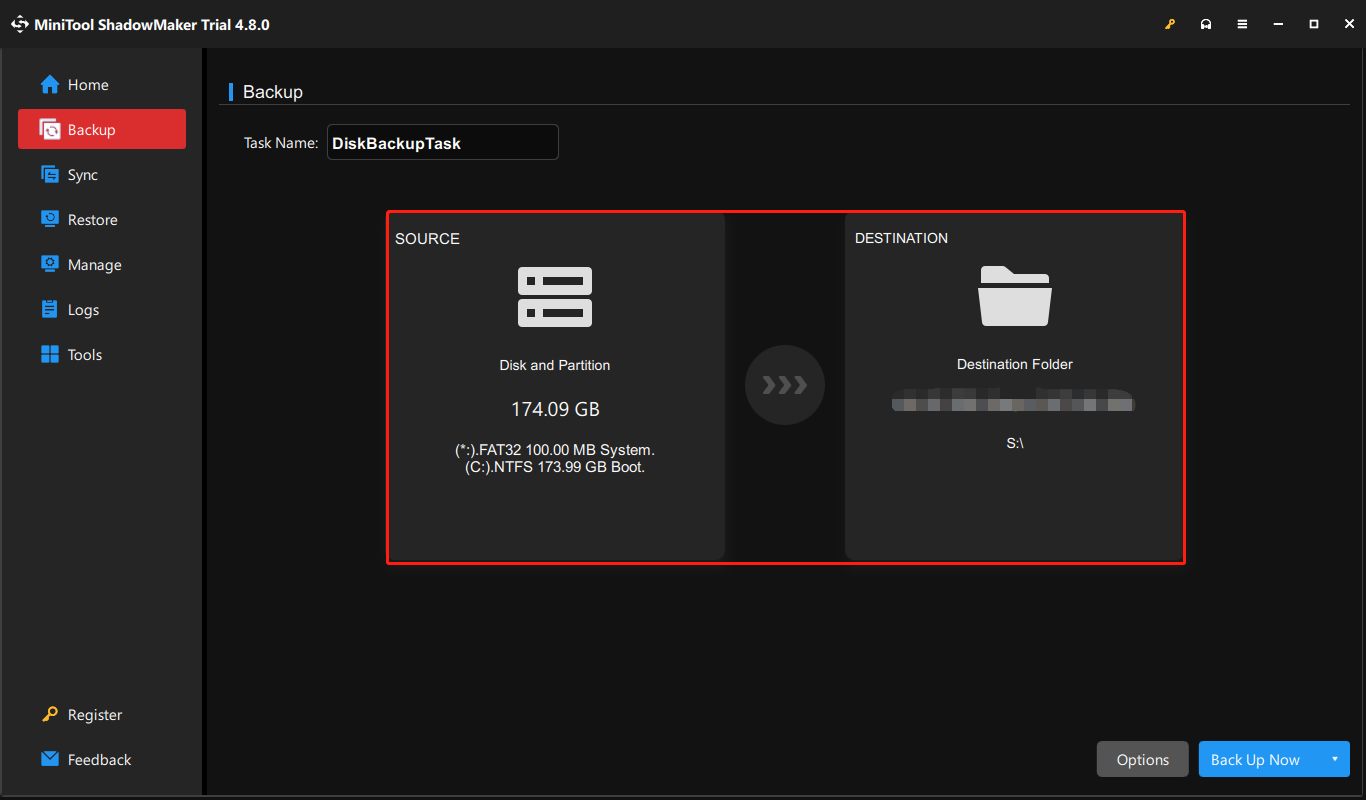
Step 4 (optional). To set up backup schemes (full, incremental, and differential) and automatic backup schedule settings, click Options.
Step 5. Click Back Up Now to start the backup process.
Here is a table showing the comparison of the recovery drive, installation media, and MiniTool ShadowMaker.
| USB recovery drive | Installation media | MiniTool ShadowMaker | |
| Purpose | Restores Windows to its original state. | Reinstall Windows. | Restore the system to a previous state. |
| USB drive requirement | USB drive | USB drive or DVD | USB drive, external hard drive, or shared folder. |
| Required space | 32 GB | 8 GB | At least the size of system-related partitions. |
| Supported file system | FAT32 | NTFS or FAT32 | All file systems supported by Windows, such as NTFS, FAT32, and exFAT. |
| Personal files | Does not back up personal files. | An in-place upgrade allows you to preserve files, while a clean installation removes all files. | Preserves personal files in system partitions. |
| Backup management | Requires recreating the recovery drive to include the latest system updates. | Requires recreating the installation media for the latest updates. | Supports scheduling automatic backups at regular intervals. |
Read More:
If you prefer using the Windows recovery drive for system backup, it is still recommended to back up personal files regularly to prevent data loss.
MiniTool ShadowMaker supports backing up files, folders, partitions, and disks to an external hard drive or shared folder for free for 30 days.
Bottom Line
In summary, to fix the “Windows recovery drive not detecting USB” issue, begin with basic checks, such as reconnecting the drive or using a different USB port.
If these measures do not resolve the issue, ensure that the USB drive’s size and file system meet the requirements of the recovery tool.
Furthermore, there are two alternative solutions for system backup: installation media and MiniTool ShadowMaker.
If you need any help when using MiniTool products, please send an email to the support team at [email protected].
Windows Recovery Drive Not Detecting USB FAQ
1. The USB drive is not properly connected to the computer or is physically damaged.
2. USB drives are disabled in BIOS settings.
3. The Compatibility Support Module (CSM) is not enabled in BIOS.
About The Author

Position: Columnist
Shirley holds a bachelor’s degree in English and has been an editor at the MiniTool Team for many years. She specializes in IT-related content, with a focus on data recovery, file backup, disk management, and other technical topics. She is committed to delivering clear, accurate, and practical solutions to help users resolve common computer issues.
User Comments :