In order to update your computer normally, it’s essential to fix the issue that Windows Update keeps turning off. You can try to disable antivirus, perform a clean boot, modify the registry, reset update components, and so on. Read more in the MiniTool post.
Why Does Windows Update Keep Turning Off
Windows Update is a Microsoft service for Windows, which helps you keep your computer up-to-date.
It automatically downloads and installs updates. These updates not only include patches and upgrades of key system files, but also cover optimized drivers, security patches, and new features.
Once the Windows Update feature obtains new updates, it will push and remind you to download and install them.
However, some users report that their Windows Update service is being automatically disabled constantly. This drives them crazy. Actually, Windows Update can turn off due to:
- Corrupted update files.
- Antivirus interference.
- Problems with the Windows Update service.
- Malware infection.
- Incorrect date and time settings.
To fix the issue that Windows Update service keeps getting disabled, you will find 9 feasible solutions in this guide.
Suggestion: Back up Data Before Major Events
Computer system issues are pretty common during updates. Therefore, it is generally recommended that you back up your data before major events, like updating.
Here, before trying the following troubleshooting steps, you should also make a file backup as a quick recovery solution.
To create a backup for your computer, a piece of free PC backup software called MiniTool ShadowMaker can satisfy all your needs. It supports system backup, disk backup, partition backup, file & folder backup, file sync, disk cloning, etc.
More importantly, you can run MiniTool ShadowMaker to backup data regularly and create differential or incremental backups for newly added data.
Now, let’s see how to back up files with MiniTool ShadowMaker:
Step 1. Download, install, and launch this freeware > hit Keep Trial to enter its main interface.
MiniTool ShadowMaker TrialClick to Download100%Clean & Safe
Step 2. Go to the Backup page.
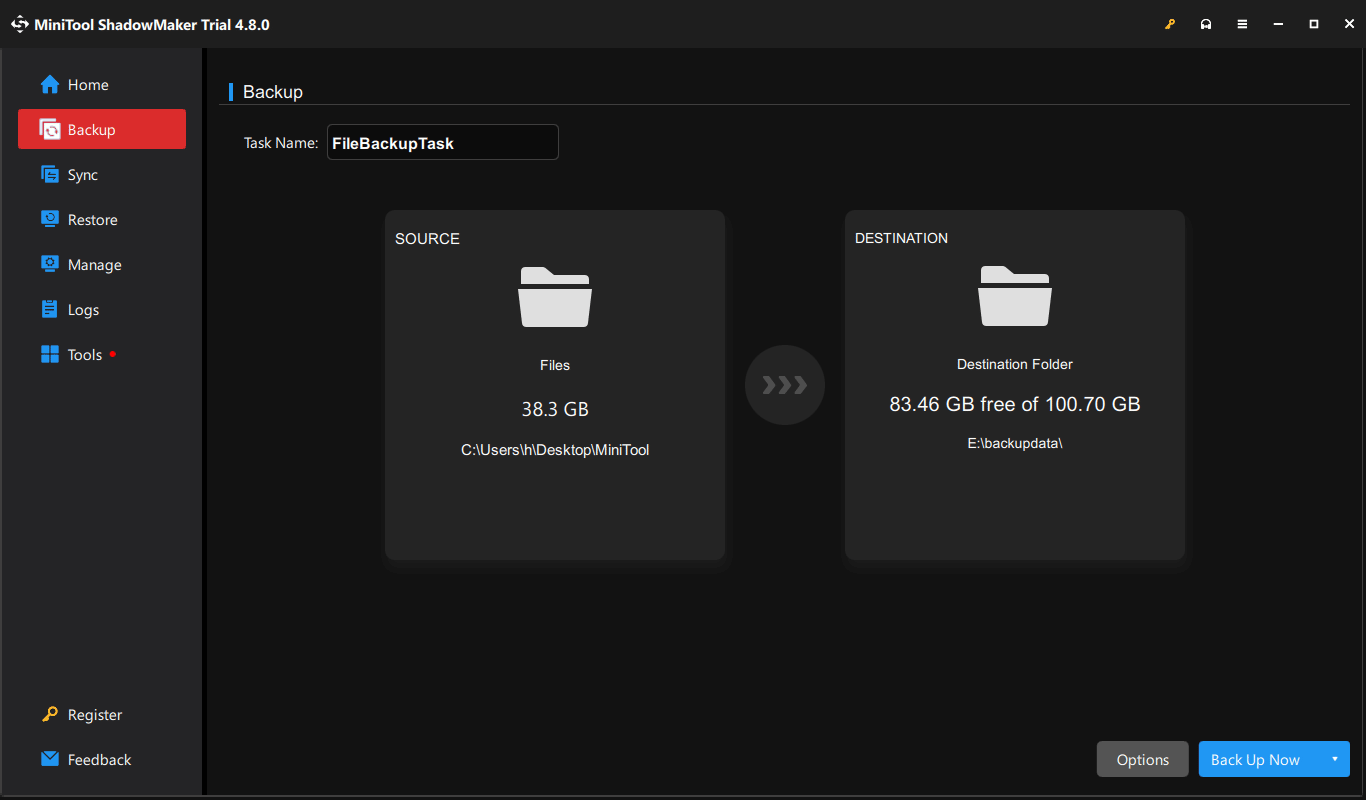
- Hit SOURCE > Folders and Files > select the crucial files you want to keep > tap on OK.
- Click DESTINATION > choose a storage path like an external hard drive or a USB flash drive > hit OK.
Step 3. After making your choice, click on Back Up Now to start the process at once.
How to Fix Windows Update Constantly Disabling
Before proceeding with the following workarounds, you can try some basic fixes:
- Restart the device.
- Check Internet connection.
- Disconnect external hardware.
If these steps cannot do the trick, then try the fixes below, such as running Windows Update troubleshooter, clearing the update cache, changing registry, or performing a clean boot.
Solution 1. Run Windows Update Troubleshooter
The Windows Update troubleshooter can identify and repair some common issues that prevent Windows Update from working properly. Running it may fix the disabled Windows Update service.
Follow the instructions to perform it:
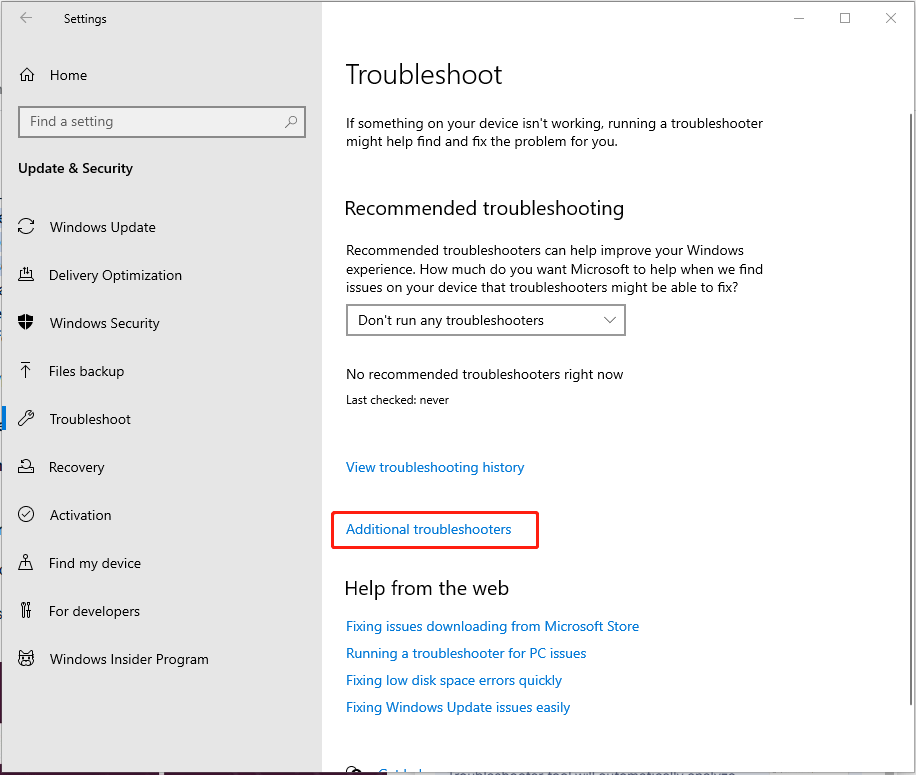
Step 1. Go to the Start menu > choose Settings > Update & Security.
Step 2. From the left-hand menu, select Troubleshoot, then click on Additional troubleshooters.
Step 3. Under the Get up and running section, select Windows Update and hit Run the troubleshooter.
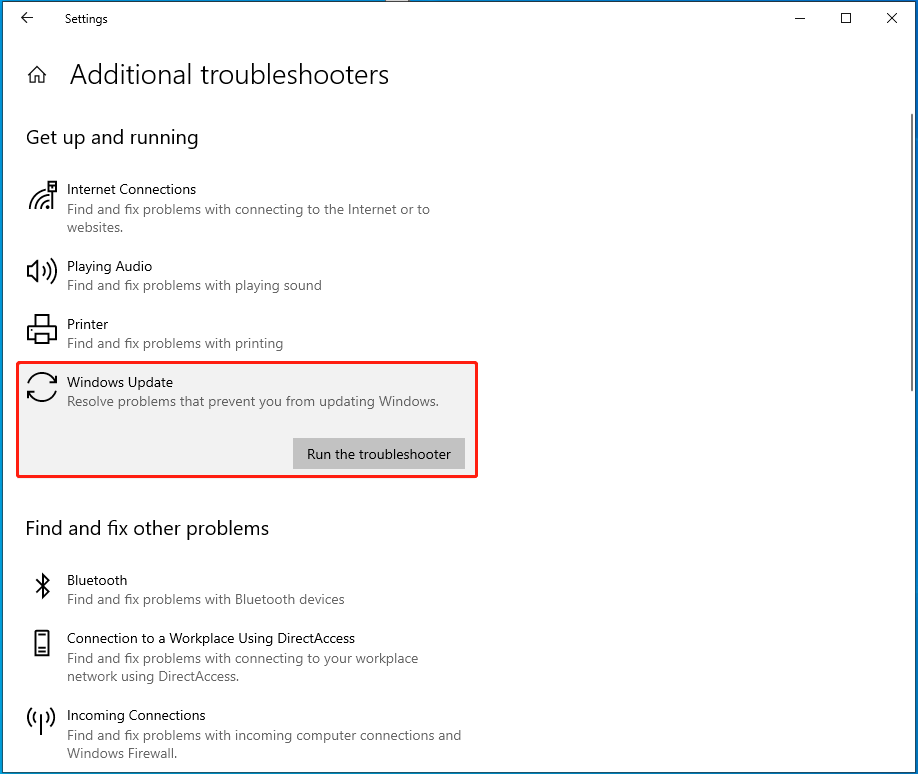
Step 4. Then follow the on-screen instructions to complete the process.
![[Full Guide] How to Fix Windows Update Troubleshooter Not Working](https://images.minitool.com/minitool.com/images/uploads/2023/03/windows-update-troubleshooter-not-working-thumbnail.png)
Solution 2. Clear Windows Update Cache
When the system is downloading and installing updates, the relevant files will be temporarily stored in the local cache directory. If these cached files are damaged or incomplete, Windows Update may fail to properly parse their contents, causing errors.
Now, to fix the problem that Windows Update turned off by itself, you can clear the cache by following these steps:
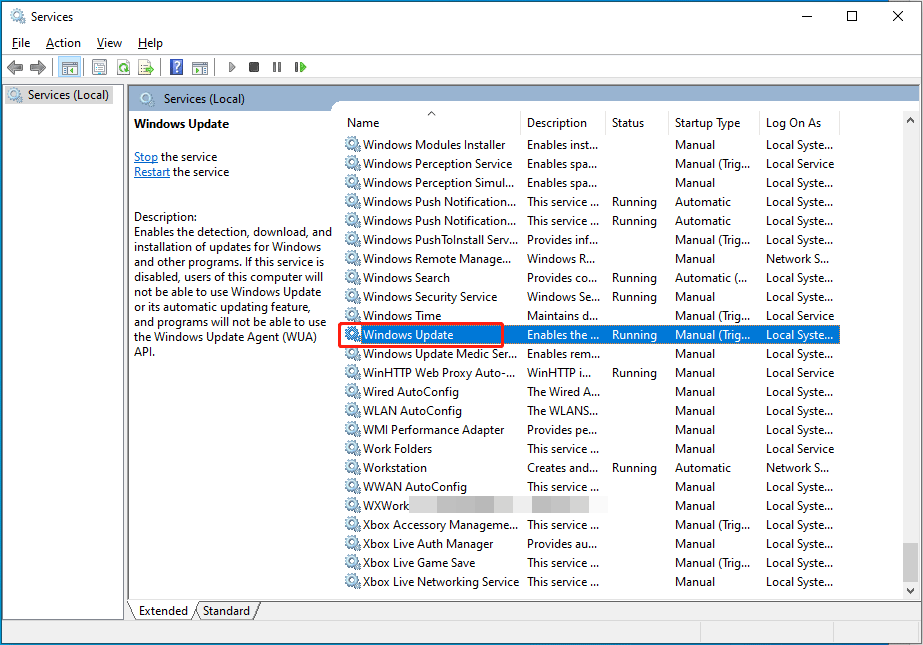
Step 1. Press Win + R to open the Run dialog box, type services.msc, and hit Enter.
Step 2. Locate the Windows Update service, right-click it, and select Stop.
Step 3. Next up, access your File Explorer by pressing Win + E > navigate to C:\Windows\SoftwareDistribution.
Step 4. Delete all files and folders inside this directory.
Step 5. Go back to the Services window, right-click on Windows Update, and select Start.
Try to update Windows again to see if it goes well.
Solution 3. Verify Date and Time Settings
Incorrect date and time settings may cause Windows updates to keep automatically shutting down. This is because Windows Update relies on accurate system time and date to verify server certificates, synchronize update content, and ensure security.
When the computer’s date or time is not in line with the actual time, the system may fail to connect to the update server, triggering security mechanisms and preventing the update process.
In this way, it’s essential to check the date and time settings on your PC.
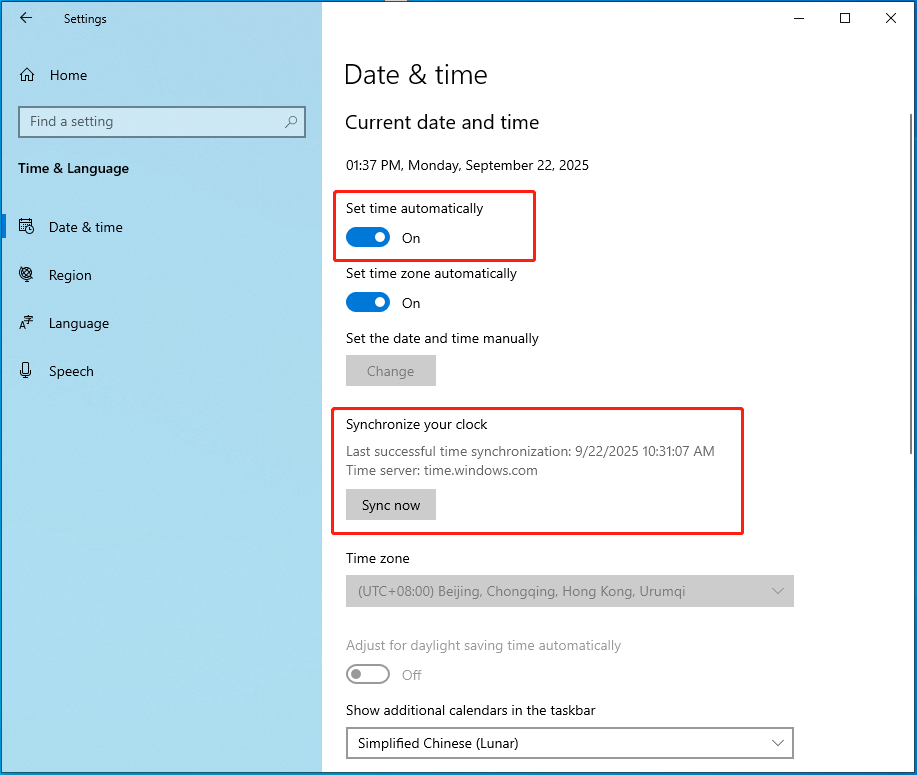
Step 1. Press Win + I to bring up Settings > choose Time & language.
Step 2. From the left-hand pane, select Date & time.
Step 3. Enable Set time automatically and, if needed, click Sync now under Synchronize your clock.
Solution 4. Disable Antivirus
Windows Security or antivirus software is a common cause of Windows Update problems since it may conflict with the Windows Update components. You can disable them to see if it helps. Let’s see how to do that:
# Disable the Antivirus Software
Here, we take Avast as an example.
Step 1. Right-click on the antivirus icon in the system tray.
Step 2. Select Manage Shields from the shortcut menu > choose Disable permanently.
Step 3. Now, launch Windows Update and check if it still keeps stopping.

# Turn off Windows Security
Step 1. Search for Windows Security from the search bar > choose the top result.
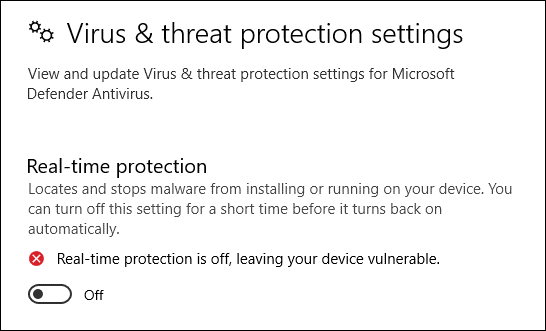
Step 2. Choose Virus & threat protection > Manage settings under Virus & threat protection settings.
Step 3. Turn off the Real-time protection option.
Then you can try to update Windows again.
Solution 5. Change Registry
The Windows Update service fails to start properly, or there are corrupted files in the Windows Update folder. These issues can be resolved by restarting Windows Update and modifying the registry keys.
Follow the steps below to make the registry changes.
Step 1. Type Command Prompt in the search box and right-click the best match to choose Run as administrator.
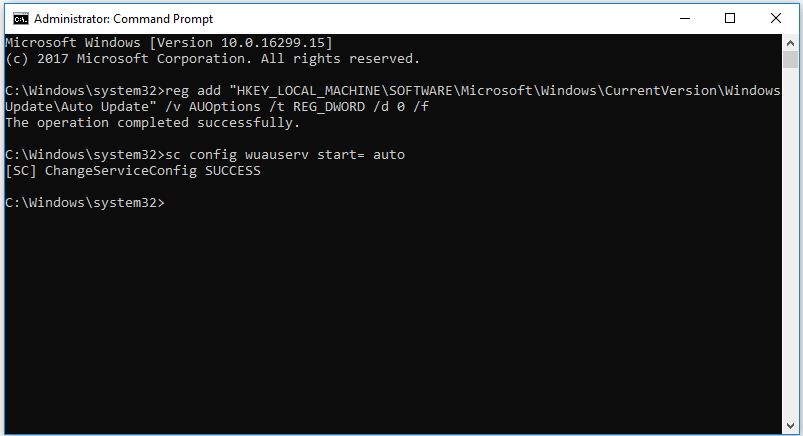
Step 2. In the command line window, type the following command and hit Enter.
reg add “HKEY_LOCAL_MACHINE\SOFTWARE\Microsoft\Windows\CurrentVersion\WindowsUpdate\Auto Update” /v AUOptions /t REG_DWORD /d 0 /f
Then execute the sc config wuauserv start= auto command.
Step 3. After running the commands, close the command window and restart the PC.
Now you can try to update Windows again.
Solution 6. Update Third-Party Drivers
Obsolete drivers could cause Windows Update to stop working constantly. Check for your drivers, including third-party ones. Once you find any outdated drivers, update them immediately.
Here’s how to fix the problem that Windows Update keeps disabling itself by updating drivers in Device Manager:
Step 1. Right-click on the Windows icon > choose Device Manager.
Step 2. Right-click on the hardware that needs to be updated> choose Update driver > Search automatically for drivers. Check and update all the outdated drivers.
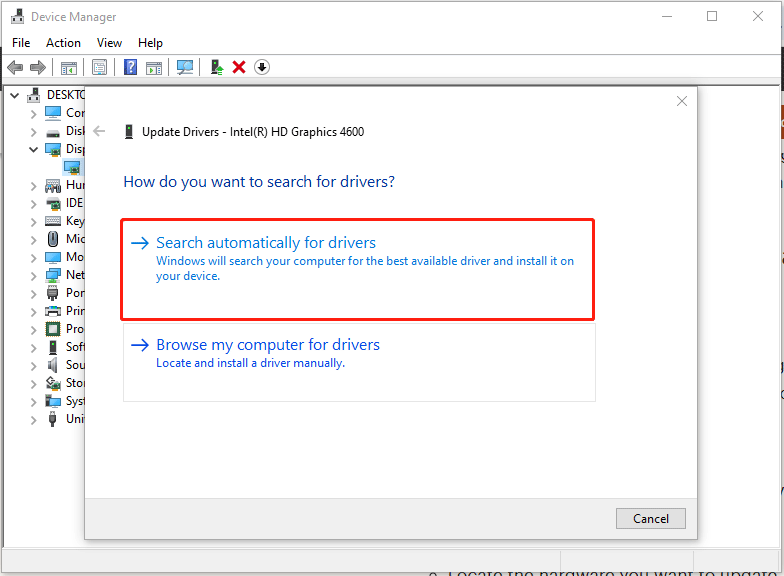
Then Windows will find and install the latest version from its database. While Device Manager is convenient, it may not always locate the latest drivers. For some hardware, it’s often best to get drivers directly from the manufacturer.
After updating, try to run updates again and see if this resolves your issue.
Solution 7. Reset Windows Update Components
Resetting Windows Update components will fix those corrupted components and help to address the problematic Update service quickly.
To reset the Update components, follow these steps:
Step 1. Open Command Prompt as an administrator through Windows Search.
Step 2. In the command line window, type the commands below in turn and press Enter after each command.
net stop bits
net stop wuauserv
net stop appidsvc
net stop cryptsvc
Ren C:\Windows\SoftwareDistribution SoftwareDistribution.old
Ren C:\Windows\System32\catroot2 Catroot2.old
net start bits
net start wuauserv
net start appidsvc
net start cryptsvc
Step 3. Restart your PC and try to install Windows Update again.
Solution 8. Free up Some Space
Make sure that your device has sufficient storage space. If your PC is running low on storage, try to free up drive space in Windows. Here’s how to do that:
Step 1. Open File Explorer and go to This PC.
Step 2. Right-click on one of your drives and select Properties from the context menu.
Step 3. Under the General tab, click on Disk Cleanup.
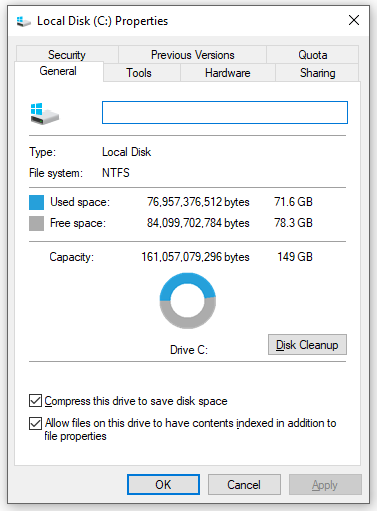
Step 4. Tick the file types you want to delete and hit OK > Delete Files to start the process.
MiniTool ShadowMaker TrialClick to Download100%Clean & Safe
Solution 9. Perform a Clean Boot
Starting Windows with a minimal set of drivers and startup programs, a clean boot can troubleshoot and identify software conflicts. In this environment, you can pinpoint which services or third-party apps are interfering with Windows Update.
We’ve outlined the steps on how to perform a clean boot in Windows 11/10:
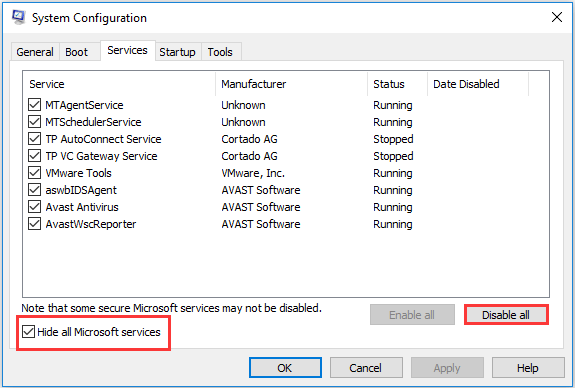
Step 1. Launch the Run window by pressing Win + R > input msconfig in the box > hit Enter.
Step 2. In the System Configuration box, head to the Services tab > check Hide all Microsoft services at the bottom > tap on Disable all.
Step 3. Go to the Startup tab > click the Open Task Manager link > select the startup programs you don’t need > hit Disable to disable them one by one.
Step 4. Exit Task Manager and click Apply & OK in System Configuration.
Step 5. Now, reboot your computer and then run Windows Update again.
If it works fine, then verify and uninstall the problematic third-party apps in the clean boot state.
After the uninstallation is completed, reset your computer to start normally.

Verdict
In conclusion, the problem that Windows Update keeps disabling might be frustrating, but there are multiple solutions you can try to fix it. Furthermore, it’s a good option to create a data backup as a quick remedy. MiniTool ShadowMaker is worth a try!
Do you have other problems with our product? If yes, please let us know via [email protected]. Our support team will reply to you as soon as possible!
Windows Update Keeps Turning Off FAQ
It will be unable to obtain new features, improvements, and compatibility support with the latest software and hardware. Finally, the system will gradually become outdated.
2. The update progress has remained unchanged for a long time.
3. The computer frequently restarts and gets stuck in the same interface.
Once that happens, you will need to do a complex data recovery. And in some cases, the entire Windows system may need to be reinstalled, posing the risk of data loss. Therefore, be sure not to interrupt the updating process.
User Comments :