The Windows Update service could not be stopped issue may arise from missing admin privileges or an interrupted update. MiniTool suggests several solutions, including clearing the update cache and performing a repair installation.
What Is Windows Update Service
The Windows Update service (wuauserv) is a background process in Windows that automatically downloads and installs updates, including security patches, drivers, and feature enhancements.
This service is essential for maintaining the security and stability of your PC. It runs in the background and connects to Microsoft’s servers to check for and apply new software updates.
However, some people report that they encounter issues while they try to stop this service temporarily. Can’t you stop the Windows Update service? If so, continue reading to know the reasons and get some useful solutions.
Why the Windows Update Service Could Not Be Stopped
Windows update service could not be stopped on Windows 10/11 due to various reasons. They are:
- Dependent services: Other system components may depend on the Windows Update service, preventing it from stopping.
- Missing administrator privileges: Missing the administrator privileges to run the command prompt may also block you from stopping the Windows Update service.
- Issues with the computer: If there are critical issues with your Windows OS, the Windows Update service may also be unable to stop.
- Corrupt files: Corrupted update files or temporary files can cause the Windows Update service to be unable to stop.
- System file corruption: Damaged system files can interfere with the normal operation of services and prevent the Windows Update service from being stopped.
- Stuck update process: If an update process is simply stuck, the Windows Update process may also be unable to stop.
Suggestion: Back Up Files to Protect Your Data
Sometimes, Windows Update problems may erase your data. Although a professional data recovery tool is available to restore them, your data is still under threat.
Therefore, it is recommended to use a data backup tool to secure your data. MiniTool ShadowMaker is such a powerful Windows backup software.
This software can help you perform file backup, server backup, system backup, and data backup. Just follow a few simple steps to successfully back up your data.
Here’s how to use it to back up your data:
Step 1. Download and install MiniTool ShadowMaker on your computer.
MiniTool ShadowMaker TrialClick to Download100%Clean & Safe
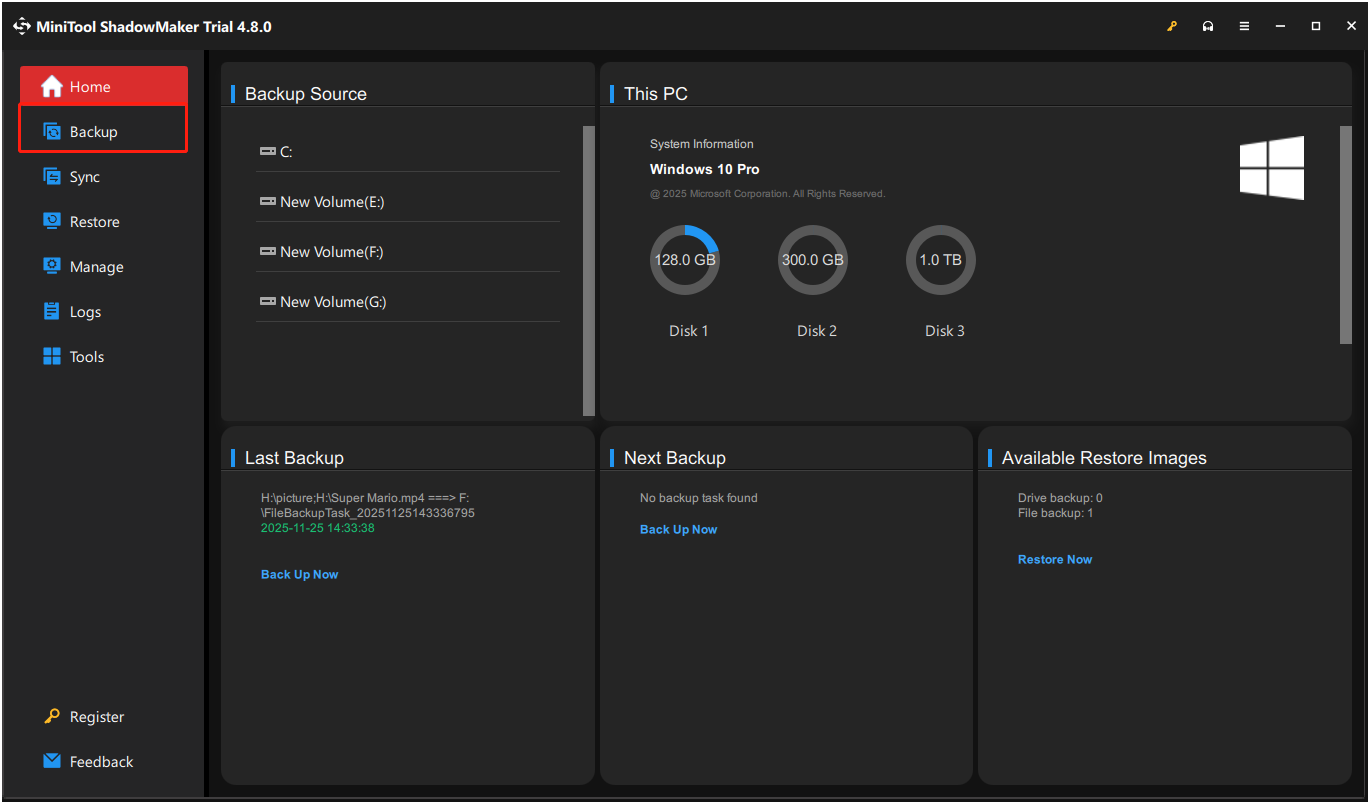
Step 2. Launch this app to enter the main interface and select Backup from the left panel.
Step 3. Go to SOURCE, select Folders and Files, and check the files that you want to back up. Then, click OK.
Step 4. Go to DESTINATION, choose a location to save the backup files, and click OK.
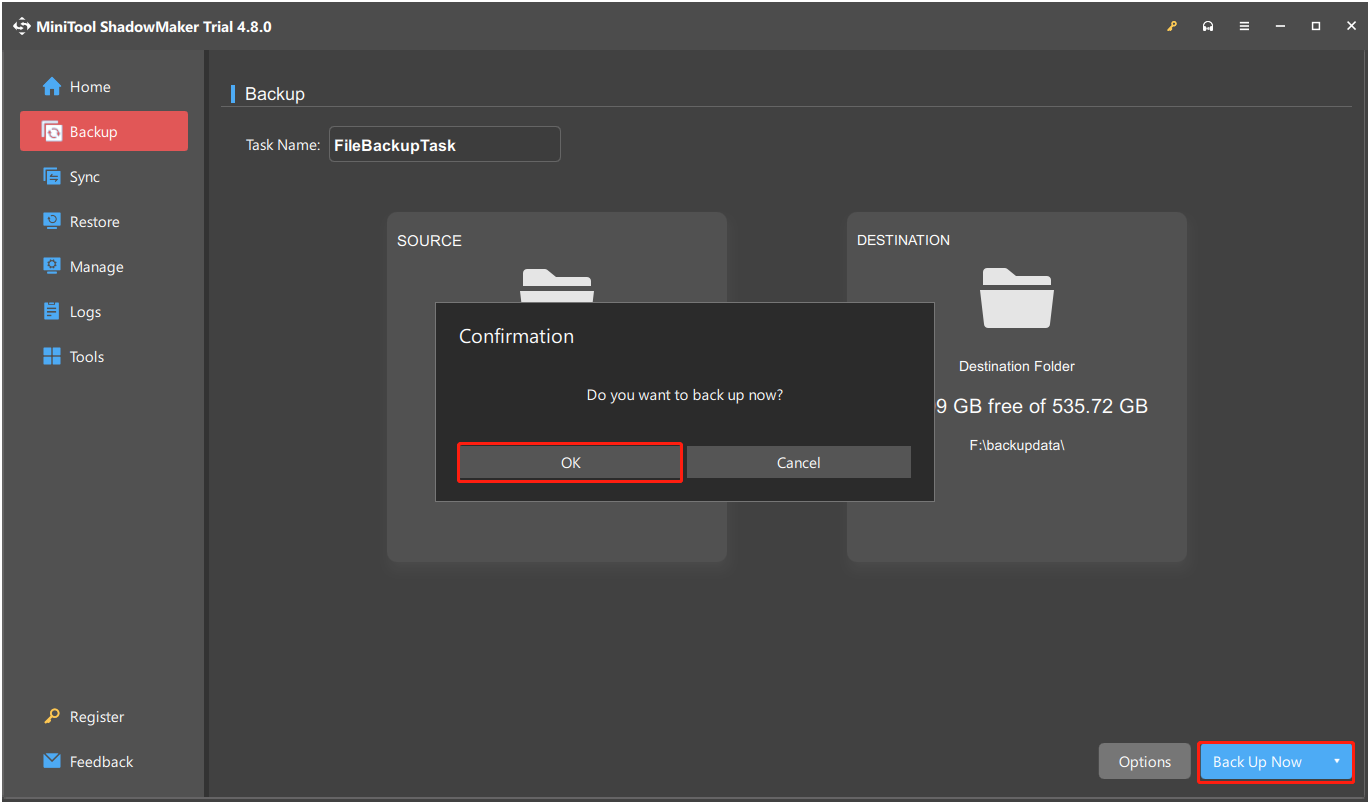
Step 5. Click Back Up Now at the bottom right corner. Then, click OK in the prompted Confirmation window.
How to Fix Windows Update Service Could Not Be Stopped
To fix the Windows update service stuck stopping issue, try stopping the Windows Update service by PID, running SFC and DISM, performing a repair installation, and other approaches.
Here’s the detailed breakdown:
Approach 1. Reboot the PC
If you have pending updates, the Update components may be unable to stop. Rebooting the PC restarts the OS services and applies pending updates. Therefore, try this method to fix the issue.
Approach 2. Use Windows Update Troubleshooter
When you cannot disable Windows Update service on Windows 10/11, try using the Windows Update troubleshooter. It is a built-in tool to troubleshoot the update-related issues. Here’s how to run it:
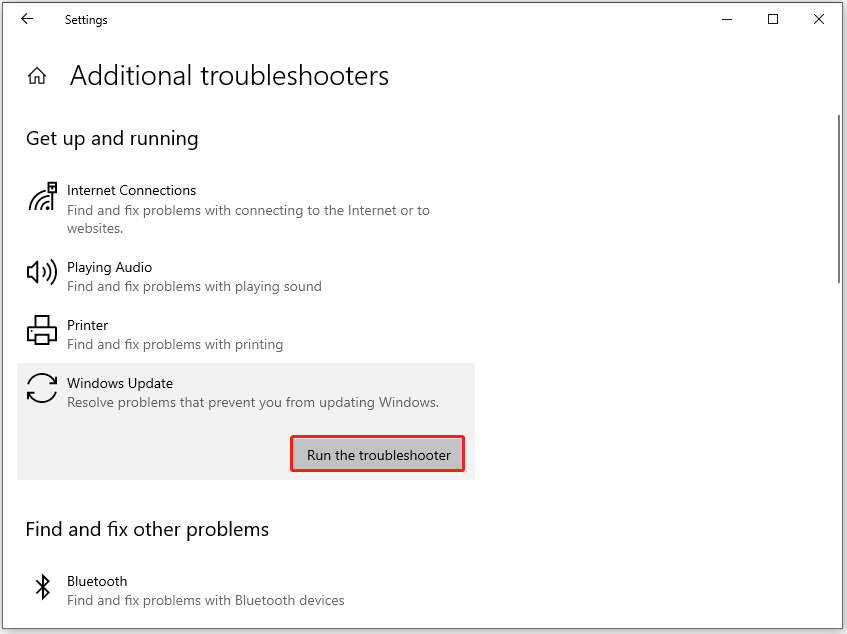
Step 1. Press Win + I to open Settings.
Step 2. Navigate to Security & Update > Troubleshoot. Then, click Additional troubleshooters.
Step 3. Choose Window Update and click Run the troubleshooter.
Step 4. Once done, restart your PC and then check if the issue has been resolved.
Approach 3. Disable Third-Party Antivirus Software
Sometimes, you can’t stop Windows Update service due to the interference from third-party antivirus software. In this case, try temporarily disabling any third-party antivirus software to solve the issue. Here are the steps:
- Locate the third-party antivirus software icon in the system tray.
- Right-click the icon and select the disable option, such as Disable protection, Pause protection, Exit, or Turn off.
- Choose a time frame if the program asks you to select how long to disable.
- Confirm your choice if a window pops up.
Approach 4. Stop Windows Update Service by PID
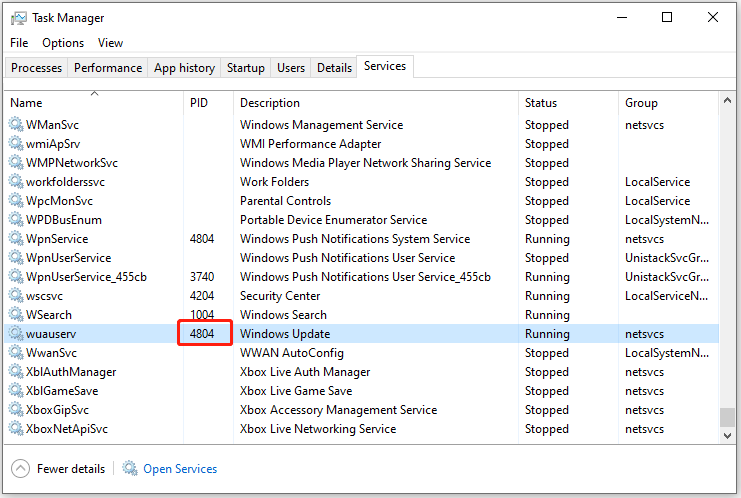
A PID is a unique identifier typically used to refer to a Process ID, which is a number assigned to each running program on a computer. If you are unable to stop the Windows Update service, try doing so by using the PID command. Here’s how to do that:
Step 1. Press Ctrl + Shift + ESC to open Task Manager.
Step 2. Go to the Services tab, find the wuauserv service from the list, and then note the PID number on paper.
Step 3. Press Win + S to open the Search window, type “cmd” in the search box. Then, find Command Prompt from the search result, right-click it, and select Run as administrator.
Step 4. In the elevated Command Prompt window, type “taskkill /f /pid PID” and press Enter.
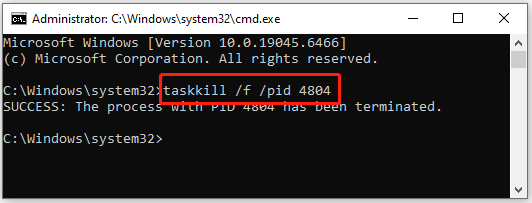
After executing the command, if Command Prompt indicates that the process with the PID has been successfully terminated, you have stopped the Windows Update service on your PC.
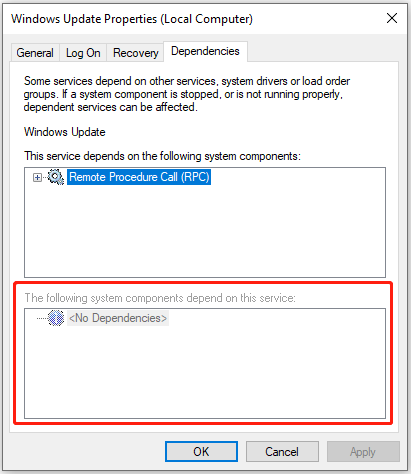
Approach 5. Check Service Dependencies
If there are dependencies between the Windows Update service and other services, you won’t be able to stop the Windows Update service. In this case, the other service that is running concurrently relies on the Update service, preventing you from stopping it.
To resolve this issue, you need to identify the dependent services and stop them first. Here’s how to do that:
Step 1. Press Win + R to open Run, type “services.msc” and press Enter.
Step 2. Scroll down to find the Windows Update service, right-click it, and select Properties.
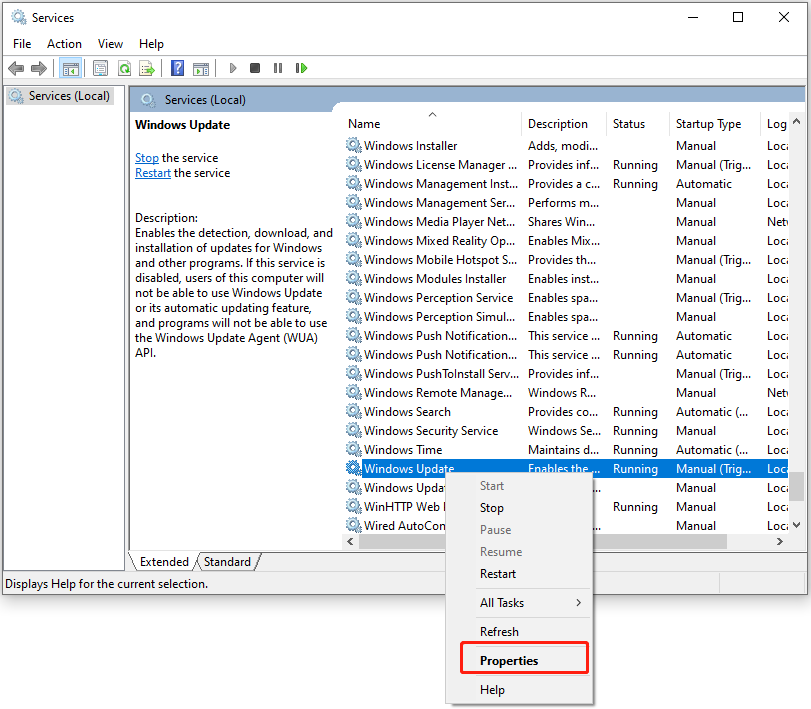
Step 3. Navigate to the Dependencies tab. If you see any services listed under The following system components depend on this service, right-click that service, and click on Stop.
If the service can’t be stopped, find the PID using Approach 3 and stop it that way.
Approach 6. Run SFC and DISM
Corrupted system files may also interrupt the update process and then make you cannot disable Windows Update service. In this case, perform the SFC and DISM commands to troubleshoot the issue. Here’s the guide:
Step 1. Run Command Prompt as administrator.
Step 2. Type “sfc /scannow” and press Enter.
Step 3. Initiate a DISM scan by running the commands below:
- DISM.exe /Online /Cleanup-Image /ScanHealth
- DISM.exe /Online /Cleanup-Image /CheckHealth
- DISM.exe /Online /Cleanup-Image /RestoreHealth
Step 4. Try to stop the Windows Update service and check if the issue has been resolved.
Approach 7. Clear the Update Cache
The Windows Update folder contains all files related to system updates. Additionally, you can try clearing the update cache to resolve the issue of the Windows Update service being stuck in the stopping state. Here’s how to do that:
Step 1. Run Command Prompt as administrator.
Step 2. Type the following command and press Enter after each command:
- net stop wuauserv
- net stop bits
Step 3. Press Win+ E to open File Explorer and go to this location: C:\Windows\SoftwareDistribution.
Step 4. Press Ctrl + A to select all files in this folder, right-click them, and select Delete.
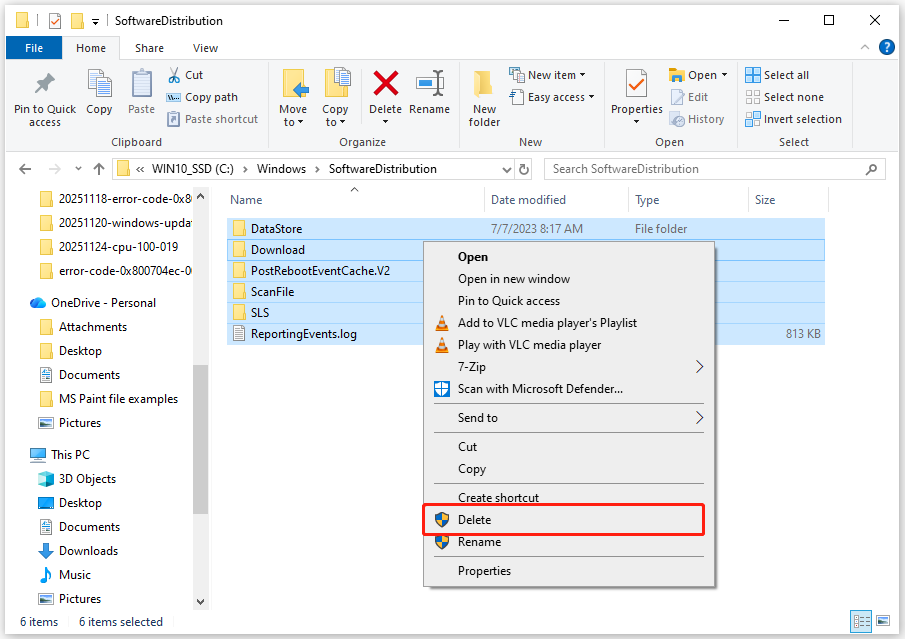
Step 5. If you wish to restart both the BITS and the Windows Update service, run the following set of commands in Command Prompt:
- net start wuauserv
- net start bits
Approach 8. Use a Batch Script
A Batch Script is a plain text file containing a series of commands for the Windows command-line interpreter (cmd.exe) to execute in sequence.
Batch files (.bat or .cmd) automate repetitive tasks such as file management, system maintenance, and software deployment.
If the Windows Update service keeps restarting, use a batch script that continuously stops it. Here are the detailed steps:
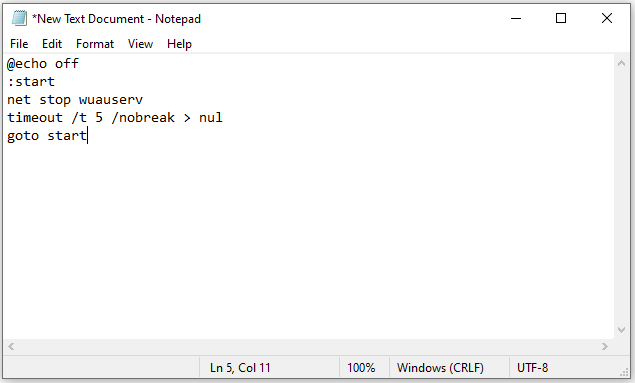
Step 1. Open Notepad and paste the following code.
- @echo off
- :start
- net stop wuauserv
- timeout /t 5 /nobreak > nul
- goto start
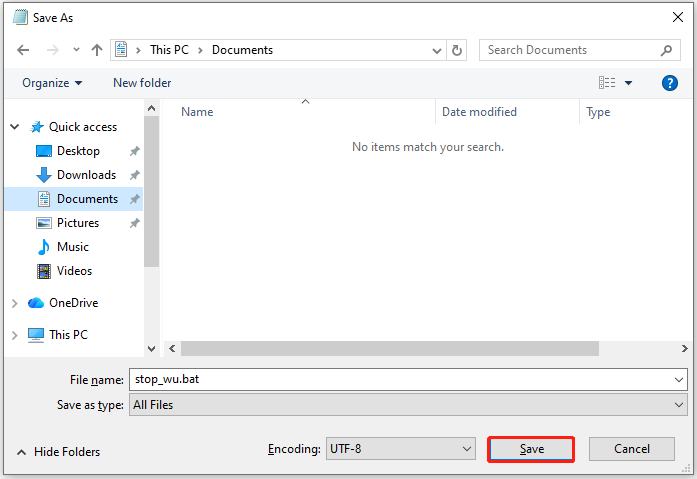
Step 2. Click File and select Save as.
Step 3. Set the File name as xxx.bat (e.g., stop_wu.bat) and select All Files from the drop-down menu of Save as type. Then, click Save.
Step 4. Right-click the file and select Run as administrator. Now, it will stop the Windows Update service whenever it starts.
Approach 9. Perform a Repair Installation
A repair installation fixes operating system issues by reinstalling the OS over the existing one. Additionally, it resolves problems with system files and built-in apps while keeping personal files, apps, and settings intact.
If none of the above approaches can help you solve the Windows update service stuck stopping issue, try performing a repair installation. Here’s how to do that:
# 1. Create Windows 10 Installation Media
Step 1. Open your browser and navigate to the Download Windows 10 website.
Step 2. Find the Create Windows 10 installation media section and click Download Now to save the Media Creation Tool to your computer.

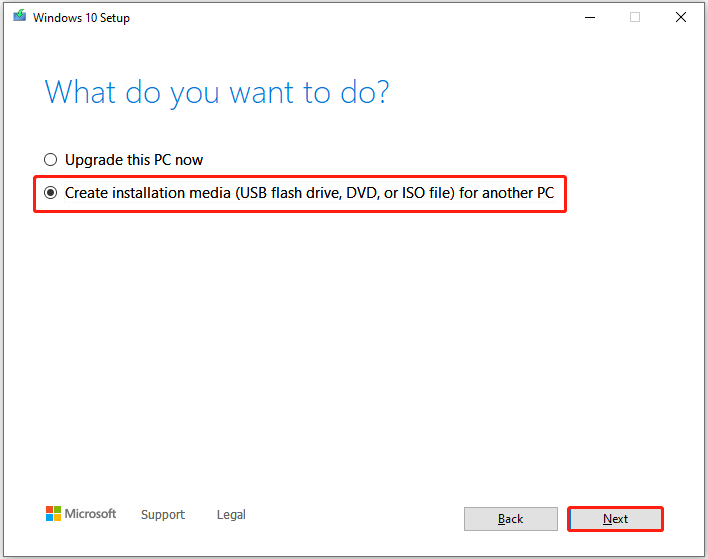
Step 3. Run the Media Creation Tool and accept the license terms.
Step 4. Select Create installation media (USB flash drive, DVD, or ISO file) for another PC and click Next.
Step 5. Click Next in the Choose your language, edition, and architecture page.
Step 6. Select ISO file and click Next. Then, choose a location to store the ISO file and click Save.
Step 7. Once the process is complete, click Finish to exit the tool. Now, the Windows 10 ISO file has been created successfully.
# 2. Perform a Repair Installation
Step 1. Find the Windows ISO file in File Explorer, right-click the file, and select Mount.
Step 2. Open the mounted drive and double-click on Setup.exe to start the installation process.
Step 3. Windows will begin the installation process. Then, accept the terms, choose Keep personal files and apps, and click Next.
Step 4. Click Install to start the process. After the installation is complete, your system will restart. Now you have a repaired installation of Windows without losing any data or applications.
Bottom Line
This post answers why the Windows Update service could not be stopped and offers some useful approaches to troubleshoot the error. Additionally, it introduces a powerful data backup tool, MiniTool ShadowMaker, to keep your data secure.
If you have suggestions or face issues while using our software, please contact us by emailing [email protected].
Windows Update Service Could Not Be Stopped FAQ
1. Small or corrupted recovery partition
2. Conflict with an older version of the Windows Recovery Environment (WinRE)
3. Corrupted system files
4. Software conflicts
5. Insufficient disk space
About The Author

Position: Columnist
Charlotte is a technology columnist with a strong focus on the Windows operating system, specializing in disk management, backup, and data recovery. She is passionate about analyzing computer errors, identifying root causes, and delivering practical solutions. In her free time, she stays updated on the latest developments in computer systems and hardware while continuously learning new technologies to broaden her expertise. Her writing style is clear and easy to understand, making complex technical topics accessible even to users with limited computer knowledge.
User Comments :