If you encounter the internal hard drive not showing up problem, try changing the drive letter, updating the driver, cleaning the disk, running CHKDSK, using the Windows troubleshooter, or initializing it. This MiniTool post provides detailed instructions about these solutions and the data rescue method.
When you start up your computer and launch File Explorer, you find that one of your internal hard drives has disappeared.
Whether this drive is filled with cherished memories, important work files, or your game collection, the internal hard drive not showing up can disrupt your daily life.
This problem may be caused by minor software issues or loose connections, but it can also be triggered by some hardware failures.
To fix the problem effectively, you should know the reasons why your internal HDD doesn’t show up. Keep reading to get the information.
Why Is Your Internal Hard Drive Not Showing Up
Here are some common causes of an internal hard drive not detected/showing up:
- Loose/Faulty Connections: Internal hard drives connect to the motherboard using a SATA cable and a power cable. Sometimes, these cables can become loose or wear out.
- Faulty Motherboard Port: If reconnecting the cables doesn’t resolve the issue, a faulty port on your motherboard may prevent the drive from communicating with your PC.
- Outdated/Corrupted Drivers: Outdated, corrupted, or incompatible drivers may cause your PC to fail to recognize the drive, especially after major Windows updates.
- Missing/Conflicting Drive Letters: If your internal drive lacks a drive letter or uses a duplicate one, it won’t appear in File Explorer.
- System Glitches: Some system bugs or glitches may prevent Windows from detecting internal drives, like faulty updates, registry errors, or conflicts with third-party software.
- Bad Sectors/File System Corruption: Sudden power outages, improper shutdowns, or malware can corrupt the file system or cause bad sectors, causing the drive to be unreadable by Windows.
- Incorrect BIOS/UEFI Settings: If the internal hard drive is disabled in the BIOS/UEFI settings, Windows won’t recognize it.
- Physical Damage: If your internal HDD is physically damaged, like a failing read/write head, damaged platters, or a burnt-out motor, the hardware failure may cause the drive to be undetected.
How to Fix an Internal Hard Drive Not Showing Up
In this part, we will explore some quick initial checks and complicated solutions to resolve the issue of the internal hard drive not showing up on Windows.
Preliminary Checks Before Advanced Fixes
Now, try some basic checks for your missing internal hard drive to resolve minor glitches, such as connection issues, incorrect settings, and hardware conflicts.
Step 1. Check if the drive shows up in Disk Management.
Start by verifying whether Windows recognizes the drive in Disk Management, even if it doesn’t show up in File Explorer.
To open Disk Management, press Win + X and choose Disk Management from the Power User menu.
- If you can see the drive here, it may be caused by a missing drive letter or file system corruption. In this case, consider updating/reinstalling the driver, assigning a drive letter, creating a volume, or initializing it.
- If it does not appear in Disk Management, the issue is likely related to the hardware. To fix the issue, opt for reconnecting it or running the Hardware and Devices troubleshooter.
Step 2. Verify physical connections.
It is common for an internal hard drive to be incorrectly connected to your computer, which may prevent the disk from appearing in Disk Management.
To resolve this connection issue, follow these steps:
- Inspect the connection cables.
- Disconnect and securely reconnect any loose cables.
- Test the port on your computer by connecting a different drive to see if it works.
- Try connecting your drive to another functioning computer to verify that there is no issue with your PC.
Step 3. Disconnect unnecessary external drives to avoid conflicts.
Sometimes, external devices can lead to drive letter conflicts, resulting in your internal drive not appearing in File Explorer.
Therefore, unplug any external hard drives, USB flash drives, or memory cards from your computer.
Then, restart your computer and see if the internal drive is visible.
Step 4. Check BIOS settings.
The BIOS is the firmware that initializes hardware during boot. To access the drive, check if it is visible in BIOS and adjust the BIOS settings related to it.
Here’s how to check the internal hard drive in BIOS:
- Reboot your computer.
- During the boot process, press the F2, F10, Esc, or Delete key to enter the BIOS menu.
- Use the arrow keys to navigate to the Main, Storage, or System Information tab and press Enter.
- Check whether the disk appears in this menu.
If the disk is not displayed, enable the corresponding port or controller in BIOS so that it can be identified in Disk Management.
Here’s the instruction to enable a drive in BIOS:
- Disconnect and reconnect the internal hard drive to your PC.
- Restart your device.
- Enter BIOS.
- Use arrow keys to navigate to Advanced, Storage, or Integrated Peripherals and press Enter.
- Find the specific SATA or NVMe port where the drive is connected. Make sure it is not configured as Disabled or Off. If it is, change the setting to Enabled or Auto.
- If the drive continues to be unrecognized, check that the SATA Controller or USB Controller is enabled within the chipset or USB settings.
- Press F10 to save the new configuration and reboot the system.
If the internal hard drive shows in BIOS, try one of the alternative methods below.
Fix 1. Assign or Change the Drive Letter
If your internal hard drive shows in Disk Management, but doesn’t show in File Explorer or This PC, you should assign it a drive letter.
Here’s how to do it:
Step 1. Press Win + X and select Disk Management.
Step 2. Locate and right-click the disk and select Change Drive Letter and Paths.
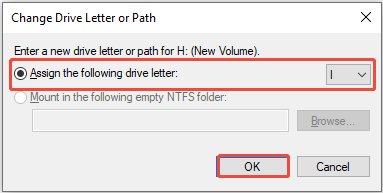
Step 3. In the pop-up window, select your drive and click Add or Change.
Step 4. Select a drive letter from the drop-down menu next to Assign the following drive letter:.
Step 5. Click OK to save the change.
Fix 2. Update or Reinstall Device Drivers
Outdated or corrupted drivers may lead to drive detection problems, causing the issue of the internal hard drive not showing up.
To fix this issue, try updating or reinstalling the drivers:
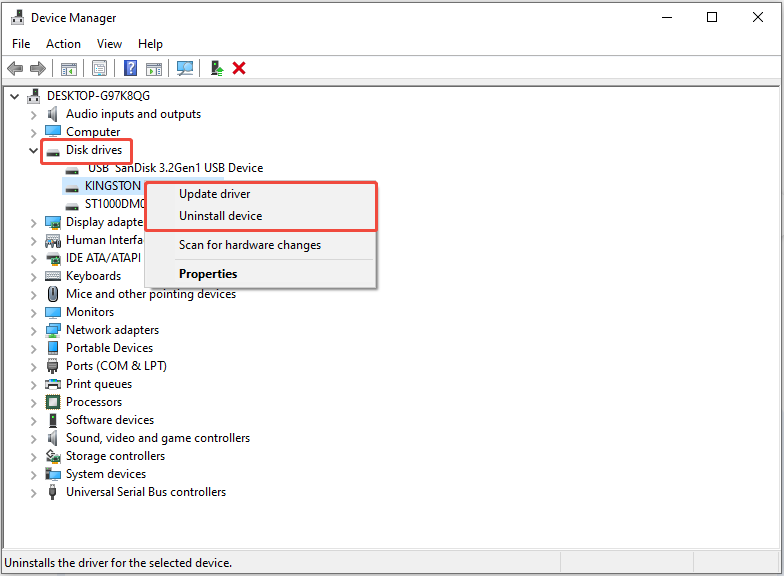
Step 1. Press Win + X and choose Device Manager.
Step 2. Expand the Disk drives category.
Step 3. Right-click the internal drive that is missing and select Update driver.
Step 4. Select Search automatically for drivers and follow the prompts to install any available updates.
Step 5. If updating the driver doesn’t resolve the issue, right-click the drive again and choose Uninstall device.
After uninstalling, restart your computer, and Windows will automatically reinstall the driver.
Fix 3. Clean the Disk
DiskPart operates at a lower level than File Explorer, allowing it to detect disks even when they are not visible in Windows Explorer.
Therefore, verify whether the internal disk appears in DiskPart. If it does, use DiskPart to clean the disk and create a new partition.
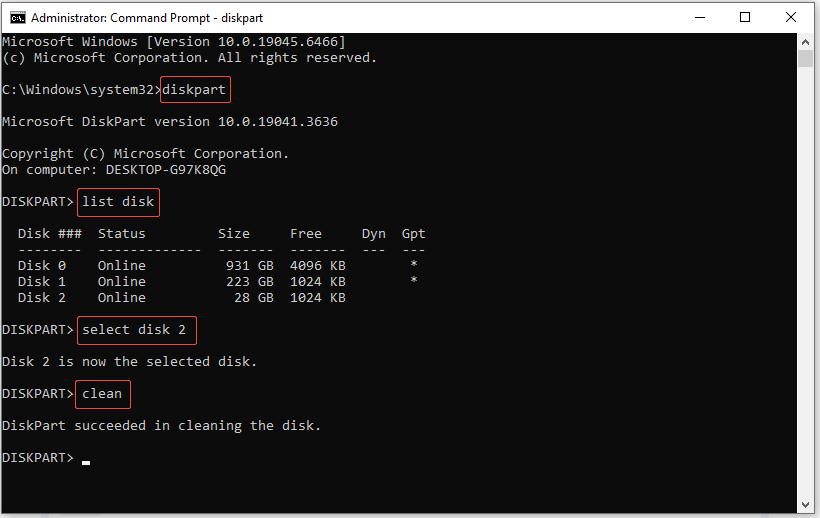
Step 1. Type cmd in the Windows search bar, right-click Command Prompt, and then select Run as administrator.
Step 2. Type diskpart and press Enter.
Step 3. Type the following commands one by one and press Enter after each:
- list disk
- select disk X (Replace X with your internal HDD’s number)
- clean
Once you see the prompt indicating that the command was completed successfully, close the Command Prompt window.
After cleaning, go to Disk Management to create a new volume by following Solution 5.
Fix 4. Initialize the Disk
If your internal HDD is labeled as “Not Initialized” in Disk Management, you need to initialize it before Windows can recognize it.
Step 1. Launch Disk Management, right-click on the problematic drive, and then select Initialize Disk.
Step 2. Choose a partition style:
- MBR (Master Boot Record) for partitions under 2TB.
- GPT (GUID Partition Table) for those exceeding 2TB.
Step 3. Click OK to proceed with the drive initialization.
Once initialized, create a new volume following the next solution and assign a drive letter.
Fix 5. Create New Simple Volume
If you had cleaned or initialized your internal hard drive, or if it shows Unallocated in Disk Management, you need to create a new volume for it.
Follow the breakdown to do it:
Step 1. Open Disk Management, select and right-click the initialized/cleaned/unallocated hard drive, then choose New Simple Volume.
Step 2. Click Next to proceed.
Step 3. Assign a drive letter and then click Next.
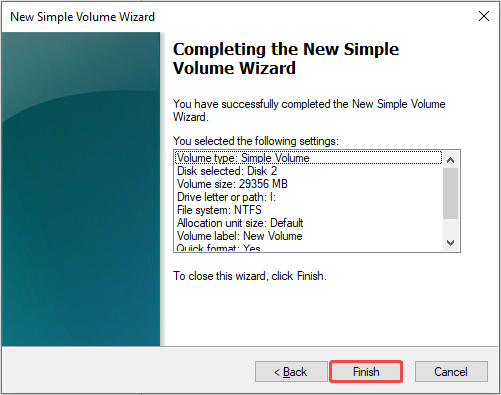
Step 4. Format the drive in the simple volume by following the wizard. Check Perform a quick format and click Next.
Step 5. Click Finish to complete the process.
Fix 6. Use CHKDSK
If your missing drive’s file system is corrupted or shows as RAW in Disk Management, use the CHKDSK command to fix errors.
Follow these steps:
Step 1. Run Command Prompt as an administrator.
Step 2. Type the command chkdsk X: /f /r (substitute X with the letter of your missing drive), and then press Enter to execute the command.
CHKDSK will check the drive for errors, mark bad sectors, and retrieve readable data. This procedure may take some time based on the size of the drive.
Fix 7. Run Windows Hardware and Devices Troubleshooter
Windows provides a built-in troubleshooter designed to automatically identify and resolve hardware problems.
Therefore, try using this tool to fix the internal hard drive not showing up issue:
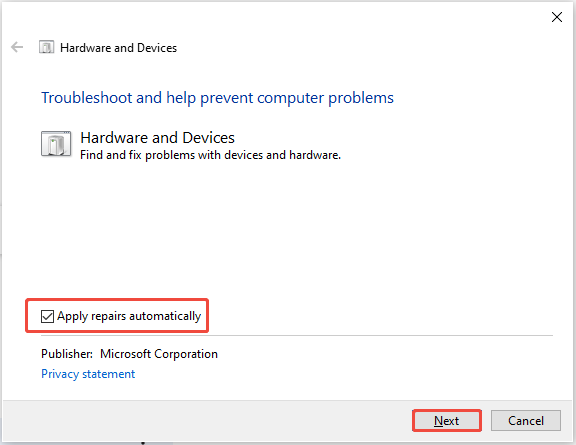
Step 1. Press Win + R to open the Run dialog box, type msdt.exe -id DeviceDiagnostic, and press Enter.
Step 2. Click Next to run the tool, ensuring Apply repairs automatically is checked in the Advanced settings if needed.
How to Recover Data From an Internal Hard Drive That Won’t Show Up
If the previous solutions don’t work, or if you encounter file system issues or hardware failure, you may want to rescue your data from the drive.
MiniTool Power Data Recovery is a reliable data recovery tool crafted to recover internal hard drive data—even those that may not show up in File Explorer.
Below are some main features of this free data recovery software:
- Comprehensive File Recovery: It can restore various file types, such as images, videos, documents, audio files, and others.
- Support for Various Data Loss Scenarios: It enables you to recover files under many data loss situations, like partition loss, disk formatting, virus infection, and so on.
- Secure Data Recovery: During the data recovery process, it will protect your original data and will not overwrite your data.
- Free Version: MiniTool provides a free version that allows you to recover 1GB of files for free.
MiniTool Power Data Recovery FreeClick to Download100%Clean & Safe
Download and install MiniTool Power Data Recovery, then follow the instructions to recover data from the internal hard drive.
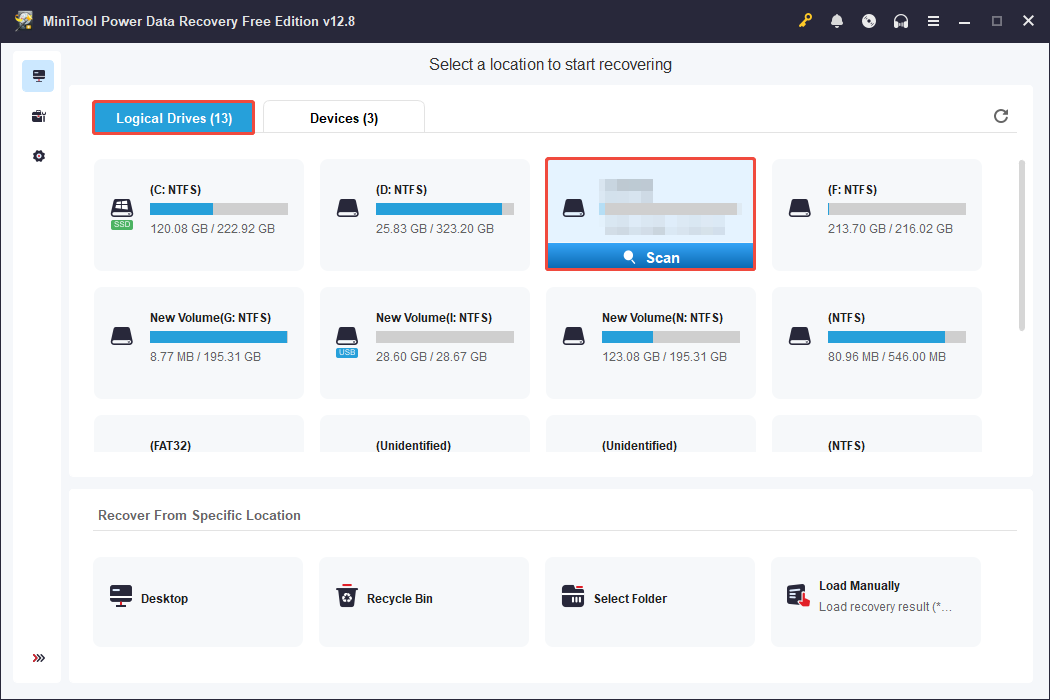
Step 1. Open MiniTool Power Data Recovery. Under the Logical Drives section, locate and select the problematic internal drive, then click Scan.
Step 2. Once the scan is complete, MiniTool will display a list of all recoverable files under Path. To view files organized by file type, switch to Type.
To filter out unnecessary files, try using the Filter feature. To locate a specific file by file name, consider using the Search feature.
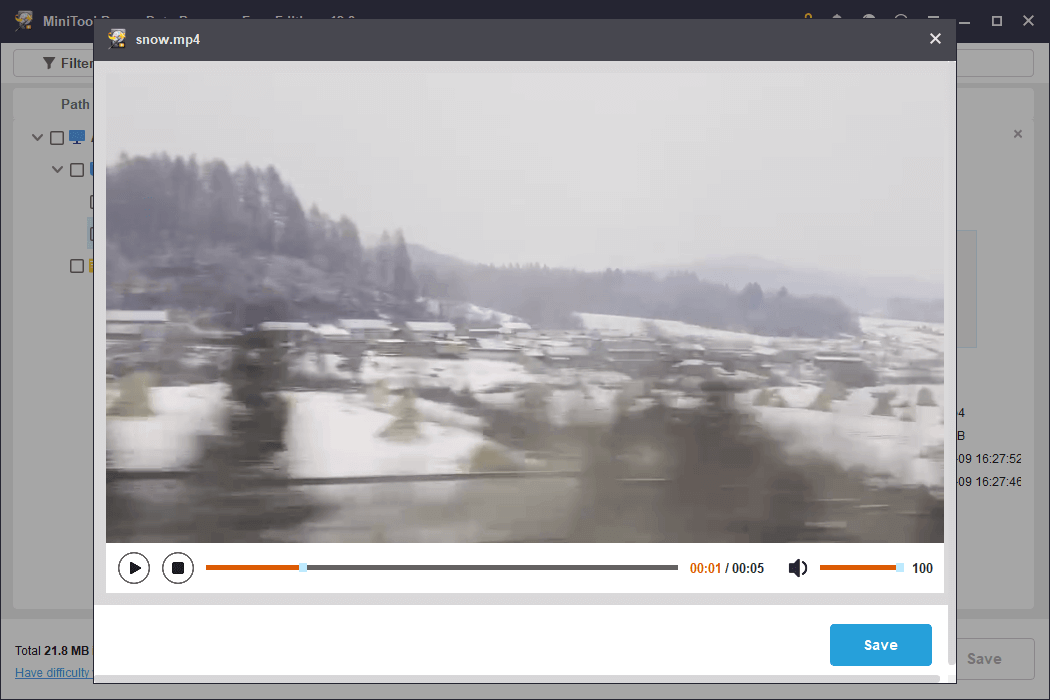
Additionally, use the Preview feature to check if your files are intact. Simply double-click on a file to view it before recovery.
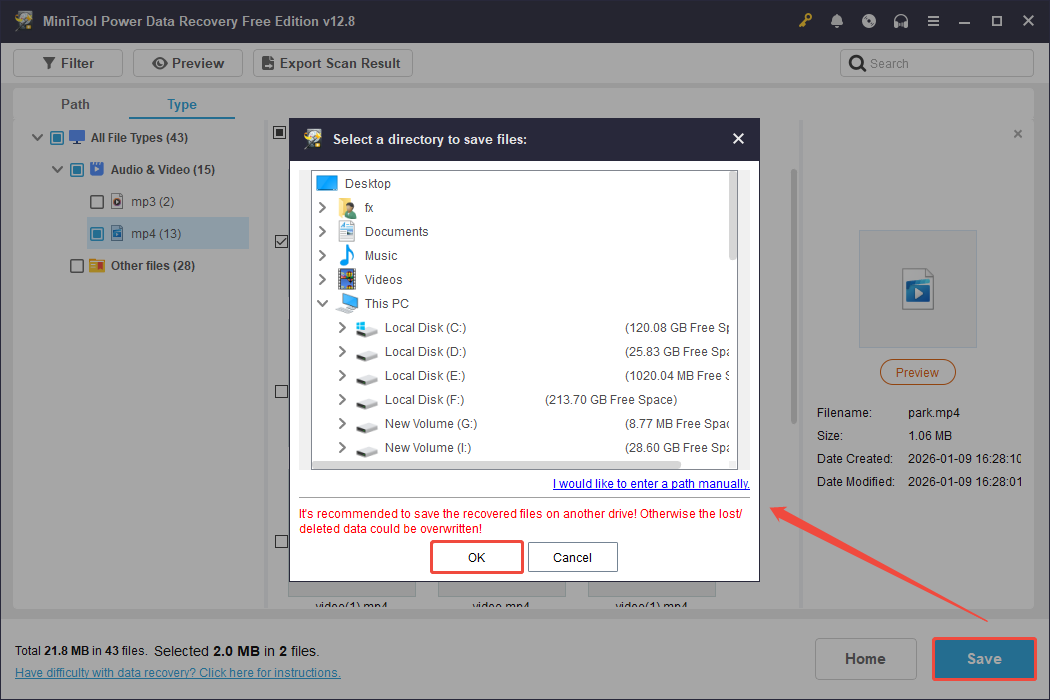
Step 3. Select the wanted files by checking the boxes next to them, and then click the Save button.
In the new window, choose a safe location to store the recovered files and click OK.
After the recovery process is complete, you can access your files from the specified location.
Final Words
In summary, this post talks about how to fix the internal hard drive not showing up issue with four basic checking steps and seven complicated fixes.
First, you need to check your disk connection, hardware conflicts, and BIOS settings. If the checks don’t fix the issue, try the mentioned solutions one by one until it is fixed.
Should you have any puzzles when using MiniTool Power Data Recovery, please feel free to let us know by email at [email protected].
About The Author

Position: Columnist
Sandy became an English editor after graduation. She is devoted to finding effective solutions for diverse IT problems and provides articles on data recovery, data backup, and computer partitions and drives. In her spare time, she likes listening to music and playing games.
User Comments :