Are you encountering an I/O device error while accessing or initializing your disk? First, try a different USB/SATA port or cable to rule out connection issues. If it does not help, recover your files and then initialize or format the disk. Simply follow this MiniTool guide for detailed instructions.
When you connect a brand-new hard drive or removable drive to your computer and try to initialize it for partitioning and storing files, you may encounter this error message:
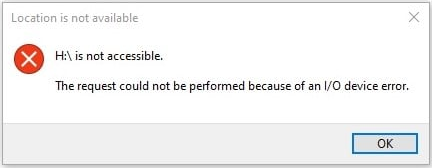
Location is not available.
Drive is not accessible.
The request could not be performed because of an I/O device error.
Quick Fixes for I/O Device Error:
- Rule out physical connection issues
- Update/reinstall the disk driver
- Initialize the disk
- Format the hard drive
This error does not only affect new drives. It can also occur on previously used disks that already contain data. According to reports from some Reddit users, the issue may appear after a sudden system crash or even a normal restart. This makes the disk inaccessible.
Why does the I/O device error occur, and how can you check the current status of your drive? Let’s walk through the details below.
What Causes the I/O Device Error
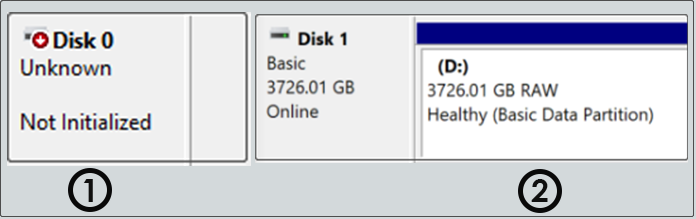
The I/O device error indicates that Windows is unable to read from or write to the disk. To start troubleshooting this problem, right-click Start, open Disk Management, and check the drive’s status. This helps you know what steps to take next.
- A brand-new disk usually appears as Unknown and Not Initialized.
- A previously used disk often shows as RAW.
Next, I will explain the reasons behind these two abnormal disk statuses one by one.
I/O Device Error on Unknown/Not Initialized Disks
If the error appears when you try to initialize the disk, it may be caused by the following reasons:
- Loose or faulty connection. The SATA/USB cable or port is damaged or not properly connected, preventing the system from reading the new disk.
- Driver issues. Outdated, missing, or corrupted disk drivers stop Windows from recognizing and initializing the disk.
- Physical defects. Even brand-new disks can be defective. Manufacturing defects make the disk unreadable.
I/O Device Error on a RAW Drive
If your disk turns RAW, it may be caused by one or more of the following reasons:
- File system corruption. A sudden system crash or violent removal may damage the file system, leaving the disk RAW.
- Bad sectors. If critical sectors on the disk become unreadable, the disk may appear as RAW.
- Not formatted. If the disk was not fully formatted or was marked unformatted by a partition manager, it will show as RAW.
- Drive failures. If the hard disk is too old or experiencing hardware issues, it may become RAW.
Now that you understand why the I/O device error prevents you from initializing or accessing your disk, the next step is to fix it.
How to Fix I/O Device Error on Windows 10/11
To fix the I/O device error on a hard drive, USB drive, or SD card, start by checking the connections of the SATA/USB cable or port. Always recover important files first, because some advanced solutions will erase all data.
Follow the instructions below.
Pre-checks Before Fixing the I/O Device Error
Make sure to rule out the connection and driver issues before trying advanced fixes.
How to check disk connections:
- Restart the computer to refresh system resources and re-detect disks.
- Reconnect the disk and ensure the SATA or USB cable is properly connected.
- Check the cable for any visible damage caused by bending, dropping, etc.
- Change a cable or port.
- For an external hard drive or removable disk, test it on another computer and check if it works.
How to reinstall the disk driver:
Step 1. Right-click the Start button and choose Device Manager.
Step 2. Expand the Disk drives category and locate the problematic disk.
Step 3. Right-click the target disk and choose Uninstall device. Then select Uninstall to confirm.

Step 4. Remove the disk from your computer (if possible).
Step 5. Reconnect the disk or restart the computer. Windows will automatically detect your disk and reinstall the driver.
If the disk has been reinstalled correctly but the I/O device error persists, it is recommended to recover your files first, as initializing or formatting the disk will delete all data on it.
Recovery Test: Restoring Data from a RAW or Uninitialized Disk
When an I/O device error occurs and the disk appears as Not Initialized or RAW, it is recommended to use data recovery software to recover your files first.
MiniTool Power Data Recovery is a reliable solution for restoring files from inaccessible disks. This software supports recovering 1 GB of files for free.
MiniTool Power Data Recovery FreeClick to Download100%Clean & Safe
To evaluate the actual performance of MiniTool Power Data Recovery in handling disk errors, I converted a 10 GB virtual hard disk (VHD) to a Not Initialized state for testing.
Test Scenario Setup:
In this test, I stored 10 new files on a virtual hard disk on my Windows 10 computer, including:
- 5 JPG pictures
- 3 MP4 videos
- 2 DOCX documents
After that, I intentionally damaged the disk structure, causing the disk to appear as Unknown and Not Initialized. Then I started scanning the disk for files.
Step 1. Scan the Uninitialized Disk.
After launching MiniTool Power Data Recovery Free, I selected the VHD disk, which appears as Lost Partition, and clicked Scan.
The software started detecting the disk and initiating a full scan.
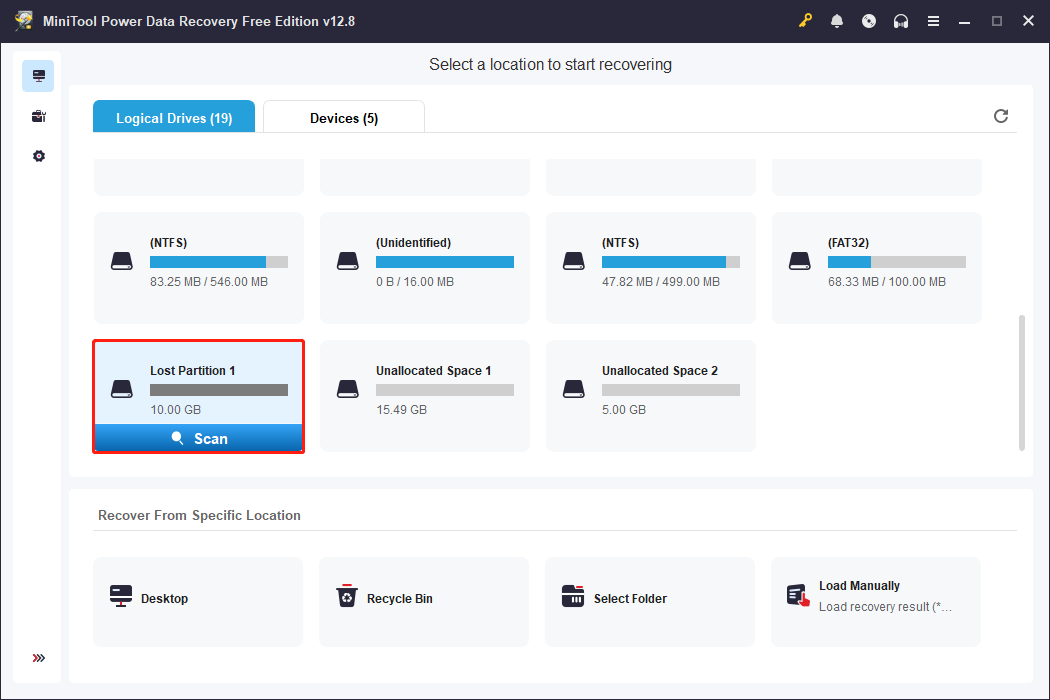
Despite the disk being Uninitialized, the software successfully located many files within a short time.
- Scan duration: 2 minutes
- Total files detected: 400 files
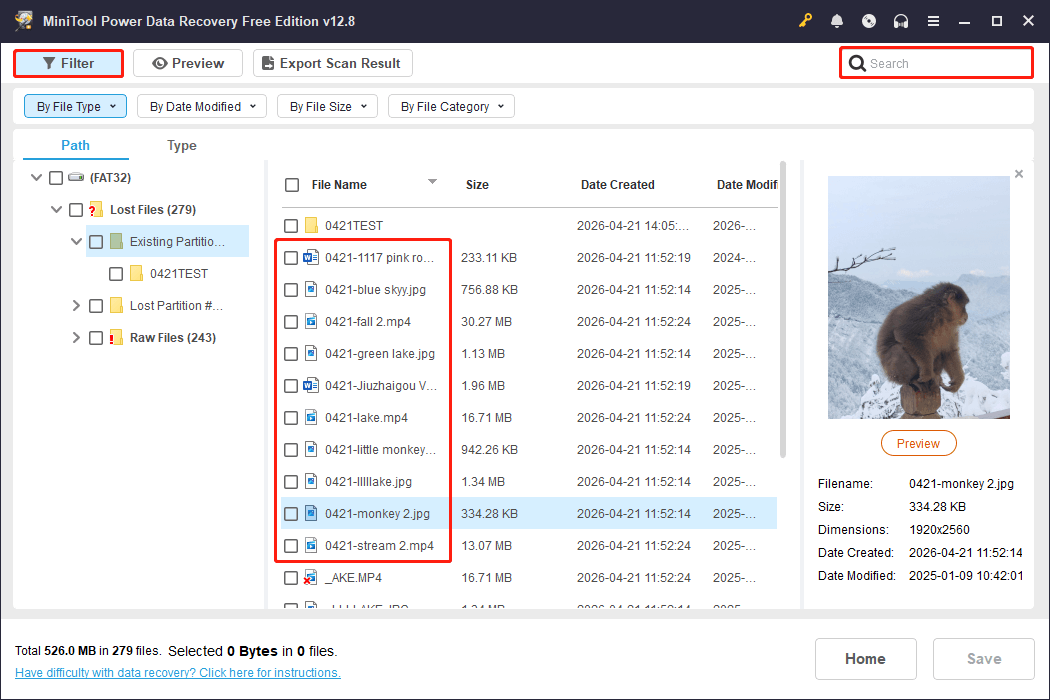
Step 2. Identify and Preview Required Files.
The recovered data is organized under both Path and Type categories, and all 10 newly created files are displayed on the scan results page.
During the file recovery process, the Filter and Search features are highly useful.
- The Filter function narrows scan results by file type, modification date, size, and category.
- The Search function helps locate files quickly when the original file names are preserved.
In addition, the Preview function worked successfully for all 10 images, videos, and documents.
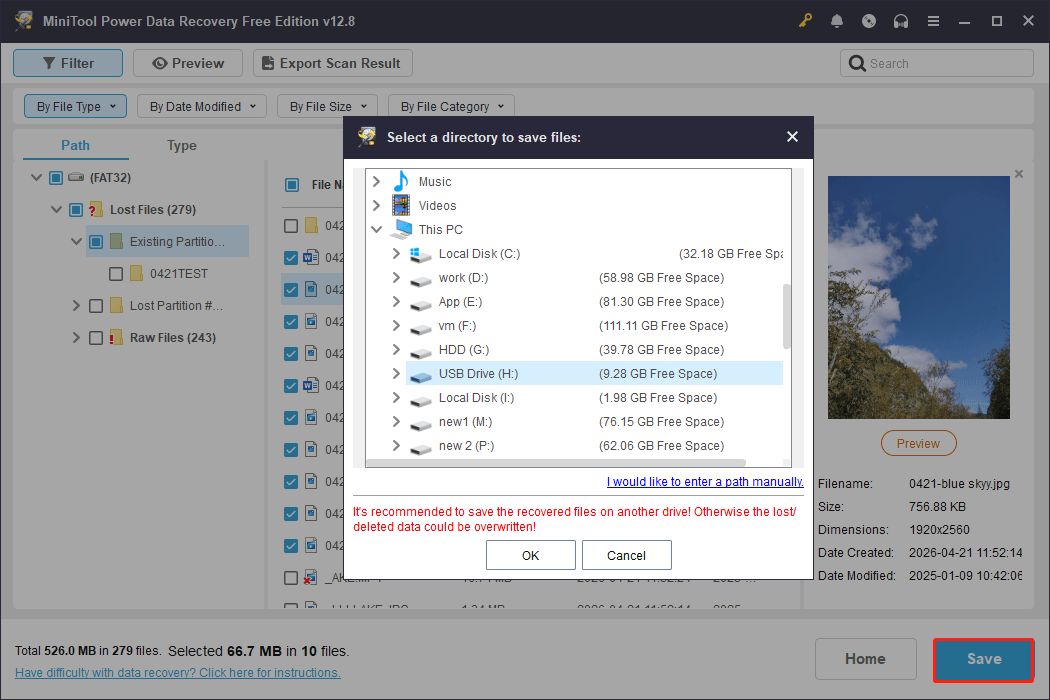
Step 3. Save Required Files.
After selecting the required files, I saved them to a separate healthy disk without any cost.
Key Findings from the Experiment
- MiniTool Power Data Recovery can scan disks even when they are uninitialized or in a RAW state.
- Most file types can be located, previewed, and recovered successfully.
- The software supports 1 GB of free data recovery.
- The tool is compatible with internal and external hard drives, virtual hard disks, and removable storage devices.
Once the recovery is complete, check the recovered files. If everything is correct, you can proceed with the following methods to initialize or format the disk.
Method 1. Initialize the Disk via CMD
If you are unable to initialize the disk in Disk Management, you may consider using the DiskPart tool via Command Prompt. DiskPart allows you to manage disks at a lower level than Disk Management.
However, it is important to note that this method may not always work, especially if the error is caused by hardware issues.
Follow the steps below to initialize a disk from Command Prompt:
Step 1. Type cmd in the Windows search box. Then right-click Command Prompt and choose Run as administrator.
Step 2. When the command-line window appears, type the following commands one by one and press Enter after each one.
- diskpart
- list disk
- select disk # (replace # with the actual disk number)
- clean (it will erase all data on the selected disk)
- convert gpt (you can also type convert mbr to set up the partition table to MBR. See MBR VS GPT)
- create partition primary
- format quick fs=ntfs (you can replace ntfs with another preferred file system like fat32)
- assign (it will assign an available drive letter)
- exit
After finishing these steps, the disk should appear in Disk Management with a healthy partition, ready for use.
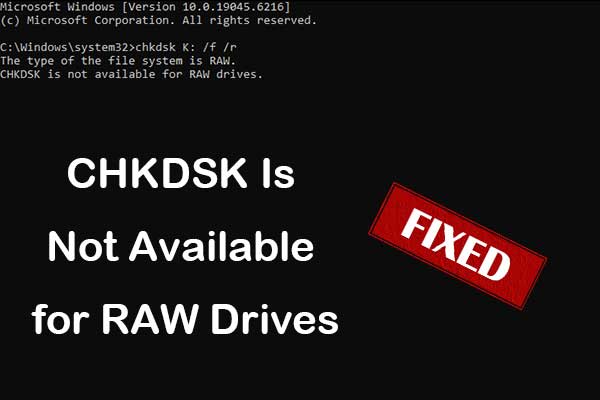
Method 2. Format the Hard Drive (for RAW Drives)
When a hard disk shows as RAW, the only way to make it usable is to format it to a recognized file system. I will show you three methods to format a disk on Windows. Choose the one you prefer to complete the formatting process.
Option 1. From Disk Management
Disk Management is a built-in system utility that allows you to view and manage file storage devices and their partitions. Follow the steps below to format your RAW drive with it:
Step 1. Right-click Start and choose Disk Management.
Step 2. Right-click the RAW drive and hit Format.
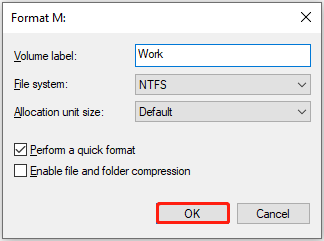
Step 3. Type a volume label, choose a file system, and click OK.
Step 4. Click OK again to confirm.
Option 2. Through File Explorer
File Explorer is a built-in tool that also lets you manage disk partitions. Here is how to format a RAW drive using it.
Step 1. Open File Explorer and right-click the inaccessible disk. Then choose Format from the context menu.
Step 2. Set up the volume label and file system, and then click Start.
Step 3. Click OK to start the process.

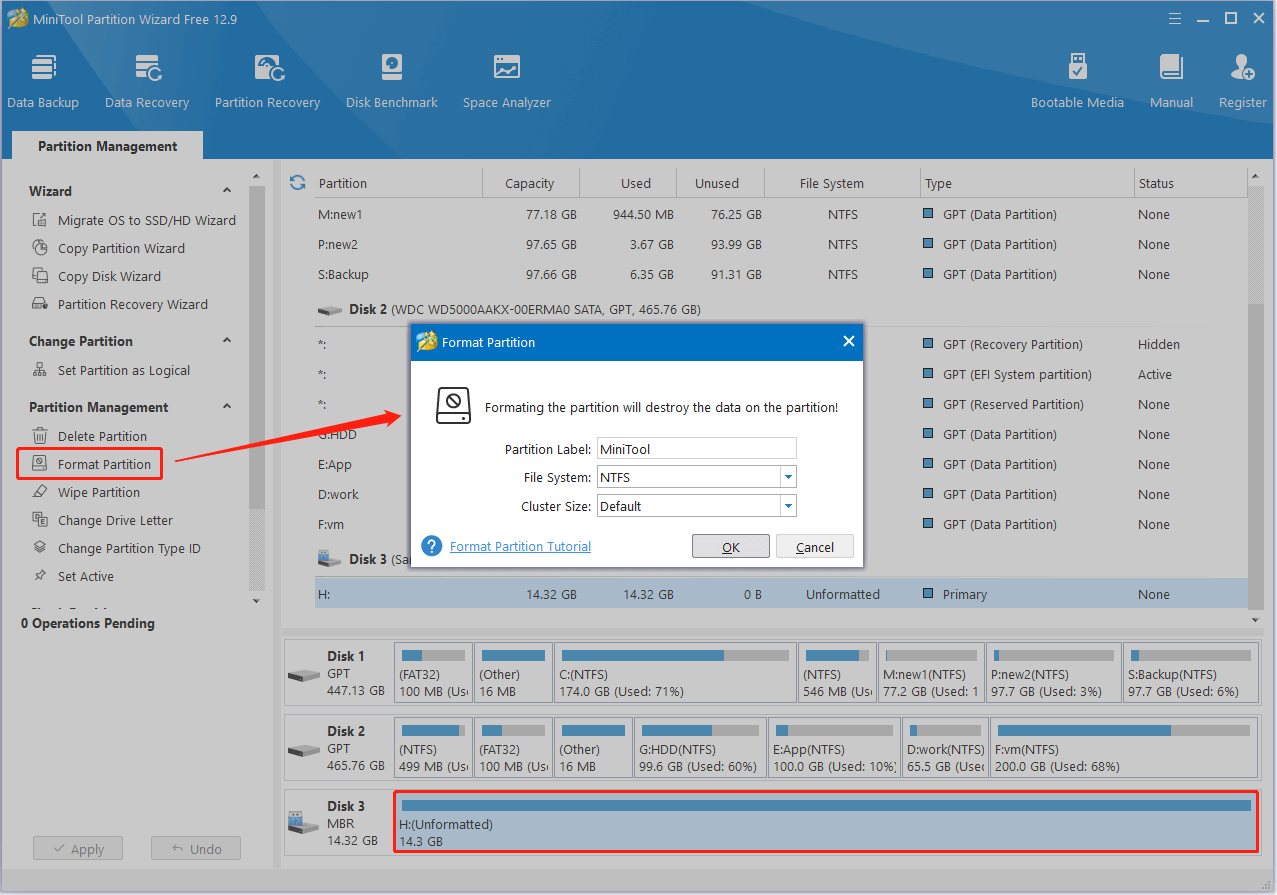
Option 3. Use MiniTool Partition Wizard
MiniTool Partition Wizard is a free partition management tool designed for Windows. It can help format internal/external hard drives, SD cards, and USB drives to common file systems, such as NTFS, FAT32, exFAT, etc.
Now, get it and launch it to format the hard drive.
MiniTool Partition Wizard FreeClick to Download100%Clean & Safe
Step 1. On the home page of this partition manager, select the target disk partition, and then choose Format Partition from the left panel.
Step 2. Specify the partition label and file system, and then click OK.
Step 3. Preview the format effect. If it is satisfied, click Apply to make it take effect.
Method 3. Replace the Disk
If your hard disk continues to show as RAW and cannot be formatted or accessed, it may be time to replace it.
For brand-new disks, most brands offer free replacement options. For older disks, once the data has been recovered, you can replace the disk with a new one.
To minimize the risk of disk failure in the future, choose a reliable brand and avoid used drives.
Bonus Time: How to Back Up Hard Disk Files
No matter how high-quality your disk is, unexpected failures can still happen. Regularly backing up important files ensures you won’t lose data permanently if a disk problem occurs.
If you are looking for professional data backup software, MiniTool ShadowMaker is an excellent choice. It allows Windows users to back up internal/external hard drives, SSDs, SD cards, and USB drives.
You can download and install the trial edition, which offers a 30-day free trial, to see how it works.
MiniTool ShadowMaker TrialClick to Download100%Clean & Safe
Here are the steps to back up files with MiniTool ShadowMaker:
Step 1. Run the backup software and click Keep Trial to enter the main interface.
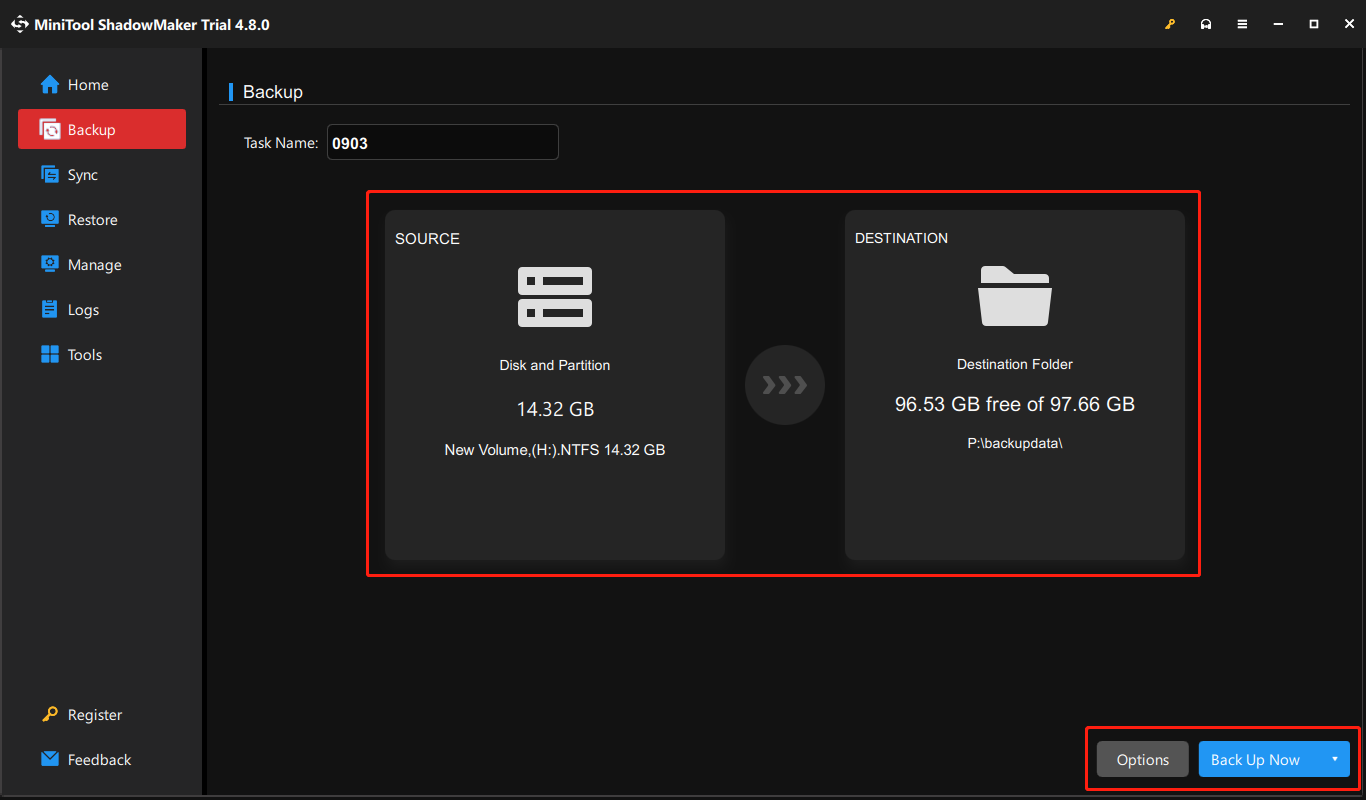
Step 2. Go to the Backup tab from the left menu.
Step 3. Hit SOURCE > Folders and Files to choose the files/folders you want to back up, or select Disk and Partitions to back up entire volumes or disks.
Next, hit DESTINATION to choose a location to store the backup file.
Step 4. Click Options to select the backup type: full, incremental, or differential. You can also configure automatic backups to run daily, weekly, monthly, or whenever you log on or log off.
Step 5. Click Back Up Now to start the backup process.
Here is how to restore a backup file:
Step 1. Launch the software and go to the Restore tab.
Step 2. Find the backup image you want to restore and click the Restore button next to it.
Step 3. Select the backup version and hit Next.
Step 4. Choose the items you want to recover and hit Next.
Step 5. Choose a destination location to save the restored files and click Start to begin the process.
Bottom Line
To sum up, this step-by-step guide explains how to troubleshoot the I/O device error on external hard drives, internal hard drives, and removable disks.
When facing disk issues, always try reconnecting the device first to rule out connection problems. If that does not work, for an uninitialized disk, you can try initializing it with DiskPart. If that fails, consider replacing the disk. For a RAW drive, formatting it to a valid file system usually resolves the issue.
No matter whether you fix the corrupted drive or replace it with a new one, developing a habit of regularly backing up important files is essential.
If you encounter any difficulties while using MiniTool’s products, please contact the support team at [email protected].
About The Author

Position: Columnist
Shirley holds a bachelor’s degree in English and has been an editor at the MiniTool Team for many years. She specializes in IT-related content, with a focus on data recovery, file backup, disk management, and other technical topics. She is committed to delivering clear, accurate, and practical solutions to help users resolve common computer issues.
User Comments :