This article reviewed by MiniTool Software introduces a type of windows built-in printer drive – Microsoft XPS Document Writer. It covers its definition, function, usage, installation, as well as reinstallation. Continue reading for more related information!
What Is Microsoft XPS Document Writer?
Microsoft XPS Document Writer (MXDW) is a print-to-file driver that enables a Windows app to create XML Paper Specification (XPS) document files on versions of Windows starting with Windows XP with Service Pack 2 (SP2).
Microsoft XPS Document Writer enables a Windows application to save its content as an XPS document without changing any of the app’s program code.
What Is Microsoft XPS Document Writer Used For?
Do I need Microsoft XPS Document Writer? Yes, when you are in the following situations.
When you want to create an XPS document from a Windows program that doesn’t have the option to save its content as a .xps file.
If you are an application developer, you would suggest the Microsoft XPS Document Writer to users who want to create XPS files when your app does not provide the option to save its content in XPS format.

Install MS XPS Document Writer
How to download and install Microsoft XPS Document Writer on your computer? If you are running Windows Vista or its later versions of operating system (OS), including Windows 7, Windows 8/8.1, Windows 10, and the newest Windows 11, you already have the MXDW on your machine for its installed together with the OS.
For Windows XP with SP2 and Windows Server 2003, you can download either .Net Framework 3.0 or the XPS Essential Pack from the Microsoft Download Center.
Make Use of Microsoft XPS Document Writer
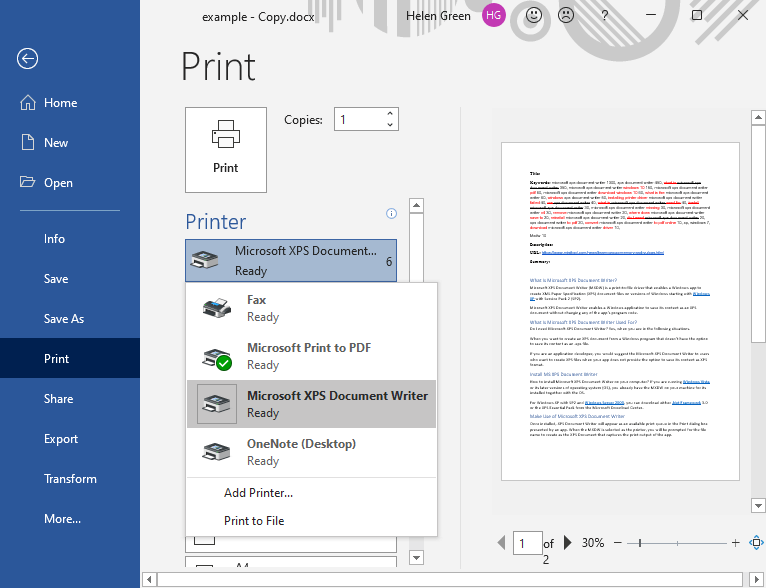
Once installed, XPS Document Writer will appear as an available print queue in the Print dialog box presented by an app. When the MXDW is selected as the printer, you will be prompted for the file name to create as the XPS Document that captures the print output of the app.
Microsoft XPS Document Writer Missing
If you can’t find the Microsoft XPS Document Writer option when trying to print a document, you can add it back following the below instructions.
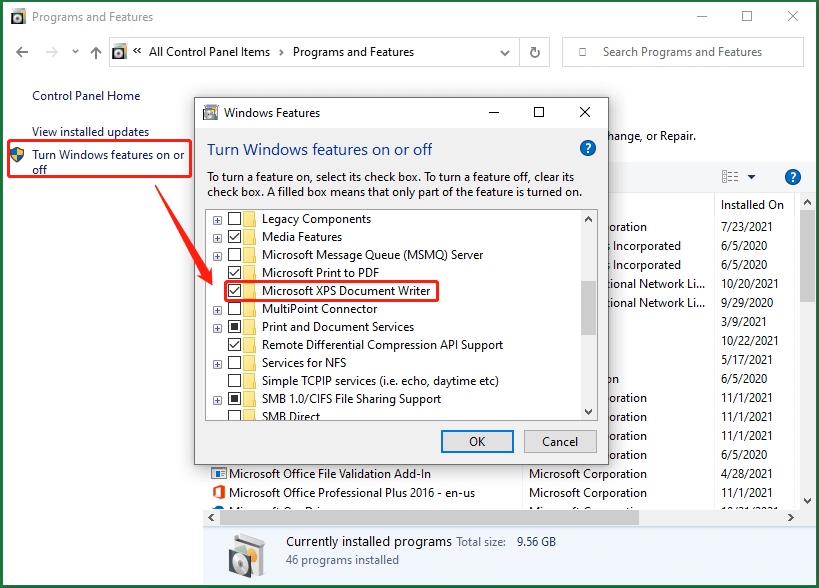
Before starting, make sure you have the Windows Features turned on. Generally, go to Control Panel > Programs and Features > Turn Windows Features on or off, scroll down the list, and make sure the Microsoft XPS Document Writer is checked.
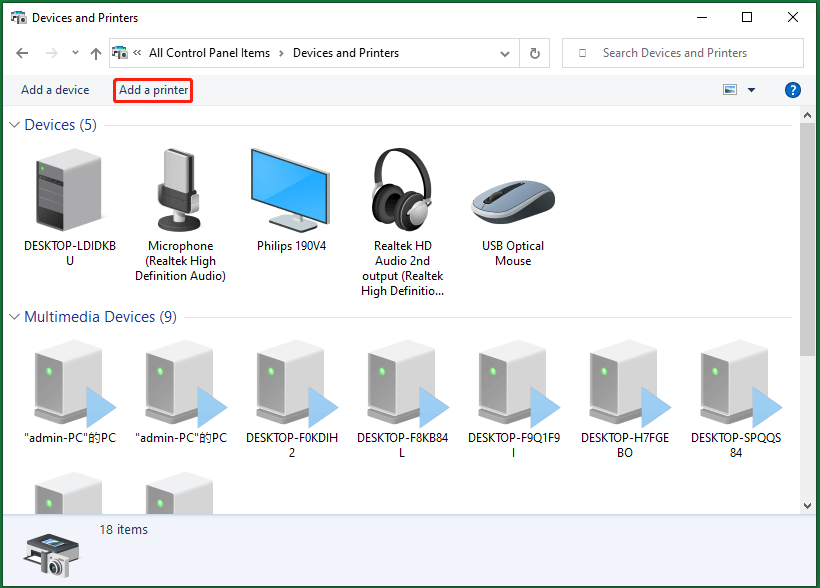
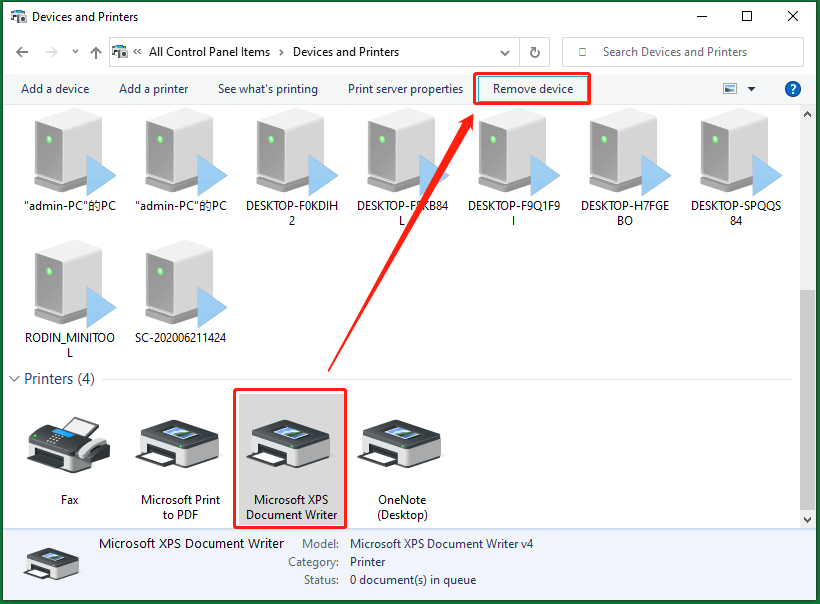
1. Navigate to Control Panel > Devices and Printers.
2. Click Add a printer in the top menu.
3. Select Local printer.
4. Under the existing port pulldown menu, select XPS Port and Next.
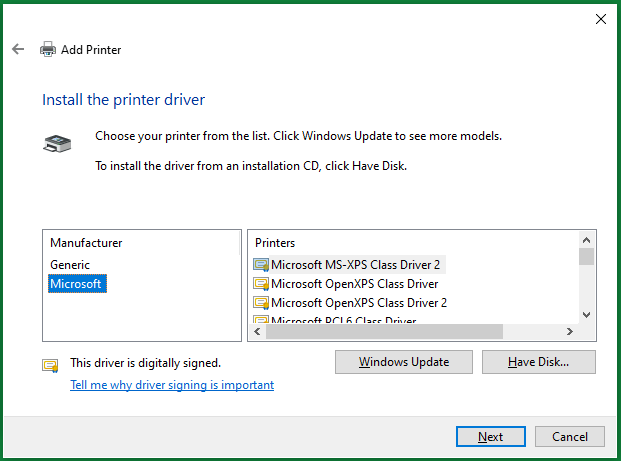
5. Choose Microsoft under manufacturer.
6. Then, click Microsoft XPS Document Writer and Next.
Next, just follow the on-screen steps to finish.
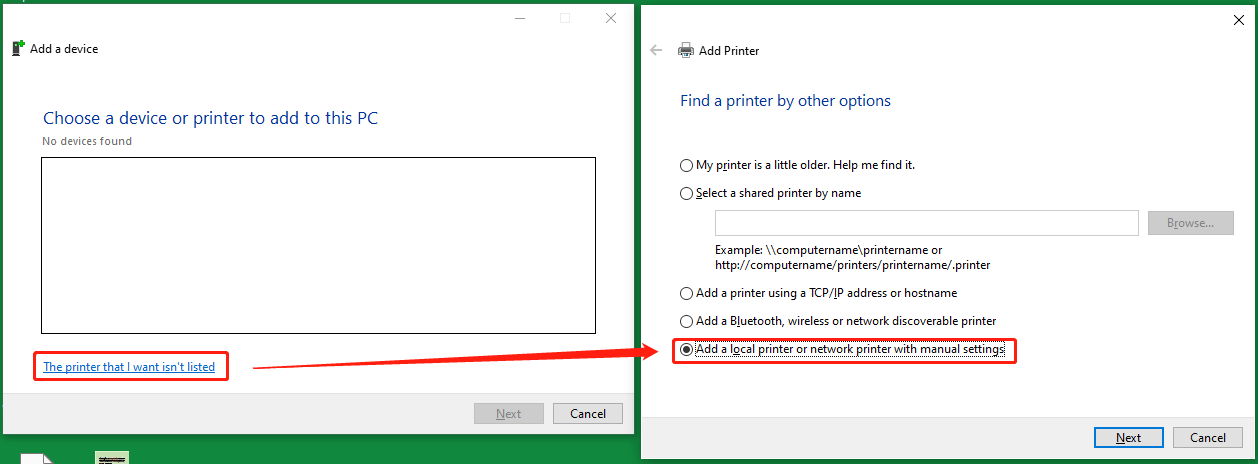
If no device is found and the list is blank after the above step 2, you should click The printer I want isn’t listed option; select Add a local printer or network printer with manual settings; choose Use an existing port; click Microsoft in the left column under Manufacturer; and select Microsoft XPS Document Writer v4 in the right column under Printers.
If you fail to find Microsoft XPS Document Writer in the right section, just click the Windows Update button below to see more models. if you want to install the driver from an installation disk, click the Have Disk button and follow the instructions.
Remove Microsoft XPS Document Writer
If you want to remove Microsoft XPS Document Writer from your computer, just click on it in the Devices and Printers page within Control Panel and click the Remove device option in the top menu.
Also read: Better Understanding of Microsoft Power Automate – What Is It?
About The Author

Position: Columnist
Helen is a tech writer with over 10 years of experience. She specializes in creating easy-to-follow guides for video editing, media file conversion, and computer performance. Helen doesn't just write—she tests every software herself and listens to feedback from users and experts. Her goal is to make complex programs simple so that everyone can solve their tech problems with confidence.
User Comments :