While data recovery success rates can vary depending on the situation, it is entirely possible to retrieve data from a hard drive on both Windows and Mac. This guide on MiniTool outlines common data loss scenarios and walks you through practical hard drive recovery steps.
Is It Possible to Recover Data From a Hard Drive
Many users experience data loss or find their internal or external hard drives suddenly inaccessible. In such situations, the first question that usually comes to mind is: Can data be recovered from the hard drive?
The good news is that hard drive recovery is often possible, but it depends on several factors. In the following content, I will explore the common causes of hard disk data loss and share the scenarios where the chances of successful recovery may be lower. Continue reading to get detailed information.
Common Causes of Hard Drive Data Loss
Below are the common reasons for file loss on a hard drive:
- You accidentally deleted files from the hard drive while managing or transferring items.
- The hard drive was accidentally formatted, resulting in permanent data loss.
- The hard disk was infected by a virus, causing files to be deleted or corrupted.
- Sudden power failure, system crashes, or improper ejection led to file loss.
- The file system of the hard drive became corrupted, making files missing or inaccessible.
- Disk partitions were deleted or went missing, preventing the system from reading the files stored on them.
- The hard disk suffered physical damage due to dropping, water exposure, or fire.
- The hard drive is too old, and aging mechanical components caused disk read errors.
Cases Where You Cannot Recover Data From a Hard Drive
In the following situations, you are unlikely to be able to recover files from your hard drive:
- The deleted or lost files have been completely overwritten by new data.
- The hard drive has been fully formatted or securely erased (See secure erase vs quick format).
- The file system is severely damaged or the disk contains numerous bad sectors.
- The disk has suffered serious physical damage and is no longer recognized by the system.
Considering the situations above, you should now have a clearer understanding of when internal or external hard drive recovery is possible.
To maximize your recovery chances, stop using the drive immediately after noticing data loss. Avoid writing new data or even accessing the drive. The less you use the disk, the higher the chance of successful data recovery.
In the next sections, I will walk you through how to recover data from a hard drive on Windows and Mac.
How to Perform Hard Drive Recovery on Windows
Way 1. Check the Recycle Bin
The Recycle Bin is a temporary storage location in the Windows operating system that stores recently deleted files from internal hard drives. When it comes to internal or external hard drive data recovery, this should be your first place to check.
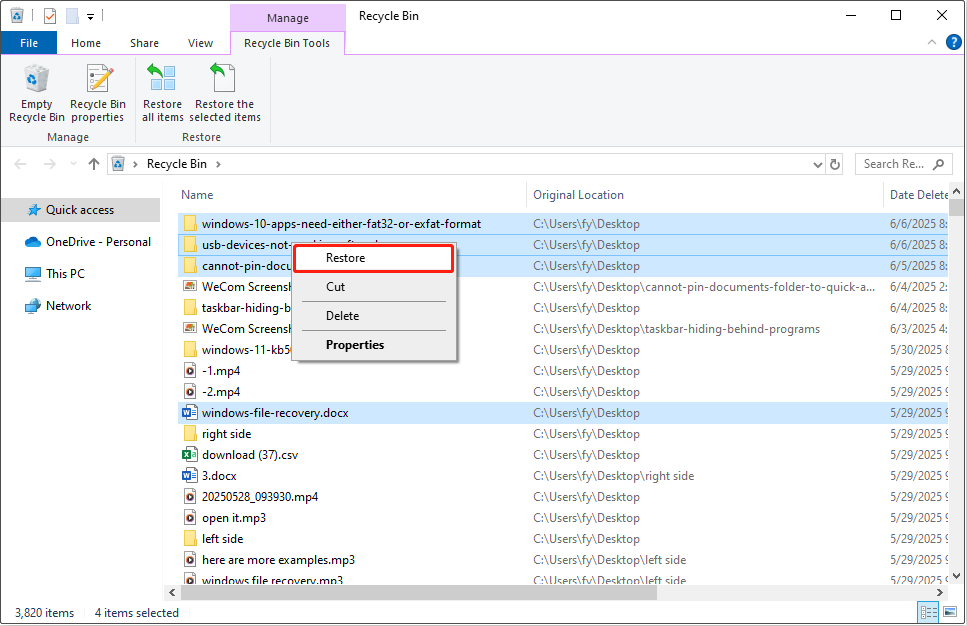
To restore files from the Recycle Bin, double-click the Recycle Bin icon on your desktop to open it. Then, sort the files by file name or deletion date, locate the files you need, right-click on them, and select Restore to recover them to their original locations. Alternatively, you can drag and drop the selected files to any preferred location.
For external hard drives, you need to connect the drive to your computer, then open the drive and access its unique Recycle Bin (a folder named $RECYCLE.BIN) to check for recoverable files.
Way 2. Use MiniTool Power Data Recovery
Want a quick and clear guide? Watch this video:
You cannot always find the deleted files in the Recycle Bin, as there are many situations where files bypass the Recycle Bin or the Recycle Bin has already been emptied. But do not worry. As long as the lost files have not been overwritten by new data, there is still a chance to recover them using free data recovery software.
MiniTool Power Data Recovery is the most recommended hard drive recovery software for Windows 11/10/8/8.1. It supports the recovery of various file types, including documents, photos, videos, audio files, emails, and more. This data recovery software is capable of retrieving data even from RAW hard drives, inaccessible or corrupted partitions, and damaged file systems.
Many users wonder how much data recovery costs. The good news is that the free edition of MiniTool Power Data Recovery allows you to recover up to 1 GB of data at no cost. As long as your total recovery size is within this limit, you will not need to pay anything.
Now, click the button below to download and install MiniTool Power Data Recovery Free, and follow the instructions to recover your files.
MiniTool Power Data Recovery FreeClick to Download100%Clean & Safe
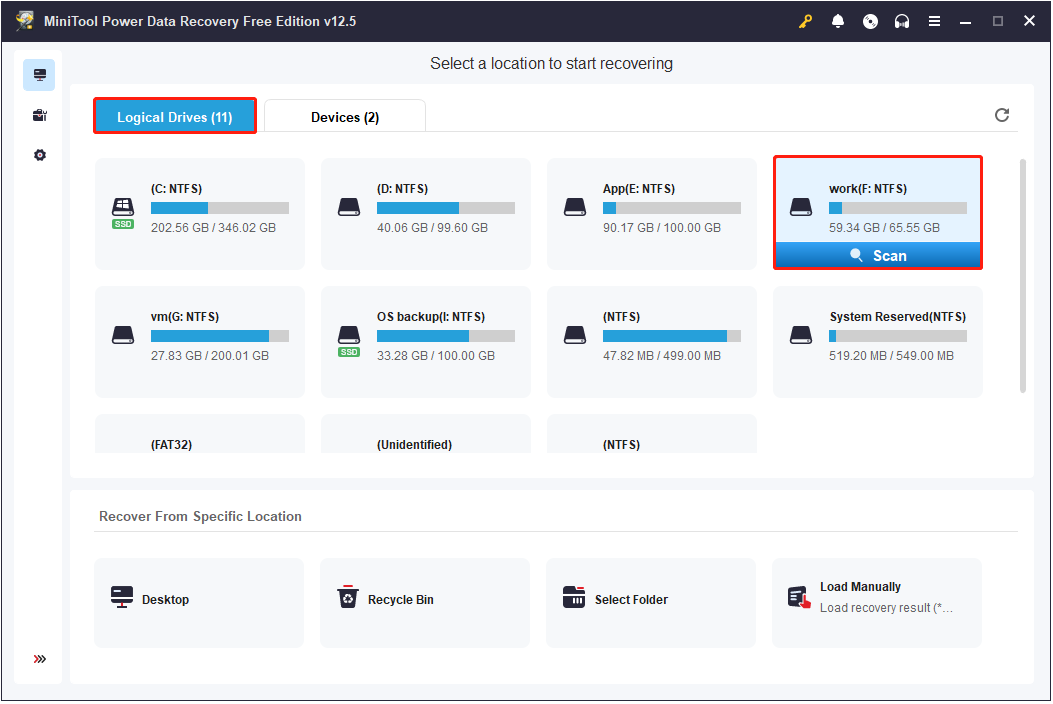
Step 1. On the home page of this free recovery tool, you are in the Logical Drives recovery module by default. Here, select the drive from which you need to recover data and click Scan to start scanning the drive for files.
In addition, you can scan a specific location, such as the Desktop, Recycle Bin, or any individual folder, to look for deleted or lost files. Or, you can move on to the Devices module and scan an entire disk.
Step 2. Once the scan is completed, all existing, lost, or deleted files are displayed. You can efficiently locate the files you need using various sorting and filtering features.
To change file views, switch between the Path and Type tabs:
- The Path tab displays files based on their original folder structure.
- The Type tab categorizes files by file format, such as documents, pictures, videos, emails, etc.
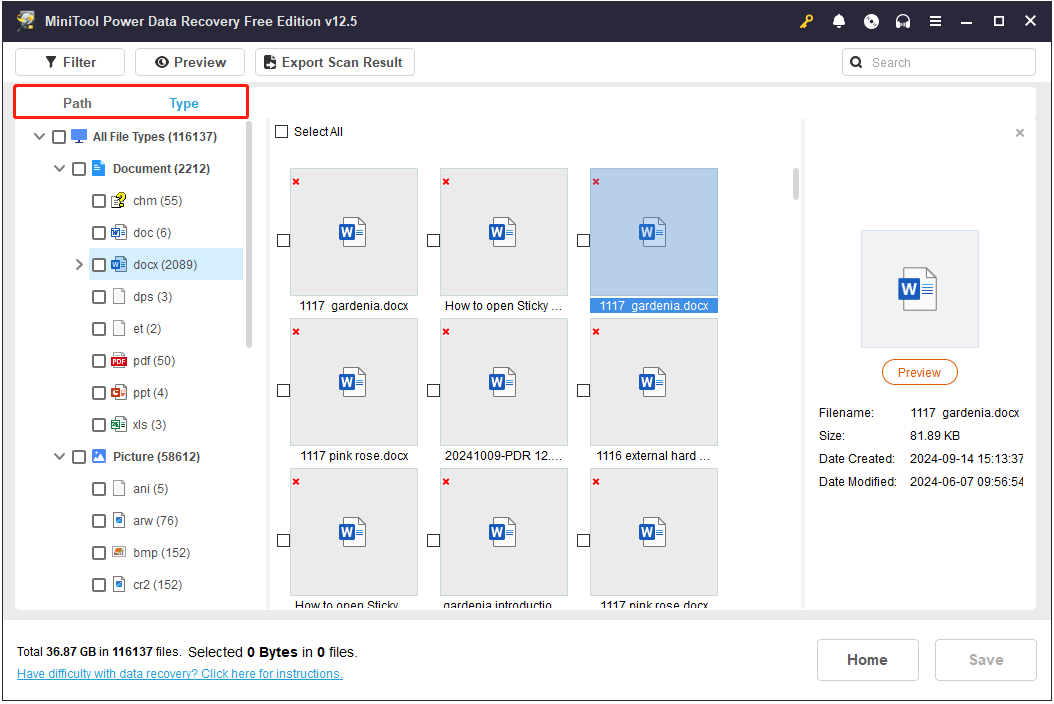
For more precise file discovery, take advantage of the Filter and Search options:
- Use Filter to narrow down results by file type, last modified date, file size, and file category.
- Use the Search function to quickly find a specific file by entering its full or partial file name in the search box and pressing Enter.
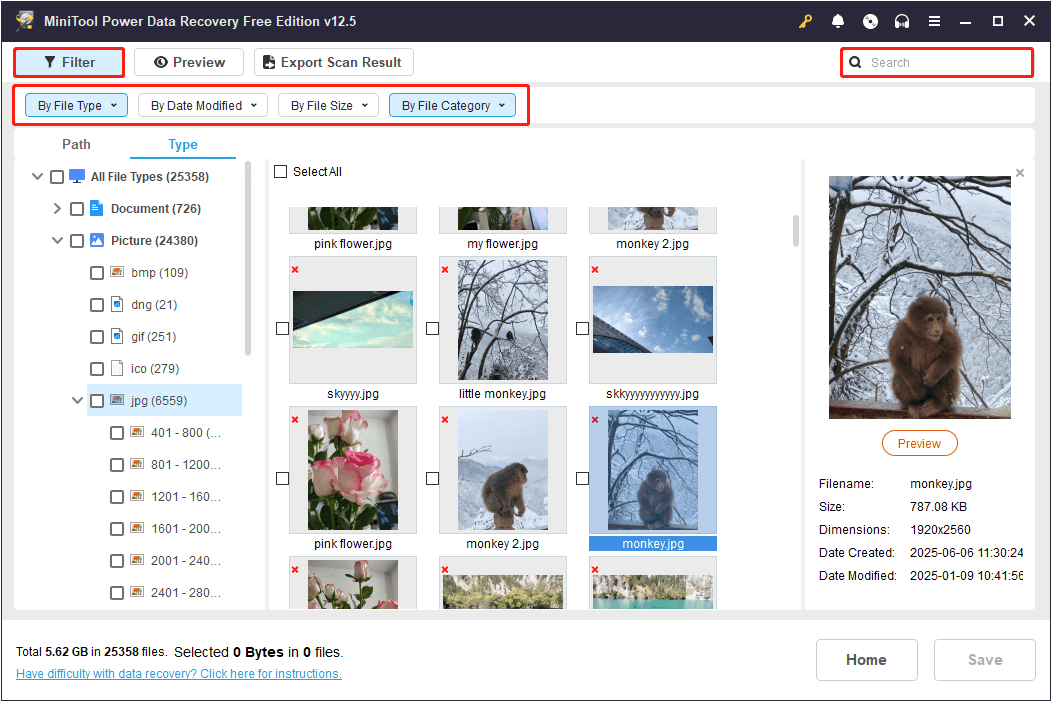
These features help simplify the recovery process, especially when you are dealing with a large number of files. In addition, for data accuracy, you can double-click on each of the files to preview them.
Step 3. Tick all the files you want to recover, and then click the Save button in the lower right corner. Choose a safe location in the new window and click OK to start the recovery.

If the total size of the selected files exceeds 1 GB, the excess part can only be recovered by upgrading the software from the free edition to a personal or business edition. The full editions can even recover files from an unbootable computer.

How to Do Hard Drive Recovery on Mac
If you are using a Mac computer, you can use the following methods to carry out hard drive recovery.
Method 1. Check the Trash Folder
The Trash folder on a Mac computer functions similarly to the Recycle Bin on Windows. It also stores deleted items from internal hard drives temporarily. To recover deleted files, simply open the Trash, look for the files you need, right-click on them, and select Put Back to restore them to their original locations.
Method 2. Use Stellar Data Recovery for Mac
Is there any data recovery software for Mac? Of course, yes.
Stellar Data Recovery for Mac is a powerful and easy-to-use tool designed for Mac that helps you recover lost or deleted files from a wide range of Mac-based storage devices. Whether your data loss is caused by accidental deletion, disk formatting, partition loss, or drive corruption, this software provides a reliable and effective recovery solution.
The supported file systems are also wide, including HFS, HFS+, NTFS, FAT32, exFAT, and so on.
But you need to know that this tool can only help you scan your disk and find the files for free. To save them, you need to upgrade to a premium edition.
Data Recovery for MacClick to Download100%Clean & Safe
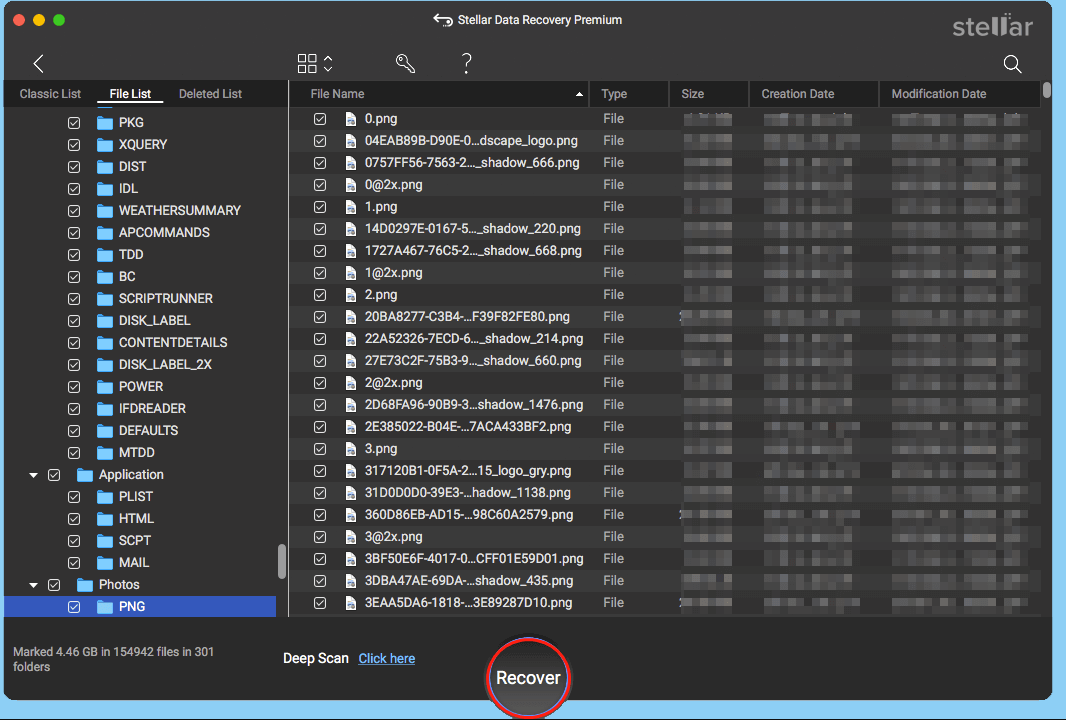
- Select the file types you want to recover and click Next.
- Select the location where the lost files should exist and click Scan.
- Find and tick the files you wish to recover from the scan results and click Recover.
Now that you know how to recover files from hard drives on Windows and Mac, the next step is to learn some useful tips to prevent your files from being lost in the future.
Useful Tips to Prevent Hard Drive File Loss in the Future
Tip 1. Back up Hard Drive Files
Although many secure data recovery services are available on the market to recover files, the most effective way to avoid permanent data loss is to take precautions in advance. Creating a comprehensive backup significantly reduces the risk of being unable to recover important files.
Both Windows and macOS offer built-in backup tools: File History and Backup and Restore for Windows, and Time Machine for macOS. You can enable these features and customize the backup settings to easily safeguard critical files.
In addition, if you are a Windows user looking for more flexible third-party backup solutions, MiniTool ShadowMaker is recommended. With its powerful backup schemes, flexible scheduling settings, and user-friendly interface, you can efficiently and easily back up files, partitions, or even the entire system.
This backup tool can be used for free within 30 days. Download the trial edition and start data protection.
MiniTool ShadowMaker TrialClick to Download100%Clean & Safe
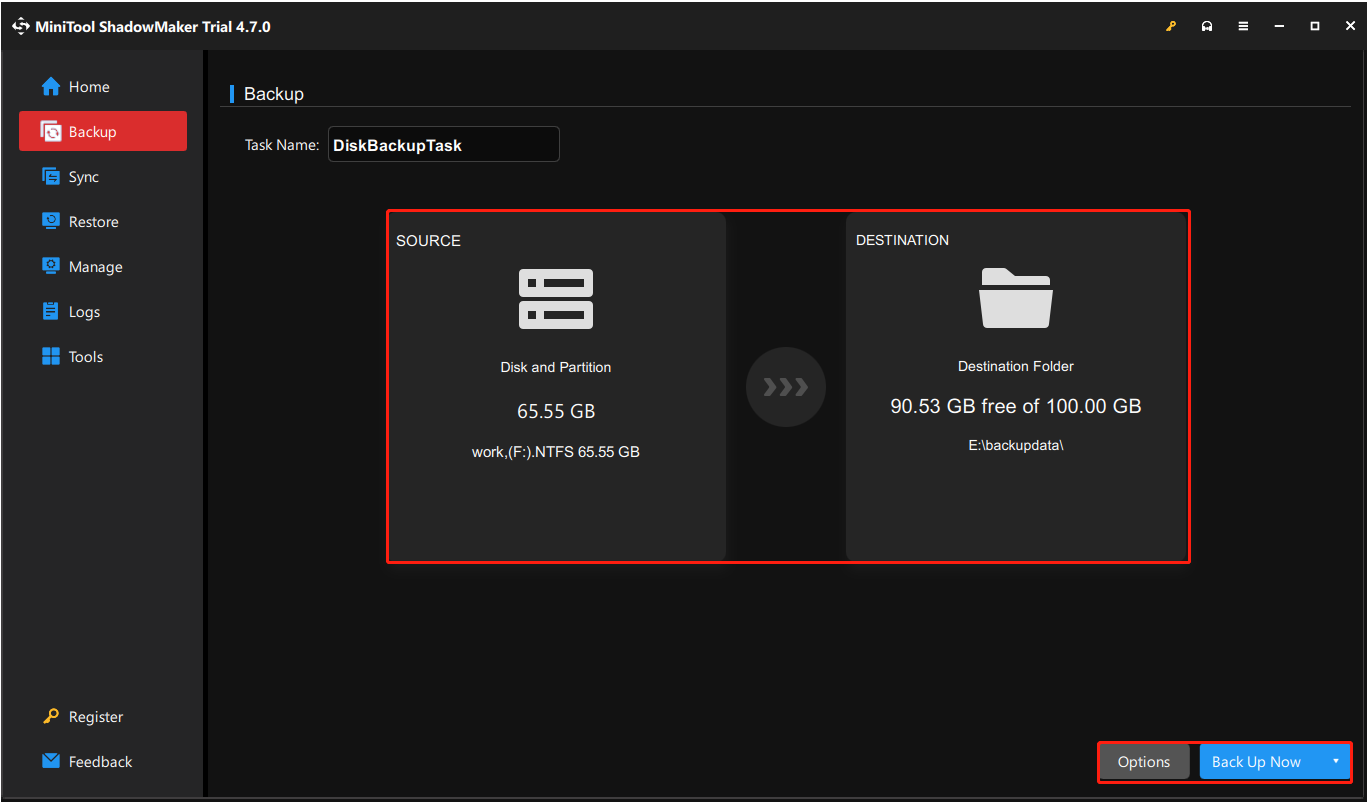
- Launch the software and click Keep Trial to access the main interface.
- Go to the Backup tab from the left menu.
- Click SOURCE to select the files/partitions you want to back up. Then click DESTINATION to select a location to store the backup image file.
- Click Options to enable Backup Scheme (full, incremental, and differential backup) and Schedule Settings and customize them.
- Hit Back Up Now to start the backup process.
Tip 2. Check Disk Health Regularly
Many data loss cases happen when a hard drive becomes inaccessible or stops working properly. Therefore, it is necessary to pay attention to the health status of your hard disk. If disk failures are found early, you can fix the drive, transfer important files, or replace the disk in time.
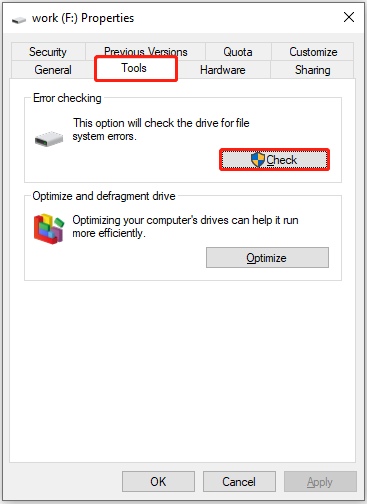
On Windows, you can use the built-in error-checking tool to scan and fix file system errors. Open File Explorer, right-click on the target drive, select Properties, go to the Tools tab, and click Check.
Additionally, for both Windows and macOS, you can use third-party disk management tools to perform more advanced health checks.
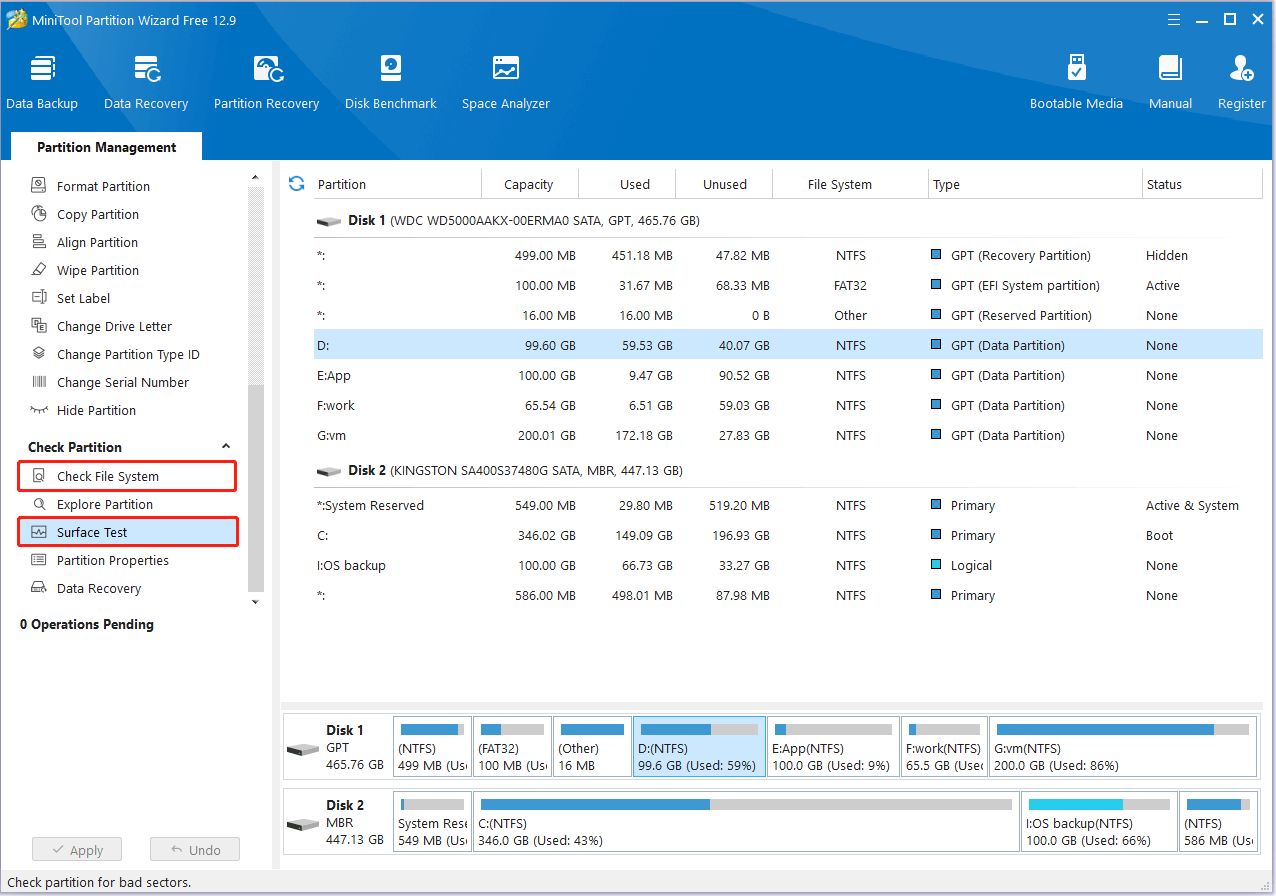
For example, MiniTool Partition Wizard (for Windows) has the Surface Test feature that can help scan and mark bad sectors. Moreover, its Check File System feature is used to check and repair file system errors so as to ensure the integrity of the file system.
MiniTool Partition Wizard FreeClick to Download100%Clean & Safe
Other Tips
Besides the tips mentioned above, you need to consider the following suggestions as well:
- Use Ctrl + C and Ctrl + V to copy and paste files instead of using Ctrl + X.
- Avoid skipping the Recycle Bin for deleting files on the hard drive.
- Keep Windows Defender or other antivirus software active to protect your computer and files against virus infections.
- Avoid downloading or installing unknown software onto your hard drive.
- Prevent power outages or sudden disk removal during file transfers.
- Ensure the hard drive stays cool to avoid overheating.
- Remove or eject internal or external hard drives properly to avoid physical damage or file system corruption.
- Purchase hard drives from well-known brands to ensure better durability and reduce hard disk failure risks linked to substandard quality.

Bottom Line
How to recover data from hard disk on Windows or Mac? Check the Recycle Bin or Trash for deleted files. If the desired files are not there, use MiniTool Power Data Recovery or Stellar Data Recovery for Mac to scan the hard drive.
If you encounter any issues or have any questions when using MiniTool’s products, please send an email to the support team via [email protected].
About The Author

Position: Columnist
Shirley graduated from English major and is currently an editor of MiniTool Team. She likes browsing and writing IT-related articles, and is committed to becoming a professional IT problem solver. The topic of her articles are generally about data recovery, data backup, and computer disk management, as well as other IT issues. In spare time, she likes watching movies, hiking and fishing.
User Comments :