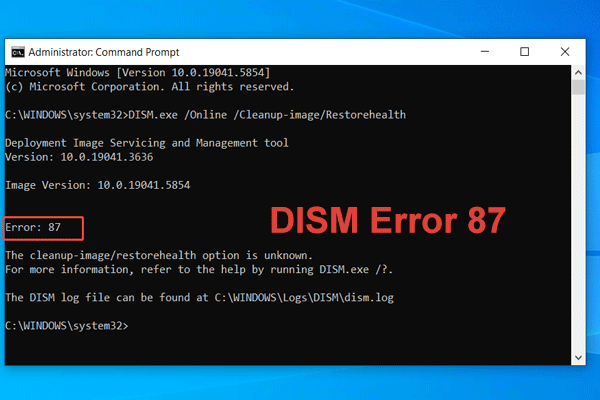
DISM Error 1009 Windows 10/11
DISM, also known as Deployment Image Servicing and Management, is an inbuilt command-line tool in Windows which allows you to prepare, modify and repair system images. In most cases, you can use DISM together with SFC to scan and repair the computer and return it to a healthy working state without reinstallation.
However, the error message “DISM Error 1009: The configuration registry database is corrupted.” or “DISM error 1009 an initialization error occurred” might show up when you use it in the following conditions:
- Repair Windows image with a corrupt registry and run the two commands: Dism /Online /Cleanup-Image /Restorehealth and Dism /Online /Cleanup-image /Restorehealth /source:wim:X:\sources\install.wim:1 /LimitAccess
- Run exe /Image:X:\ /Cleanup-Image /Restorehealth in Windows Recovery Environment.
- Update Windows but it fails.
In this post, we are going to show you how to fix DISM error 1009 on Windows 10/11 step by step and you need to execute these steps as carefully as you can.
Does your DISM command tool work normally? If not, you need to repair it under the guidelines of this article - [Solved 2022] DISM Failed On Windows 10/8/7 Computer.
How to Fix DISM Error Code 1009 Windows 10/11?
Preparation Before Troubleshooting DISM Error 1009
To fix DISM error 1009 on Windows 10, you need to boot your computer from a Windows installation media. If you don’t have your Windows 10 installation media at this moment, you must create one on your computer. You can either create a Windows 10 USB installation media or a DVD one. Now, let me show you how to create a bootable USB flash disk:
Step 1. Download Media Creation Tool from Microsoft Website.
Step 2. Run it and accept the License terms.
Step 3. Tick Create installation media (USB flash drive, DVD, or ISO file) for another PC.

Step 4. If you run Windows 10 now, Windows will recognize automatically your current version of Windows. Leave the Language, Edition & Architecture options unchanged, tick Use the recommended options for this PC and hit Next.
Tip: Unticking Use the recommended options for this PC and changing the Windows Language, Edition & Architecture allows you to install Windows 10 on another computer.
Step 5. Check USB flash drive and press Next.
Step 6. Connect your USB drive (not less than 4GB) to your computer and hit Next. Media Creation Tool will start to download the Windows 10 installation files.
Step 7. When this process is completed, your Windows 10 installation media is ready to use. Click on Finish.
If you are a Windows 11 user, you can find guidelines on creating a Windows 11 installation media from this article - How to Create Windows 11 Installation Media on PC, Mac, or Linux.
Fix 1: Remove Windows Updates
If you experience DISM error code 1009 in a Windows update failure, you are supposed to get rid of these updates.
Step 1. Boot your PC using the installation media you created.
Step 2. On the boot screen, press Shift + F10 at the same time to evoke Command Prompt.
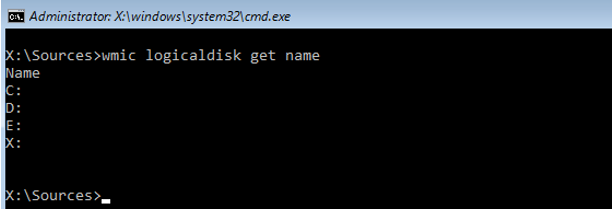
Step 3. Type wmic logicaldisk get name in the command window and hit Enter to get a list of all the drives of your system.
Step 4. If your Windows folder is in Drive D:, type dir D:. You can replace D with the drive which contains the Windows folder.
Step 5. Type D: again and tap on Enter.
Step 6. Copy & paste the following command to create a scratch folder in your drive and hit Enter.
mkdir D:\Scratch
Step 7. Now remove the recently installed updates by executing the following DISM command:
DISM /Image:D:\ /ScratchDir:D:\Scratch /Cleanup-Image /RevertPendingActions
Step 8. Exit Command Prompt and reboot your PC until you receive a message which informs you of the completion of this operation.
If your computer boot successfully, congratulations, you have solved DISM error 1009. If it fails to boot and even tries to install the updates again, you can follow these guidelines:
Step 1. Restart your computer using the installation media and launch Command Prompt again.
Step 2. Copy & paste the three commands one by one and hit Enter before running each command. Make sure to replace D: with the drive which contains the Windows folder.
del D:\Windows\SoftwareDistribution
del D:\Windows\WinSxS\cleanup.xml
del D:\Windows\WinSxS\pending.xml
Step 3. After executing these commands successfully, close Command Prompt and restart your computer again.
If you experience a boot failure again, don’t worry! There’s still a fix for you.
Step 1. Boot your computer a third time and open Command Prompt from Windows Recovery Environment.
Step 2. Run the following commands and don’t forget to replace D: with the right driver letter as mentioned in previous steps.
chkdsk /f D:
sfc /scannow /offbootdir=D:\ /offwindir=D:\windows
dism /image:D:\ /cleanup-image /restorehealth
Now, you will probably boot the computer successfully. If it still goes wrong, you can try the next fix.
Fix 2: Restore Registry from Backup
Restoring the Windows registry also helps to solve DISM error code 1009 Windows 10/11. Here’s what you should do:
Step 1. Enter Windows Recovery Environment and access Command Prompt.
Step 2. Type D: and tap on Enter to open the Windows folder. (You should also replace D: with the corresponding drive letter.)
Step 3. Run these commands below one by one.
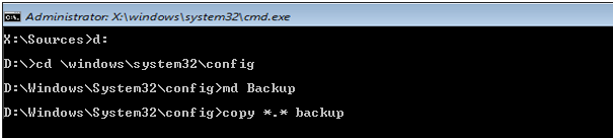
cd \windows\system32\config
md Backup
copy *.* Backup
Step 4. Locate the RegBack folder by running cd RegBack.
There will be two conditions. One is seeing files contain 0 bytes, the other is that none of the files displayed has 0 bytes. The former means that registry files are either corrupted or empty and you should stop your operation and then restore Windows. If you are in the latter condition, you can continue the following instructions.
Step 5. Run the copy *.* .. command to copy the registry files to the Windows folder.
Step 6. Type A to overwrite the files in the destination.
Step 7. Once the file copying process is done, type exit and hit Enter to close Command Prompt.
Step 8. Restart your device.
If you boot the computer unsuccessfully, boot it again with installation media and launch Command Prompt to execute these commands one after another:
chkdsk /f D:
sfc /scannow /offbootdir=D:\ /offwindir=D:\windows
dism /image:D:\ /cleanup-image /restorehealth
Step 9. Reboot your PC and if still having trouble booting, please try the next solution.
Fix 3: Perform System Restore
As mentioned in the fourth step in Fix 2, one condition is that you might notice some files with 0 bytes due to corrupt registry files. In this case, you need to perform a system restore to restore your Windows to an earlier version.
Step 1. Boot your system from the Windows installation media.
Step 2. If you see a page named Windows Setup, hit Next > Repair your computer > Troubleshoot.
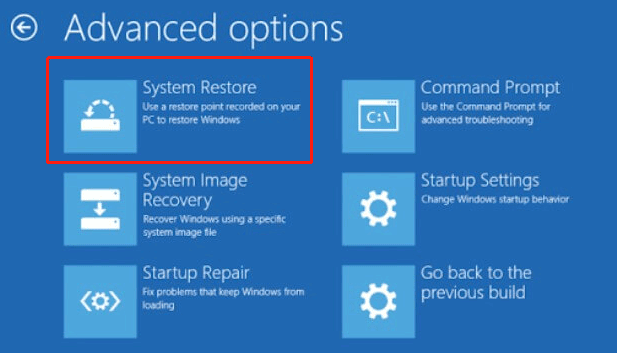
Step 3. Under Advanced options, hit System Restore.
Step 4. Now, you can choose a target operating system. Select one and hit Next at System Restore Wizard.
Step 5. Select a restore point when your system was running normally.
Step 6. Tap Next to start the system restore process. When finishing this process, your system will restart automatically and then you can check if DISM error 1009 is gone.
What to do when System Restore failed? Don’t worry! Every problem has a fix. You can turn to this guide for help - System Restore Failed And Did Not Complete Successfully: 5 Fixes.
Fix 4: Perform an In-place Upgrade
Performing an in-place upgrade also helps to remove DISM error code 1009 Windows 10. To do so, you need to make some preparations:
- Log in with administrator rights.
- Disable all the third-party anti-virus software.
- Remove all the external devices except for the LAN cable, keyboard and mouse.
Step 1. Download Media Creation Tool.
Step 2. After downloading & installing it successfully, open this application and tick Upgrade this PC now.
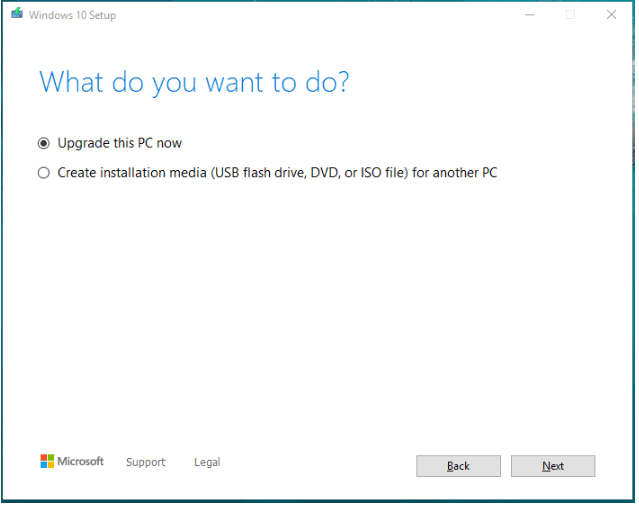
ALT= choose Upgrade this PC now
Step 3. Follow the on-screen instructions. In the window named Ready to Install, choose the items you want to keep in your computer after installation.
Step 4. Hit Next and follow the instructions on the screen to start the installation. As soon as the in-place upgrade is done, the DISM error 1009 will disappear.
Fix 5: Reset Windows
If none of the solutions works out for you, you can try the last but the most effective resort – reset your Windows 10/11 to get rid of DISM error 1009 thoroughly. This operation will remove all installed applications & files and reset your system hence you must back up your personal data with a reliable backup tool before proceeding.
MiniTool ShadowMaker TrialClick to Download100%Clean & Safe
Do you know what the difference of reset Windows, clean install and fresh start is? If you are interested in it, please go to - Windows 10 Reset VS Clean Install VS Fresh Start, Detailed Guide.
Preparations Before Resetting your PC
Before resetting your device, you had better back up your important files in advance. To easily keep your data safe, a professional backup software, MiniTool ShadowMaker will be a good choice. It is specially designed to back up files, folders, systems, disks and partitions on Windows 11/10/8/7. At the same time, it supports full backup, incremental backup, differential backup and even automatic backup.
Now, you only need to do a few simple steps to back up your files:
Step 1. Download & install MiniTool ShadowMaker Trial.
MiniTool ShadowMaker TrialClick to Download100%Clean & Safe
Step 2. Launch it and click on Keep Trial to enjoy its service for free.
Step 3. Go to the Backup functional page and hit Source > Folders and Files.
Step 4. You can select the desired files/folders now. After making your choice, click OK to go back to the Backup functional page.
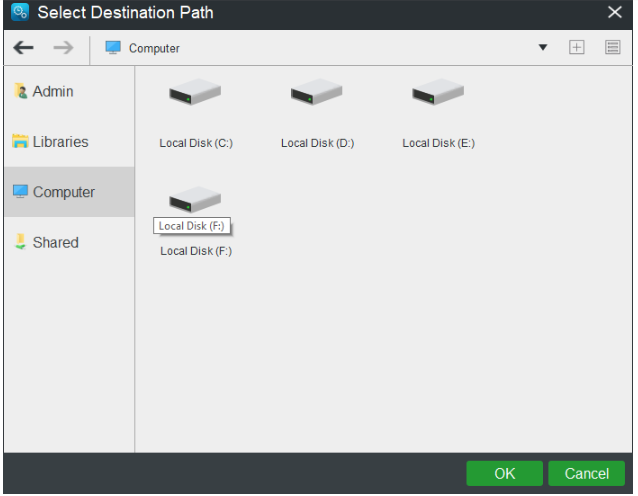
Step 5. Hit Destination on the right pane to choose a destination path for your backup image.
Step 6. The last step is to click on Back up Now to start the backup task at once.
That’s all about how to create a file backup. Now you can put your whole heart into resetting your Windows 10.
Step 1. Click on the gear icon to open Windows Settings.
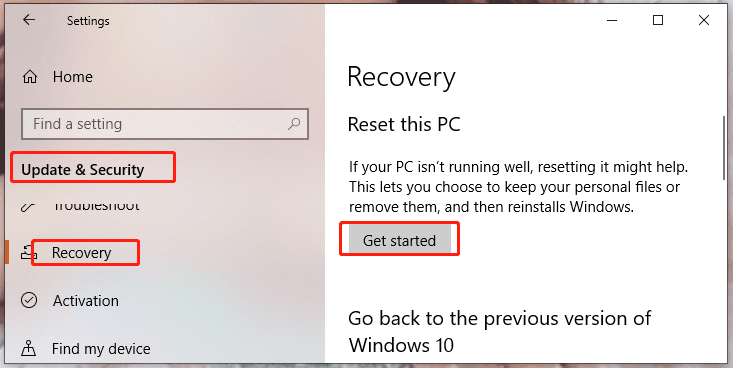
Step 2. In the settings menu, scroll down to find Update & Security and tap on it.
Step 3. In the Recovery tab, hit Get started under Reset this PC.
Step 4. In the new window, you should decide either to keep your files or remove them. Select Keep my files if you want to save your data.
Step 5. Now follow the guidelines on the screen to reset your Windows.
Step 6. If DISM error 1009 is still there, you can follow the steps above again and will have to choose Remove everything before resetting Windows.
Final Words
To sum up, this article shows you what DISM error 1009 is and when you might meet it. Most importantly, it walks you through five detailed solutions to DISM error 1009 Windows 10/11.
If you figure out any better solution to DISM error 1009, you can drop a comment below. Or you have any confusion with this post or MiniTool ShadowMaker, please feel free to send an email to us via [email protected] and we will spare no effort to help you.
User Comments :