DISM error 87 commonly appears due to incorrect syntax, insufficient privileges, Windows version compatibility, and more. To fix it, make sure you run Command Prompt with admin rights, enter the correct command, etc. Just follow the instructions in the MiniTool guide.
About DISM
DISM, short for Deployment Image Servicing and Management, is a command-line tool built into Windows. It is available through Windows PowerShell and Command Prompt. This tool allows you to service and prepare Windows images used for Windows PE, WinRE, and Windows Setup.
Besides, DISM helps you to uninstall, install, configure, and update Windows packages, features, and drivers. With DISM, you can also repair an offline Windows image in a WIM or VHD file, or an online Windows image.
DISM Error 87 Windows 11/10
What Is Error 87 in DISM
When experiencing some issues with the system, such as failed Windows updates and error messages, you may try to run the DISM tool. However, the error code 87 may appear on the screen. Sometimes, no matter which DISM command you use, you receive the 87 error.
Commonly, dism /online /cleanup-image /restorehealth error 87 and dism /online /cleanup-image /checkhealth error 87 are reported by many users. The following screenshot shows you this case: DISM error 87 cleanup-image option is unknown.
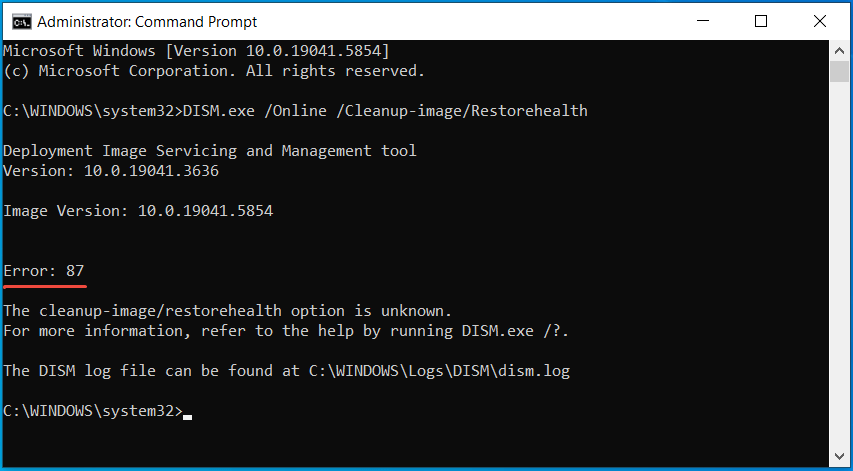
Do you know the reasons behind this error? Let’s explore some.
What Causes Error 87 DISM
Commonly, error 87 in DISM indicates a problem with the command syntax.
In addition, it can happen due to other potential causes like insufficient rights, corrupted system files, incorrect DISM version, and more.
Here are the main causes.
- Incorrect command syntax: You may type an incorrect DISM command, like missing spaces before slashes. For example, using “dism /online /cleanup-image/restorehealth” instead of “dism /online /cleanup-image /restorehealth” triggers error 87.
- Insufficient privileges: You may not launch Command Prompt in elevated mode and run DISM. You should know that administrator privileges are required for DISM to function properly.
- Incorrect DISM version: Using an outdated or incorrect DISM version when servicing a Windows 10 image can also cause error 87.
- Corrupted system files: DISM may throw error 87 if there are corrupted system files.
- Outdated Windows: The system is not up-to-date, which sometimes causes the error.
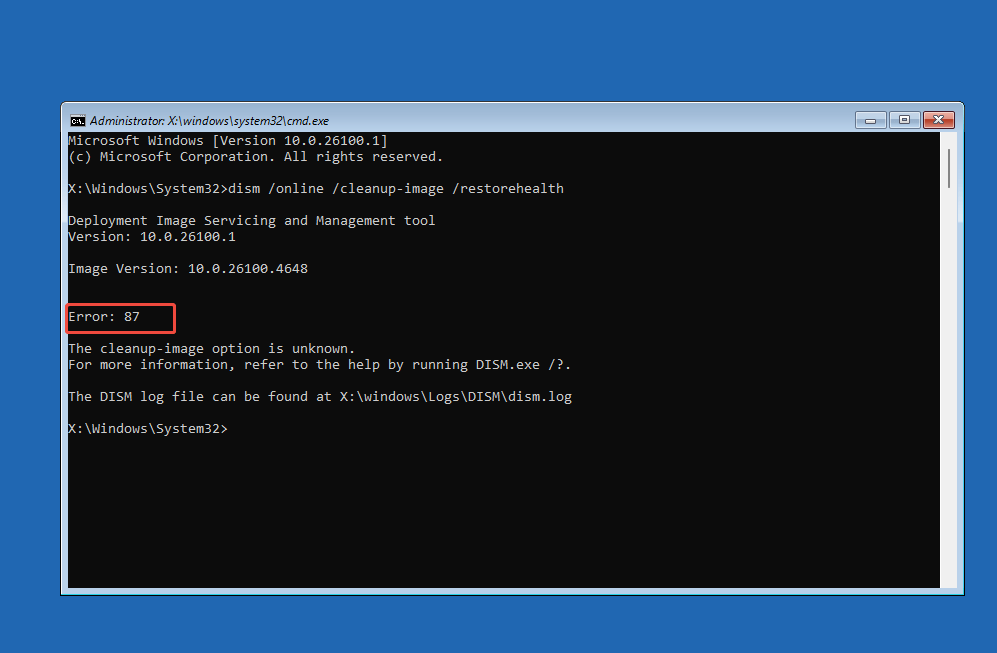
- Run DISM in an unsupported environment: The /online option of DISM only works in the currently running system. It is not available in Windows Recovery Environment (WinRE) and Windows Preinstallation Environment (WinPE). Otherwise, you receive error 87, as shown below.
How to Fix DISM Error 87 Windows 11/10
There are several ways for you to resolve error 87 when running DISM. You can check the command syntax, run Command Prompt with admin rights, update Windows, run SFC, etc.
Verify Command Syntax
As stated, a wrong DISM command returns the 87 error in Windows 11/10. Thus, you should double-check your command and ensure its syntax is correct. Just check if there are missing or extra spaces, or misspelled parameters.
Here are 3 common examples:
- dism /online /cleanup-image /checkhealth: perform a quick scan to see if the Windows image is repairable.
- dism /online /cleanup-image /scanhealth: run an in-depth scan and check for corruption in the Windows component store.
- dism /online /cleanup-image /restorehealth: repair corrupted files in the Windows image.
To learn more commands, refer to DISM Image Management Command-Line Options from Microsoft.
Run Command Prompt as Admin
Before running DISM, make sure you run Command Prompt with full admin permissions. Otherwise, DISM may fail to run.
Here are 2 options to run Command Prompt as admin:
1. Press Win + R to launch Run, type cmd, and press Ctrl + Shift + Enter on your keyboard.
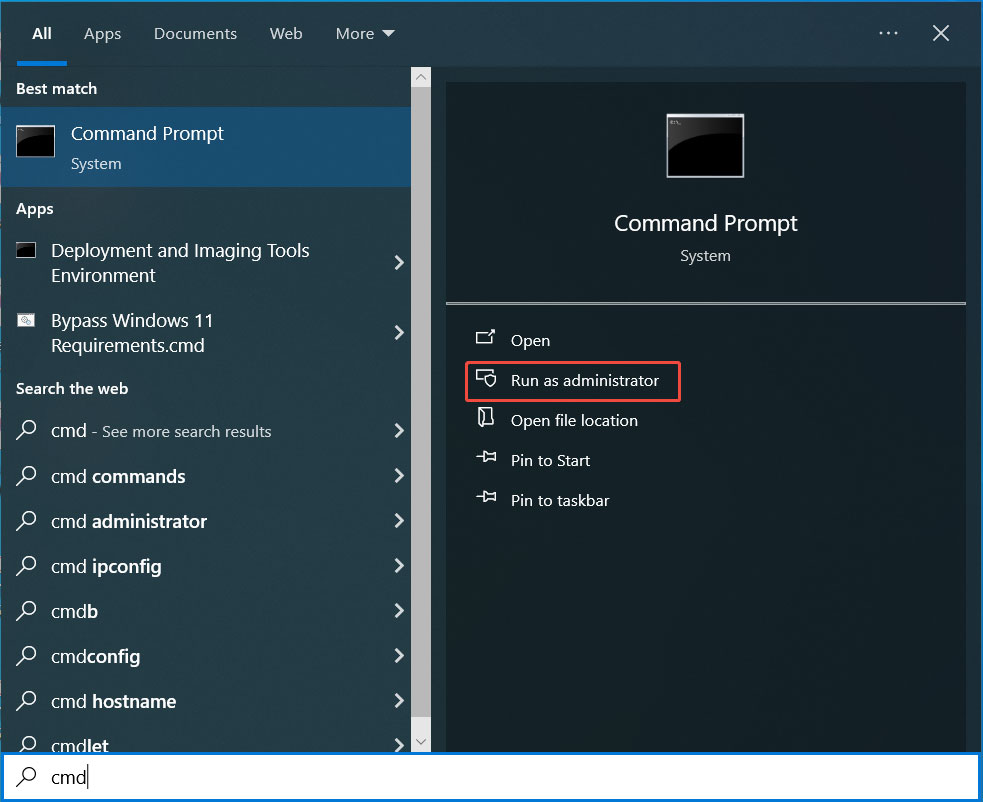
2. Type cmd in Windows Search and hit Run as administrator from the right pane.
Update Windows
A buggy or outdated Windows version can result in malfunctioning system commands, including DISM error 87. Try to update Windows to the latest version to resolve your issue. Besides, Windows updates bring bug fixes to address known issues in the system.
Step 1: Launch Windows Settings by pressing Win + I.
Step 2: In Windows 10, go to Update & Security > Windows Update. In Windows 11, go directly to Windows Update.
Step 3: Hit Check for updates. After checking for available updates, download & install them.
Step 4: Restart the PC several times to finish the installation.
Then, check if error 87 DISM persists. If yes, continue troubleshooting.
Run SFC
Windows may not function properly if some system files are corrupted. Perhaps error 87 is the result of such corruption. To fix the issue, perform a scan by using System File Checker (SFC).
SFC, a built-in Windows utility, helps scan for and repair corrupted or incorrect versions of system files. By replacing those system files with cached copies, various problems and errors can be solved.
To run SFC:
Step 1: Open Command Prompt with admin permissions in Windows 10/11.
Step 2: Input sfc /scannow and press Enter to begin a system scan.
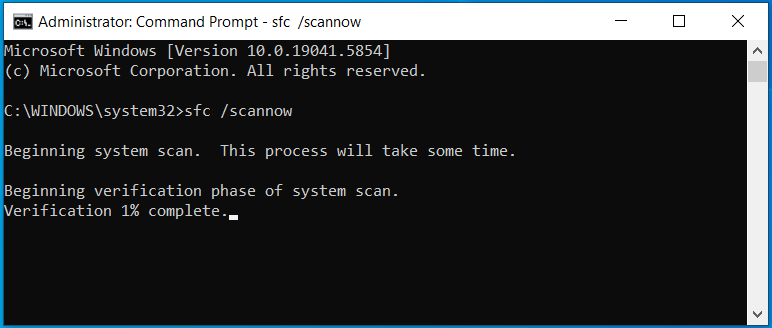
Step 3: The scan will take some time. Once completed, restart the PC.
Then, run DISM and check if you still receive the 87 error.
Check Windows Modules Installer Service
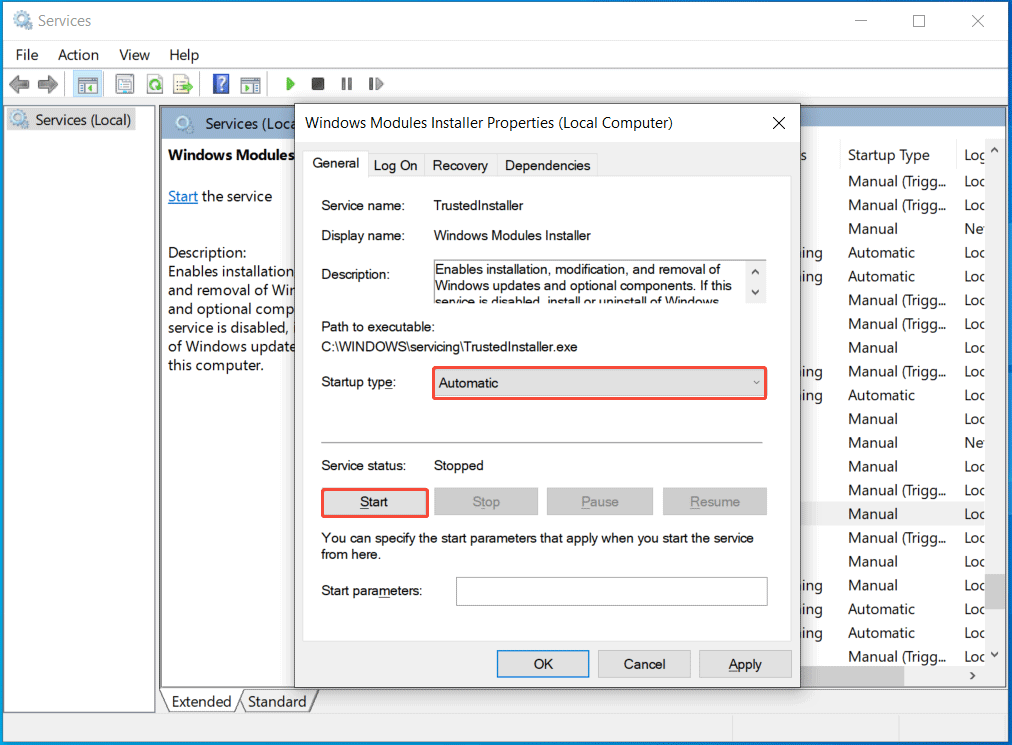
If Windows Modules Installer service is stopped, it may cause dism /online /cleanup-image /restorehealth error 87. Ensure the service is running to resolve the issue.
Step 1: Open the Services app by searching for services.msc in the Search box.
Step 2: Locate Windows Modules Installer and double-click on this service to open its Properties window.
Step 3: Set the Startup type to Automatic and click Start if the service is stopped.
Step 4: Click Apply > OK.
Use the Correct DISM Version
Error 87 when running DISM can stem from an unsupported DISM version. According to Microsoft, this happens when you apply a Windows 10 image using a version from Windows 8.1 or earlier.
To solve the problem, you must use the Windows 10 version of DISM with the Wofadk.sys filter driver. For more information, refer to the guide from Microsoft on DISM command fails with error code 87.
Use a Windows ISO File
When encountering error 87, some users resolve it by using a Windows ISO file.
Take these steps:
Step 1: Download Windows ISO using Media Creation Tool. You can follow the guide on Windows 10 22H2 ISO 64/32-bit full version download.
Step 2: Mount the ISO image file to get a virtual drive. Note the drive letter, e.g., K:.
Step 3: In the elevated Command Prompt, execute the following command:
dism /online /cleanup-image /restorehealth /source:K:\sources\install.wim
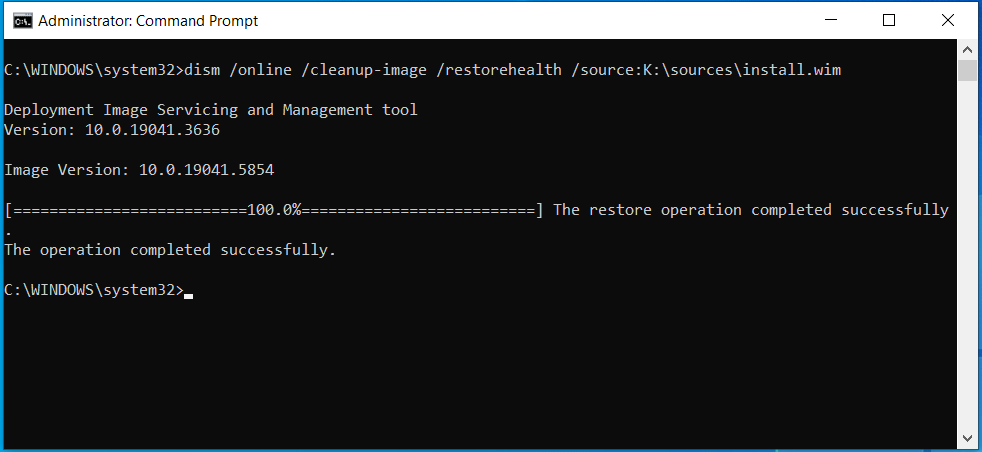
Or, run dism /online /cleanup-image /restorehealth /source:K:\sources\install.wim /limitaccess. This limits the use of Windows Update.
Copy SysprepProvider.dll to a PC
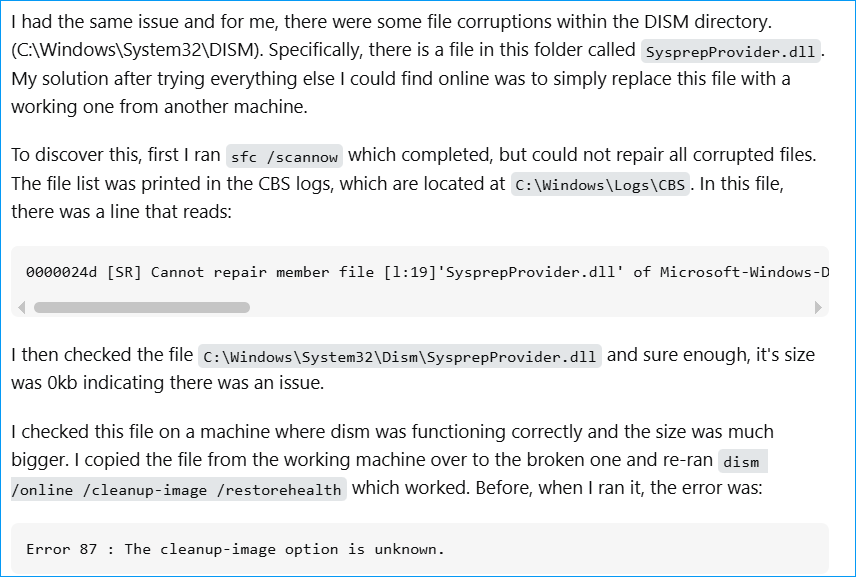
This method was suggested in a thread from Superuser about DISM error 87 cleanup-image option is unknown. Have a try!
You can copy the SysprepProvider.dll file from C:\Windows\System32\Dism on a working computer to the machine that has error 87. After copying, re-run DISM and it should work normally.
Reinstall Windows
If none of the above methods work, the last resort is reinstalling Windows. This can remove the existing system and reinstall a fresh copy of Windows. That way, various issues, including error 87 when running DISM, can be easily resolved.
To reinstall Windows 11/10, here are 2 common options: resetting this PC and making a clean installation from a USB drive. Regardless of the way, first, you should back up important files. As you know, the reinstallation/resetting process leads to data loss.
#1. Back Up Data
In terms of data backup, we suggest using MiniTool ShadowMaker, a free backup software. It plays an important role in disk/partition/system/folder/file backup and recovery.
For computer backup, this software offers options to create scheduled backups, incremental, and differential backups. This saves much time and storage space, and ensures backup continuity.
Now, get MiniTool ShadowMaker via the download button.
MiniTool ShadowMaker TrialClick to Download100%Clean & Safe
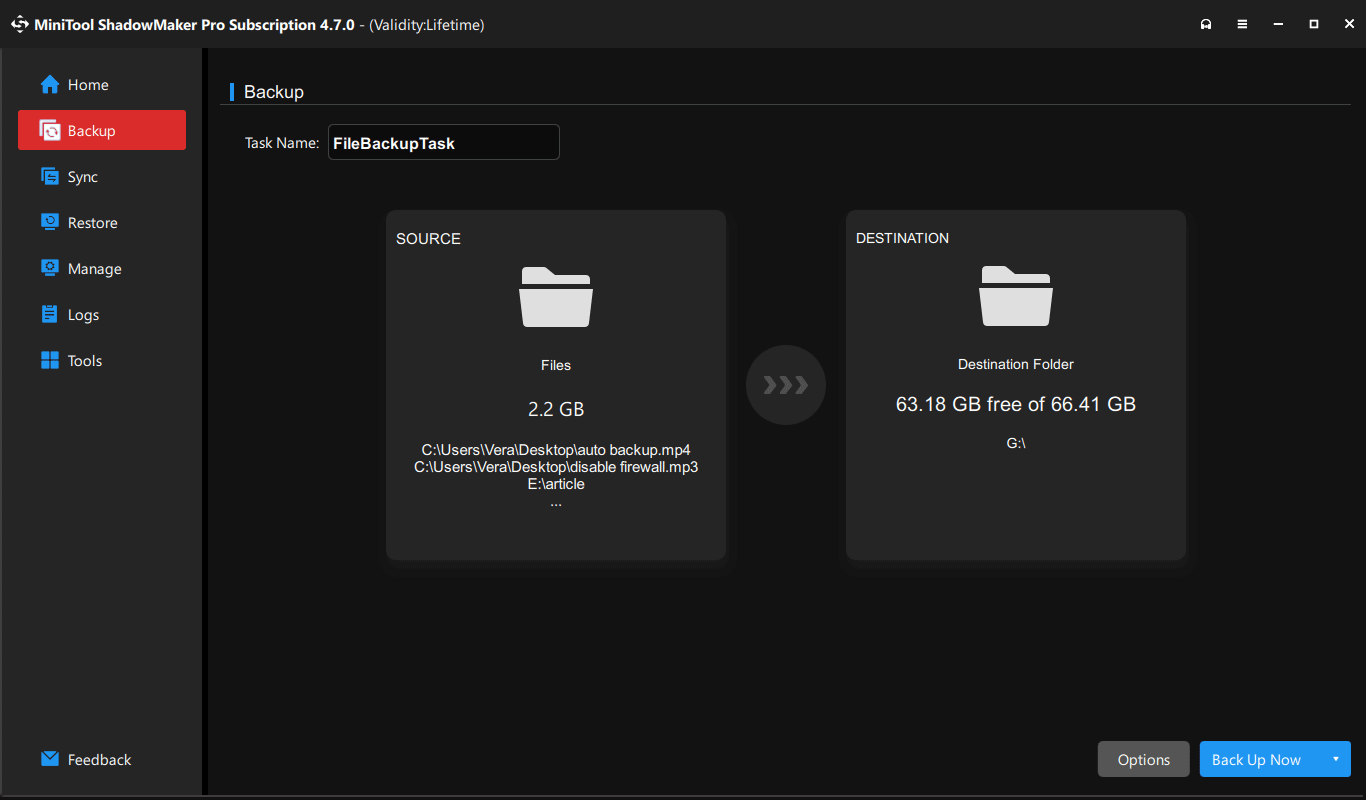
Step 1: Connect a USB or external drive to the computer and launch this backup software.
Step 2: Head to Backup, hit SOURCE > Folders and Files, and choose what to back up. Then, click DESTINATION to pick the connected drive.
Step 3: Click Back Up Now to start data backup.
#2. Reinstall Windows
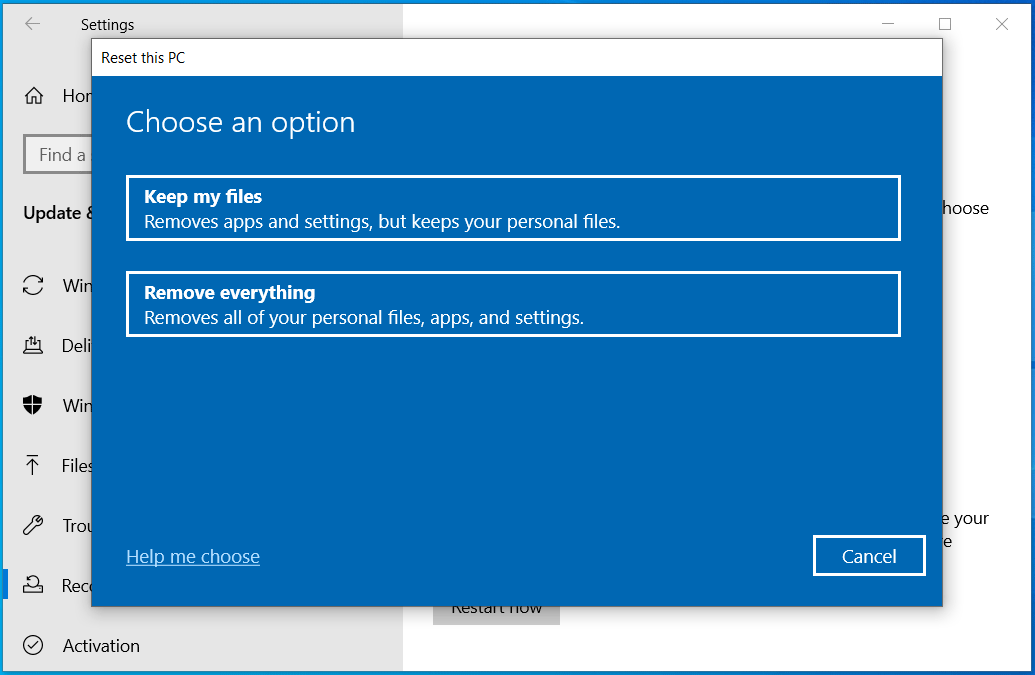
To reinstall Windows via PC resetting:
1. Go to Settings.
2. Hit Update & Security > Recovery > Get started under Reset this PC in Windows 10.
Or, click System > Recovery > Reset PC in Windows 11.
3. Finish the resetting process by following the prompts.
To clean install Windows:
1. Download an ISO file of Windows 11/10.
2. Create a bootable USB drive using that ISO.
3. Boot the machine from that USB drive.
4. In the Windows Setup interface, follow the on-screen instructions to begin installing the system.
To learn details, you can refer to this guide on how to reinstall Windows 11.
The End
That’s all the information about DISM error 87 and how to fix this error in Windows 11/10. If you are experiencing the same issue, check the DISM command, run it in an elevated Command Prompt, update Windows, run SFC, etc.
DISM Error 87 FAQ
1. Run Command Prompt as admin.
2. Execute the dism /online /cleanup-image /restorehealth command.
User Comments :