Error code 0x800703f1 is commonly caused by corrupted system files, Windows Update component corruption, or driver issues. This MiniTool guide covers the most effective fixes, including SFC, DISM, CHKDSK, and resetting Windows Update components.
Quick Answer
Error code 0x800703f1 usually means Windows cannot complete an update or driver installation because of corrupted system files, damaged Windows Update components, driver conflicts, or disk errors. In most cases, running SFC/DISM, resetting Windows Update components, or repairing disk errors resolves the issue.
What Is the 0x800703f1 Error
Error code 0x800703f1 is a Windows system error that commonly occurs during Windows Update, driver installation, or System Restore.
It usually indicates that Windows cannot access or repair essential system components because of corrupted registry data, damaged system files, driver issues, or broken update components.
Various reasons may cause the error code 0x800703f1, including:
- Corrupted system files
- Windows Update cache corruption
- Driver conflicts
- Disk errors
- Antivirus interference
- Interrupted updates
Back Up Your Important Data Immediately
Data loss can occur when some errors appear on the computer. To keep data secure, backing up your important files with Windows backup software is necessary.
To achieve that, it is highly recommended to use MiniTool ShadowMaker, which offers a Backup feature to perform file backup and system backup. Here’s how to use this software:
Step 1. Download and install MiniTool ShadowMaker on your computer.
MiniTool ShadowMaker TrialClick to Download100%Clean & Safe
Step 2. Launch this app to access its main interface and select Backup.
Step 3. Enter the SOURCE section and select Folders and Files.
Step 4. Check the files that you want to back up and click OK.
Step 5. Go to Destination, select a suitable location to save the backup files, and then click OK.
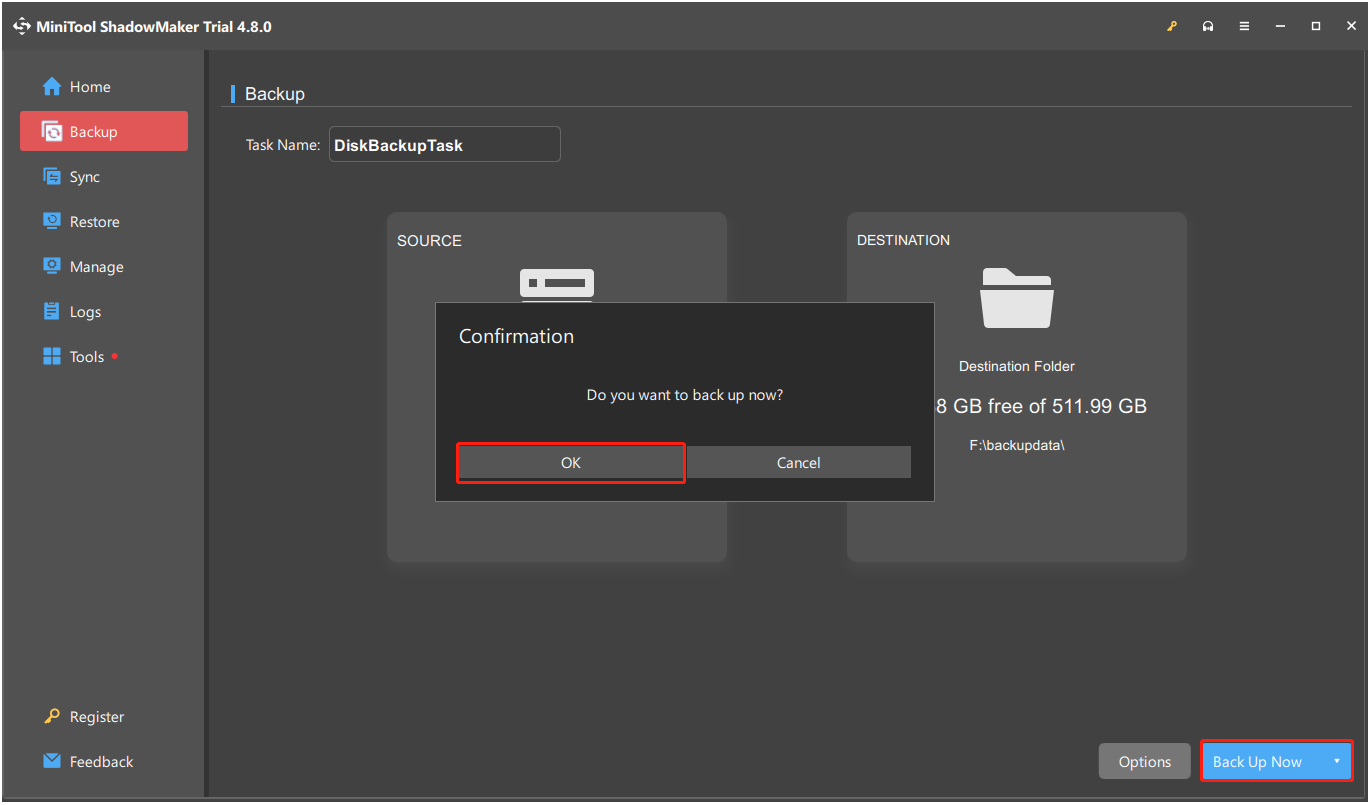
Step 6. Click Back Up Now and OK sequentially to confirm the operation.
How to Fix 0x800703f1 in Windows 10/11
Before trying every troubleshooting method, use the table below to identify the solution that best matches your situation. If the recommended fix doesn’t resolve the error, continue with the remaining methods in order.
| If… | Recommended Fix |
| The error appears during Windows Update | Run the Windows Update Troubleshooter (Fix 1) |
| The error occurs after updating a device driver | Update, roll back, or reinstall the driver (Fix 3) |
| You suspect corrupted system files | Run DISM and SFC (Fix 5) |
| Windows Update repeatedly fails | Reset Windows Update components (Fix 8) |
| Nothing works | Perform a System Restore (Fix 10) |
Fix 1. Run Windows Update Troubleshooter
Windows Update Troubleshooter is a built-in tool on Windows that is designed for troubleshooting issues related to updates. Hence, running this tool to fix error code 0x800703f1 is worth trying. Here’s how to do that:
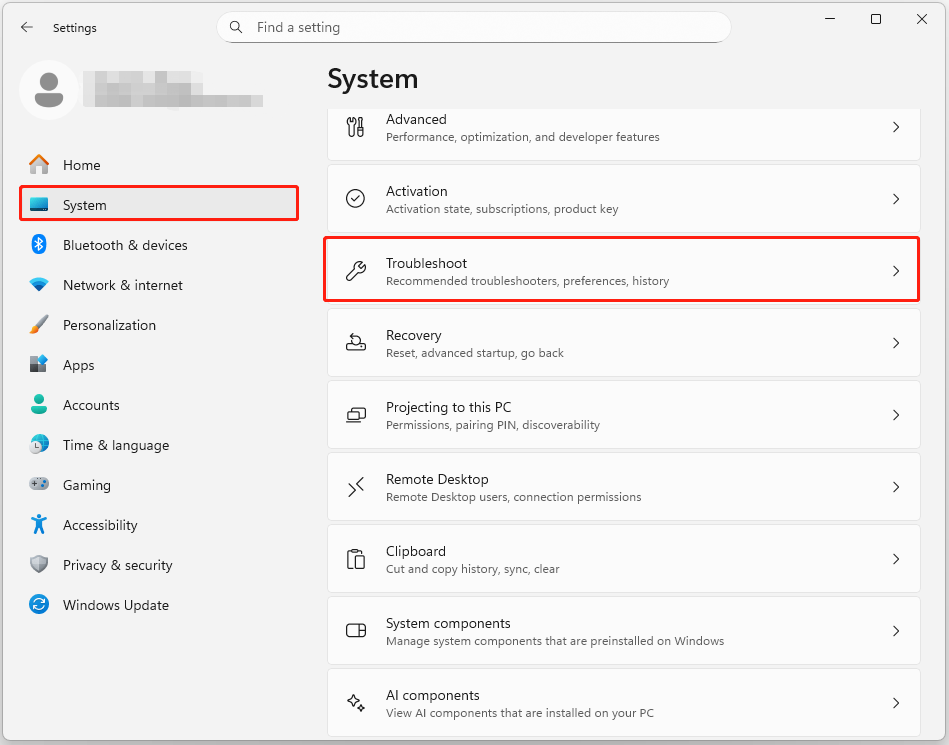
Step 1. Press Win + I to open Settings and select System > Troubleshoot.
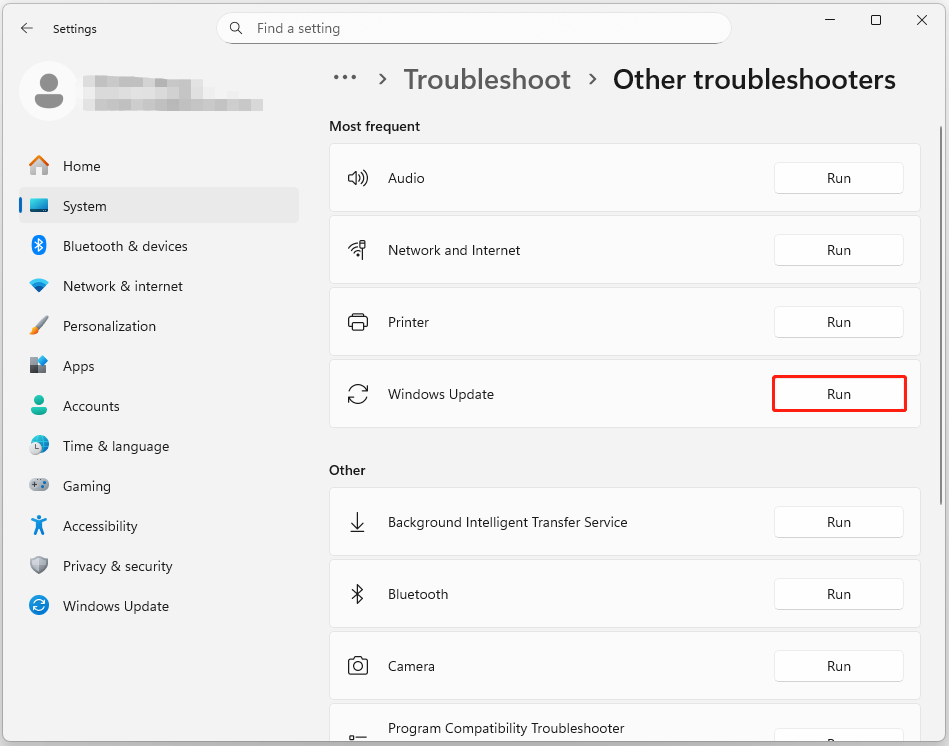
Step 2. On the next page, select Other troubleshooters.
Step 3. Under the Most frequent section, find and locate Windows Update, and then click Run next to it.
Step 4. The troubleshooter will scan for issues and attempt to fix them automatically. Follow the on-screen instructions.
Fix 2. Scan for Malware
Malware can cause various issues on a computer, including the install error – 0x800703f1. In this case, scanning for malware is necessary. If you haven’t installed any third-party antivirus software, follow the steps to run a virus scan with Windows Defender:
Step 1. Type windows security in the Search box and press Enter.
Step 2. Select Virus & threat protection and click scan options.
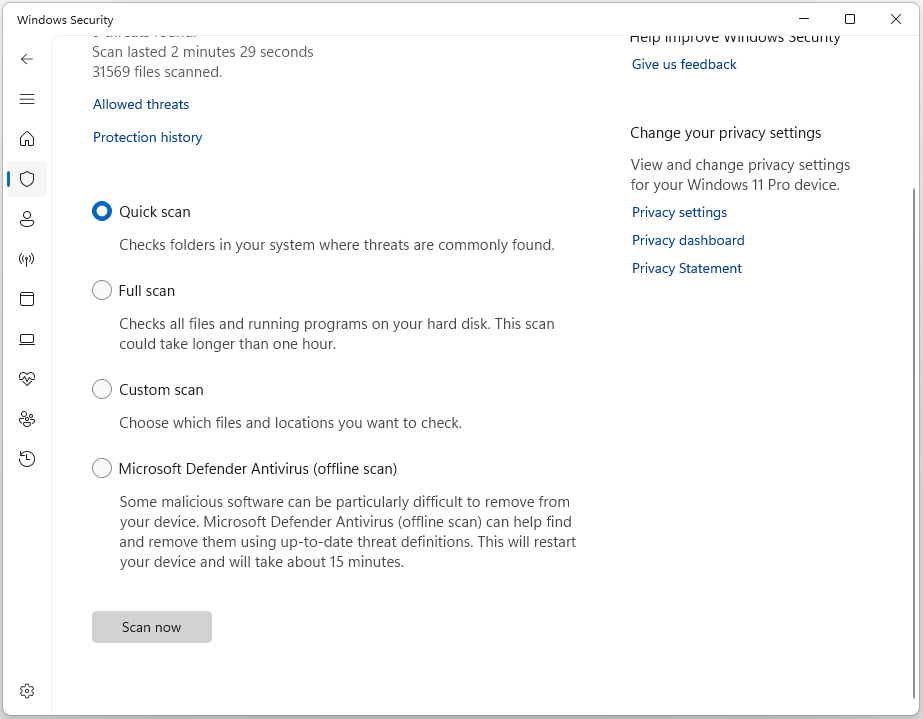
Step 3. In the Scan Options page, choose a scan method you like and click Scan now.
- Quick scan: Checks high-risk system areas and memory for a fast scan.
- Full scan: Inspects every file and folder on your hard drive for a complete security check.
- Custom scan: Scans specific files, folders, or locations selected by the user.
- Microsoft Defender Antivirus (offline scan): Removes stubborn malware offline that a standard scan can’t find.
Step 4. Once done, go to the Protection history page and find the quarantined item. Next, choose Remove to delete it permanently.
Moreover, third-party antivirus software may conflict with Windows processes, including the update process. For a successful update, temporarily disable that software.
Fix 3. Check Device Manager
An outdated or corrupted driver can cause error 0x800703f1. Fix it by updating or reinstalling the target driver. If the error started after a recent driver update, roll that driver back instead.
First, press Win + X to open Quick Link and select Device Manager from the menu to open Device Manager.
Update driver:
Step 1. Expand the category that contains the outdated driver.
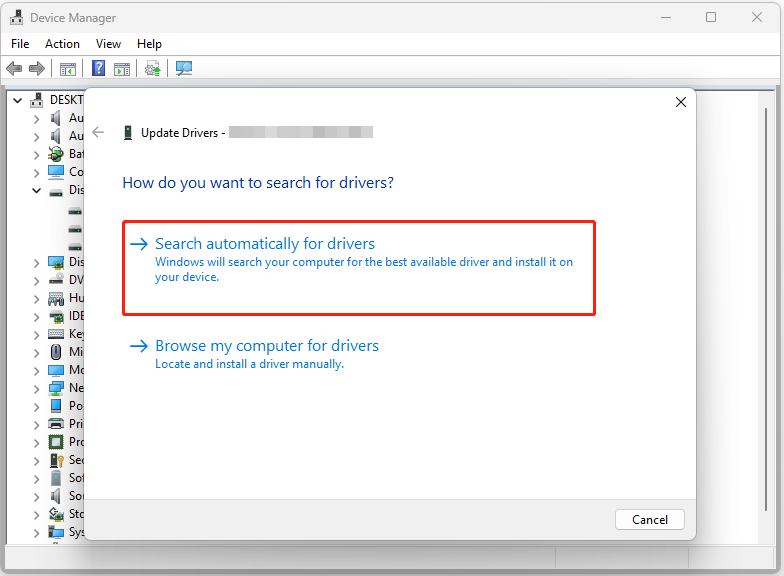
Step 2. Right-click the driver and select Update driver.
Step 3. In the pop-up window, select Search automatically for drivers.
Step 4. Follow the on-screen guide to complete the process.
Step 5. Next, repeat the Step 1-4 to update all the outdated drivers.
Step 1. Expand the category that contains the driver you’ve just updated.
Step 2. Right-click the target driver and select Properties.
Step 3. Navigate to the Driver tab and click Roll Back Driver.
Step 4. Follow the on-screen guide to complete the process. Once completed, check if the error has been resolved.
Reinstall driver:
Step 1. Expand the category that contains the problematic driver.
Step 2. Right-click the driver and select Uninstall device.
Step 3. Click Uninstall in the pop-up window.
Step 4. Once finished, reboot your PC, and then Windows will automatically reinstall the driver.
Fix 4. Uninstall the Latest Windows Updates
In some cases, incomplete previous updates may interfere with the new update installation, resulting in install error 0x800703f1. To resolve the issue, uninstall the latest update. Here’s the guide:
Step 1. Open Settings and go to Windows Update.
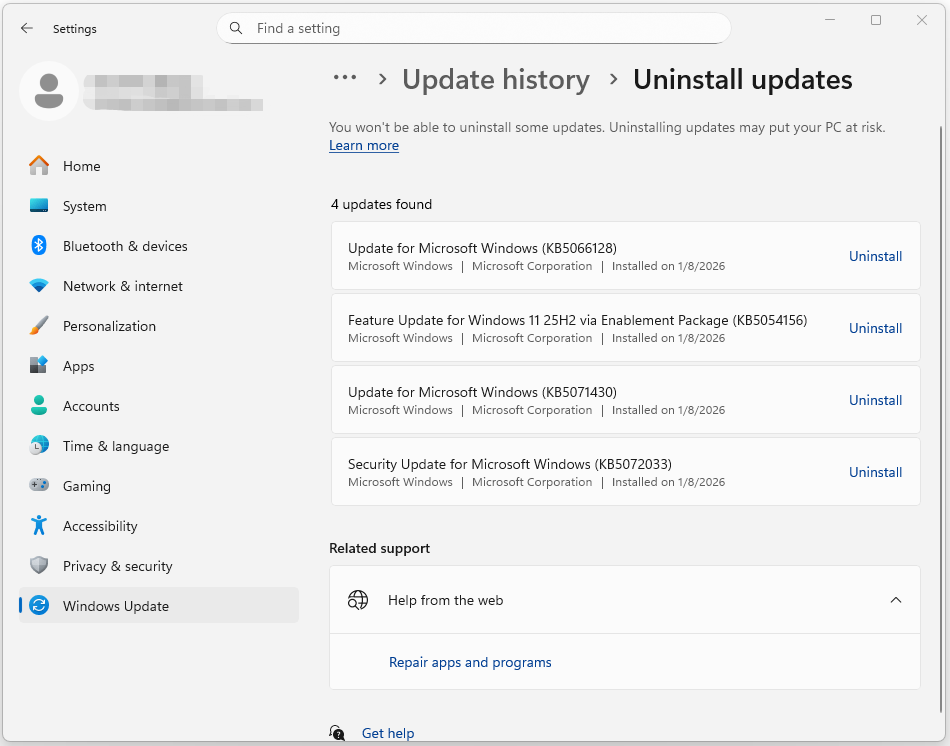
Step 2. Under the More options section, select Update history.
Step 3. In the Related settings section, click Uninstall Updates.
Step 4. On the next page, click Uninstall next to the latest update, and then follow the on-screen instructions to complete the process.
Step 5. Once done, reboot Windows and check if the error has been resolved.
Fix 5. Run SFC and DISM
Corrupted system files are one of the most common causes of error code 0x800703f1. Run DISM to repair the Windows component store first, then use SFC to replace damaged system files.
Step 1. Search for Command Prompt and select Run as administrator.
Step 2. Run the DISM command first:
DISM /Online /Cleanup-Image /RestoreHealth
Step 3. Wait until the process finishes.
Step 4. Then run System File Checker:
Step 5. Restart your computer and check whether Windows Defender turns on.
If SFC reports that some files could not be repaired, run the SFC command again after restarting Windows.
Fix 6. Perform a CHKDSK Scan
Hard disk or SSD errors can also trigger Windows update error 0x800703f1. To fix disk errors, performing CHKDSK is a good choice. It can scan for file system errors and bad sectors. Here’s how to check the drive:
Step 1. Open Command Prompt as administrator.
Step 2. Type chkdsk C: /f /r and press Enter.
- /f: This parameter repairs the incorrect file index or corrupted directory structure.
- /r: This parameter includes the feature of /f. Additionally, it checks for bad sectors and attempts to recover readable data.
Step 3. Press Y to schedule a disk check on reboot.
Step 4. Restart your system and Windows begins the scan. Once complete, rerun Windows Update and check if the error is fixed.
Fix 7. Restart Windows Update Service
Restarting the Windows Update service is useful for fixing issues like stuck downloads and failed installations. Thus, restart the service to fix install error 0x800703f1. Here are the detailed steps:
Step 1. Press Win + R to open Run.
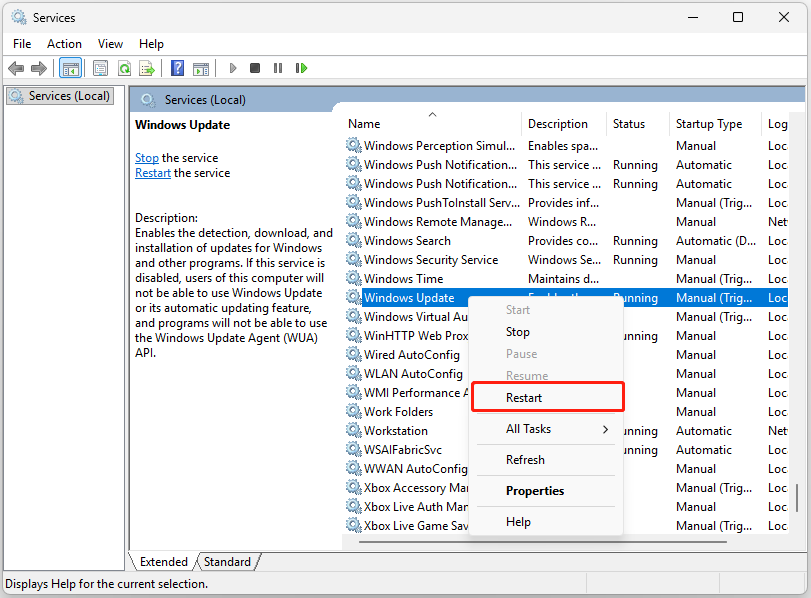
Step 2. Type services.msc and press Enter to open Services.
Step 3. Scroll down to find and locate Windows Update.
Step 4. Right-click it and select Restart. After that, check if the error is fixed.
Fix 8. Reset Windows Update Components
Resetting Windows Update components can resolve corruptions, clear temporary files, reconfigure essential services, and then fix update-related issues, such as Windows Update error 0x800703f1. Here’s how to perform that:
Step 1. Run Command Prompt as administrator.
Step 2. In the elevated Command Prompt window, execute the following commands one by one to reset Windows Update Components:
- net stop wuauserv
- net stop cryptSvc
- net stop bits
- net stop msiserver
- ren C:WindowsSoftwareDistribution SoftwareDistribution.old
- ren C:WindowsSystem32catroot2 Catroot2.old
- net start wuauserv
- net start cryptSvc
- net start bits
- net start msiserver
Step 3. Once the process is complete, update Windows again to check if the error has been resolved.
Fix 9. Try a Clean Boot
Performing a clean boot can start Windows with only essential drivers and programs. So, this helps identify which third-party application is causing the Windows update install error 0x800703f1. Here’s the guide:
Step 1. Open Run, type msconfig, and press Enter to open the System Configuration window.
Step 2. Disable all non-Microsoft services.
- Go to the Services tab.
- Check the Hide all Microsoft services option.
- Click Disable all and click Apply.

Step 3. Disable the suspect startup applications.
- Go to the Startup tab.
- Click Open Task Manager.
- Right-click the apps you suspect and select Disable.
Step 4. Exit Task Manager, click OK under the Startup tab. After that, your computer will restart into a clean boot environment.
Step 5. Now, update Windows again and check if the issue has been resolved.
If yes, it means that the culprit is third-party programs. Next, try to find out the culprit and boot into normal Windows.
Fix 10. Run a System Restore
System Restore is just like a time machine that can revert your computer’s system files, registry, and installed programs to a previous state. If you have created a system restore point before you run into install error – 0x800703f1, try running a system restore.
Here’s the process:
- Open Settings.
- Go to System > About and select the System protection link on the right panel.
- In the prompted window, click System Restore.
- Select Next.
- Choose the restore point you want to use in the list and click Next.
- Click Finish and Yes sequentially to confirm the operation.
- The System Restore process will begin. Wait for this process to be completed.
- Once done, your Windows will revert to the previous state.
What If Error 0x800703f1 Still Won’t Go Away
If none of the above methods work, consider performing an in-place repair upgrade to repair Windows without deleting personal files. A clean installation should be the last resort.
0x800703f1 FAQ
Bottom Line
Error code 0x800703f1 is usually related to Windows Update corruption, damaged system files, driver conflicts, or disk issues. In most cases, running SFC/DISM, resetting Windows Update components, or repairing disk errors resolves the problem.
If the issue persists, consider performing an in-place repair upgrade before reinstalling Windows.
Additionally, if you encounter issues while using MiniTool ShadowMaker to back up your data, contact us via [email protected].
About The Author

Position: Columnist
Charlotte is a technology columnist with a strong focus on the Windows operating system, specializing in disk management, backup, and data recovery. She is passionate about analyzing computer errors, identifying root causes, and delivering practical solutions. In her free time, she stays updated on the latest developments in computer systems and hardware while continuously learning new technologies to broaden her expertise. Her writing style is clear and easy to understand, making complex technical topics accessible even to users with limited computer knowledge.
User Comments :