What is Atlas OS Windows 10/11? Is Atlas OS safe? How to download Atlas OS Windows 10/11 and install it on your PC for gaming? From this post on the MiniTool website, you can find much information about Windows 11/Windows 10 Lite Atlas OS including a step-by-step guide on how to get this system.
If you are a gaming user, you may be looking for a specialized Windows operating system to play games with lower input delay and latency & higher framerate. Fortunately, you come to the right place and you can find Atlas OS is the proper one.
Overview of Atlas OS Windows 10/11
Atlas OS is a lite edition that is designed for game players and it is a modified version that allows players to enjoy high framerate in games. The Atlas OS removes all the negative demerits of the Windows operating system that could impact gaming performance.
Atlas OS is a source project that applies itself to offering an equal gaming chance whether you are running a gaming PC or a low-end PC. Besides, Atlas OS helps to reduce system and network latency & input lag as well as protect user privacy.
In Atlas OS, pre-installed applications and other components are removed, which reduces ISO and the installation size although chances are that compatibility issues appear. Besides, Atlas OS improves Windows in many aspects, for instance, reduced number of services & drivers, disabled power savings/unneeded devices/performance-hungry security mitigations, optimized process scheduling, etc.
Atlas OS is very secure since it aims to be as safe as possible without losing performance by disabling some features that can be exploited or leak information. If you are interested in this lite edition of the Windows operating system, you can download and install it on your PC. Just refer to the following guide to know what you should do.
Note that currently Atlas only supports Windows 10 22H2 and Windows 11 23H2.
Preparations – Windows 11/Windows 10 Atlas OS
Before starting to install Atlas OS Windows 10/11 on your PC, there are some things you should pay attention to. Just do them by following the given instructions here.
Back up Files Before Atlas OS Windows 11/10 Installation
Installing Atlas OS refers to reinstalling your computer to a clean version of Windows. That is to say, your files on the current Windows OS could be deleted during the installation process. Thus, you had better create a backup for the crucial files or folders you want to keep, either on an external drive or in the cloud.
In terms of cloud backup, you can easily back up data to Google Drive, One Drive, or Dropbox. If you want to back up data to an external hard drive, how can you do this task? Using a professional PC backup software is recommended.
MiniTool ShadowMaker, a free backup software for Windows 11/10/8/7, is designed to help to back up your PC easily including the Windows operating system, partition, disk, and files & folders to an internal drive, external hard drive, USB flash drive, network drive, and more. Other features are supported by this software, including scheduled backup, differential backup, incremental backup, file sync, cloning HDD to SSD, and more.
Now tap on the download button below to get the installer of MiniTool ShadowMaker Trial Edition and install it on your PC via the .exe file by following the on-screen instructions. Then, start a file backup.
MiniTool ShadowMaker TrialClick to Download100%Clean & Safe
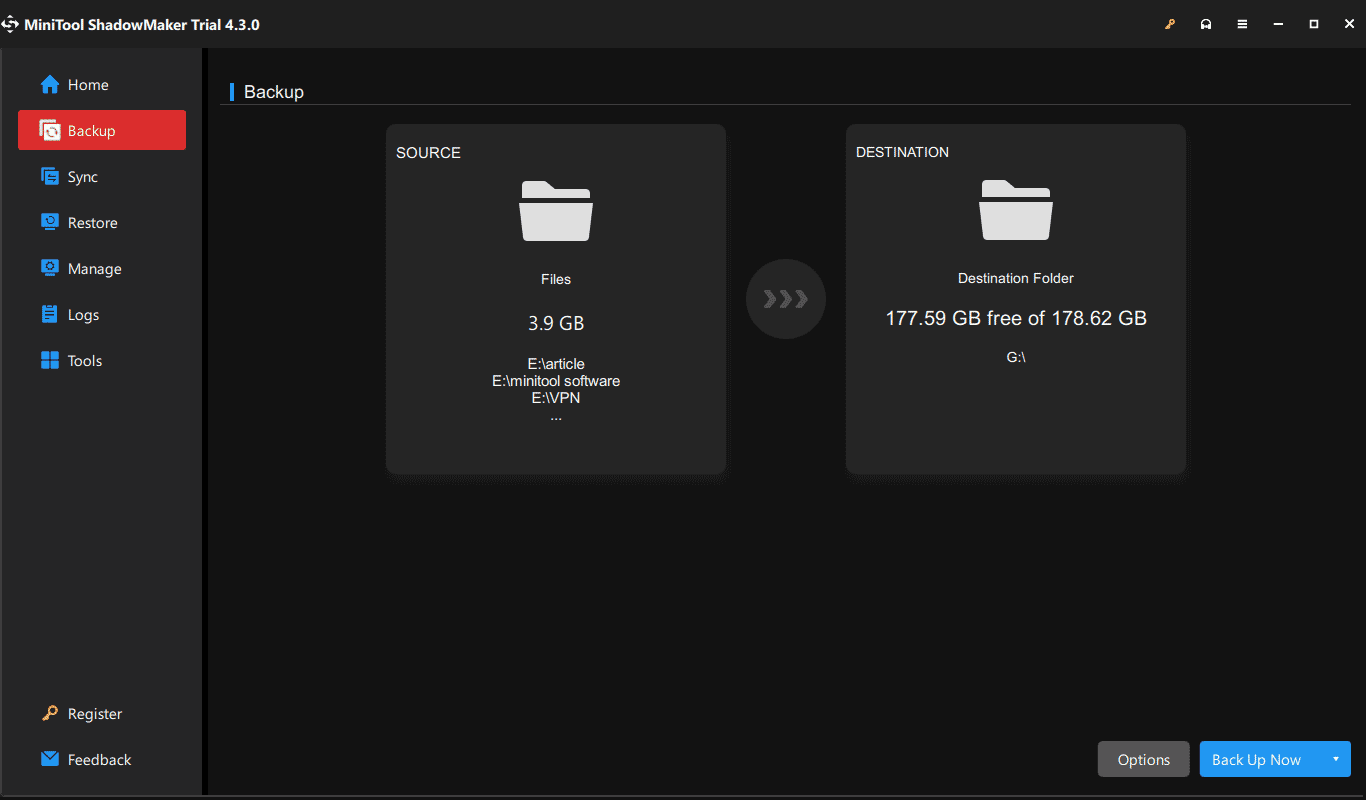
Step 1: Run MiniTool ShadowMaker on your PC by double-clicking on the icon of this software. After it finishes loading, click Keep Trial to enter the main interface.
Step 2: To back up the files that you need under the Backup tab, click SOURCE > Folders and Files, find items under Computer, and click OK to confirm the selection.
Step 3: Click DESTINATION to choose a path to save backed-up files – an external drive or USB drive is recommended.
Step 4: Click on Back Up Now to execute the file backup right now.
Create a Folder to Store Atlas OS Installation Files
To install Atlas OS on your machine, you need to prepare the necessary installation files. Follow the instructions below:
Step 1: In a web browser, visit the AtlasOS download page – https://atlasos.net/.
Step 2: Then, you need to download AME Wizard & Atlas Playbook. After a while, you can get AME Wizard Beta.zip and AtlasPlaybook_v0.3.2.zip.
Step 3: Extract all the files from these two .zip folders to the folder called AtlasFiles.

Download Network Drivers
This way is a precaution in case your network doesn’t work during the installation of Atlas OS Windows 11/10. Just go to the motherboard manufacturer’s website and download the latest network driver. Then, save it to your AtlasFiles folder.
Now, you have all the files you need on your computer. You can save these files to a USB drive or external hard drive. After getting ready, let’s continue reading to learn how to install Atlas OS on your PC.
Guide: Atlas OS Windows 10/11 Download & Install
How to install Atlas OS Windows 11/10? Atlas OS installation is not a complicated and hard process. If you follow the step-by-step guide below, you can easily finish the task. Now, let’s start the Windows 11/Windows 10 Lite Atlas OS setup.
Move 1: Download an Atlas OS ISO File
To install Atlas OS Windows 10 22H2 or Windows 11 23H2, an ISO is required. To do this thing, you need to ask the tool called Media Creation Tool for help.
See how to do this task in Windows 10:
Step 1: Download Windows 10 Media Creation Tool from the download page of Microsoft.
Step 2: Double-click on the .exe to run this tool. Then, accept applicable notices and license terms by clicking the Accept button.
Step 3: Choose Create installation media (USB flash drive, DVD, or ISO file) for another PC to go on.
Step 4: Choose some options based on your needs and here we select:
Language: English (United States)
Edition: Windows 10
Architecture: 64-bit (x64)
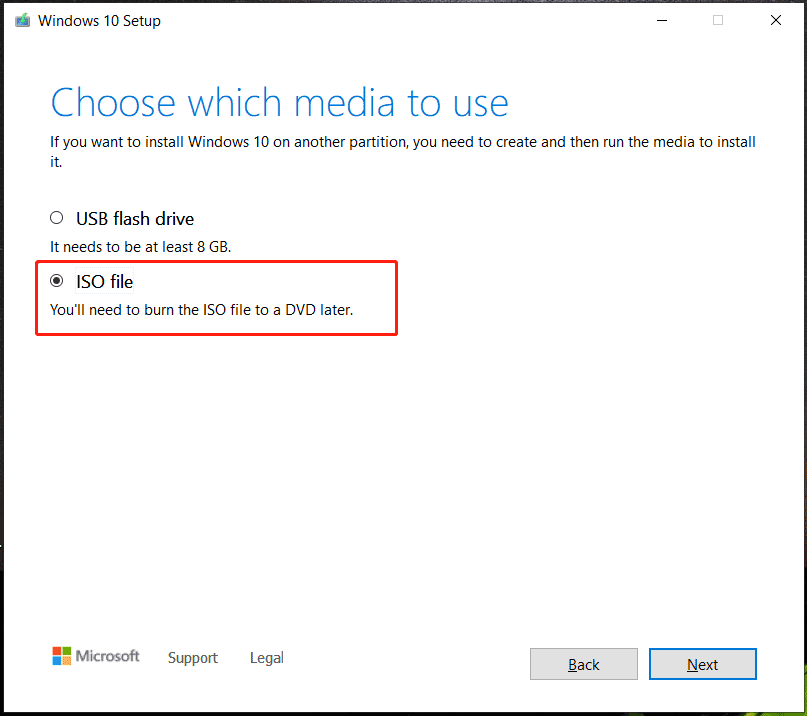
Step 5: Choose ISO file and click Next. Then, choose a download location.
Step 6: Then, the downloading process starts. You need to wait some time.
Move 2: Identify BIOS Mode – UEFI or Legacy
It is important to identify BIOS mode – UEFI or Legacy. This concerns the selection when creating a bootable USB drive via your bootable USB creator. To know which BIOS mode your computer is in, you can check the manual of your device, check it in Windows, or look it up in BIOS.
If you want to check it in Windows, try these steps:
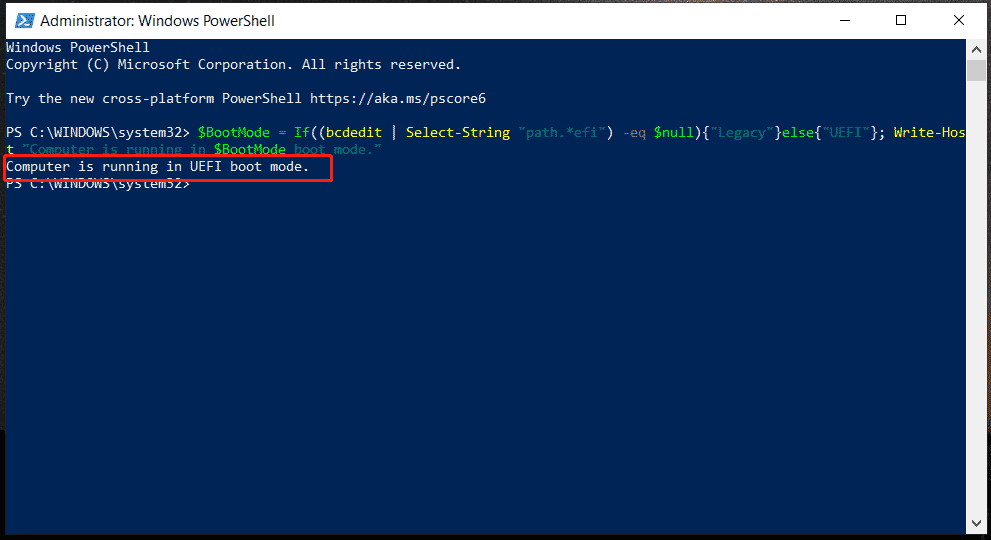
Step 1: Run PowerShell with admin rights – right-click on the Start icon and choose Windows PowerShell (Admin).
Step 2: Then, copy and paste the following command to the window. Don’t remember to press Enter after the command:
$BootMode = If((bcdedit | Select-String “path.*efi”) -eq $null){“Legacy”}else{“UEFI”}; Write-Host “Computer is running in $BootMode boot mode.”
Then, you can see a message to tell you the boot mode. On my PC, it is running in UEFI boot mode.
Related post: UEFI vs BIOS – What’re the Differences and Which One Is Better
Move 3: Create a Bootable USB Drive
Based on the tool, this operation is different. Here, we will show you how to do this thing via Rufus.
Step 1: Go to download Rufus online and run this tool.
Step 2: Connect your USB drive to your PC.
Step 3: Click the SELECT button, find the Windows 10 ISO, and choose it.
Step 4: Choose GPT if your computer is in UEFI boot mode under Partition scheme. If your PC is in Legacy boot mode, choose MBR.

Step 5: Click START and then click OK in the Windows User Experience popup.
Step 6: Click OK again to confirm the operation.
Step 7: After finishing the creation of a bootable USB drive, you need to put the folder that includes all the Atlas OS installation files in the root directory of the USB drive.
Move 4: Boot Windows from USB for Reinstallation
Next, it is time to run the Windows operating system from the bootable USB drive to reinstall Windows 11/10.
To do this thing, you need to disconnect the internet connection and not connect to the network during the installation. This could be helpful to block Windows OOBE from making unauthorized changes that may be harmful to the later installation process of Atlas OS Windows 10/11.
Press a specific key like F2, Del, etc. to boot the PC to BIOS and change the boot order to let it run from the USB drive. Then, you are in the Windows Setup interface. Finish the installation as usual.

Move 5: Install Atlas OS Windows 11/10
After installing Windows via USB, you need to do some things to get Atlas OS Windows 10/11:
Step 1: Put the AtlasFiles folder on the desktop from your USB drive.
Step 2: Open this folder and run Disable Drivers Installation in Windows Update.reg to stop installing drivers via Windows Update if you have manually installed drivers. Then, restart the PC.
Step 3: Connect to the internet to install a driver for Ethernet/Wi-Fi adapter. If there is no network connection, you can use the network driver file you downloaded and saved to the AtlasFiles folder beforehand to install.
Step 4: Check for the latest updates of Windows in Windows Update.
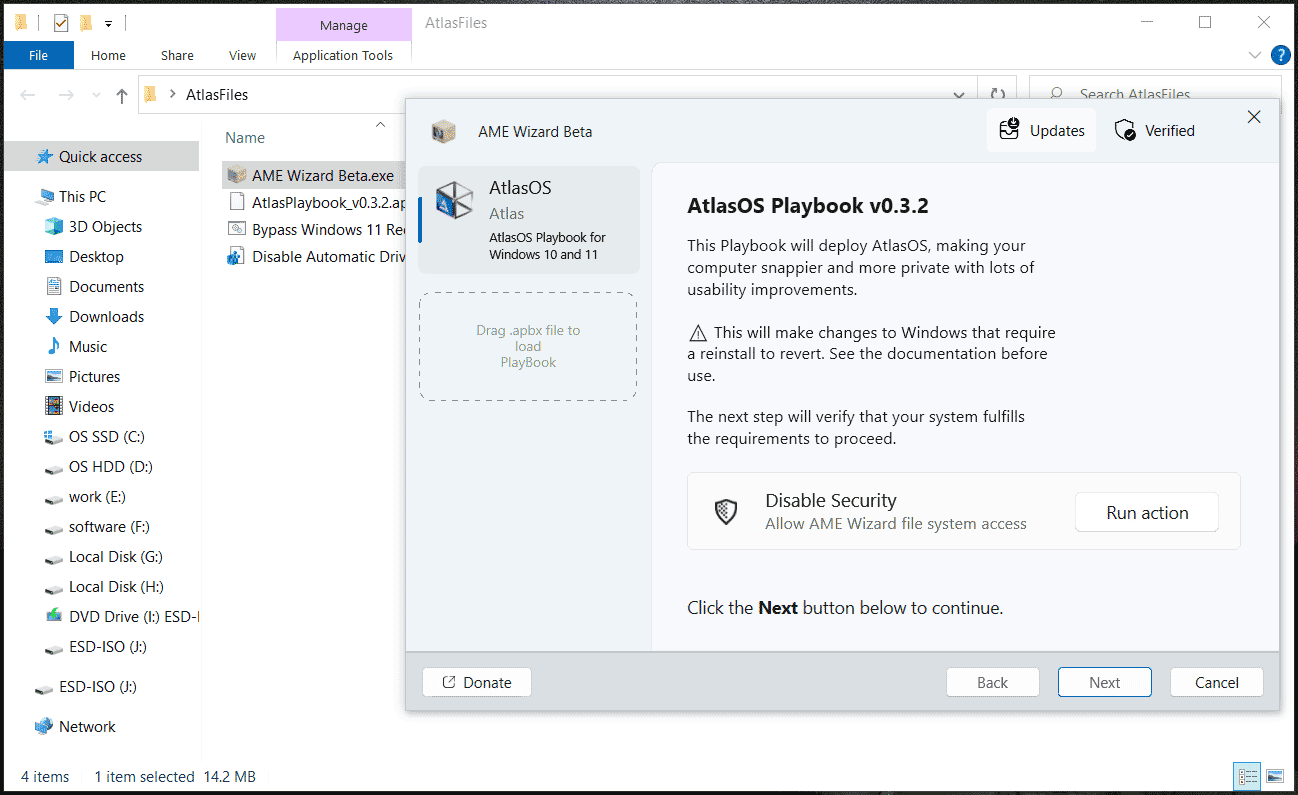
Step 5: Run AME Wizard.exe and load the Atlas Playbook – drag the .apbx file from the AtlasFiles folder to load Playbook. Then, finish all the operations by following the on-screen instructions.
After several restarts, the system is optimized with less junk on it. Then, you can play your games at a fast speed with more privacy.
Conclusion
When talking about how to install Atlas OS Windows 10/11, it is a bit different from the clean install of Windows. The installation in these two cases requires a bootable USB drive (downloading an ISO file and creating one via a creator like Rufus) and then you need to boot the PC from the USB drive to finish the setup of Windows 10/11.
The difference is that you need to download AME Wizard and the Atlas Playbook, extract folders, and move them to the bootable USB. Then, move these folders to the desktop after installation, open Disable Drivers Installation in Windows Update.reg, run AME Wizard, and load Atlas PlayBook. Details can be found in the above paragraphs.
Final Words
When reading here, you know what Atlas OS is and a detailed guide on Atlas OS Windows 10/11 download & installation. To sum up, it is not hard to get Atlas OS. If you are looking for a guide on how to install Atlas OS, this post could help you a lot.
About The Author

Position: Columnist
Vera has been working at the MiniTool Team for over 10 years as a technical editor and content writer. She mainly focuses on disk and partition management, data recovery, Windows backup and restore, and PC troubleshooting. Through in-depth software testing and hands-on experience, she has helped users solve a wide range of computer problems and better protect their data on Windows devices.
User Comments :