Update: The official Windows 11 is already available since October 5, 2021.
I believe that most of you know and have been using Microsoft OneDrive for a certain time. In general, OneDrive on the one hand is a kind of cloud storage space that is as well-known as Google Drive and Dropbox. On the other hand, OneDrive is also a type of data backup service that creates another copy of the target files/folders and syncs them between local devices and the cloud storage.
With OneDrive cloud and OneDrive Windows 11 cloud backup technology, you are able to protect your important documents and get access to them across your devices anytime and anywhere!
Windows 11 Replaces Old Backup Methods with OneDrive
As we all know, there are two types of local backup services that are built-in Windows 10 operating system (OS), File History and Backup and Restore. Both of them can be accessed through Windows Settings. Just go to Windows Start > Settings > Update & Security > Backup and you can find them there.
However, in Windows 11, the entrances for Backup & Restore and File History have been removed from Windows 11 Settings. Yet, you can still access them via Control Panel.
In replace of the backup feature in Settings, Microsoft adds OneDrive synchronization to Settings.
Windows 11 OneDrive vs Windows 10 OneDrive
Then, is there any difference between WIN10 and WIN11 OneDrive? Generally, there isn’t any difference between them as for features. For the other aspects, the only difference is that there is an entrance in Settings for OneDrive in Windows 11.
How to Use Windows OneDrive in Settings?
Now, let’s see how to make use of the OneDrive utility through Settings in Windows 11.
1. Click on the Windows Start icon and select the Settings icon (gear icon). Then, the Settings window will pop up.
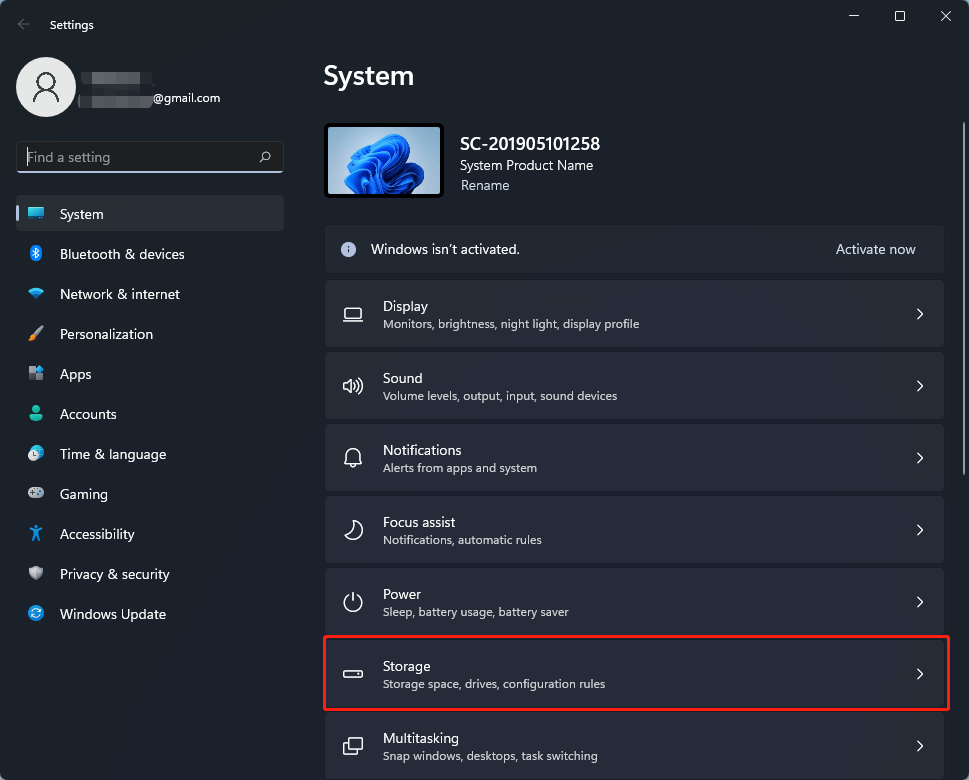
2. In the default System tab, scroll down to find the Storage option and click on it.
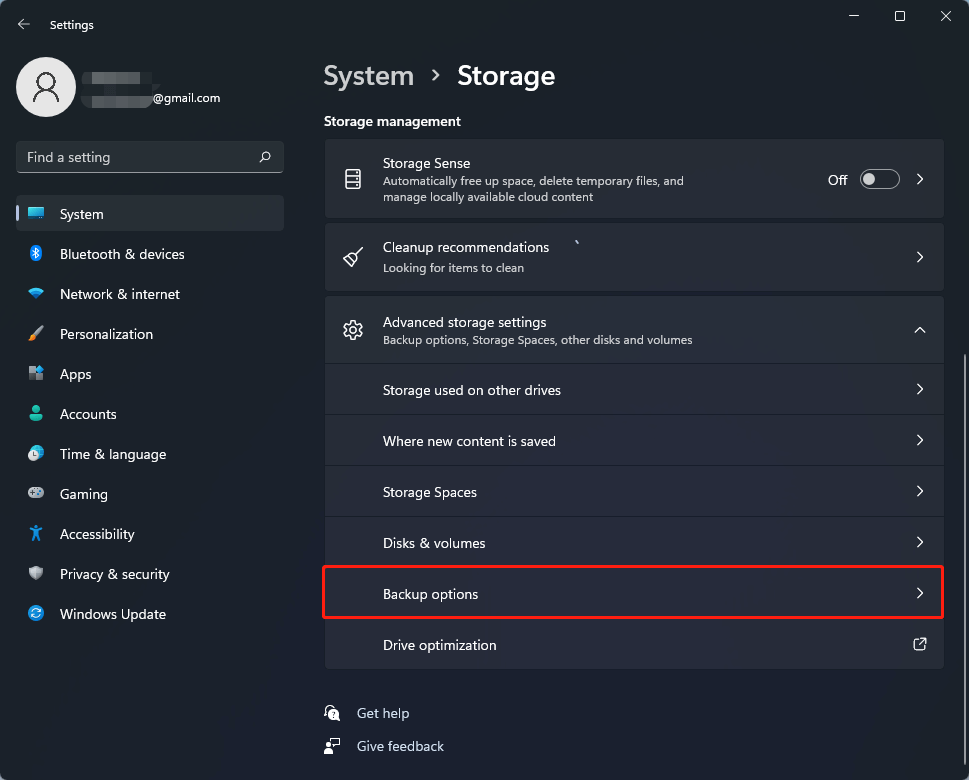
3. In the Storage page, unfold the Advanced storage settings and choose Backup options in the drop-down menu.
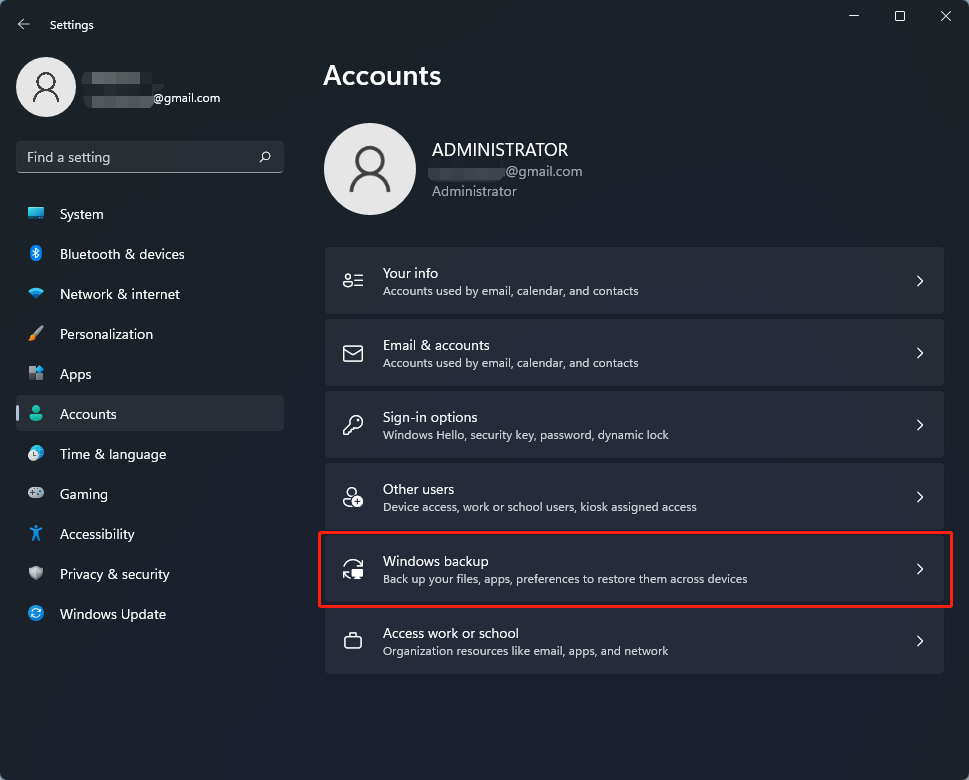
4. Then, you will be brought to the Windows backup page. You can also arrive there through Settings > Accounts > Windows backup.
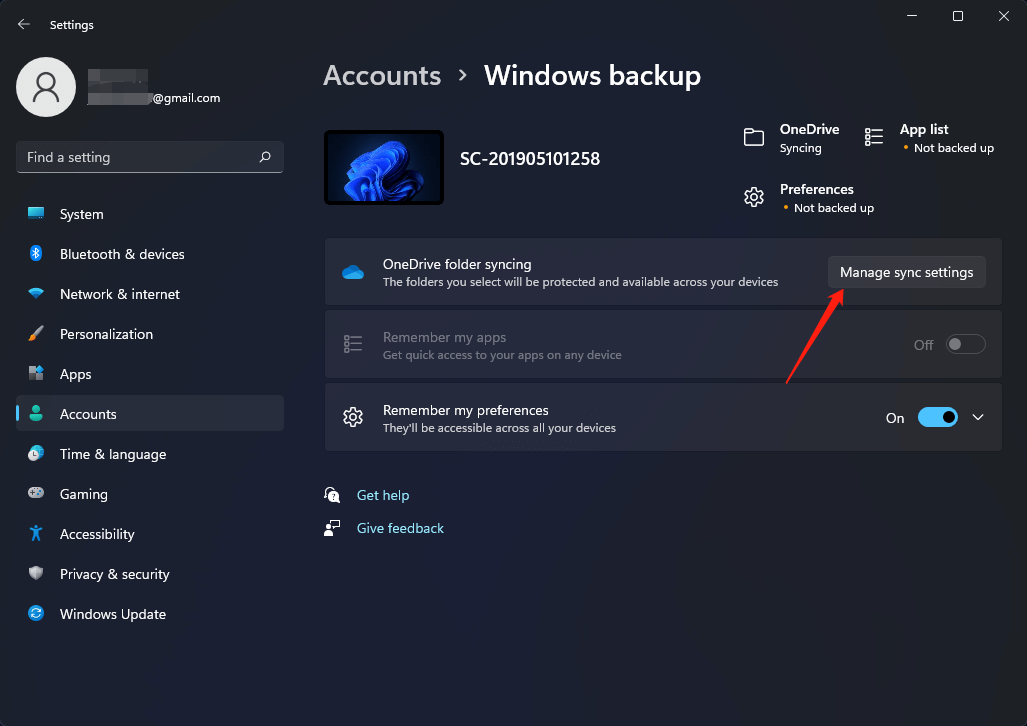
5. On the Windows backup page, click on the Manage sync settings within the OneDrive folder syncing option. The folders you select will be protected and available across your devices.
6. A new window will pop up. Within it, you can manage folder backup in Windows 11 OneDrive and decide which folder(s) to be backed up. Selected folders will sync in OneDrive. New and existing files will be added to OneDrive, backed up, and available on your other devices even if you lose this PC.
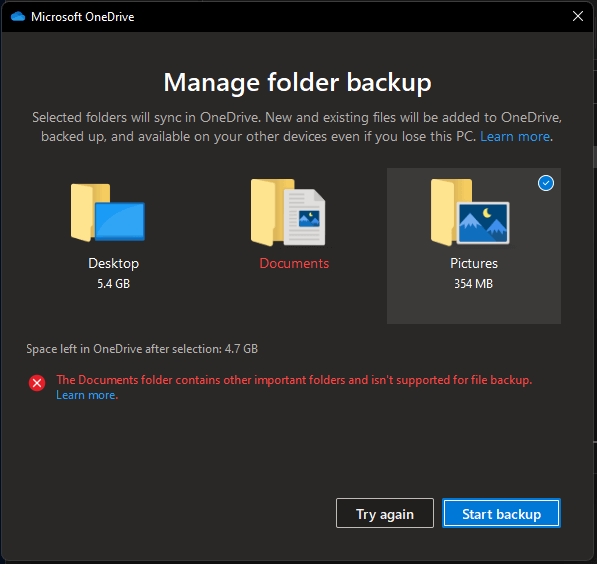
As you can see from the above picture, you are allowed to choose the Desktop, Documents, and Pictures folder as you like. Once selected, just click on the Start backup button. Finally, it will begin syncing the selected folders to your OneDrive storage.
How to Set up OneDrive for Windows 11?
Since OneDrive is pre-installed in Windows 10, if you upgrade Windows 10 to Windows 11, your OneDrive is still there. If you clean install Windows 11 via the downloaded official Windows 11 iso, OneDrive will be installed together with the OS as well.
Next, let see how to personalize your OneDrive in Windows 11.
1. Click on the OneDrive icon (the cloud icon) on the right side of the taskbar and sign in to your Windows 11 OneDrive account if you haven’t done so. If you can’t find it in the taskbar, just search it on your computer using the magnifier icon on the taskbar.
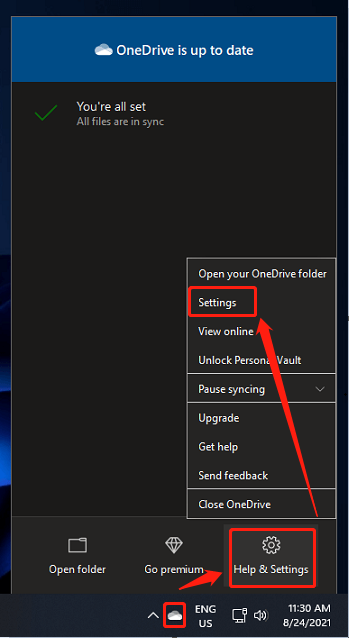
2. Click on the OneDrive in the taskbar, select Help & Settings, and choose Settings in the new popup.
3. Then, the Microsoft OneDrive window will appear. In the default Account tab, you can add another account, get more OneDrive cloud storage by purchasing if you are currently a free user, and do some privacy settings.
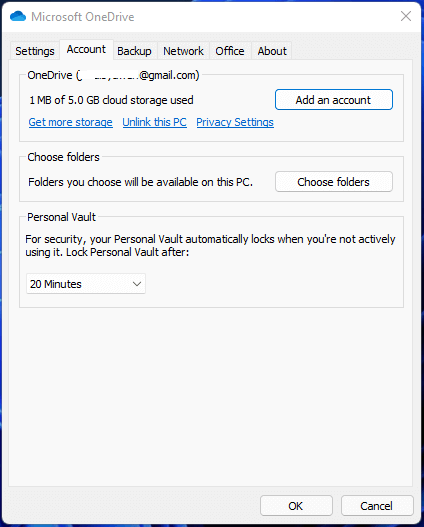
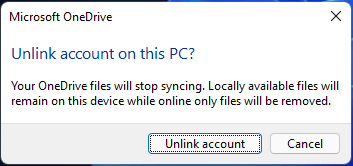
Besides, you can Unlink this PC from your Win11 OneDrive account. However, if you do so, your OneDrive files will stop syncing. Locally available files will remain on this device while online-only files will be removed.
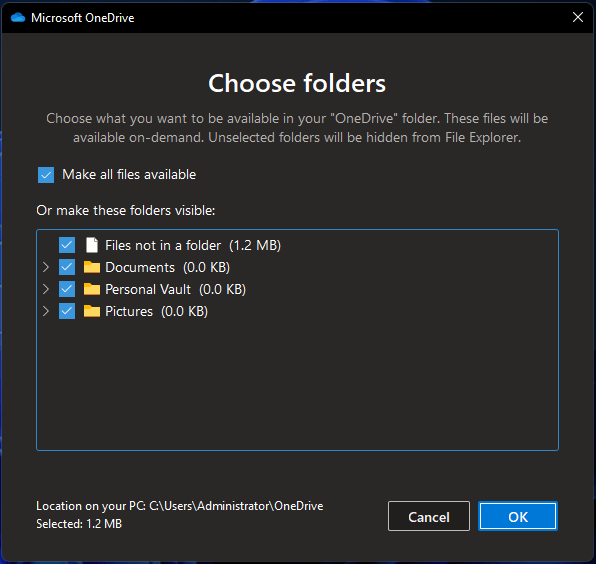
Moreover, you are permitted to determine which folders to be seen on your local device. Just click on the Choose folders button under the Account tab on the above screen.
4. Select the folders or files that you would like to be available in your local OneDrive folder. Those items will be available on-demand. Unselected folders will be hidden from File Explorer.
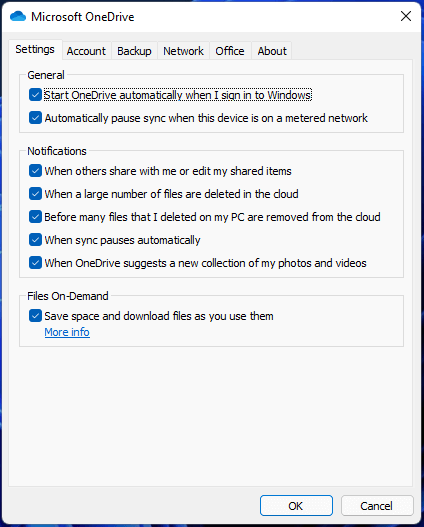
5. Let’s move to the first Settings tab. There, you can do some general and notification settings to your Windows 11 OneDrive service.
General settings
- Start OneDrive automatically when I sign in to Windows.
- Automatically pause sync when this device is on a metered network.
Notification settings (when to notify me)
- When others share with me or edit my shared items.
- When a large number of files are deleted in the cloud.
- Before many files that I deleted on my PC are removed from the cloud.
- When sync pauses automatically.
- When OneDrive suggests a new collection of my photos and videos.
Files On-Demand
This option is only applied to the local Windows 11 OneDrive folder. Normally, you can view the list of files/folders that are saved in the cloud from your local OneDrive folder. Yet, they aren’t really on your local device. Only when you open and use them, they will be downloaded from the cloud immediately.
6. Next, let’s go to the Backup tab. There, you can specify whether to back up your local Desktop, Documents, or Pictures folders to OneDrive cloud or not, just like the customization in the above part. Just click on the Manage backup button and you will get the same screen as what is in the above section.
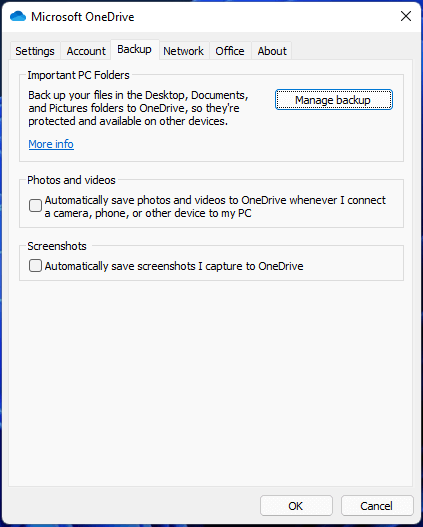
Also, you can choose whether to automatically save photos and videos to Windows 11 OneDrive whenever you connect a camera, phone, or other devices to your PC; and whether to automatically save screenshots you capture to OneDrive or not.
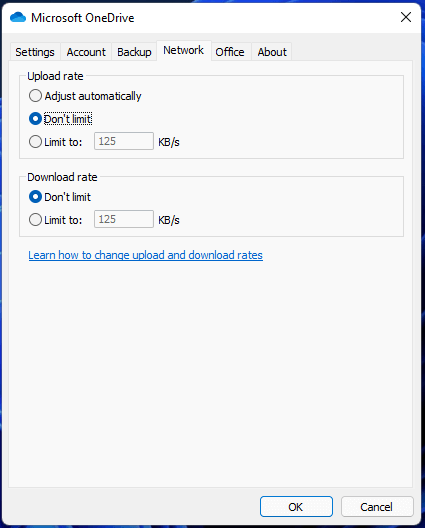
7. Then, navigate to the Network tab. There, you can manage the upload and download rate of your network connection. You can choose to not limit the speed or to restrict the bandwidth within a certain KB/s.
8. Skip to the Office tab. There, you can set up to work on Office files with other people at the same time by syncing the files with Office. Use Office applications to sync Office files that you open instead of relying on Win11 OneDrive.
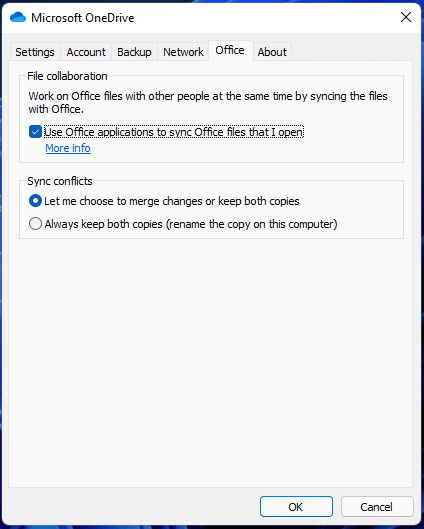
Furthermore, you can decide how to deal with sync conflicts when it happens. You can either manually choose to merge changes or keep both copies, or just automatically always keep both copies by renaming the copy on this computer.
9. Arrive the last About tab. There, you can get more help online from Microsoft Windows 11 OneDrive. You can also learn the terms of use, privacy & cookies, third party notices, as well as OneDrive device ID.

How to Sync Between 2 Local Locations or 2 Cloud Accounts?
As you can figure out from the above content, OneDrive in Win11 can help you synchronize files from local to the cloud or from cloud to local. Furtherly, you may wonder what if someone wants to sync files from local to local or from cloud to cloud, how to do that?
Actually, you can still rely on OneDrive to achieve file synchronization between two local locations or two cloud storage. Yet, things become a little complex.
1. Sync Files Between Two Local Locations
The two local locations can be two locations on the same device or in different devices. The instructions are below. You will need a OneDrive cloud as transit.
- Set up a local-cloud sync following the steps in the previous content. Then, the files in this local account will be synced to the OneDrive cloud.
- Set up another synchronization between the OneDrive cloud and the other local location. So, the files in the OneDrive cloud will be synced to the other local location.
- Finally, the files in the first local location will be sent to the second local location with the OneDrive cloud as transit.
- Vice versa, the files in the second local account will be synced to the first local account also using the OneDrive cloud as a hub.
2. Sync Files Between Two Cloud Accounts
The guide to synchronize items between two cloud drives is similar to that of syncing files between two local addresses described above.
- Build a synchronization between one cloud account and a local OneDrive folder.
- Create a sync between the local OneDrive folder and another OneDrive account.
- Finally, the files in both OneDrive clouds will be synced to each other by relying on the local OneDrive folder as transit.
Also read: How to Sync Multiple OneDrive Accounts in Windows 10
3. Directly Sync from Local to Local
Although Windows 11 OneDrive enables you to sync files from one local address to another, it is a little difficult and you have to keep the two synchronizations work properly. More importantly, the files in both local locations and the cloud are always the same. If you don’t subscribe to the OneDrive Premium plan, the 5GB free cloud storage will soon be used up.
Besides, OneDrive can only sync local files in the Desktop, Documents, Pictures, and OneDrive folders. If you want to sync files in other places, you have to move them better to the OneDrive folder in advance.
If you only want to have another copy of your crucial files in case of data loss or damage due to accidents, you are recommended to save the extra copy locally, which is considered safer than online cloud storage, especially when you have a large amount of local space (external storage is better).
Then, is it possible to sync a large number of files to a local location automatically instead of manually copy & paste each time? Of course! Yet, you will need to rely on a professional and reliable program like MiniTool ShadowMaker.
MiniTool ShadowMaker TrialClick to Download100%Clean & Safe
1. Download, install, and launch MiniTool ShadowMaker on your computer.
2. If it asks for purchase, just click the Keep Trial button on the upper right to continue enjoying its features for free.
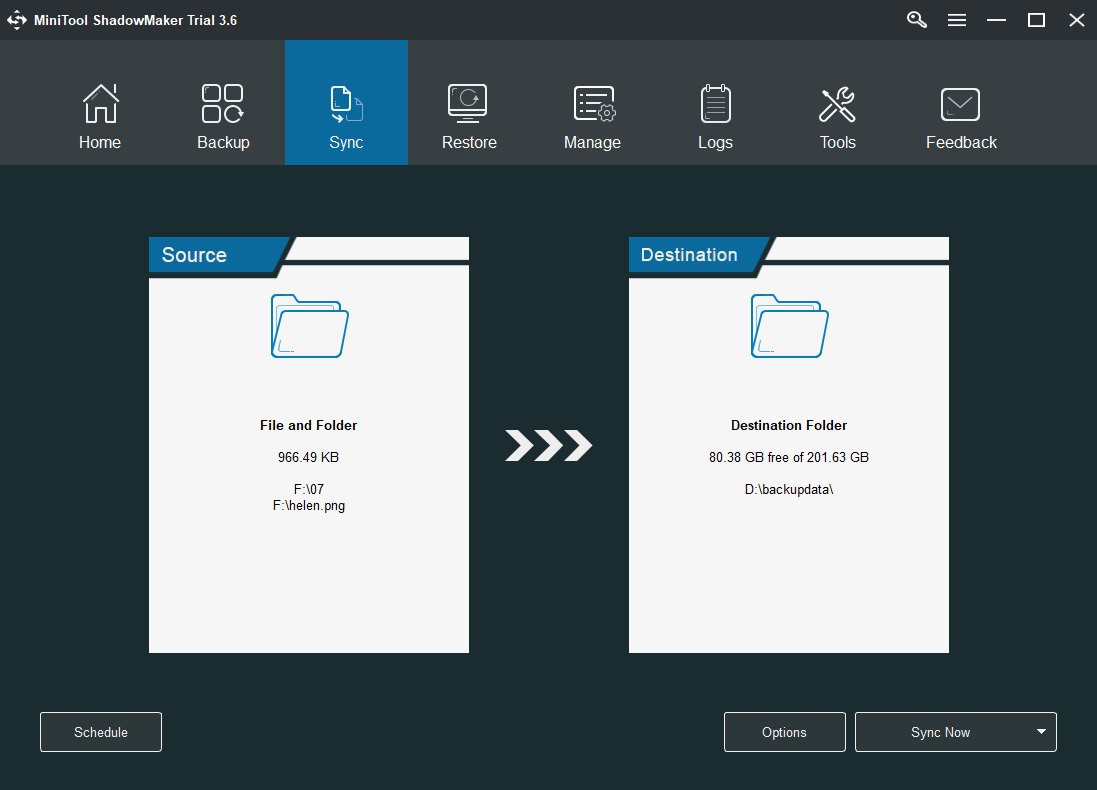
3. When it enters into its main interface, go to the Sync There, click the Source module to select the files/folders you want to protect. Click the Destination module to pick up a local location to save the synced copy.
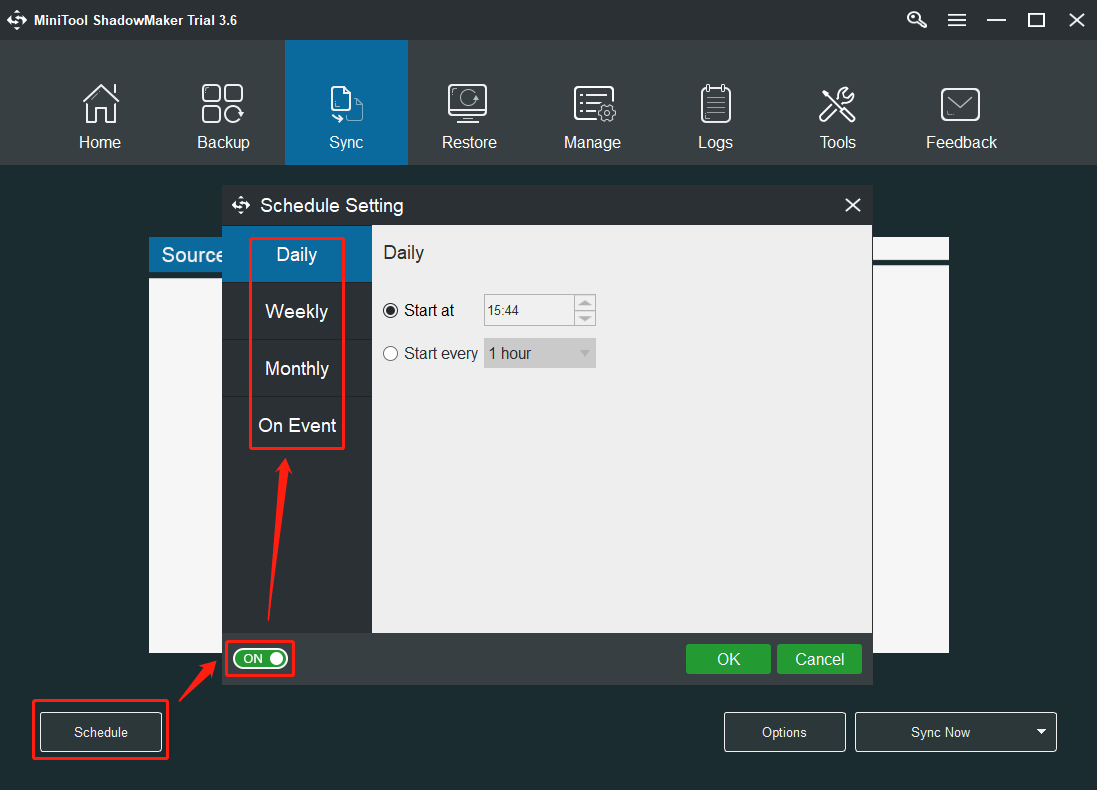
4. Click on the Schedule button in the bottom left. A small window of schedule settings will pop up. Just switch on the schedule settings in the lower-left of the new window and select a proper schedule (daily, weekly, monthly, or on event).
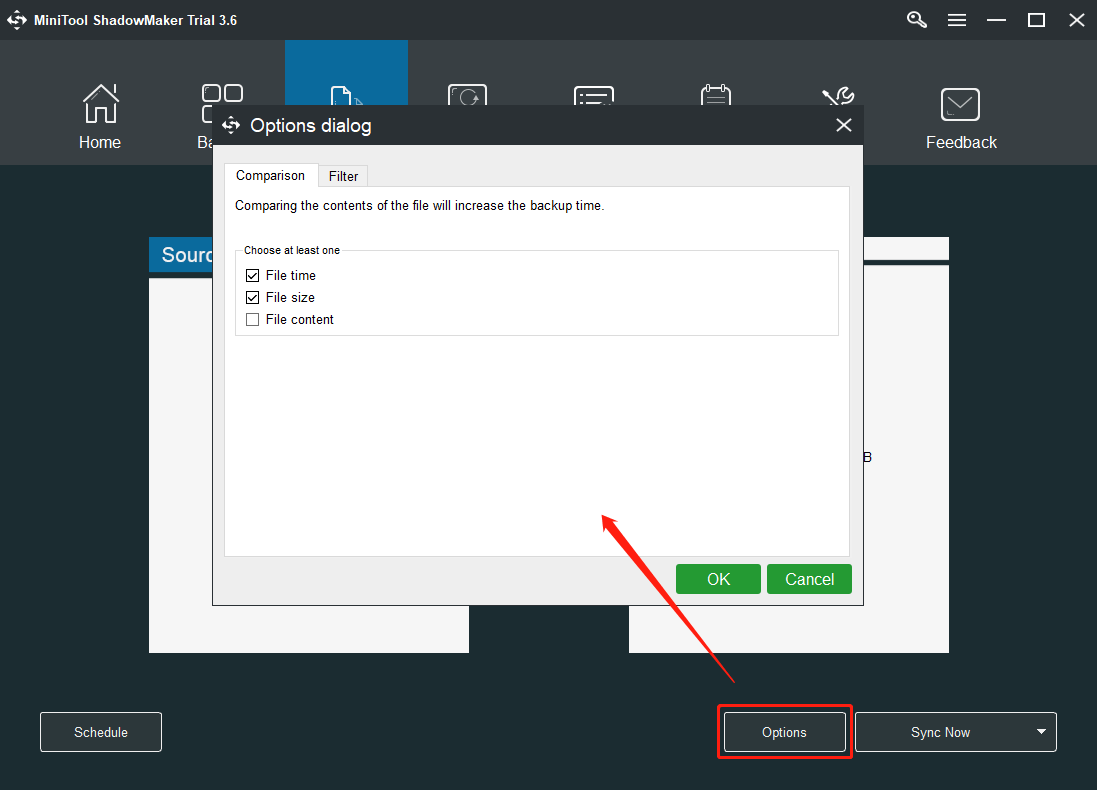
5. Click on the Options button in the lower right and you will be allowed to decide how the synchronization will happen, by comparing file time, file size, or file content. If you choose to sync files by comparing their content, it will take a longer time than comparing the other two parameters.
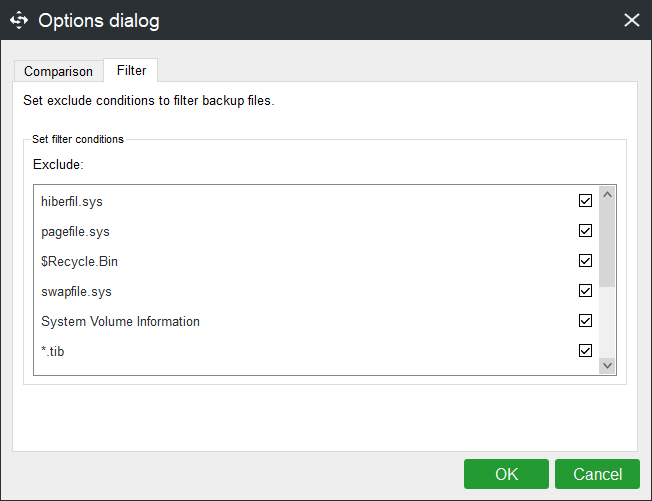
You can also filter certain files from syncing, such as hibernation files, page files, recycle bin files, etc.
Besides syncing files from one location to another, MiniTool ShadowMaker can also back up files/folders, partitions/volumes, system, and even the entire hard disk to another local, external, or network location.
The following is a table comparing MiniTool ShadowMaker File Sync and OneDrive.
| MiniTool ShadowMaker | OneDrive | |
| Sync Source | All files on PC or connected to PC. |
|
| Source Files Filter | Yes | No |
| Sync Destination | Local | Local or cloud |
| Sync Schedule | Daily, weekly, monthly, or on event. | Real-time |
| Sync Method | One-way sync | Two-way sync |
To Wrap Things Up
Microsoft Windows 11 OneDrive has replaced File History and Backup & Restore in Settings. You can take advantage of it to easily sync your local files to cloud storage or vice versa. Yet, if you just want to save a copy of vital files locally and automatically, you can rely on third-party software such as MiniTool ShadowMaker.
Also read
About The Author

Position: Columnist
Helen is a tech writer with over 10 years of experience. She specializes in creating easy-to-follow guides for video editing, media file conversion, and computer performance. Helen doesn't just write—she tests every software herself and listens to feedback from users and experts. Her goal is to make complex programs simple so that everyone can solve their tech problems with confidence.
User Comments :