Windows PC stuck on Choose an operating system screen is really a nuisance that prevents you from accessing everything on your desktop. Luckily! This informative article from MiniTool will explore the underlying causes and help you try a set of well-established tactics to troubleshoot this issue easily.
Quick Answer: What to Do If Windows Is Stuck on Choose an Operating System
If Windows is stuck on the Choose an Operating System screen, try these fixes:
- Remove incorrect or duplicate boot entries.
- Run Windows Startup Repair.
- Rebuild the Boot Configuration Data (BCD).
- Repair corrupted system files.
- Check BIOS boot settings.
These methods fix the underlying boot record and system file damage to restore normal startup.
Introduction
When a PC keeps booting to Choose an Operating System, or gets stuck in a Windows 11 Choose an Operating System loop or a Windows 10 stuck on Choose an Operating System issue, users are often unable to enter Windows normally.
This problem is usually related to multiple boot entries, corrupted Boot Configuration Data (BCD), or incorrect BIOS boot settings.
In most cases, the issue can be resolved without reinstalling Windows by removing duplicate boot entries, running Startup Repair, or rebuilding the boot configuration.
What Does “Choose an Operating System” Mean
The Choose an Operating System screen is part of the Windows Boot Manager and appears when the computer detects multiple boot options. This interface typically generates under the following conditions:
- Multiple OS installations: You have installed more than one version of Windows.
- Leftover data: An old Windows installation wasn’t fully cleaned out.
- Upgrade glitches: A recent system reset or upgrade accidentally generated a duplicate boot entry.
- Configuration errors: Windows is struggling to pinpoint the correct startup path.
If Windows stays on this screen, repeatedly shows it after restarting, or does not load the selected operating system, the boot configuration may need to be repaired.
Why Is My PC Stuck on Choose an Operating System
The most common culprits include:
| Cause | Description |
| Duplicate boot entries | Residual files from old or unused Windows installations can leave behind ghost startup options. |
| Corrupted BCD files | Windows Boot Manager cannot find the correct system files. |
| Failed update or reset | A failed or abruptly stopped system update/reset can severely corrupt your startup settings. |
| Incorrect BIOS settings | The PC may boot from the wrong drive or option. |
| Disk errors | Storage problems can prevent Windows from loading correctly. |
Backup Files via MiniTool ShadowMaker
Before operation, make sure to back up data! In this case, a piece of PC backup software called MiniTool ShadowMaker comes in handy. This program comes with the Media Builder feature that enables you to create a bootable USB drive.
When your PC faces system crashes, or doesn’t respond, you can boot it from this drive and backup files on your Windows machine. It’s worth noting that there are also other powerful features like system backup, partition backup, disk backup, file sync, disk cloning, etc.
MiniTool ShadowMaker TrialClick to Download100%Clean & Safe
# Preparation: Create a Bootable USB Drive on a Working Computer
Step 1. Connect an empty USB flash drive to another working computer.
Step 2. Download, install, and launch MiniTool ShadowMaker. Click on Keep Trial to enter its main interface.
Step 3. Move to the Tools page and select Media Builder.
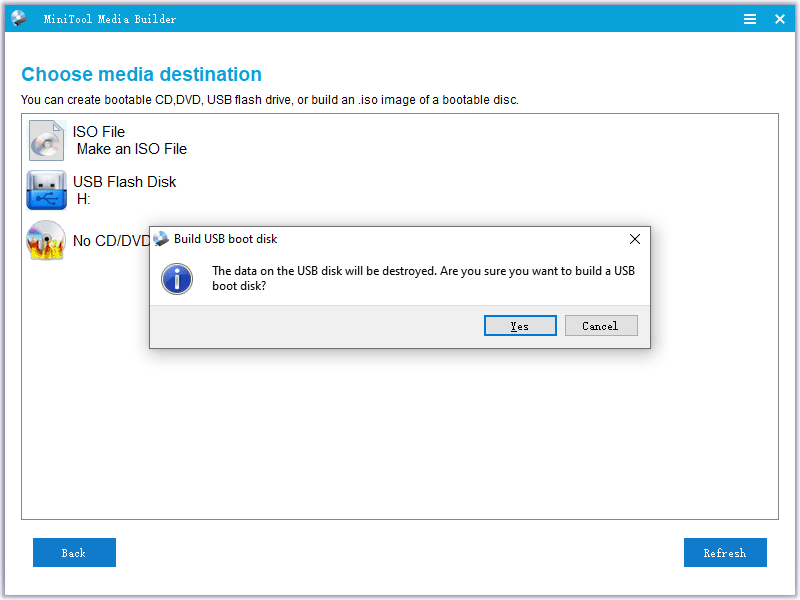
Step 4. Tap on WinPE-based media with MiniTool plug-in > select your USB drive as the media destination > click on Yes to start the process.
# Back up the Files on Your Problematic Toshiba Laptop
After the bootable USB drive is created, plug it into your device, set it as the first boot device in BIOS and then boot your computer from it. Next, follow these steps to create a file backup:
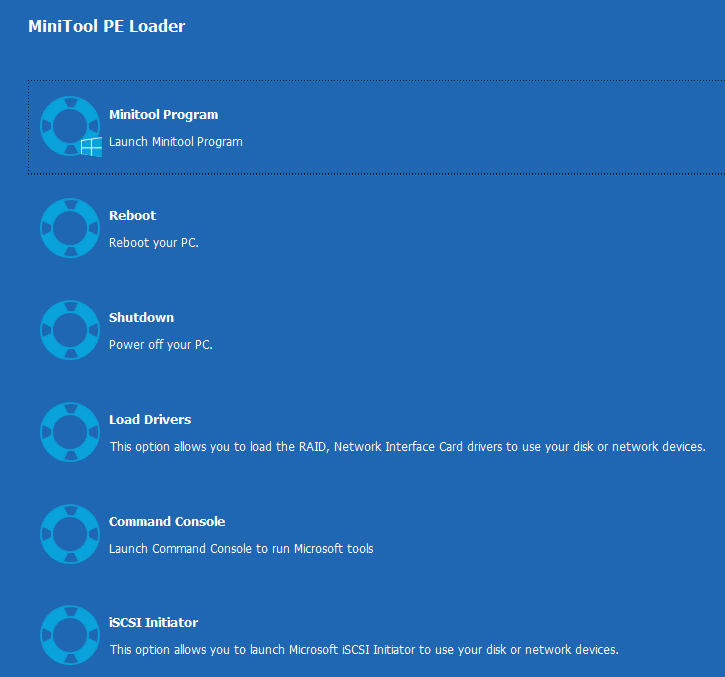
Step 1. In the MiniTool PE Loader screen, click on MiniTool Program to launch MiniTool ShadowMaker.
Step 2. Head to the Backup page > select SOURCE > Folders and Files to check the files you what to backup.
Step 3. Go to DESTINATION to select an external hard drive or a USB flash drive as the storage path.
Step 4. Once done, click on Back Up Now to start the process at once.
How to Fix Windows 11/10 Stuck on Choose an Operating System?
Scenario 1. Factory Reset Interruption Leads to System Issues
Specifically, a factory reset is a complex system-level task that involves deleting files, reconfiguring the system, and reinstalling drivers, among other steps.
During the process of restoring factory settings, the progress bar remained stuck at 40% or 65% for a long time and failed to advance further. Due to the excessively long waiting time, you might mistakenly think that the system has crashed and thus choose to force shut down to interrupt the reset process.
However, if you forcibly terminate the operation before these critical steps are completed, it may lead to problems such as incomplete system files, damaged registry, or incorrect startup configuration. These issues can directly result in the operating system not starting up properly, or Windows 10 stuck on Choose an operating system.
Fix 1. Create a Bootable USB Drive to Reinstall Windows
Step 1. Prepare an empty USB drive with a capacity of ≥ 8 GB.
Step 2. Download the Media Creation Tool.
1. Open your web browser and go to the Windows 11 download page or Windows 10.
2. Click on the Download Now button under the Create Windows 10 Installation Media section.
Step 3. Run the Media Creation tool.
1. Once the download is complete, run the Media Creation Tool executable file (MediaCreationTool22H2.exe for Windows 10, for example).
2. Read the license terms and click Accept to continue.
Step 4. Choose the installation media.
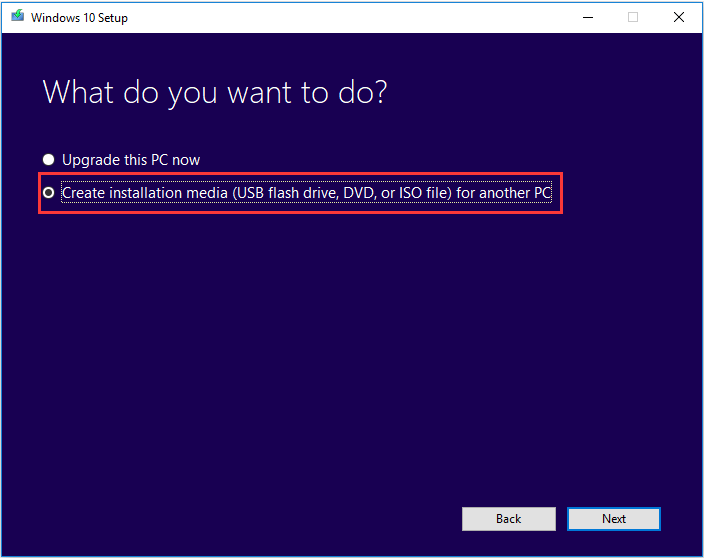
1. Select Create installation media (USB flash drive, DVD, or ISO file) for another PC and click on Next.
2. Choose your language, edition, and architecture preferences.
Step 5. Download and create media.
1. Choose USB flash drive and tap on Next.
2. Insert your USB flash drive into your PC > select it > click on Next.
3. Then, the Media Creation Tool will download the necessary Windows files. This might take some time, depending on your internet connection speed.
4. Once the download is complete, the tool will create the bootable USB drive.
5. When finished, you will see a message saying Your USB flash drive is ready. Click Finish to exit the tool.
Step 6. Boot from the USB drive.
1. Insert the bootable USB drive into the PC you want to install and restart the computer.
2. As the PC starts, press the appropriate key (commonly F12 or Del, depending on your PC’s manufacturer) repeatedly until you enter the Boot Menu.
2. Select the USB drive from the options to boot from it and then follow the on-screen instructions to install Windows.
Scenario 2. Repeated Startup Options and Point to the Same Volume
In the system selection interface, two systems in the list are marked with the same volume. This is likely to be a problem caused by partition corruption or errors.
Firstly, the partition is an important way used by the operating system to identify the structure of the hard disk. If the partition is damaged due to unexpected power failure, forced shutdown, virus infection, or improper operation, it may lead to the system being unable to correctly distinguish different partitions, associating multiple systems incorrectly with the same volume.
Secondly, this problem may also be related to the configuration of the bootloader. If the boot configuration data (BCD) of the Windows system is modified or damaged, it may also cause abnormal display of options in the boot menu.
Thirdly, if the hard disk has bad sectors or performance degradation, errors may occur when reading partition, especially for aging hard disks that have been in use for a long time, which in turn leads to inaccurate options.
Fix 1. Create a Bootable Media and Perform Startup Repair
Step 1. Refer to step 1 to step 5 in Scenario 1 to create a bootable USB drive.
Step 2. After creating, insert the USB into the problematic PC and turn it on.
Step 3. Immediately, hold down F12, F10, Delete, or other special keys, select the USB drive as the boot order, and then press Enter to boot from it.
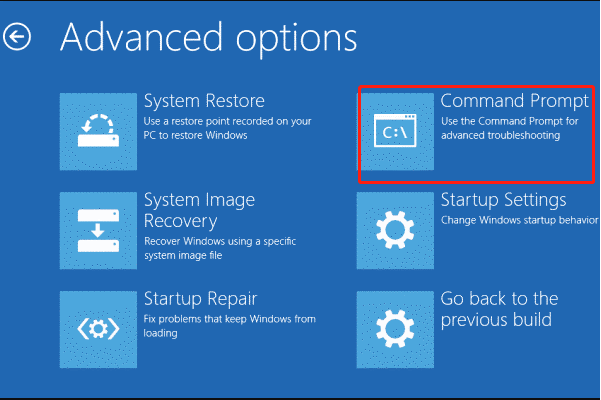
Step 4. In the Windows installation environment, choose Repair this computer > click on Troubleshoot > Advanced Options > Startup repair > Restart. Then wait for some time.
Step 5. When the repair finishes, check if your device starts up normally.
Step 6. If the boot repair failed, go to Troubleshoot > Advanced Options > System Restore > select the latest point to restore from. (This will work only if you have a system restore point.)
Fix 2. Manually Build BCD and Check Your PC
Step 1. Connect the bootable USB you created to the faulty PC.
Step 2. Power on your PC and press the special key repeatedly to enter the boot menu. Then set it to boot from the USB drive.
Step 3. Select your language and other preferences, then click Next.
Step 4. Select Repair your computer > Troubleshoot > Advanced options > Command Prompt. Then enter your account and password when required.
Step 5. In the command window, execute the following commands:
bootrec /fixmbr
bootrec /fixboot
bootrec /scanos
bootrec /rebuildbcd
Step 6. When the operation is completed successfully, restart your computer to check if it can start up correctly.
Scenario 3. Stuck on System Selection Page During Factory Reset
During the process of restoring factory settings, the system keeps booting to Choose an operating system and no matter which option is chosen, the reset process cannot be completed, ultimately resulting in a failed reset. This may be related to the following factors: corrupted system file, hardware failure, compatibility issues, and more.
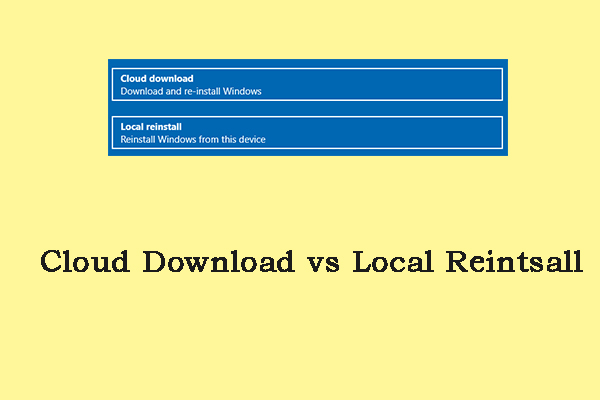
Fix 1. Restore Windows 11 from the Cloud
Windows 11 has a new feature called Cloud Download. With this tool, you can reset operating system, download the installation files from the Microsoft cloud. However, this requires a fast internet connection, as the operating system downloads all required data from the internet. The advantage of this method is that you do not need an installation media and can restore your data from the cloud.
Fix 2. Deep Cleanup and Reset
Step 1. Access to Windows Recovery Environment.
1. Start your device and wait for the Windows logo to appear.
2. As soon as it appears, press & hold the Power button until the device shuts down.
3. Turn your device on again and repeat step 2.
4. Turn your PC on a third time. Windows should display the Automatic Repair screen and then select Advanced options.
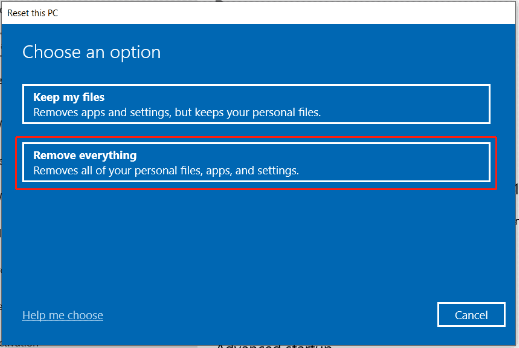
Step 2. In the Choose an option page, select Troubleshoot > Reset this PC > Remove everything > Remove files and clean the drive > Reset.
Step 3. Restart your device and check if it starts up correctly.
Fix 3. Custom Installation
Step 1. Create a bootable USB drive and boot your PC to enter the Windows Setup interface.
Step 2. Choose your preferences and click Install now > Custom: Install Windows only (advanced).
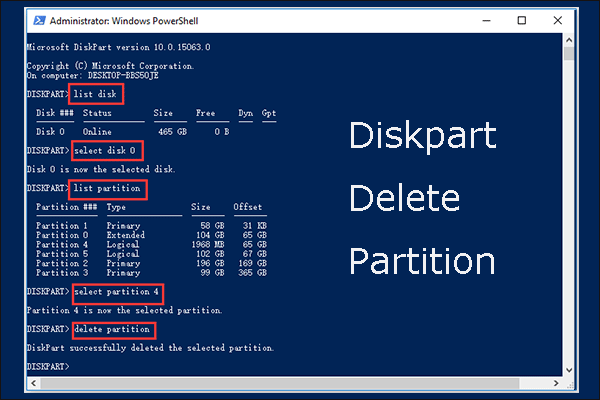
Step 3. Delete the partitions one by one down to Unallocated Space > click Next to let it create needed partitions.
Step 4. Then you can perform a fresh install.
Scenario 4. Windows 11/10 Keeps Booting to Choose an Operating System
Every time your computer is turned on, the Choose an Operating System page will appear. This usually indicates that the system has detected multiple startup options or there are some problems in the boot configuration. This situation may be caused by the following reasons: multiple systems, incorrect boot configuration, virtual machines sharing resources with the host system, etc.
Fix 1. Run msconfig
Step 1. If it is possible to temporarily access the system, press Win + R to evoke the Run dialog box.
Step 2. Type msconfig and hit OK.
Step 3. In System Configuration, go to the Boot tab > select extra entries one by one > click on Delete > tap Apply & OK.
Step 4. Restart the PC to see if the system selection page persists.
Fix 2. Full System Reinstallation
If you cannot access the desktop and get stuck on Choose an operating system, you need to boot from the USB drive for a fresh installation (similar to Scenario 1).
By following the above steps, most of the system failures can be covered. If the problem persists, it is recommended to contact professional support.
Stuck on Choose an Operating System FAQ
The invalid entry can be removed by opening System Configuration (msconfig), navigating to the Boot tab, selecting the duplicate option lacking the Current OS label, and clicking Delete.
Alternatively, execute bcdedit /timeout 0 in an elevated Command Prompt to immediately load the default operating system.
Conclusion
Windows being stuck on the “Choose an Operating System” screen is caused by duplicate entries, damaged BCD files, failed updates, or incorrect settings.
Fix this by removing redundant options at startup, or by running Startup Repair and rebuilding the BCD from the recovery environment.
This guide analyzes four key scenarios to provide data-safe solutions. For support issues regarding MiniTool ShadowMaker during this process, contact [email protected].
About The Author

Position: Columnist
Charlotte is a technology columnist with a strong focus on the Windows operating system, specializing in disk management, backup, and data recovery. She is passionate about analyzing computer errors, identifying root causes, and delivering practical solutions. In her free time, she stays updated on the latest developments in computer systems and hardware while continuously learning new technologies to broaden her expertise. Her writing style is clear and easy to understand, making complex technical topics accessible even to users with limited computer knowledge.
User Comments :