Backing up Windows 11 is crucial. So, what is the best way to back up Windows 11? MiniTool introduces 5 backup solutions for Windows 11. Just use MiniTool ShadowMaker, Backup and Restore, File History, OneDrive, and Windows Backup as needed.
Quick Answer
The best way to back up Windows 11 is:
- Backing up important files automatically.
- Creating a system image backup.
- Storing backups on an external drive.
- Keeping an additional cloud backup copy.
Among all solutions, third-party software, such as MinTool ShadowMaker, can be one of the best options due to its flexible options, such as incremental/differential/automatic backups.
When to Back Up
You should back up Windows 11 before/after major changes or regularly. Here is a list.
- Before Major changes to the operating system: Before upgrading to Windows 11 from Windows 10, installing feature updates, or reinstalling the system, back up crucial data or the system.
- Before making system changes: It is wise to create a Windows 11 system backup if you plan to make significant changes to the system configuration.
- After significant changes: Back up Windows 11 again after making new changes to the system configuration, installing new software, or adding important files.
- Regularly: For frequently changing data, consider daily or weekly backups.
What to Consider When Choosing a Backup Method
When selecting the best way to back up Windows 11, take some things into consideration. They involve what to back up, where to back up, backup frequency, and so on.
Let’s take a look at a detailed breakdown.
What to Back up
Not all files are equally important. Prioritizing backup content can help save storage space and speed up recovery.
| Priority | What to Back Up | Why It Matters |
| Critical | System | Perform full recovery after crashes |
| Critical | Personal files | Prevent data loss |
| Important | Installed apps | Preserve app data |
| Optional | Game files | Avoid re-downloading |
Generally, the system and personal files are the critical data that should be backed up.
Where to Back up
- Removable devices such as USB flash drives: For small backups, a USB drive is convenient.
- External hard drives, both HDDs and SSDs: They are a popular choice to back up Windows 11. An external drive offers large storage space and is affordable. But it is susceptible to damage.
- DAS (Direct Attached Storage): Due to its speed, simplicity, and cost-effectiveness, DAS can be a suitable backup solution. It is useful for individual users and medium-sized businesses.
- Network locations or NAS (Network Attached Storage): NAS allows for centralized storage for multiple devices, making it highly flexible to control over your data.
- Cloud storage: Services such as OneDrive, Google Drive, and Dropbox provide off-site backups. You can access backed-up files from various devices.
How Often Should You Back Up Windows 11
The data backup frequency depends on how important your data is and how frequently it changes.
| Data Type | Recommended Backup Frequency |
| Critical data | Daily |
| Important documents | Weekly |
| Less frequently changing data | Monthly |
Critical data: It includes data that changes frequently or crucial data, such as financial records, employee data, customer databases, etc. Back up this data daily or even hourly.
Important documents: It is advisable to back up documents and academic & project files at least weekly. If you frequently modify the data, consider daily backups.
Less frequently changing data: For family photos and personal videos, create monthly backups. Or back up them once or twice a year.
In addition, you had better also consider security, compatibility, budget, and the backup software you use.
Next, let’s explore how to back up Windows 11 to an external drive or cloud.
Here is a quick video guide:
5 Best Solutions to Back up Windows 11
Quick Comparison Table
| Backup Solution | Best for | System Backup | Automatic Backup | Ease of Use |
| MiniTool ShadowMaker | Full system protection | Yes | Yes | Very easy |
| File History | Folders in libraries | No | Yes | Easy |
| Backup and Restore | system image | Yes | Limited | Moderate |
| OneDrive | Online backup | No | No | Easy |
| Windows Backup | New PC migration | No | No | Easy |
MiniTool ShadowMaker
MiniTool ShadowMaker, the professional and reliable backup software, is highly recommended. It is a comprehensive backup and recovery solution for laptops, desktops, and workstations.
Specially designed for Windows, this free backup software provides great compatibility. You can run it properly in Windows 11/10/8/7 and Windows Server 2022/2019/2016.
#1. What it does
MiniTool ShadowMaker can easily create a system image, automatically back up data, and clone a hard drive to another drive.
It can be one of the best all-around backup solutions for Windows 11/10 due to its complete system and file protection.
Best for:
- Full system backup
- External drive backup
- Fast disaster recovery
- Advanced backup management
MiniTool ShadowMaker TrialClick to Download100%Clean & Safe
#2. How to use it
See the guide on how to back up Windows 11 to an external drive/USB drive:
Step 1: First, connect an external hard drive or USB drive to your computer.
Step 2: On the Backup page, the current OS is auto-selecte as the source.
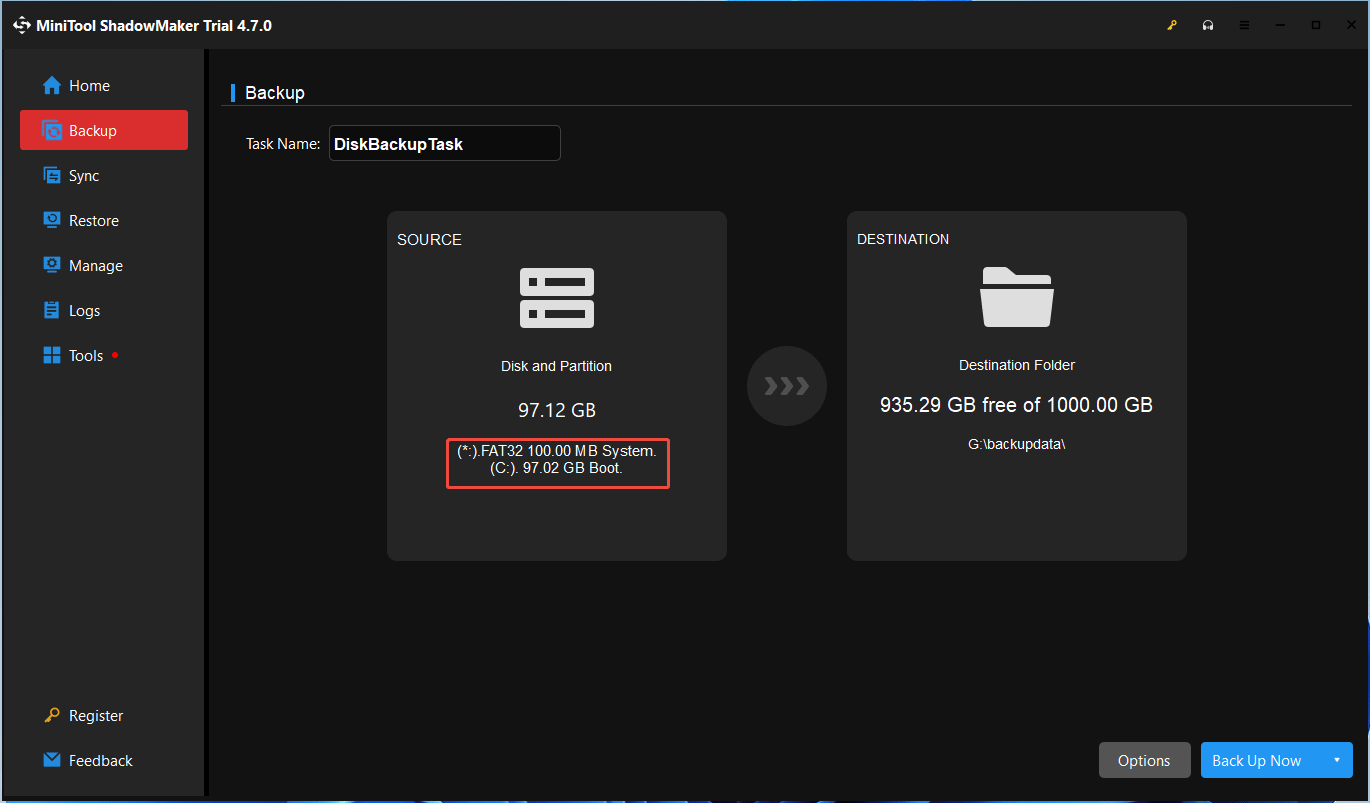
To create a system image for Windows 11, navigate to DESTINATION > Computer. Then, choose the connected device as the target.
To back up files, head to SOURCE > Folders and Files. Then, check the box of the files you want to back up. Next, choose a target path to save the backups.
Step 3: Finally, perform the backup immediately by clicking Back Up Now.
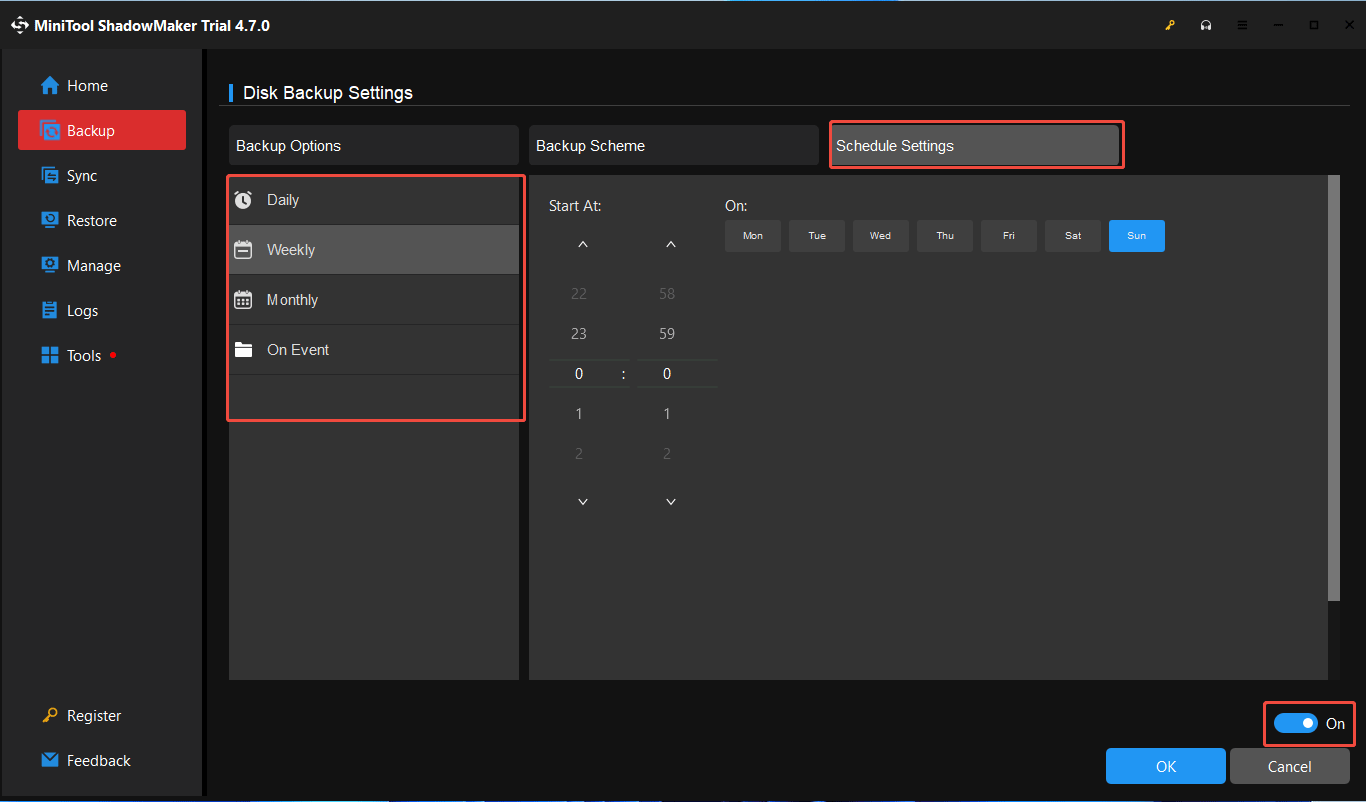
Before proceeding to the last step, you can click Options to configure advanced settings for the Windows 11 backup.
- Backup Options: Configure the software to run a sector-by-sector backup; choose a compression level; add a comment for the backup; enable email notification, etc.
- Backup Scheme: Set a backup type like incremental, and meanwhile, delete old versions.
- Schedule Settings: Set scheduled backups for your important data.
#3. Pros & Cons
Pros
- Free version with core features
- Fast image backups
- User-friendly interface
- Automatic backups
- Full, incremental, and differential backups
- Disk cloning
- No bundled adware
Cons:
- Lack of cloud integration
- One-way sync
- No file/folder refresh
In our opinion, MiniTool ShadowMaker is the best way to back up Windows 11 to an external hard drive.
But someone wonders about Windows 11’s built-in backup tools. Let’s explore them one by one.
File History
Microsoft introduced File History in Windows 8 to automatically back up and protect personal files. In Windows 11, it has been removed from Settings.
#1. What it does
It is used to automatically back up files in the user folder (Desktop, Videos, Music, Pictures, Documents, and Downloads) and preserve multiple versions of files for recovery.
Best for:
- Personal file backup
- Basic file backup needs
- Version control
#2. How to use it
Step 1: Type Control Panel in Search and press Enter on your keyboard to open it.
Step 2: View all the times by Large icons and then click File History.
Step 3: If you receive the message “No usable drive was found.”, we recommend using an external hard drive. Just connect it to your computer and refresh this page.
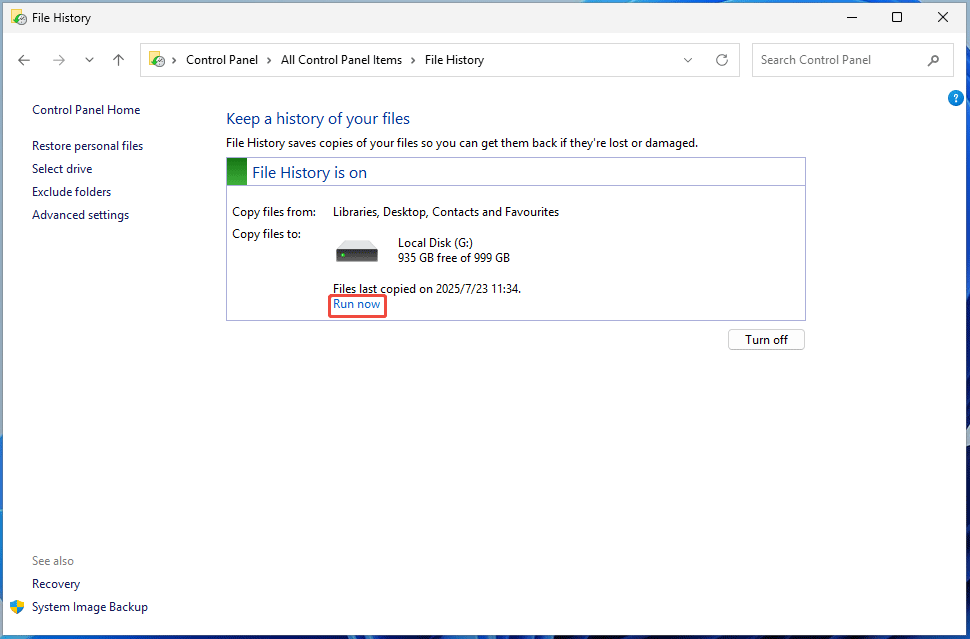
If you ever connected a drive, make sure you enable File History by hitting Turn on.
Step 4: Confirm the backup settings and hit Run now. In my case, Libraries, Desktop, Contacts, and Favourites are copied to drive G.
#3. Pros & Cons
Pros:
- Simple to set up and use
- Free and built-in
- Automatically backs up files from Libraries
- Restores previous versions of files
Cons:
- Doesn’t back up the system or custom folders
- Only backs up to an external drive or network location
- Needs to be manually enabled
Backup and Restore (Windows 7)
When it comes to “best way to back up computer Windows 11”, some users recommend Backup and Restore. It is a built-in legacy solution from Windows 7, but it can still work in Windows 11.
#1. What it does
Backup and Restore (Windows 7) is mainly designed to create a system image and restore Windows in case of system crashes. Additionally, it can back up files to an external drive or a network drive and supports creating automatic backups.
Best for:
- System image creation
- Full system recovery
#2. How to use it
To back up Windows 11 to an external drive, follow these steps.
Step 1: Connect an external drive to your PC first.
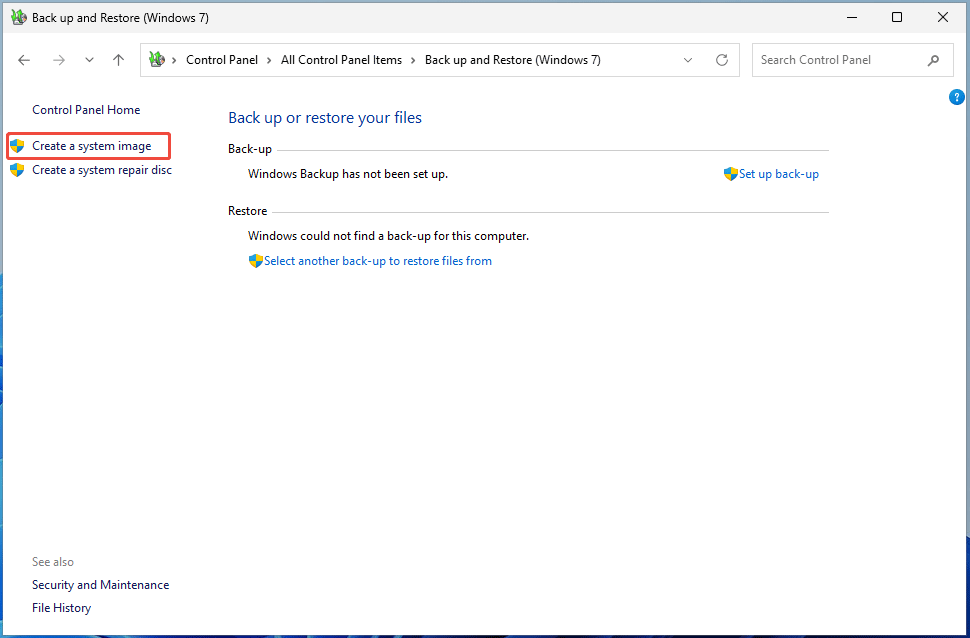
Step 2: In Control Panel, hit Backup and Restore (Windows 7).
Step 3: Click the Create a system image link to proceed.
Step 4: Choose the external drive under On a hard disk.
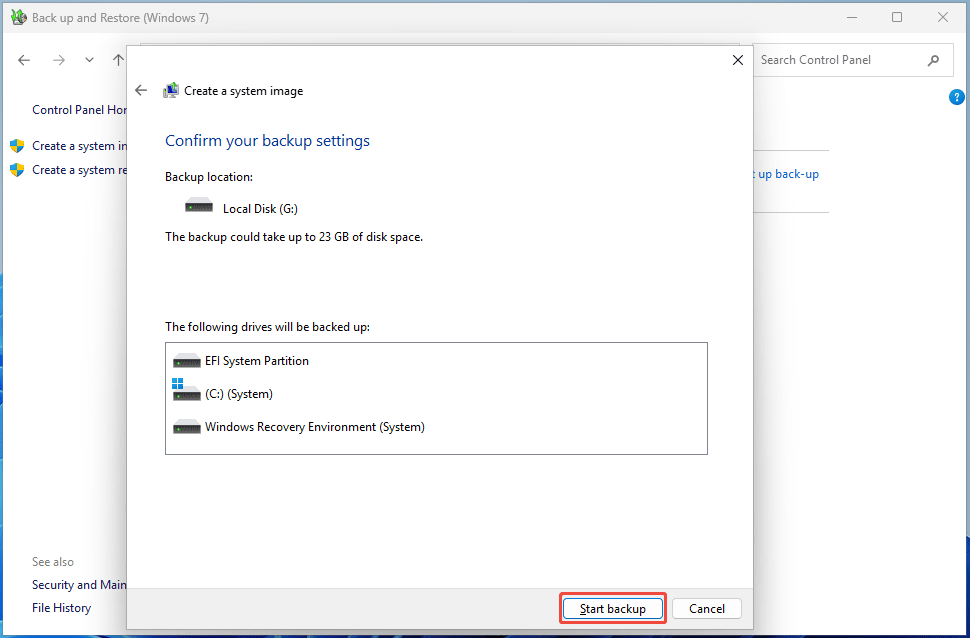
Step 5: The drives required for Windows to run are selected. Hit Next to continue.
Step 6: Confirm backup settings and then begin creating a full system image.
Further tips:
1. Once backup finishes, click Create a system repair disc. That way, you have a repair disc to boot your computer for system recovery.
2. Backup and Restore doesn’t allow you to create a system image on a USB drive. It can throw up the error “the drive is not a valid backup location”. For this task, run the backup software, MiniTool ShadowMaker.
3. To back up folders, click Set up back-up on the right side.
#3. Pros & Cons
Pros:
- Free and built-in
- Offers data protection from loss
- Creates a full system image
- Restores individual files for backups
Cons:
- Lack of flexibility
- Not support individual file backup
- Not allow for cloud storage
- Requires a large storage space
- Backup failures/errors often occur
Cloud Storage Like OneDrive
A cloud service such as Google Drive, OneDrive, or Dropbox is considered one of the best ways to back up Windows 11 files. They can be used to sync specific folders or files to the cloud to prevent data loss.
Here, we’ll use OneDrive as an example.

#1. What OneDrive does
Microsoft OneDrive is integrated into Windows 11. So, this makes it a convenient location for saving and managing files. It allows you to store, access, and share files/folders across devices signed in with the same Microsoft account.
Best for:
- Cloud file sync
- Remote file access
#2. How to use it
Step 1: Type OneDrive in Windows 11 Search and click Open to launch it.
Step 2: Enter a Microsoft account to sign in.
Step 3: Your OneDrive folder is in C:\Users\username. To change the default location, hit Change location.
Step 4: Determine which folders on the PC you want to back up. Then, click Start backup.
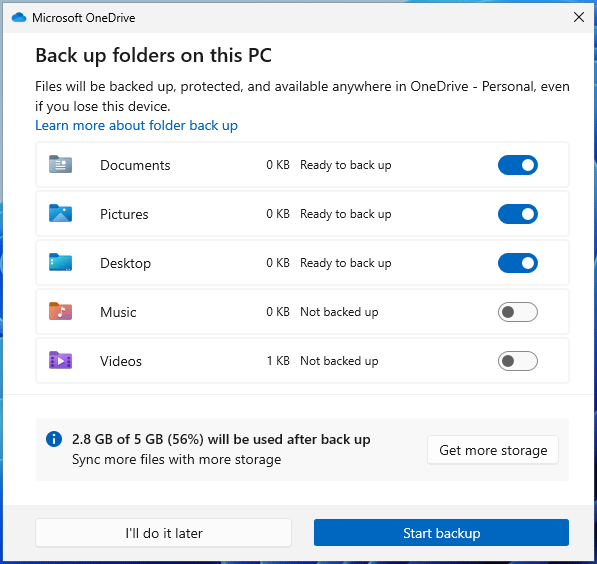
Step 5: Finish the rest setup by following the on-screen prompts.
Step 6: To manage OneDrive settings, click the OneDrive icon in the taskbar, hit the gear icon, and choose Settings.
#3. Pros & Cons
Pros:
- Ubiquitous access
- Easy sharing
- Real-time collaboration
- Seamless integration with Windows 11
Cons:
- Requires an internet connection
- Has limited storage space (5GB) in the free edition
- Only syncs files & folders, not the entire system
Windows Backup
In Windows 11, there is a native backup option named Windows Backup. Also, the Windows Backup app is integrated into Windows 10.
#1. What it does
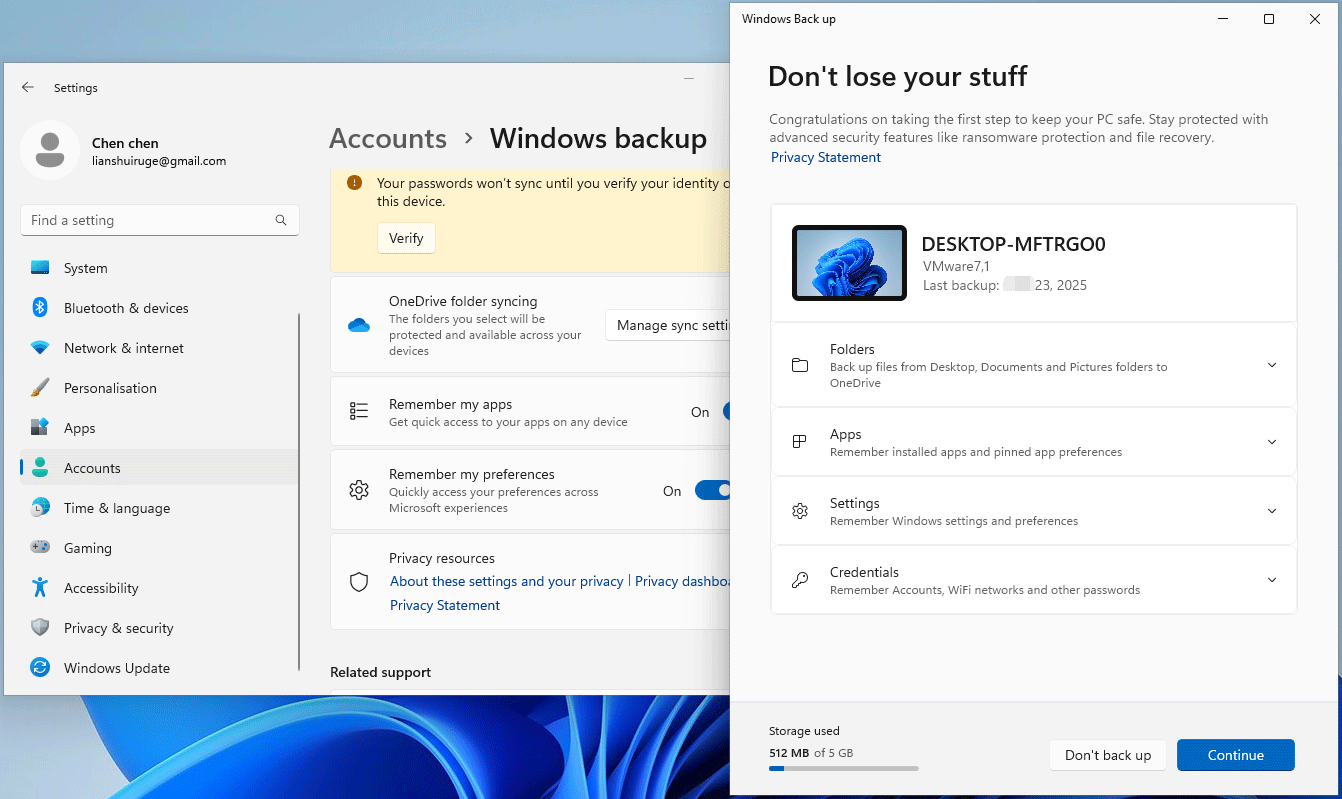
Windows Backup backs up personal files, apps, credentials, and Windows settings to OneDrive so you can easily restore data and settings when setting up a new PC.
Best for: Switching to a new PC
#2. How to use it
Step 1: Go to Windows 11 Settings by pressing Win + I.
Step 2: Navigate to Accounts > Windows back up.
Step 3: Hit Manage sync settings to choose the folders you want to protect.
Besides, enable Remember my apps and Remember my preferences to back up apps and your preferences.
Step 4: After finishing the configurations for Windows Backup, launch it.
Just type Windows back up to Search and press Enter.
Step 5: Finally, click Continue to begin backing up.
#3. Pros & Cons
- Ease of use
- Free and built-in
- Backs up folders, apps, settings, and credentials to OneDrive
Cons:
- No support for the entire system
- Limited storage space
- Needs an internet connection
Conclusion
Which is the best way to back up Windows 11 that suits you? We make a conclusion here to help you.
| MiniTool ShadowMaker | File History | Backup and Restore | OneDrive | Windows Backup | |
| Backup Scope | 1. System 2. File 3. Folder 4. Disk 5. Partition | Folders in Libraries | 1. System 2. Folder | Default folders (Documents, Pictures, Desktop, Music, Videos) But you can drag and drop individual files to the OneDrive folder in File Explorer | 1. Folders including Documents, Pictures, Desktop, Music, and Videos 2. Apps 3. Windows settings and preferences 4. Credentials |
| Backup Location | Local | Local | Local | Cloud | Cloud |
| Automatic backup | Yes | Yes | Yes | No | No |
Choose the proper way depending on actual needs:
- Create a system image: Use MiniTool ShadowMaker or Backup and Restore (Windows 7).
- Backup individual files and folders: Run MiniTool ShadowMaker that supports automatic, incremental & differential backups.
- Only back up personal files: Use File History or OneDrive.
- Set up a new Windows 11 PC or transfer personal files, settings, and apps from an older Windows device: Use the Windows Backup app.
Best Practices for Windows 11 Backup
In terms of computer backup in Windows 11, you should follow some backup practices.
- Implement the 3-2-1 backup strategy: Keep 3 copies of your data (the original, one backup stored to an external hard drive, and another backup saved offsite, like the cloud).
- Automate backups: Schedule backups to run automatically, ensuring you always have an up-to-date backup.
- Combine backups: Create an image backup for the entire system, regularly back up files to an external drive, and sync folders/files to OneDrive.
- Secure your backups: When using third-party software like MiniTool ShadowMaker, use its encryption option to keep backup data safe.
- Test backups: Regularly do this work to ensure backups are functioning properly and restorable.
The End
In this post, you can learn 5 backup solutions for PC backup and how to back up Windows 11 using them. Choose the best way to back up Windows 11 now, as per your needs.
If you encounter any issues while using MiniTool ShadowMaker, just send an email to [email protected].
Best way to Back up Windows 11 FAQ
2. Launch MiniTool ShadowMaker and head to its Backup page.
3. Hit SOURCE > Folders and Files and select the files you need to back up.
4. Click DESTINATION to choose the connected external drive to save backups.
5. Begin backing up files by clicking Back Up Now.
About The Author

Position: Columnist
Vera has been working at the MiniTool Team for over 10 years as a technical editor and content writer. She mainly focuses on disk and partition management, data recovery, Windows backup and restore, and PC troubleshooting. Through in-depth software testing and hands-on experience, she has helped users solve a wide range of computer problems and better protect their data on Windows devices.
User Comments :