What to do if you turn on your Gateway laptop but the screen fails to display anything? This might be pretty troublesome because it might affect your work efficiency. In this article on MiniTool Website, we will delve into Gateway laptop black screen for you!
Gateway Laptop Black Screen
Gateway laptops are a good option because they have a powerful processor & a sleek design and offer premium features at an affordable price. Although they are very reliable, some problems can also occur at any time. Gateway laptop black screen might be a nightmare for you.
Once your screen goes black, you can do nothing but spend a while to troubleshoot your device. The causes are various and here we listed some of them for you:
- A peripheral connected to your computer.
- A hardware issue with the display, connection, or video adapter.
- A compatibility problem caused by a faulty or outdated graphics driver.
- A malfunction of the explorer.exe process.
- Infection of viruses or malware.
Fortunately, you can find multiple ways to get through the black screen on Gateway laptops. In the following part, we will show you some methods that are proven to be effective.
How to Fix Gateway Laptop Black Screen on Windows 10/11?
Fix 1: Restart Your Gateway Laptop
A simple restart of your computer can fix most problems including Gateway laptop black screen. This can solve some software issues or clear some temporary glitches. Follow these steps:
Step 1. Turn off your Gateway laptop and then disconnect the power cord, battery, and other external devices from your laptop.
Step 2. Press and hold the power button for about 15 seconds to drain the rest power.
Step 3. Reconnect the power cord and battery without connecting other external devices.
Step 4. Power on your computer to see if Gateway laptop black screen is still there.
Fix 2: Test Your Gateway Laptop with Another Monitor
To rule out a firmware problem, you can connect your device with an external display to have a check. If the second monitor works normally, then the black screen issue might be caused by the conflict between a graphics card driver and the laptop LCD display. If the monitor is still black, please move to the next solution.
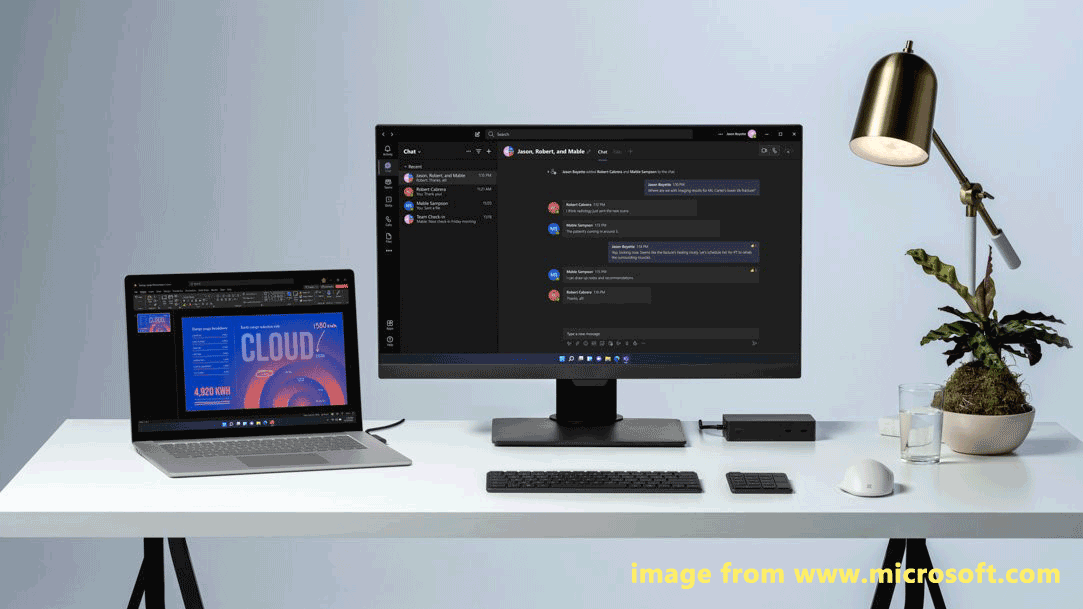
Also see: How to Set up Dual Monitors on Windows 11/10 [A Simple Way]
# Preparation: Boot Your Laptop into Safe Mode
Since you are experiencing the black screen issue on your laptop and might not enter the desktop, it is a good idea to enter Safe Mode before taking the following advanced solutions. Safe Mode only allows basic system programs and services to start at startup so that it is easier for you to detect and repair computer system issues like Gateway laptop black screen.
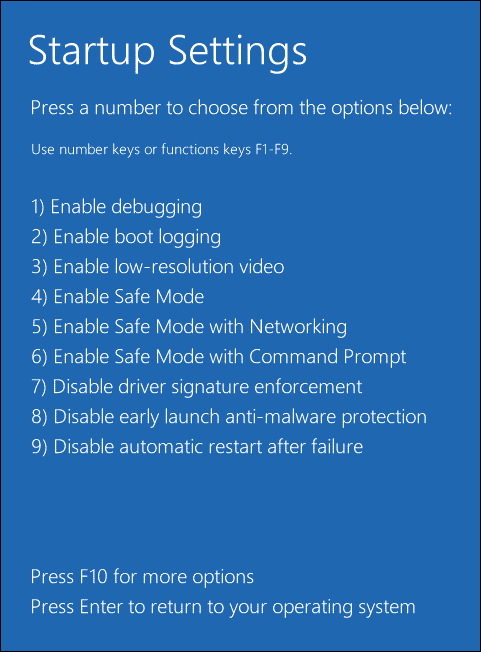
Step 1. Shut down your computer > reboot it > press the power button again when the Gateway logo appears on the screen. Repeat this process three times to enter Windows Recovery Environment.
Step 2. Go to Troubleshoot > Advanced options > Startup Settings.
Step 3. In the Startup Setting page, you can press F4 or F5 to enable Safe Mode only or enable Safe Mode with network.
Fix 3: Reinstall Your Graphics Driver
If your Gateway laptop goes black but is still running, the culprit might be a faulty video driver. Therefore, you can consider reinstalling the driver in Safe Mode. To do so:
Step 1. Type device manager in the search bar and hit Enter.
Step 2. Expand Display adapters, right-click on your graphics card driver, and select Uninstall device.
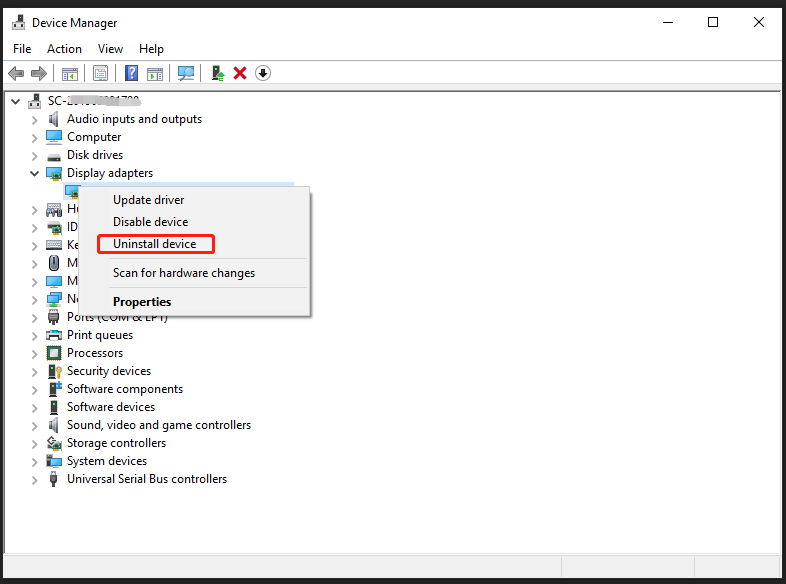
Step 3. Tick Delete the driver software for this device and click on Uninstall to confirm the action.
Step 4. Reboot your computer and Windows will automatically install the latest version of graphics driver on your computer. Also, you can note down the driver name on your computer, download it from the official website and then reinstall it manually.
Fix 4: Restart the Explorer.exe Process
The malfunction of the explorer.exe process can also result in Gateway laptop black screen Windows 10/11. In this case, you can see Gateway laptop black screen with cursor. Restarting the explorer.exe process can be a good choice. Here’s the detailed tutorial:
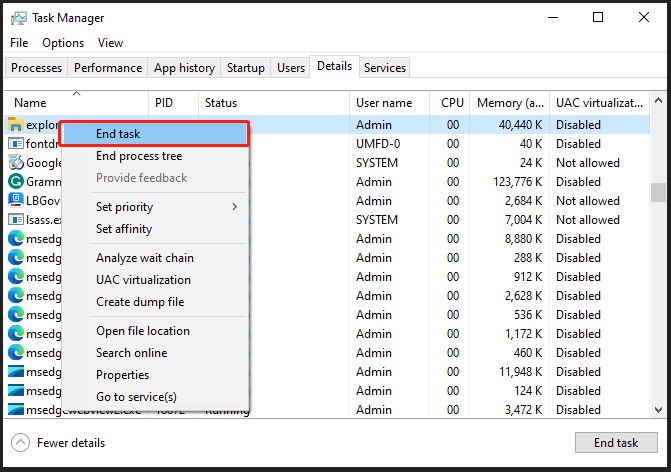
Step 1. Right-click on taskbar and select Task Manager from the context menu.
Step 2. Under the Details tab, scroll down to find explorer.exe and right-click on it to choose End task.
Fix 5: Disable Fast Startup
Although the fast startup feature can speed up the boot process of your computer, it may be why Gateway monitor turns on then goes black. Disabling this feature can help you to avoid suffering from Gateway laptop black screen again. Here’s how to do it:
Step 1. Enable Safe Mode with Command Prompt.
Step 2. In the command window, type powercfg /h off and hit Enter to disable fast startup.
Step 3. Restart your Gateway laptop.
Fix 6: Scan for Malware or Virus Infections
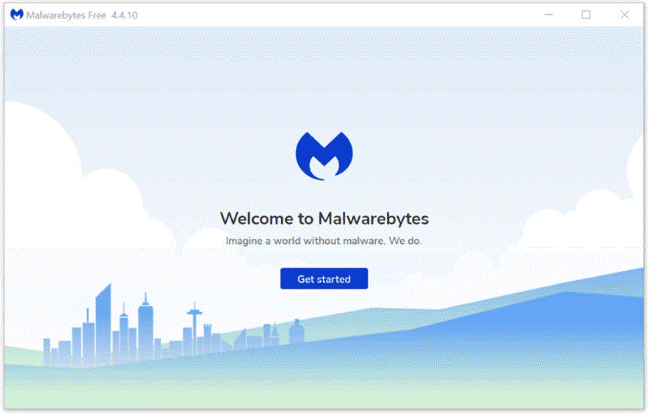
Gateway laptop black screen can also be the result of malware or virus infections. To get rid of these threats, you also need to boot into Safe Mode with a network to download, install & launch third-party antivirus programs like Avast, AVG, Malwarebytes, and more to perform a deep scan of your Windows system.
Fix 7: Reset Your PC
If Gateway laptop black screen still persists after trying all the solutions above, the last resort is to factory reset your Gateway laptop. This will help you to fix some annoying problems like Gateway laptop black screen but still running, improve system performance, as well as release more disk space for new data. Follow these steps:
MiniTool ShadowMaker TrialClick to Download100%Clean & Safe
Step 1. Boot your Gateway laptop. Once you see the Gateway logo on the screen, press Alt + F10 continuously until you see the recovery manager tab.
Step 2. Then, there are 3 options available for you:
- Completely Restore System to Factory Defaults
- Reinstall Drivers and Applications
- Restore Operating System and Retain User Data
Here, it is recommended to choose Completely Restore System to Factory Defaults.
Step 3. Now, your system will start to restore to its factory settings and you can log into the system with the account and password.
Suggestion: Back up Your Gateway Laptop with MiniTool ShadowMaker
In addition to black screen, other severe system issues such as PC stuck on the logo screen, blue screen of death, hardware failures, system crashes and more are very common. What steps should you take to fix them? Will you spend a lot of time troubleshooting your device again?
To avoid wasting more time, we recommend a better remedy for you – creating a system image when your computer can work properly. Once you encounter similar problems, you can directly use the system image to restore your system and recover it to the normal state.
Here comes the question: how to back up your system with ease? MiniTool ShadowMaker is a perfect assistant for you! This is a piece of PC backup software that enables you to perform data backup and recovery on almost all Windows systems. It supports backing up files, folders, systems, disks, and partitions with simple steps. Moreover, if you feel like cloning HDD to SSD for better performance, MiniTool ShadowMaker can also meet your needs.
Now, let’s see how to back up your system with this useful tool:
Step 1. Launch MiniTool ShadowMaker and go to the Backup page.
MiniTool ShadowMaker TrialClick to Download100%Clean & Safe
Step 2. As you can see, the system is selected in SOURCE by default, so you just need to choose a storage path for the system image in DESTINATION. Here, it is more preferred to store the backup image on an external hard drive, USB flash drive and more.
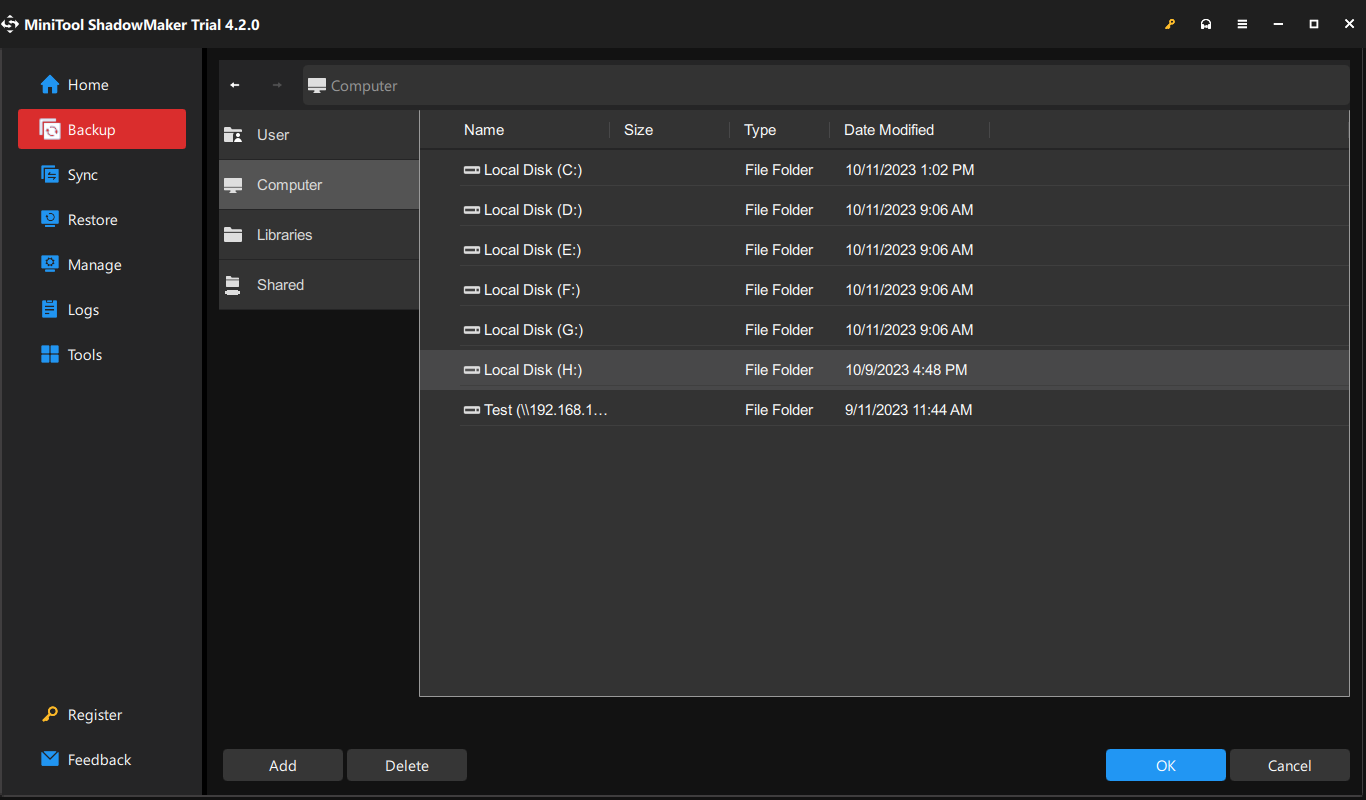
Step 3. Click on Back Up Now to start the task. To make the task complete more quickly, you had better end other resource-hogging programs during the process.
# Create a Bootable USB Drive
After making a system image, it’s better to continue to use MiniTool ShadowMaker to create a bootable disk. As long as your Gateway laptop is confronted with some severe system problems or has trouble booting, you can boot your device from this medium and perform system recovery with it.
Step 1. Run MiniTool ShadowMaker.
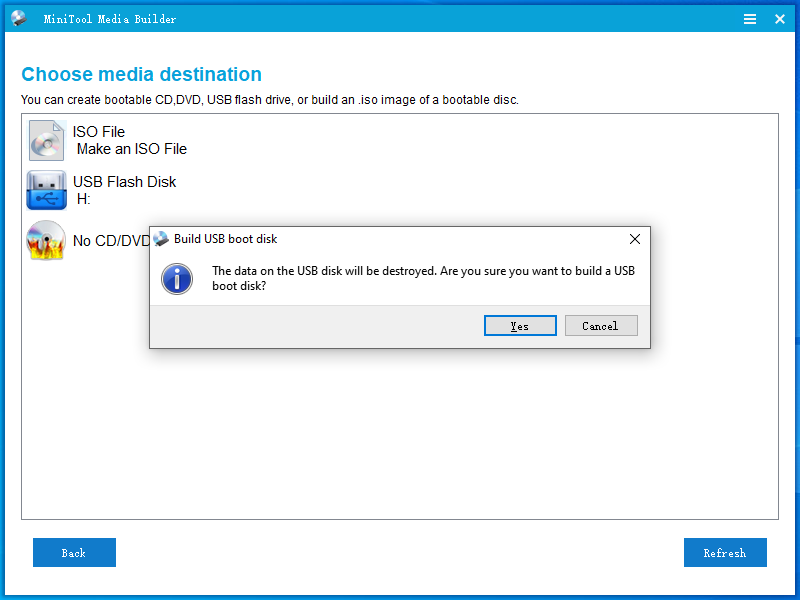
Step 2. In the Tools page, click on Media Builder > select WinPE-based media with MiniTool plug-in.
Step 3. Select your USB flash drive as the media destination and hit Yes to confirm the action.
We Need Your Voice
After applying all the solutions and suggestions above, you will never be afraid of Gateway laptop black screen and they are also effective on other brands of computers such as Acer, ASUS, HP, Dell, Lenovo, and so on. Sincerely hope that this guide works for you.
Any feedback about our products will be greatly appreciated. For any suggestions, don’t hesitate to contact us directly via [email protected].
Gateway Laptop Black Screen FAQ
Fix 1: Hard Reset Your PC
Fix 2: Test Your Monitor
Fix 3: Reseat the Memory Module
Fix 4: Reset BIOS
Fix 5: Check Hardware
Fix 5: Clear CMOS Battery
Fix 2: Remove External Disks and Devices
Fix 3: Hard Reset Your Laptop
Fix 4: Boot into Safe Mode
Fix 5: Reset BIOS Settings to Default
Fix 6: Reset This PC
· Way 1: via Gateway Recovery Management
· Way 2: via Windows Reset
· Way 3: via DVD/USB Bootable drive
· The explorer.exe process doesn’t work properly.
· The display driver is corrupted or outdated.
· There are some problems with the display adapter.
· You have enabled fast startup.




User Comments :