At present, the Windows 10 system still occupies the largest market share of desktop systems. The system is fast and easy to use, bringing great convenience to people’s life and work. But Windows 10 still has some problems. For instance, Windows 10 booting to a black screen.
Let’s see a true example from microsoft.com:
When I try to boot newly installed Windows 10, I get a black screen (with no cursor) almost straight away. I discovered that if I power off and power on, the boot proceeds OK. But next time it fails again.
microsoft.com

Generally, Windows 10 booting to a black screen is the worst issue you come across because you don’t get any error code or message giving you an idea of where to start troubleshooting.
What should you do if your PC is experiencing a black screen?
In today’s post, you will see how to fix the Windows 10 booting to a black screen of death (BSOD) issue without affecting the original data.
Part 1: Data Recovery From Windows 10 Booting to a Black Screen
Experienced users will transfer data before solving the Windows 10 booting to a black screen issue in case of any accidents (If the original data is mistakenly overwritten when you try to fix this black screen error, you will lose the data forever).
Now, you might be wondering: “How to effectively recover lost data from the Windows 10 black screen of death?”
MiniTool Power Data Recovery, professional data recovery software for Windows, offers MiniTool Bootable Media Builder to recover lost data when the operating system crashes or to recover data when PC won’t boot without bringing any damage to the original data.
Let’s see how to recover data after BSOD with ease.
Note: Before doing the following actions, you need to prepare a USB drive or CD/DVD without any important files. Because MiniTool Bootable Media Builder will format the USB flash drive or CD/DVD while building bootable media.
Action 1: Create MiniTool Power Data Recovery Bootable Media.
Step 1. Connect a USB flash drive or CD/DVD to a working computer.
Step 2. Download and launch MiniTool Power Data Recovery Personal Ultimate edition.
MiniTool Power Data Recovery FreeClick to Download100%Clean & Safe
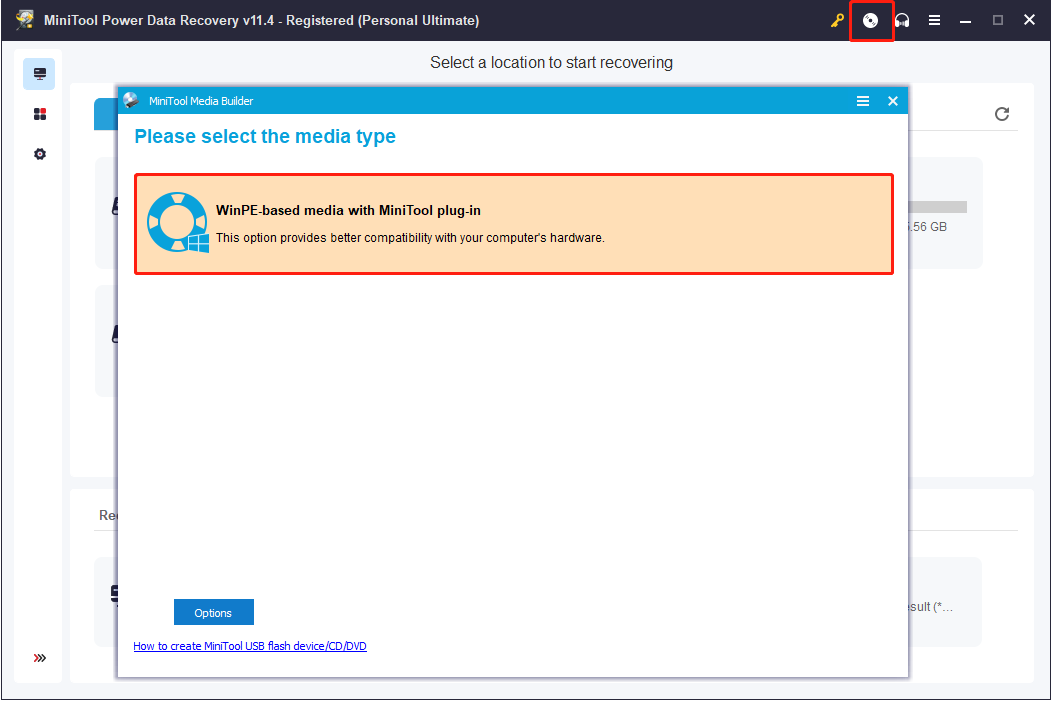
Step 3. Click the Bootable Media icon at the top menu bar and select WinPE-based media with MiniTool plug-in to continue.
Step 4. Create a bootable USB flash drive or CD/DVD.
Step 5. Click Finish after successful burning.
Action 2: Boot Windows 10 From the Bootable Media.
Step 1. Connect the burned bootable media to your PC with a black screen error.
Step 2. Start the computer and enter the BIOS.
Step 3. Set the bootable media as the first boot device and follow the instructions on the screen to save configuration changes.
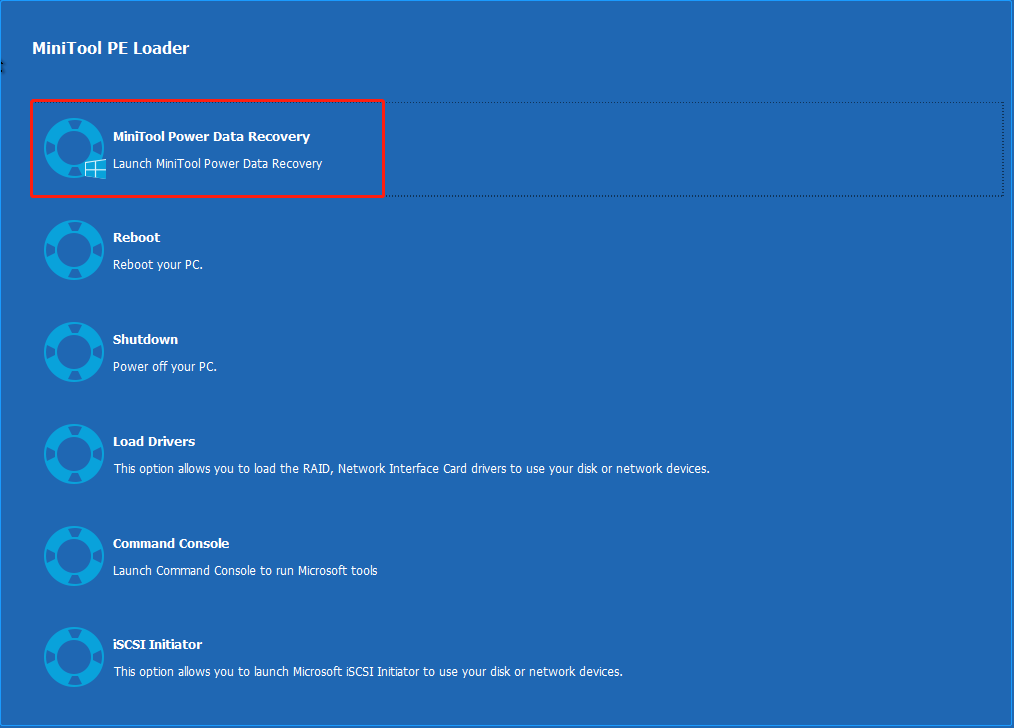
Step 4. Click MiniTool Power Data Recovery in the main interface of MiniTool PE Loader.
Action 3: Recover Lost Data After Windows 10 Black Screen of Death.
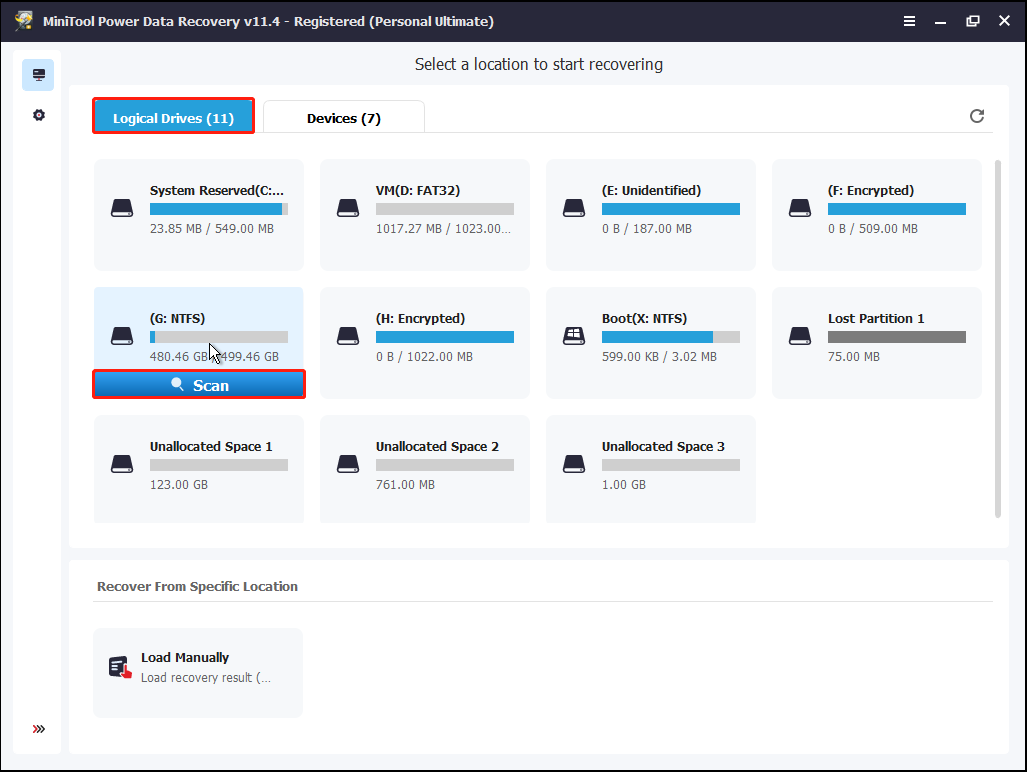
Step 1. Select the drive you want to recover lost data from, and then click the Scan button.
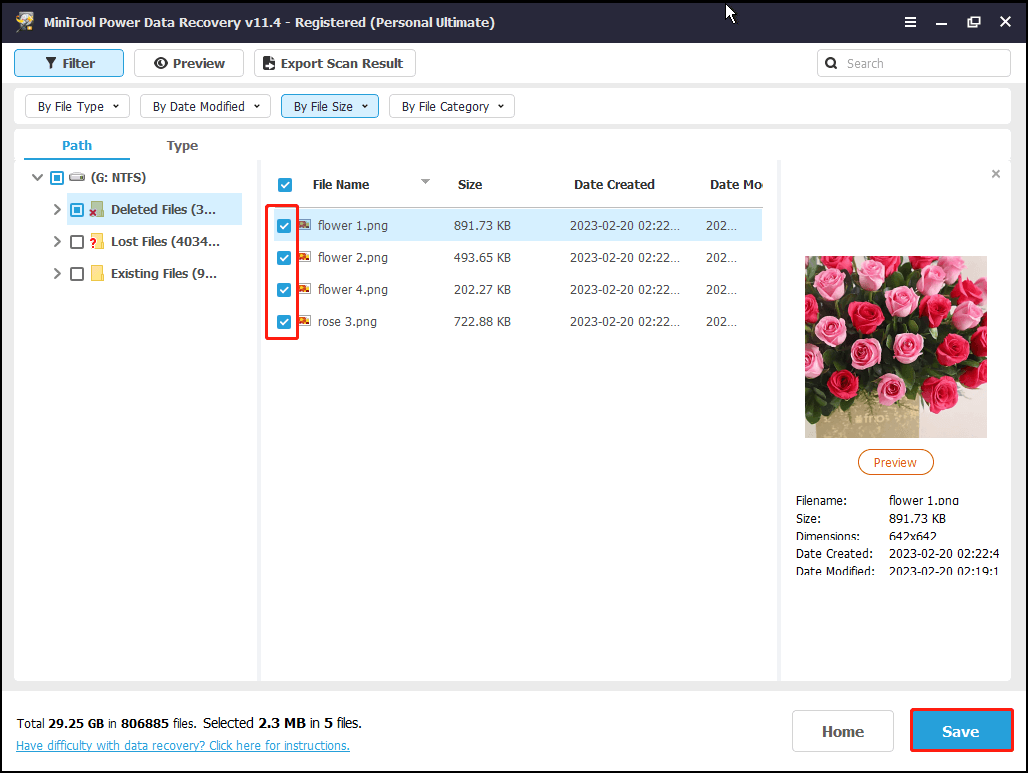
Step 2. After scanning, check all needed files and click the Save button to store them in a safe place different from the original path.
After data recovery, let’s discuss how to fix Windows 10 black screen of death issues.
Part 2: Troubleshoot Windows 10 Black Screen on Your PC
You may encounter the Windows 10 booting to a black screen error in the following two situations:
- You see a black screen before logging into Windows 10.
- You see a black screen after logging into Windows 10.
Situation 1: Fix a Black Screen Death Before Signing into Windows 10
1. Check the cable connections and the displays
Cables that have not been replaced for a long time may be damaged, resulting in a black screen. You can replace a cable to confirm whether the cable connection affects the computer’s startup.
A black screen can also happen when your monitor is defective or the source is set incorrectly. You can also try connecting a different monitor to your computer to confirm that your primary monitor is fine.
2. Remove or update third-party antivirus software
As we know, some third-party antivirus software has been known to cause a black screen. Removing the software won’t leave your PC unprotected, for Windows Defender will kick in if no other antivirus software is running.

3. Perform a clean boot of your PC
If the above solutions cannot help you, you can perform a clean boot of your PC. You can find more details in this post: How to Perform a Clean Boot on Your Windows 11 PC.
Situation 2: Fix a Black Screen Death After Signing into Windows 10
How to effectively resolve the Windows 10 black screen of death (BSOD) problem after login – with or without the cursor, on boot? Now, you can try the following solutions.
1. Start explorer.exe
If you get the Windows 10 black screen with a cursor after login, you should first try pressing Ctrl + Alt + Delete key combinations to see if it brings up the Task Manager. If it does, click on Task Manager and then click File > Run new task. Type explorer.exe and hit Enter.
2. Unplug & Remove external devices
If the first method doesn’t work, you can unplug and remove all external devices and reboot your PC. If you can get a display, it might mean that one of the external hardware is causing the black screen.
In this case, start plugging in external devices one by one until you lose the display. Then remove the last device you plugged in and see if you get the display back. If yes, please stop using that hardware device.
3. Boot in Safe Mode to troubleshoot and fix a black screen problem
If the above ways cannot help you, there could be several other reasons and you can boot your computer in Safe Mode to try to fix the black screen.
Here is a step-by-step guide to booting Windows 10 in Safe Mode.
Step 1. At the sign-in screen, hold the Shift key down, and click the Power button on the bottom right. Then select Restart.
Note: if you cannot see anything on the screen because of the BSOD error, you can start your PC. When the blue Windows logo appears, press the Power button and reboot it again. You might need to repeat these steps 3 times until you trigger Windows 10 automatic repair. Follow the on-screen directions and launch the advanced options menu.
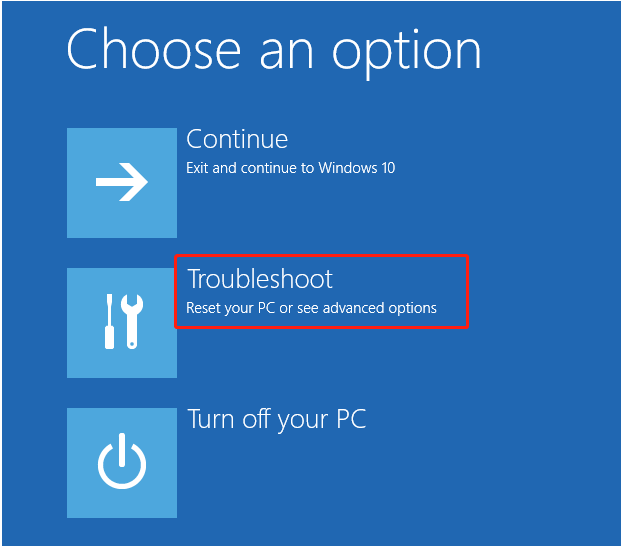
Step 2. Click Troubleshoot.
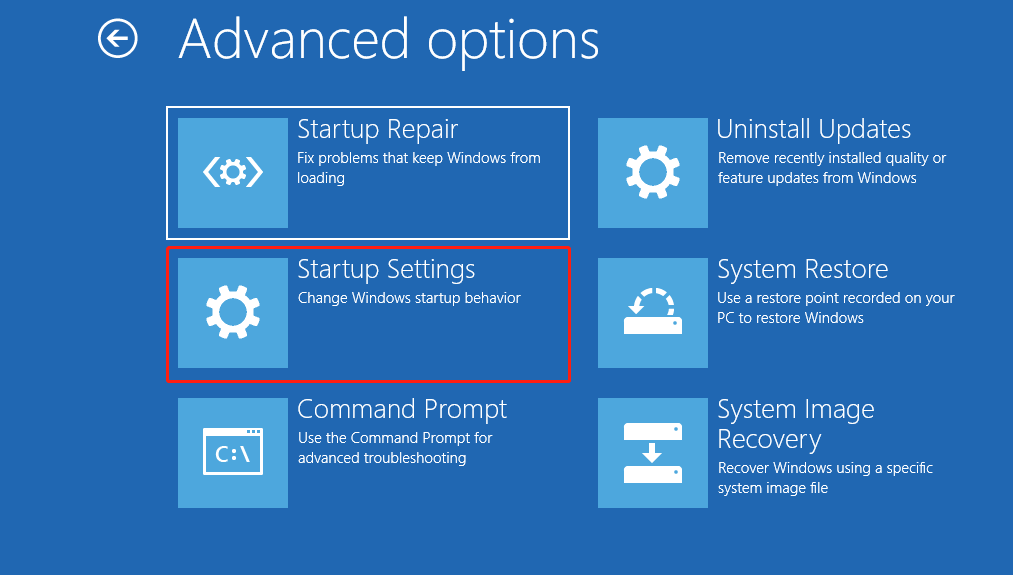
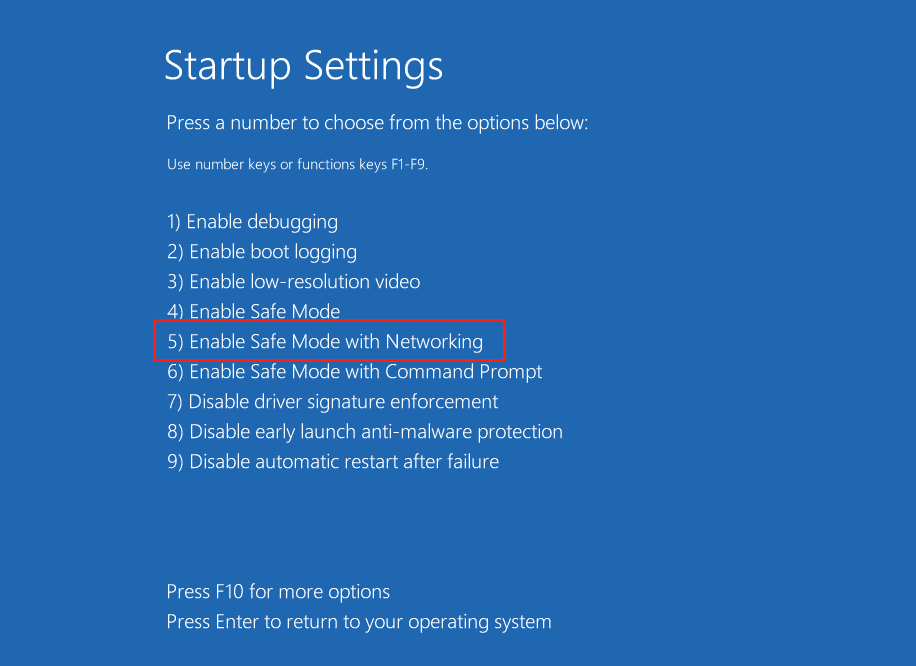
Step 3. Click Advanced options. Then click Startup Settings.
Step 4. Click the Restart button.
Step 5. Press 5 or F5 on the Startup Settings to enter Safe Mode with Networking.
4. Reinstall the video driver in Safe Mode
If the video driver isn’t working correctly, your Windows 10 might boot to a black screen. Now, to solve this issue, you can uninstall it in Safe Mode, and then let the operating system reinstall the driver automatically upon restart.
Step 1. Press the Windows key + X to open the power user menu.
Step 2. Select Device Manager.
Step 3. Expand Display adapters.
Step 4. Right-click the adapter and select Uninstall device.
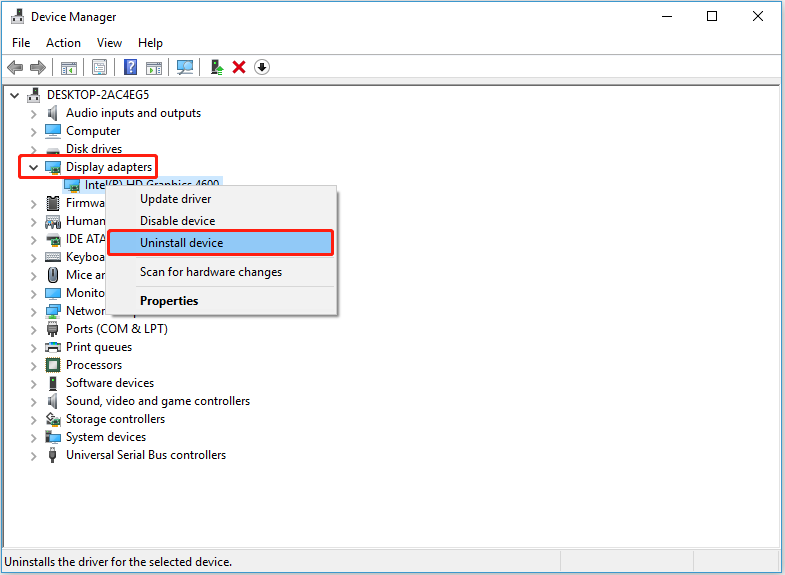
Step 5. Click OK to confirm. Then restart your computer.
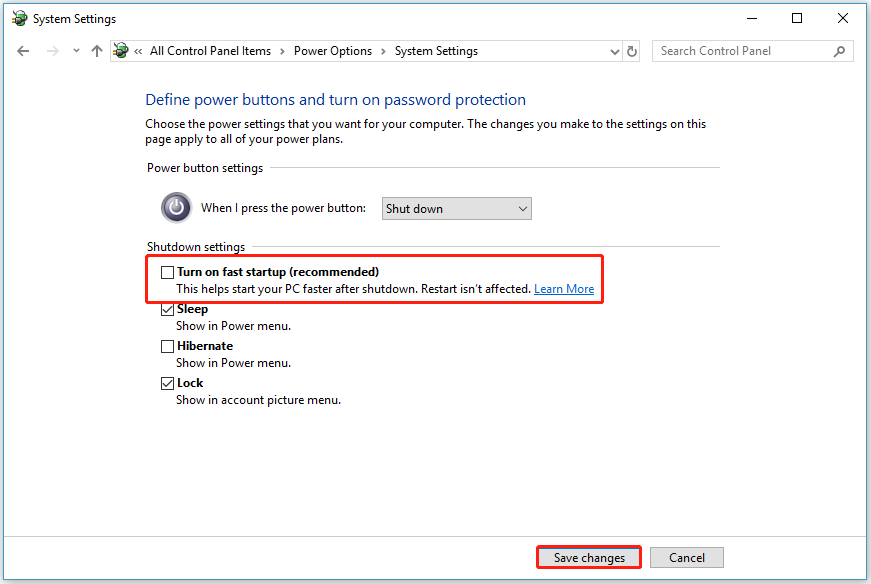
5. Disable fast startup
Sometimes, if the fast startup is enabled on your computer, the black screen problem keeps happening.
Step 1. Open Control Panel and click Power Options.
Step 2. Select Choose what the power button does link on the left pane.
Step 3. Click the Change settings that are currently unavailable link.
Step 4. Uncheck the Turn on fast startup (recommended) option and click Save changes.
Step 5. Restart your computer.
6. Close RunOnce processes
Step 1. Open Task Manager by pressing the Ctrl + Shift + Esc keyboard shortcuts.
Step 2. Go to the Processes and the Services tabs to look for any instances of RunOnce.exe and RunOnce32.exe.
If you find an instance in the Processes tab, you should select the item and click on End task. If you find an instance in the Services tab, you should right-click the item and click Stop.
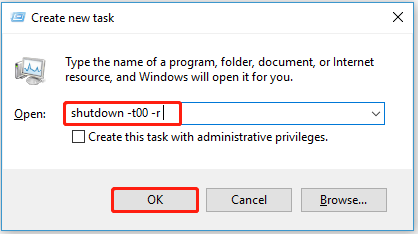
Step 3. Click on File and Select Run new task.
Step 4. Type shutdown -t00 -r and click OK to restart your PC.
Related post: Here Are Ways to Fix Black Screen Error When Booting Windows
Part 3: Useful Tips to Prevent Windows 10 Data Loss
Although Windows 10 has already proven to be a reliable operating system, Windows 10 data loss always happens. In addition to the black screen of death, blue screen error and data loss due to Windows update failures often occur. So, it is recommended to back up Windows 10 in case of any accidents.
MiniTool ShadowMaker, a piece of professional and easy-to-use file backup software, is recommended here. It can help you back up the operating system, files, folders, disks, partitions, etc. in Windows 7/8/10/11 easily.
Now you can follow the steps below to back up Windows 10.
Step 1. Download, install, and launch MiniTool ShadowMaker to get its main interface.
MiniTool ShadowMaker TrialClick to Download100%Clean & Safe
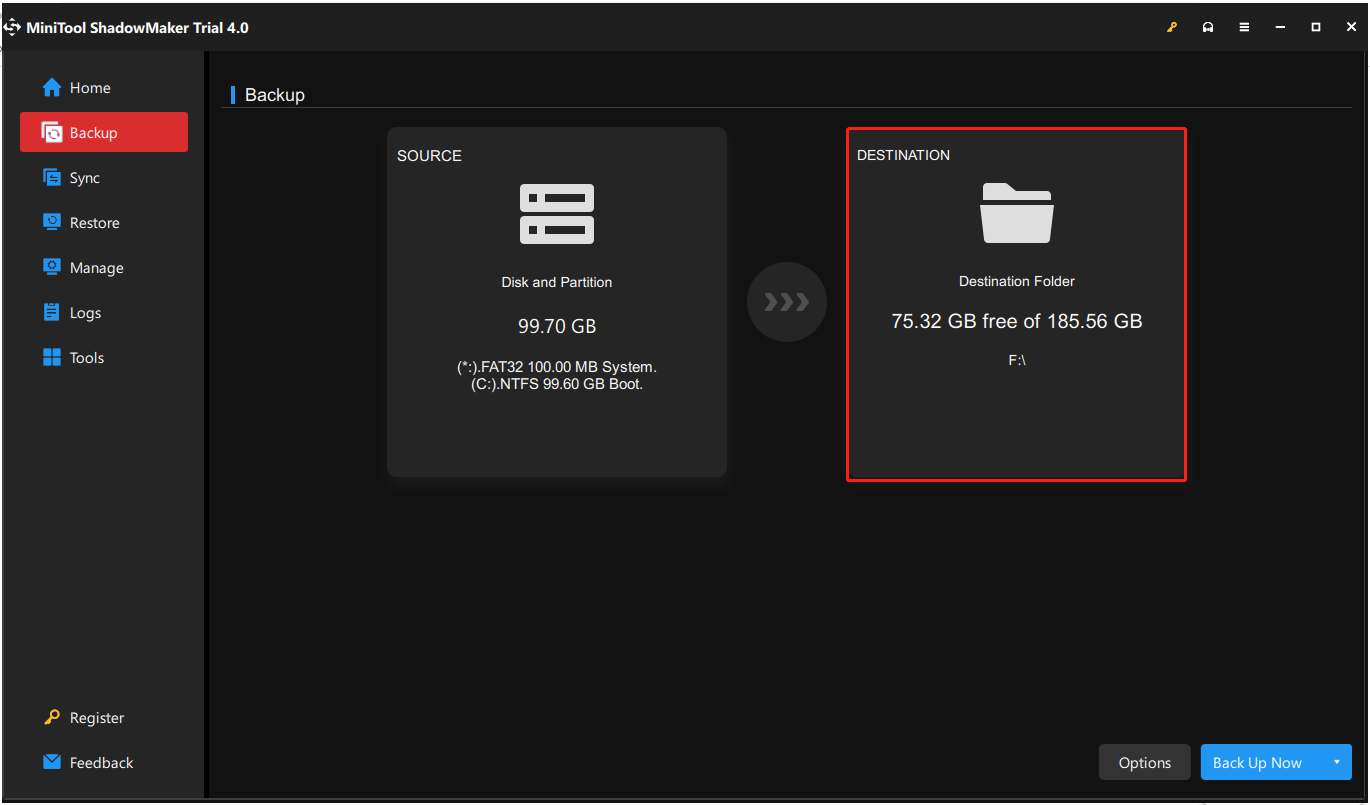
Step 2. Go to the Backup tab. You will see the system partitions are automatically selected in the SOURCE section.
You need to click Destination Folder and choose a safe place separate from the system partitions (It is recommended to use an external drive) to store the backup data.
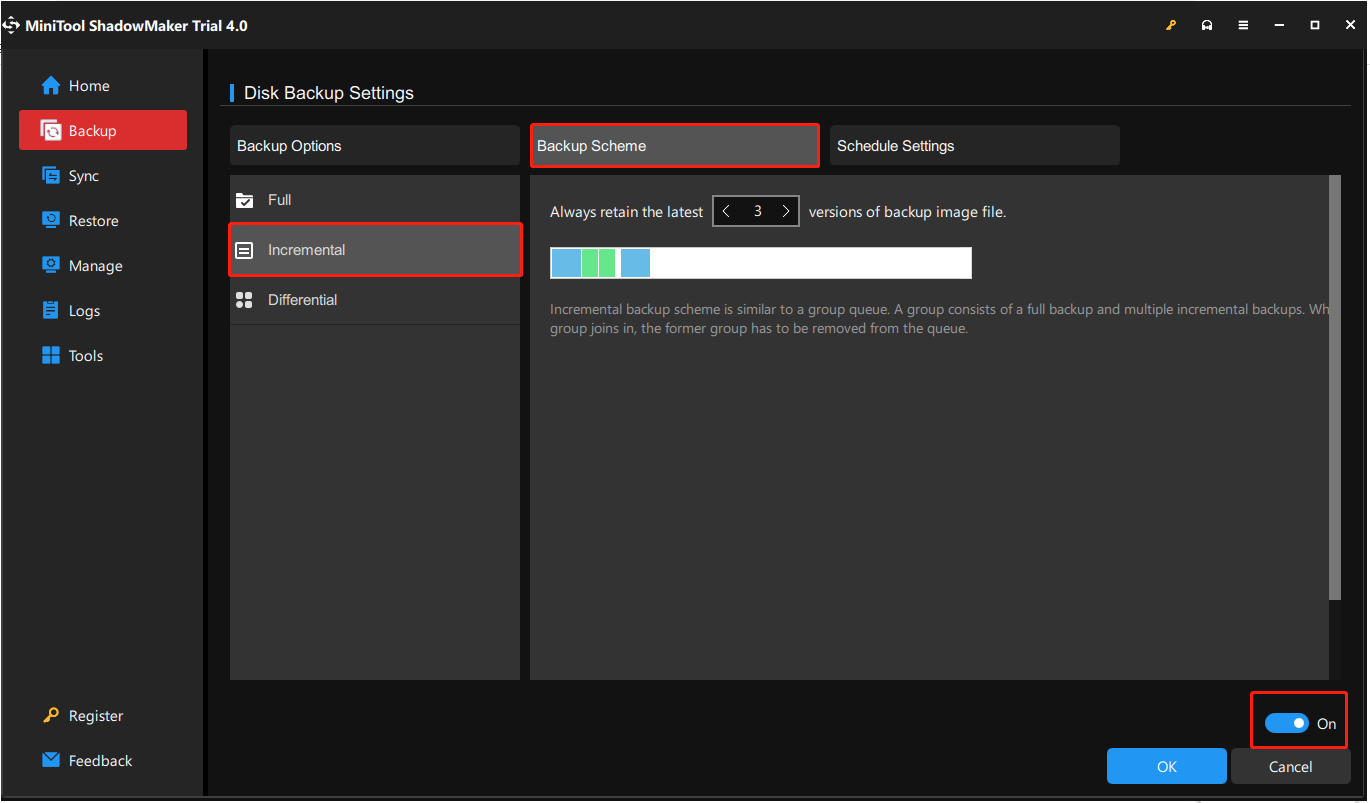
Before starting to back up your system, here you are suggested to set up your disk backup settings.
Tips:
- Click Options in the backup window and go to the Backup Scheme Then turn it on by clicking the button in the lower right corner (Make sure to choose Incremental in the left panel). After that, click OK to save your changes.
- Move on to the Schedule Settings section and enable it. Then choose the appropriate backup time according to your preferences. Finally, click OK.
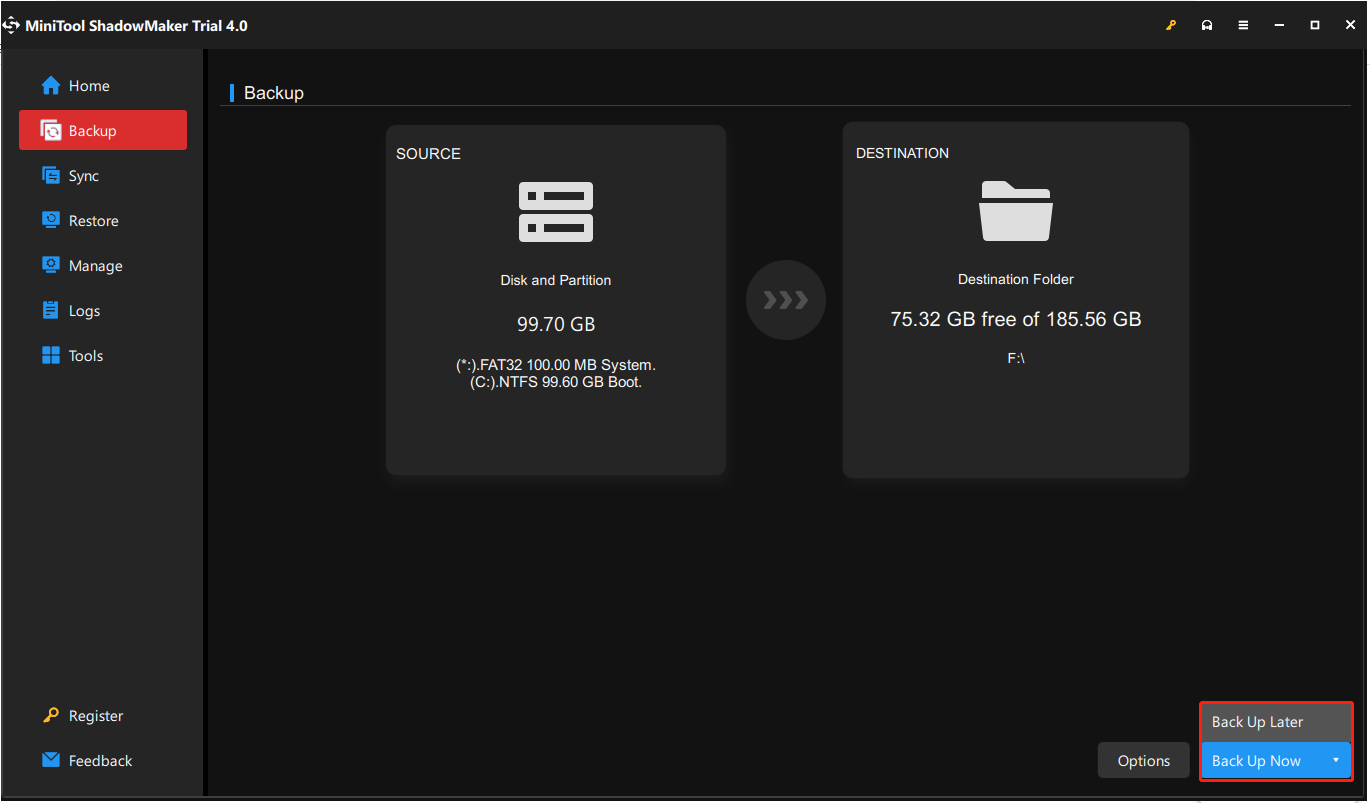
Step 3. Click Back Up Now or Back Up Later (Select Yes in the pop-up window).
Now please wait for the backup process to complete and then your system is well-protected. And you will no longer need to worry about Windows 10 data loss when your computer has a black screen issue.
Bottom Line
Did these troubleshooting steps help you fix the Windows 10 booting black screen of death? Tell us in the comments below. Or, if you have any other good solutions for Windows 10 BSOD, please share them with our readers.
On the other hand, should you have any questions about MiniTool software, please feel free to contact us via [email protected]. Thanks in advance!
About The Author

Position: Columnist
Shirley holds a bachelor’s degree in English and has been an editor at the MiniTool Team for many years. She specializes in IT-related content, with a focus on data recovery, file backup, disk management, and other technical topics. She is committed to delivering clear, accurate, and practical solutions to help users resolve common computer issues.
User Comments :